PathMaster-REV-L-4.5-1.pdf - 第22页
Machine Operati on Manual Revision L / February 2020 Page 22 of 200 Overview Figure 5 : Pat hMaster® Window If PathMaster® is opened while Po rtal is in us e, the PathMaster® window will open as an attached s plit scree …
Machine Operation Manual
Revision L /
February 2020
Page 21 of 200
Tool Commands in Programs
Pneumatic positions (tool up, tool down, rotary selection, etc.) are not automatically
programmed by PathMaster® and there is no communication between the workcell and
PathMaster® related to the active tool and its pneumatic position. The operator must
select the correct tool in PathMaster® and put the necessary pneumatic commands in the
program. The pneumatics can be operated from the Tools Tab in Portal, or from the OIT
Interface on the workcell in Manual mode. It is important these commands are in the
correct locations. In general, follow these rules:
• Move the X and Y (and W) axes into position before a tool slide or tool rotary is
actuated.
• Actuate a tool slide before a tool rotary, if necessary. Make sure there is nothing in
the motion radius of the tool rotary.
• Program each segment with the related tool slide in the down position.
• Add tool slide down and tool rotary B commands into the path program, before any
segment(s) where the tool is used.
• Move the gantry to a save Z-height before returning a tool to rotary A position, then
actuate the tool slide. Input tool rotary A and tool slide up commands into the path
program when finished with the tool.
• To change the tool being used safely, include a non-dispense move on the Z-axis to
0, so there is room for the new tool to lower (refer to Section 2.10).
Inter-Path Movement
After a path is complete, the workcell returns to the ‘standby’ position taught in Setup
mode. It is necessary to plan out a path programs to make sure there are no obstructions
between paths. To avoid any potential crashes, program a ‘Z only’ move, with the Z-axis
target set to 0. The operator must make sure all path programs are safe to run on the
workcell and dispense surface.
Machine Operation Manual
Revision L /
February 2020
Page 22 of 200
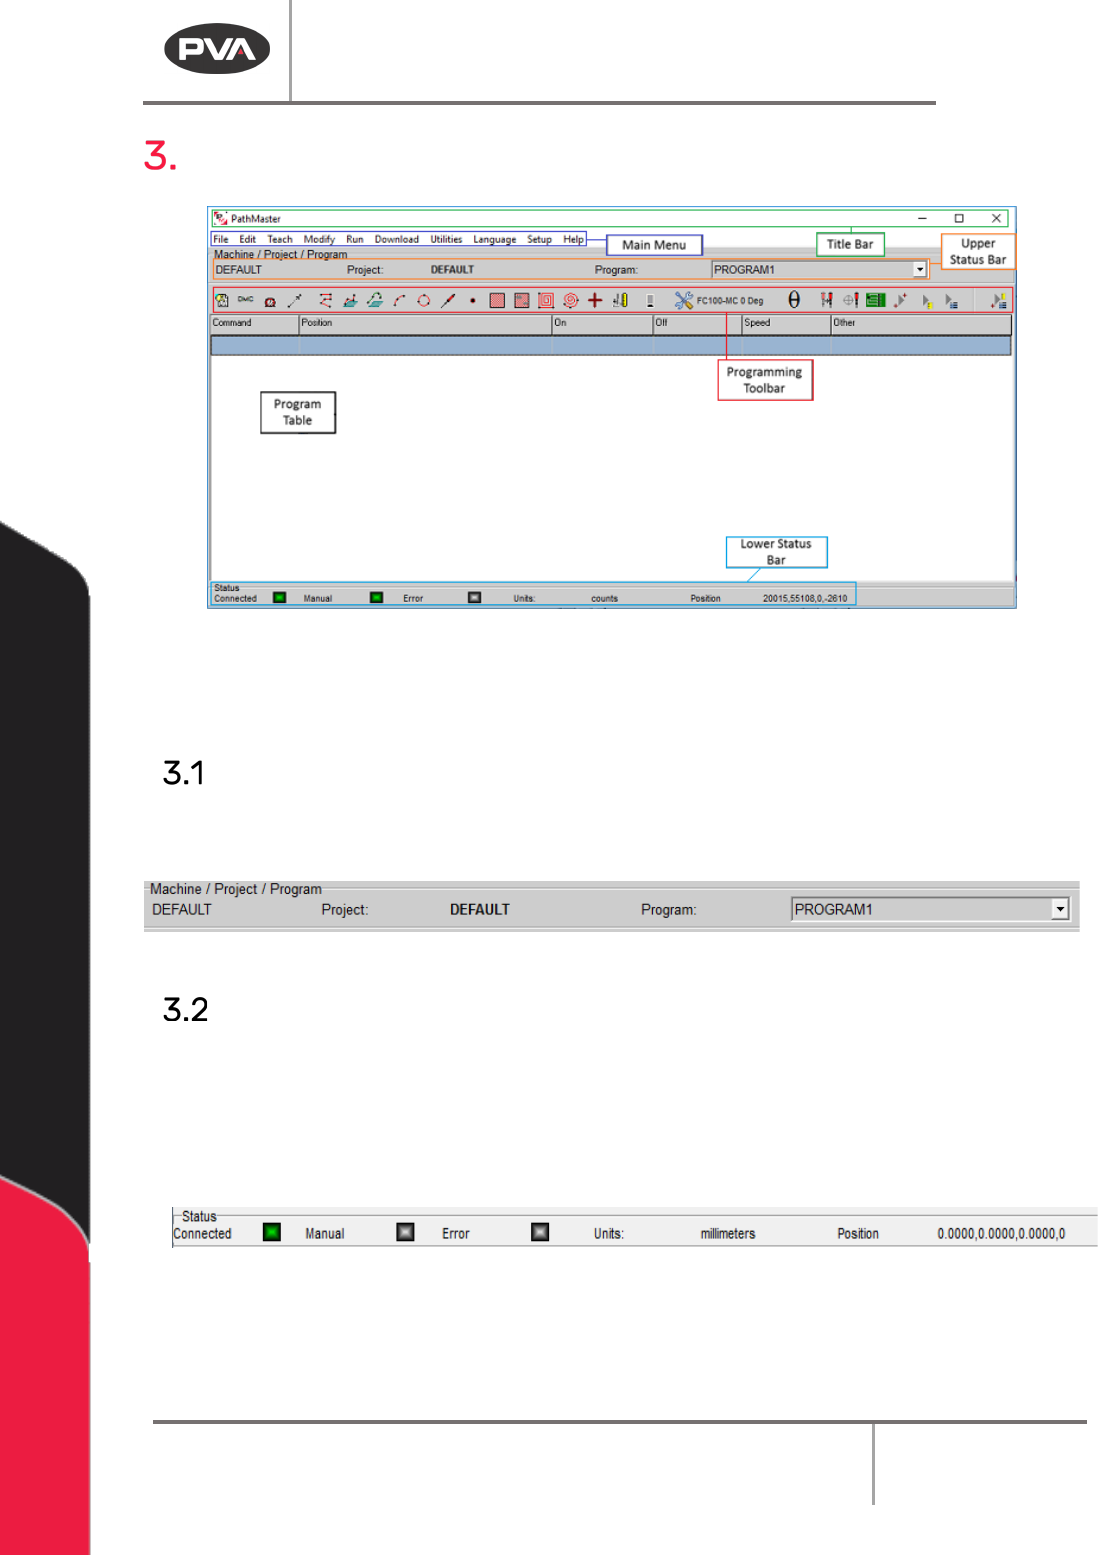
Overview
Figure 5: PathMaster® Window
If PathMaster® is opened while Portal is in use, the PathMaster® window will open as an
attached split screen below the Portal window, which will hide the Title Bar.
Upper Status Bar
The upper status bar displays the active machine configuration, current project file and
current path program, which can be changed with the Program drop-down menu.
Figure 6: Upper Status Bar
Lower Status Bar
The lower status bar shows the current status of the workcell. The communication status
between the PC and the workcell is shown in the “Connected” display. The “Manual” display
shows if the workcell is in Manual mode. The “Error” display shows if the workcell is in a
state of error. The Units field gives the measurement system used when programming
paths, and can be changed in the Setup section of PathMaster®.
Figure 7: Lower Status Bar
NOTE: In order to teach path programs online, PathMaster® must be connected to a
workcell that is in Manual mode, and not in a state of error.
Machine Operation Manual
Revision L /
February 2020
Page 23 of 200
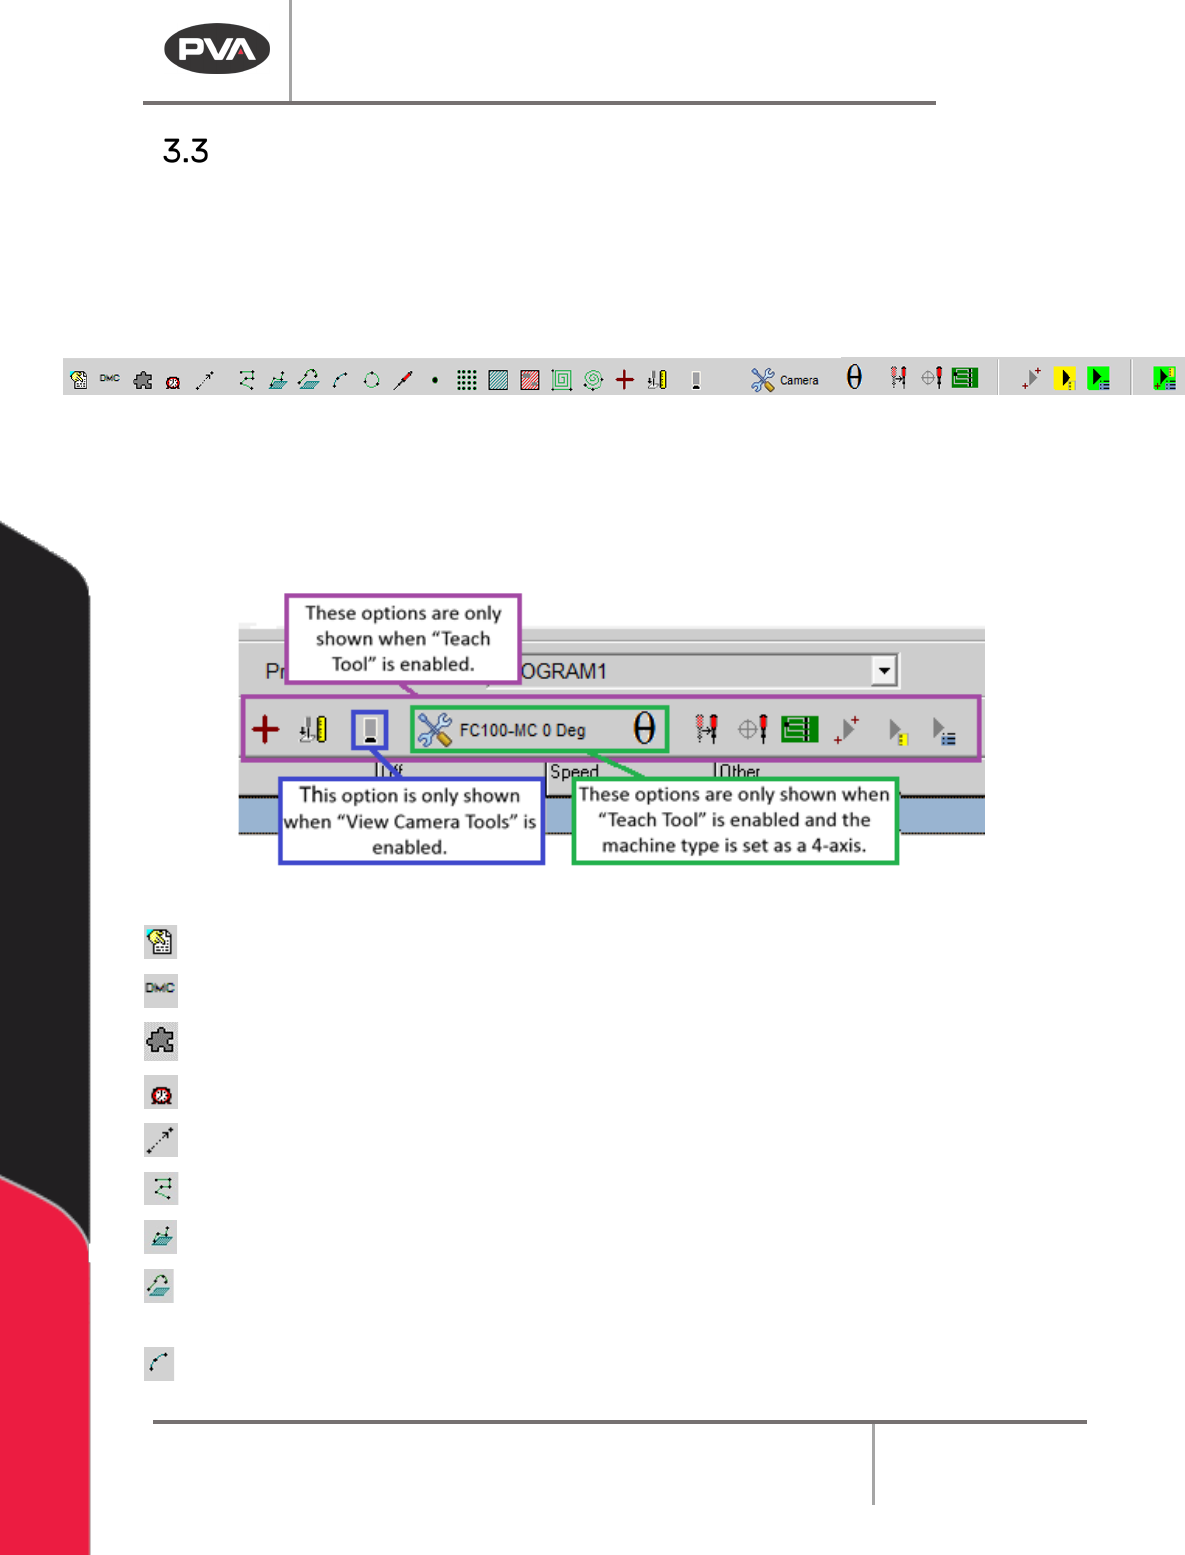
Programming Functions
The programming toolbar shows the most frequently used programming functions.
Functions that are green or outlined in green have the ability to reference surfaces.
Functions that are red do not. With the exception of Polyline, Functions can only reference
one surface. The toolbar you see depends on the workcell controller. The toolbar shown is
for a DMC4000 or newer controller.
Figure 8: Programming Toolbar
Programming functions are used to create path segments, which make up a path program.
PathMaster® contains a variety of useful programming functions which can be used to
create 2 dimensional and 3 dimensional paths. The most common functions are on the
toolbar, other functions can be accessed from the Teach menu.
Figure 9: Explanation of Functions
Comment – Add comments into the program.
DMC – Teach a DMC command line in the program.
Plugin Select – Select a plugin from a preset list of options.
Dwell – Teach a delay in the program for a set period of time.
Move – Teach a move to a specific location.
2D Path – Teach a 2D path segment and program tool operation.
3D Path – Teach a 3D path segment and program tool operation.
Polyline – Teach 2D or 3D path segments and program tool operations that can make
use of Height Profiling, if applicable.
Arc – Teach an arc path segment and program tool operation.