PathMaster-REV-L-4.5-1.pdf - 第190页
Machine Operati on Manual Revision L / February 2020 Page 190 of 20 0 9. Install the threa ded spik e on to the pick and place tool. Turn the th rea ded spike clockwise un til it i s tight, do no t overtigh ten. Figure 2…
Machine Operation Manual
Revision L /
February 2020
Page 189 of 200
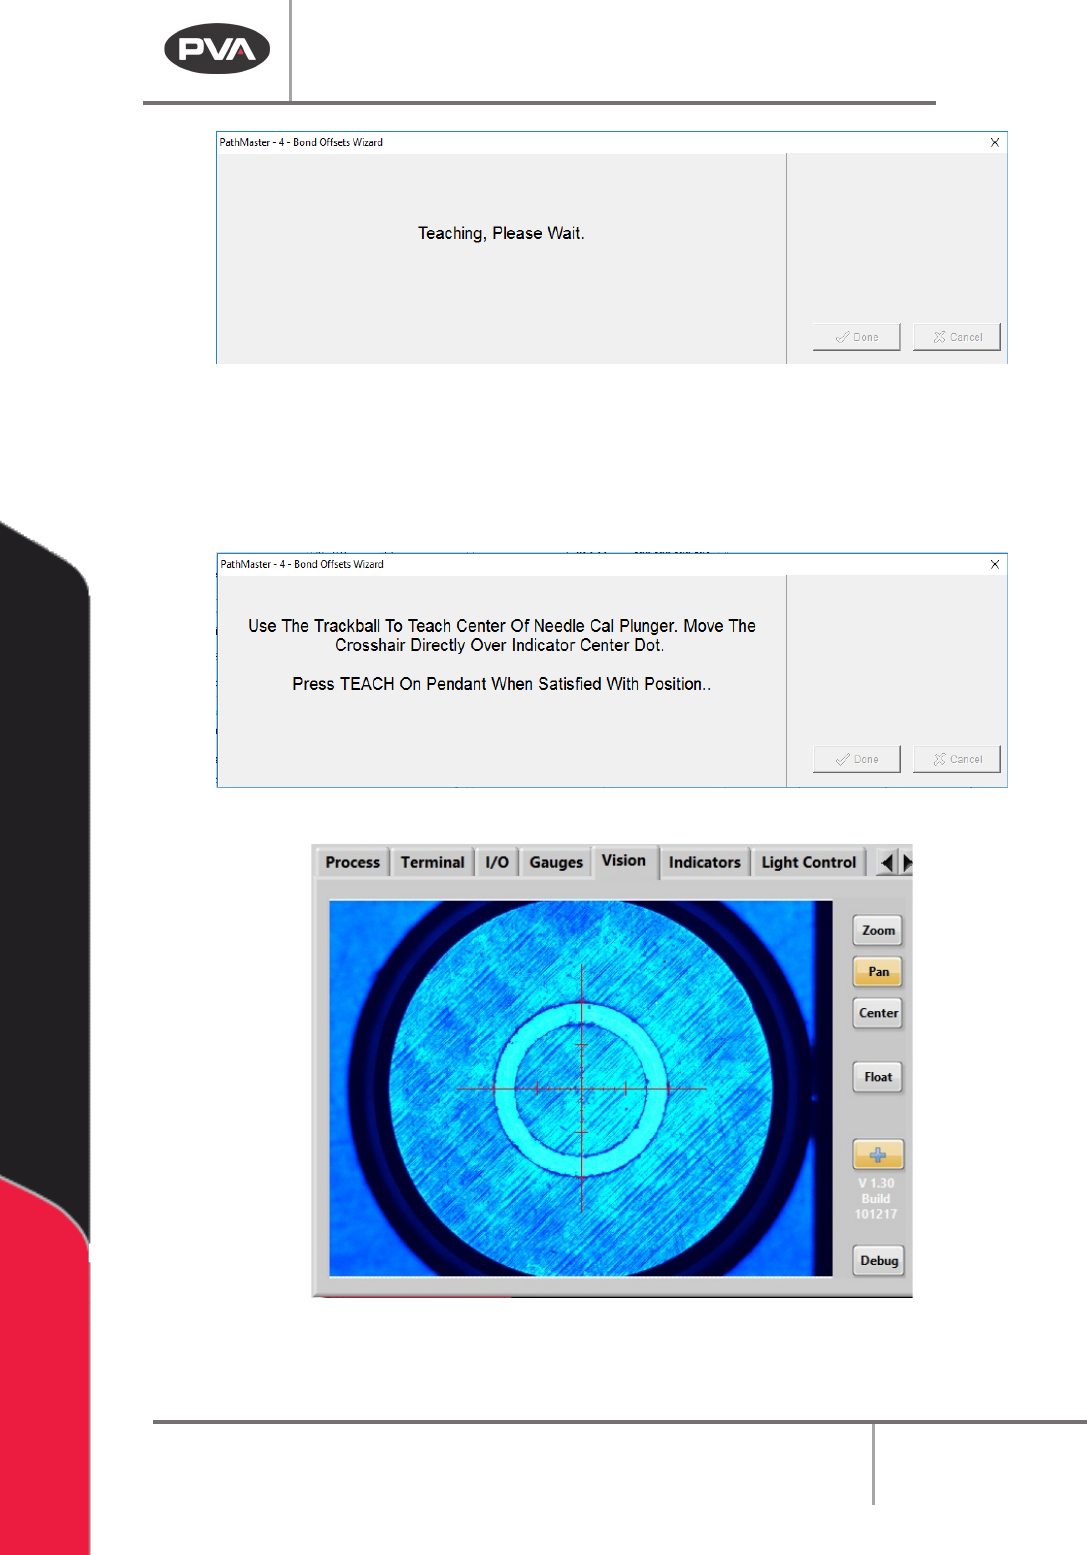
Figure 207: Teaching, Please Wait
7. Use the teach pendant to teach the center of the needle calibration plunger as
shown on the screen. Use the teach pendant to make sure the crosshair is in the
center of the indicator dot. When the crosshair is correctly aligned, push the “
Teach”
button on the teach pendant.
Figure 208: Teach the Needle Cal Plunger Center
Figure 209: Portal Front Panel Screen, Needle Calibration for Plunger Center
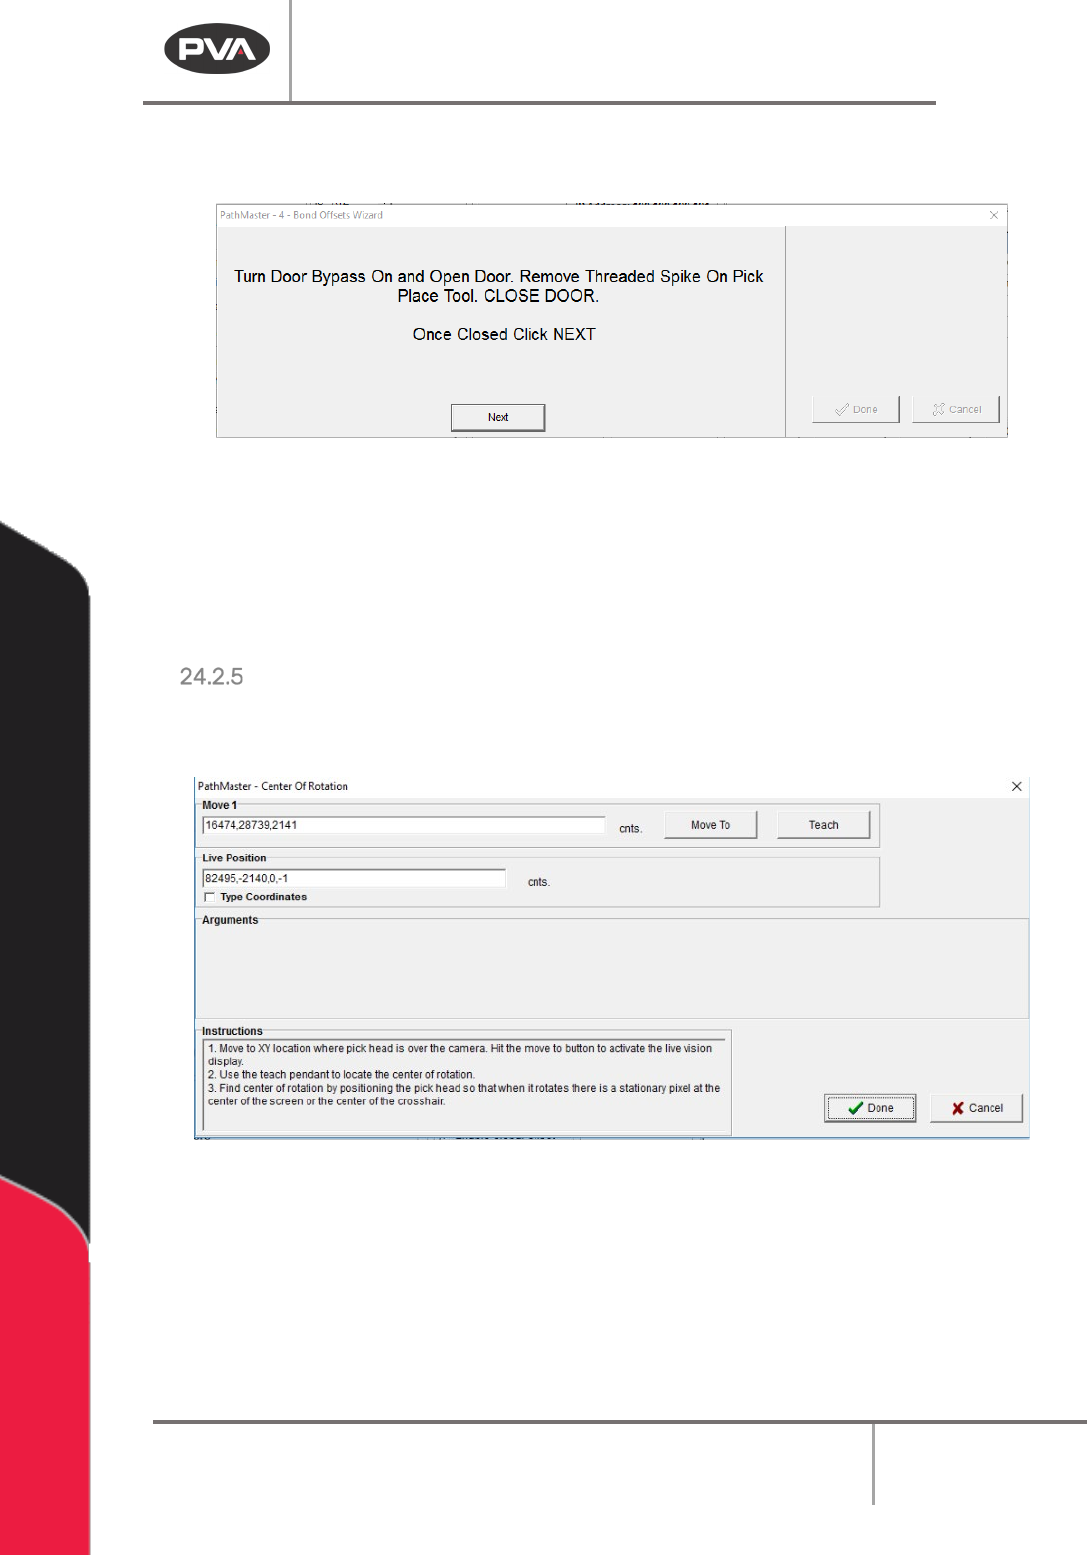
8. Next, to turn the door bypass to on.

Machine Operation Manual
Revision L /
February 2020
Page 190 of 200
9. Install the threaded spike on to the pick and place tool. Turn the threaded spike
clockwise until it is tight, do not overtighten.
Figure 210: Install the Threaded Spike
10. When the threaded spike is installed, click the “Next” button.
11. Use the trackball to move the spike directly over the center of the needle calibration
plunger.
12. Push the “Teach” button when the position is correct.
Figure 211: Teach the Needle Calibration Position
Figure 212: Position Taught Screen
Machine Operation Manual
Revision L /
February 2020
Page 191 of 200
13. After the position is taught a confirmation screen will be shown for the X and Y
positions Select “
Next”. Another screen will confirm the Z-position.
Figure 213: Remove Threaded Spike
14. Turn the door bypass “Off” and open the door.
15. Turn the threaded spike counterclockwise to remove it.
16. Close the door.
17. Select “Next”.
Center of Rotation
1. When you hit the “Move to” button the camera goes live and feed is displayed in the
vision tab.
Figure 214: "Move To" Button
2. To teach the center of rotation, use the teach pendant to move the X,Y location so
that when you move the W-axis the exact center of the image is stationary and
everything is rotating around it (center of rotation).
3. When this location correct push the “Teach” button on the teach pendant.