PathMaster-REV-L-4.5-1.pdf - 第68页
Machine Operati on Manual Revision L / February 2020 Page 68 of 200 Edit Windows The opera tor can cha nge a path segment af ter it has be en created . Dou ble click on the path segme nt to show t he edit wi ndow. The Co…
Machine Operation Manual
Revision L /
February 2020
Page 67 of 200
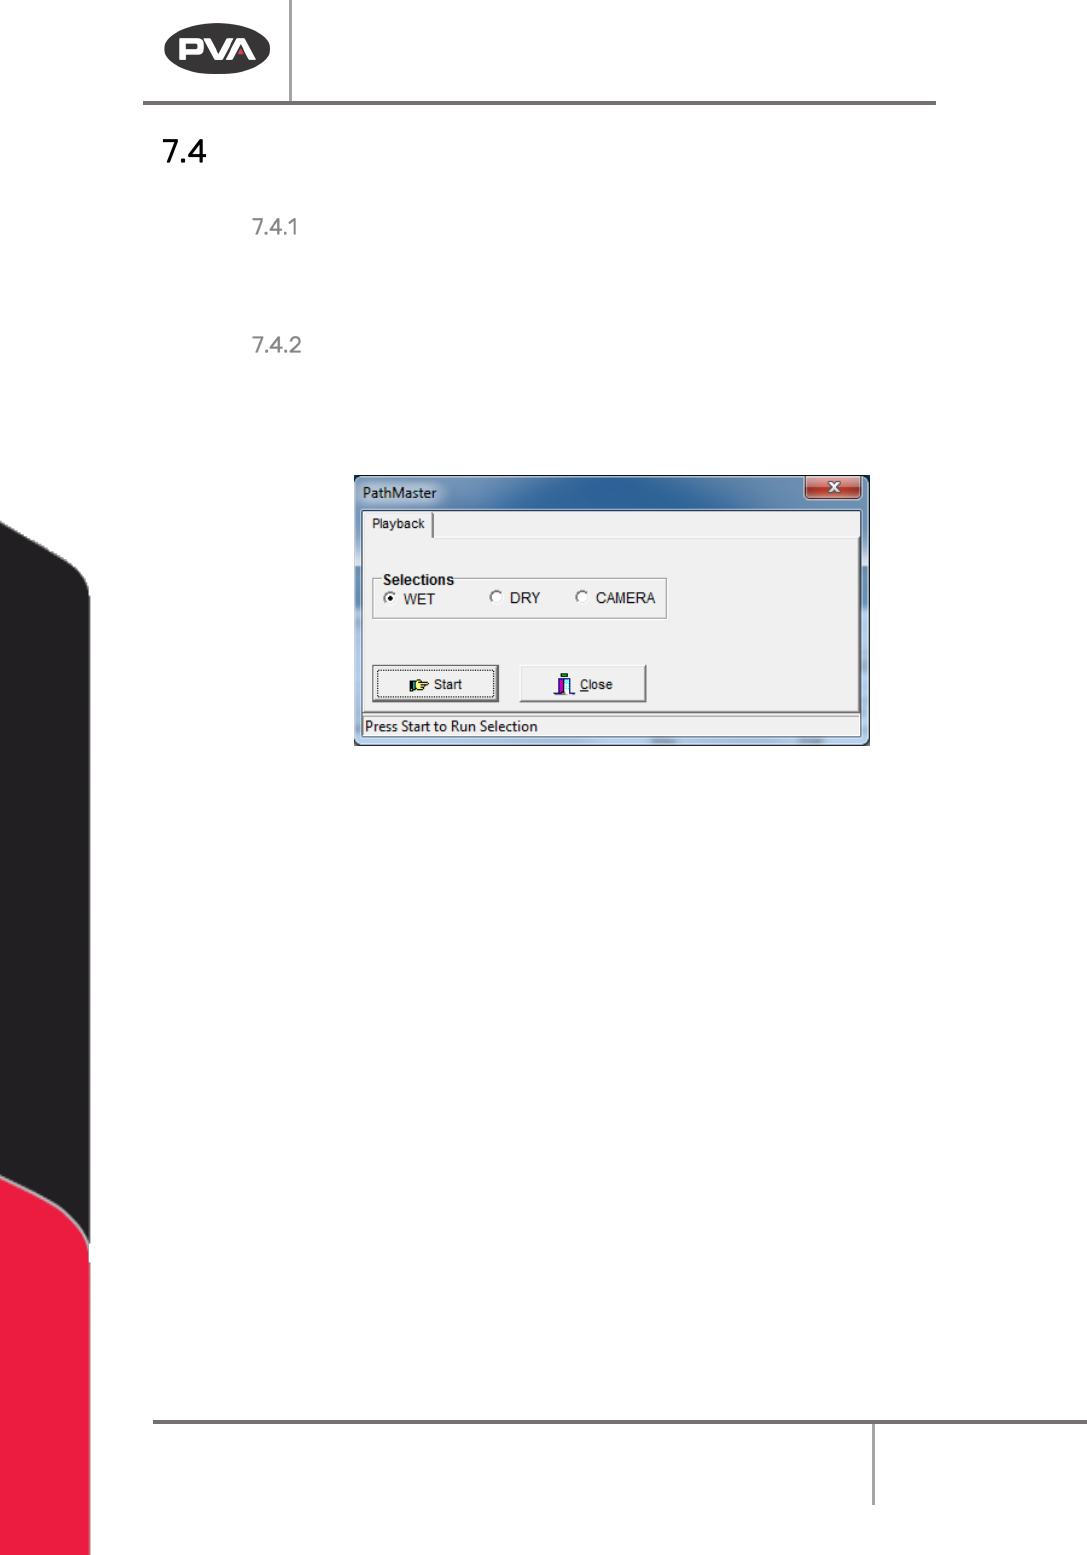
Playback
Paths can be played with PathMaster® or downloaded and run on the workcell.
To run an individual path
1. Highlight an individual path from the PathMaster® window.
2. Select
Run ->Selection
from the drop-down menu or the right-click menu.
To run an entire program
3. Select
Run ->Program
from the drop-down menu or the right-click menu.
4. Before the path runs, the user must select “Wet”, “Dry” or “Virtual Tool 0”. The name
for the third option will be the name of Virtual Tool 0.
Figure 66: Playback
“Wet” playback activates the tool(s) and material will dispense. “Dry” playback does not
activate the tool(s). “
Virtual Tool 0” (replaced by the name of “Virtual Tool 0”) will run the
path with the teach tool at “
Virtual Tool 0” Z, as defined in Machine Parameters instead of
the run tool.
5. Select “Start” to run the path as selected or “Close” to exit without running the
path.
Machine Operation Manual
Revision L /
February 2020
Page 68 of 200
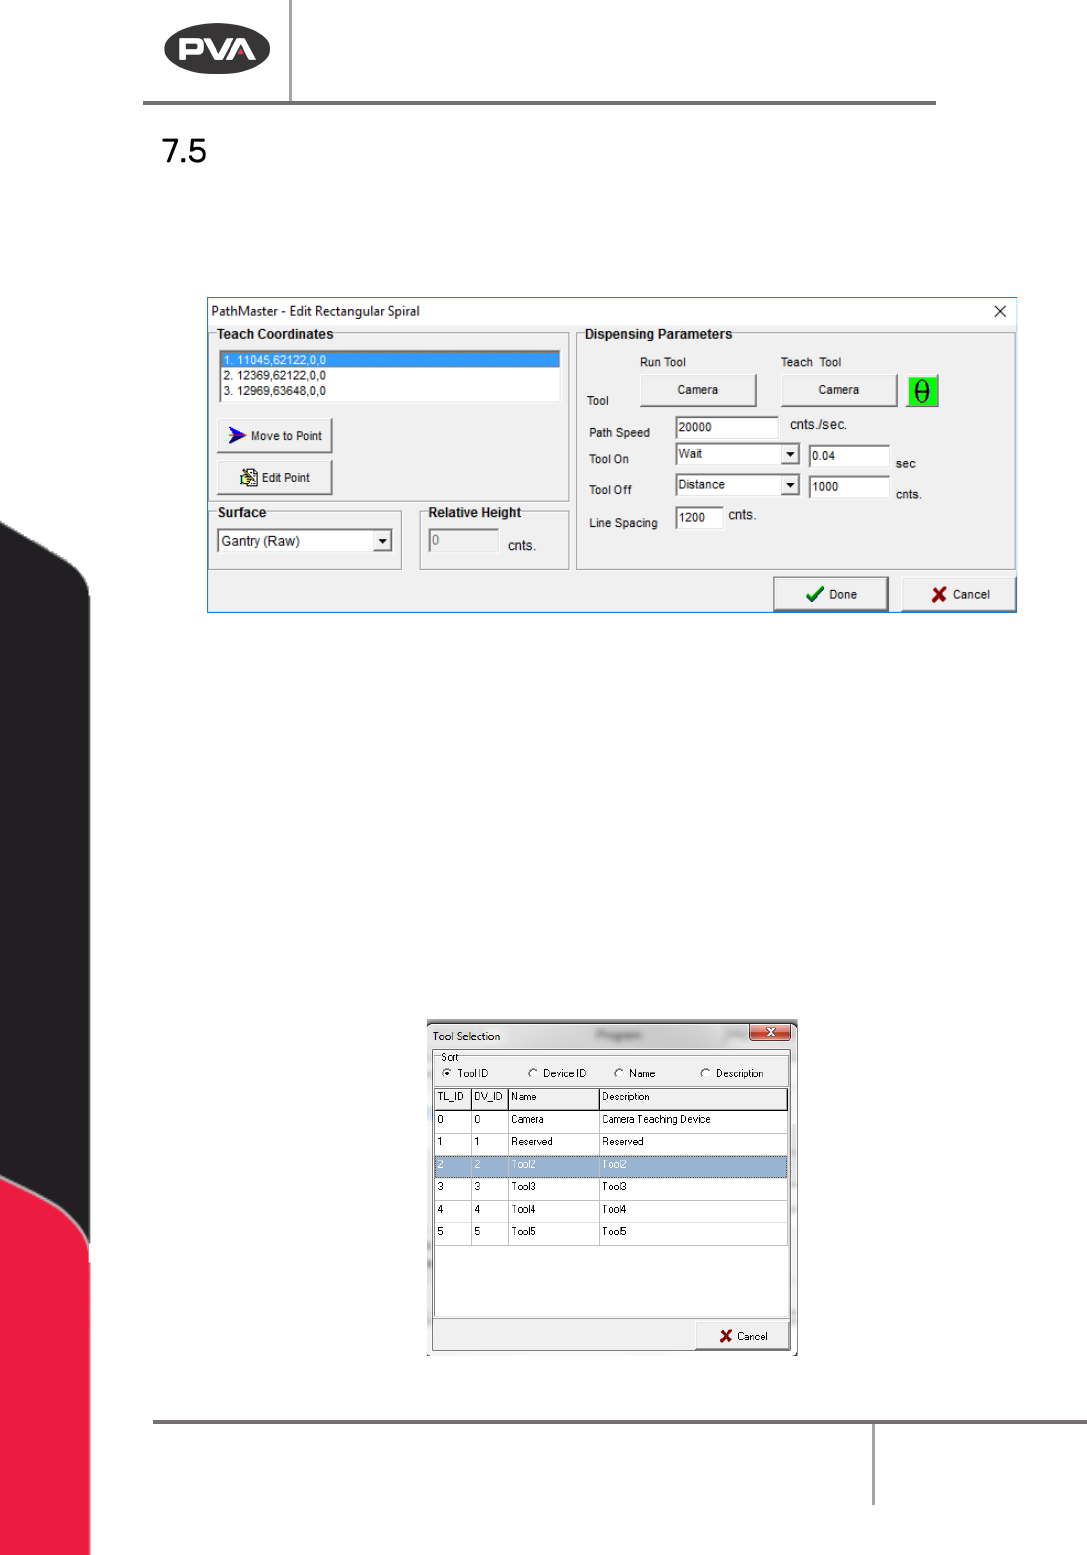
Edit Windows
The operator can change a path segment after it has been created. Double click on the
path segment to show the edit window. The Coordinates box is shown in the upper left-
hand corner of the edit window. All the programmed coordinates are shown.
Figure 67: Example Edit Window
Use the options shown as necessary to edit the paths. Not all options will be shown in
every edit window.
1. Select Move to Point to move to the point highlighted in the coordinates box.
2. Select Edit Point to open the point highlighted in the Coordinates box in the edit
window.
3. Set the Tool Height to “Use the Current Z Height” or “Use Calibrated Z Height,” or, if
the function has surfaces, select the
Surface from the drop-down menu. If
necessary, set the
Relative Height in millimeters.
4. Select the Run Tool.
5. Select (double click) on the necessary tool.
Figure 68: Tool Selection

Machine Operation Manual
Revision L /
February 2020
Page 69 of 200
6. Select the Teach Tool.
7. Select (double click) on the necessary tool.
8. Set the Path Speed.
9. Set the Tool On to “Wait” or “Distance” and set the time or distance.
10. Set the Tool Off to “Wait” or “Distance” and set the time or distance.
11. Set the Line Spacing.
12. Select “Done” to save the changes, or “Cancel” to exit and not save changes.
Important Reminders
• To Insert Code – When PathMaster® programming functions are used to insert code,
the code is inserted above the current highlighted location on the screen. The
operator must make sure the new path is put in the correct position.
• To Insert Tool Functions – Commands to move the tools are NOT automatically
inserted into the path programs. If a tool must change position (up/down, rotary)
the correct function must be inserted manually with the Tool programming
function. Refer Section 2.9.
• To Download Files – The operator must activate the EMERGENCY STOP button when
downloading files to the controller.