PathMaster-REV-L-4.5-1.pdf - 第54页
Machine Operati on Manual Revision L / February 2020 Page 54 of 200 Tool Configur ation 1. Select Setup - >Ma chine P aramete rs from the Main me nu to open the M achine Parameters window. 2. To configure an exis ting…
Machine Operation Manual
Revision L /
February 2020
Page 53 of 200
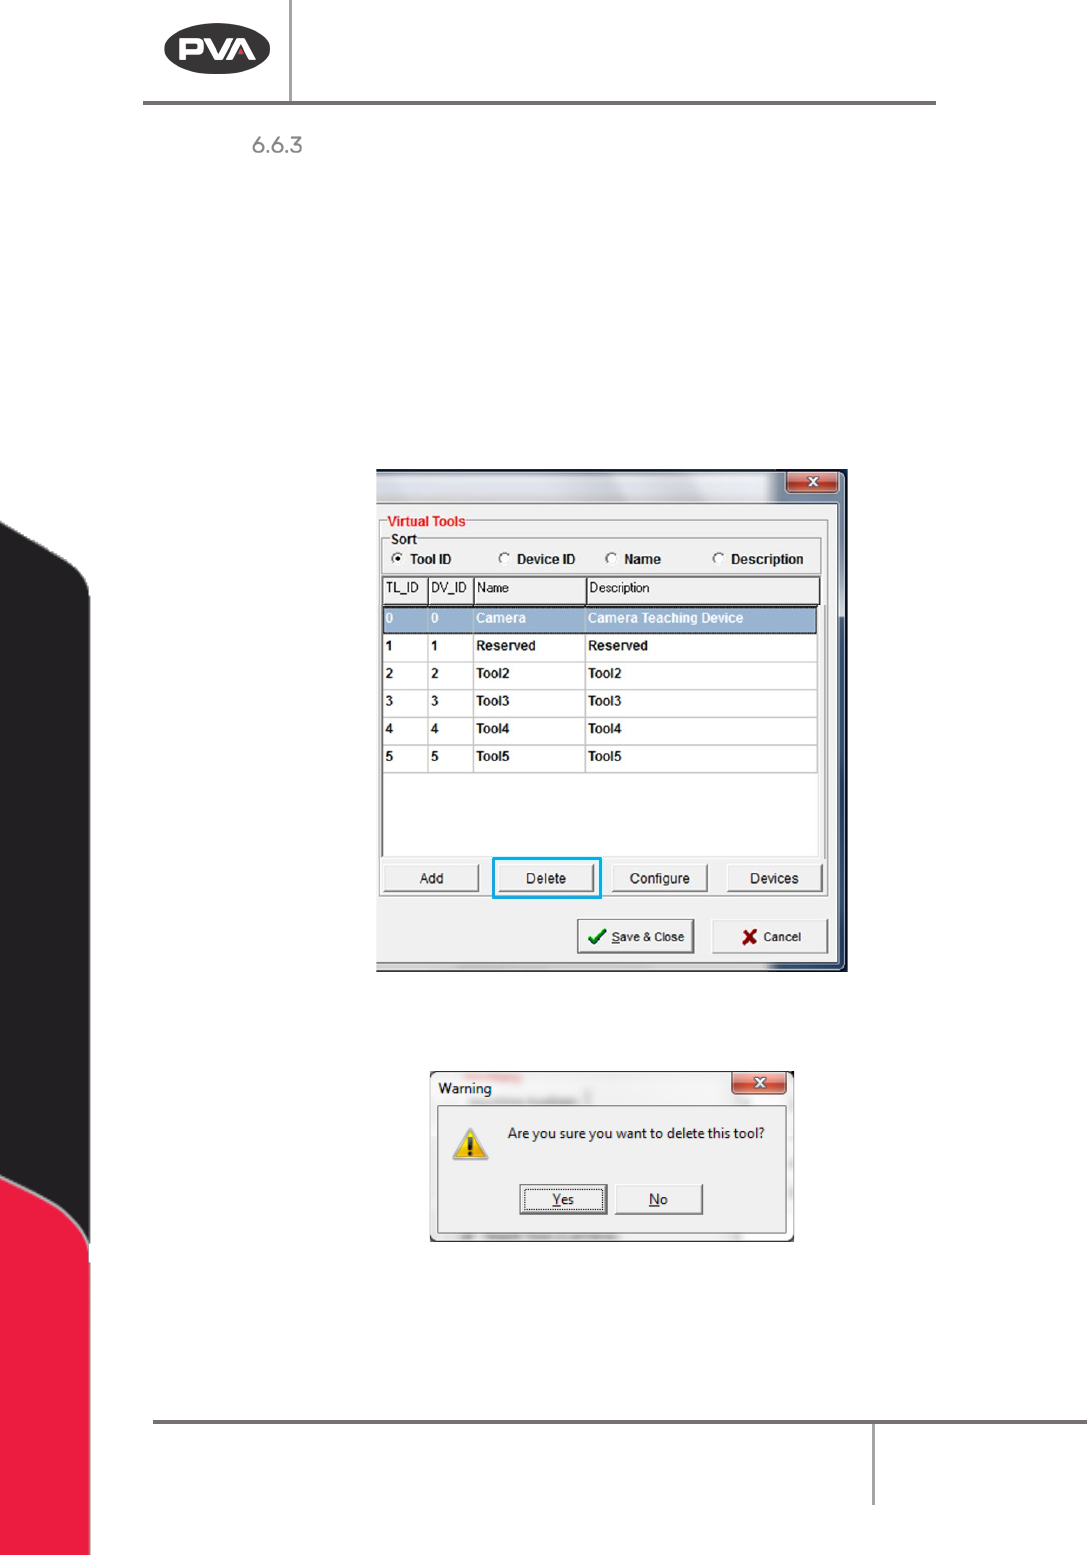
Delete a Tool
Select
Setup->Machine Parameters
from the Main menu to open the Machine Parameters
window.
WARNING: If a Virtual Tool was used in a path before it is deleted you will have to update
that path with a different virtual tool. If you play a path that uses a deleted virtual tool
there may be unintended consequences.
1. To delete a virtual tool, select the tool in the Virtual Tools section of Machine
Parameters window.
2. Click the “Delete” button.
Figure 47: Select Virtual Tool and Delete
3. A warning window will be shown, click “Yes”.
Figure 48: Delete Tool Window
A deleted tool ID will go to a reserved state. You will have the option to use the deleted tool
ID when you create a new virtual tool.
Machine Operation Manual
Revision L /
February 2020
Page 54 of 200
Tool Configuration
1. Select
Setup->Machine Parameters
from the Main menu to open the Machine
Parameters window.
2. To configure an existing virtual tool, highlight a virtual tool and click the “Configure”
button in the
Virtual Tools section of Machine Parameters. Or, double-click an
existing tool to open the
Tool Configuration window.
Figure 49: Tool Configuration
3. Set the Tool ID from the dropdown number list. This can only be changed when you
add a new virtual tool.
4. Set the Device the virtual tool uses with the dropdown menu. The device is the
physical tool that the virtual tool uses with specific programmed settings.
5. Set the Type of virtual tool with the dropdown menu. This is the type of device that
will be used during operation.
6. Select the Z-Slide box if this tool has a slide installed.
7. Select the Rotary box if this tool has a rotary installed.
8. Set the tool On to Wait or Distance and set the time or distance. Wait is the pause
after the tool turns on but before the path is started.
Distance is the length of the
path traveled before the tool turns on.
Machine Operation Manual
Revision L /
February 2020
Page 55 of 200
9. Set the tool Off to Wait or Distance and set the time or distance. Wait is the pause
after the path is finished and the tool is off but before the tool goes to the next
point.
Distance is the length of the path traveled after the tool is off but before the
path is done.
10. Set the default Speed for the virtual tool.
11. Set the Line Spacing for the distance between runs when an area path or
rectangular spiral is used.
12. Set the Display Color for the color used for offline programming features.
13. Set the default Relative Height. This is the distance from the surface of the product
to the lowest point of the tool above the product, as taught in the tool offset
function (offline programming only).
14. Set the Dot On Dwell and the Dot Off Dwell time. This will be the default tool on and
tool off time for the Dot function for this virtual tool.
15. Set the Z-Retract (relative) distance. This will be the default relative Z-retract for
the Dot function for this virtual tool.
16. Select “Save” to save your changes and exit. Select “Cancel” to exit and not save
changes.
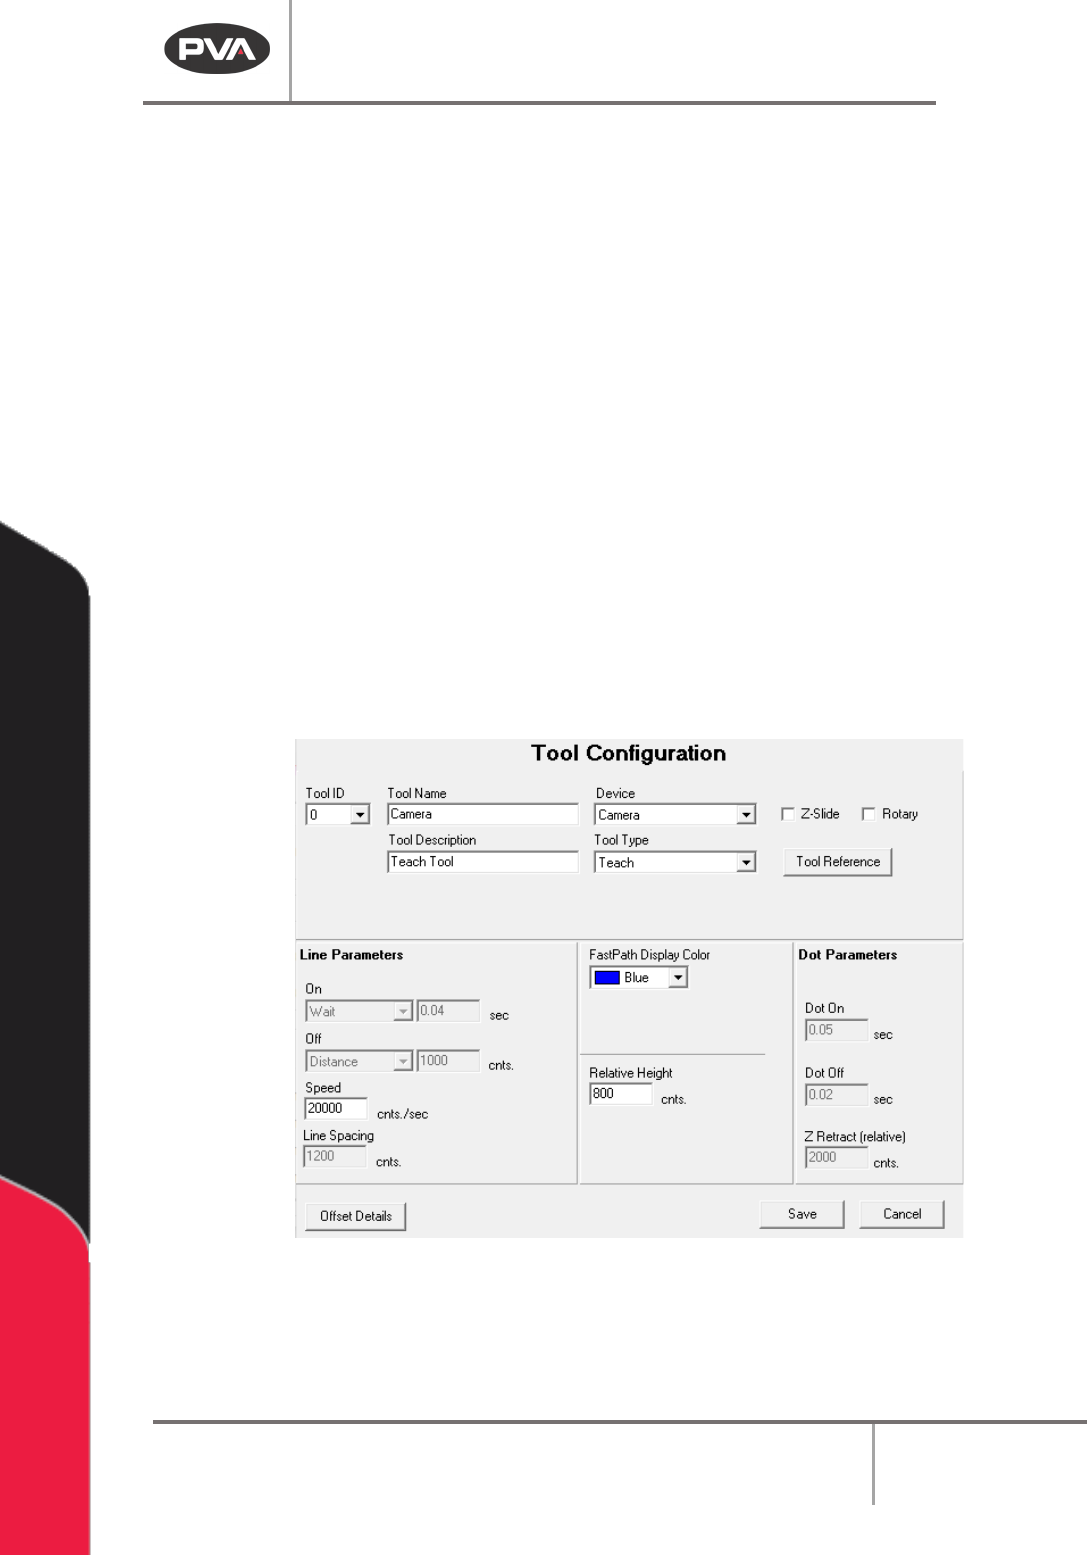
Figure 50: Teach Tool Configuration
NOTE: Some options in Tool Configuration are changed or disabled when a type of “Teach”
or “Profile” is selected.