PathMaster-REV-L-4.5-1.pdf - 第69页
Machine Operati on Manual Revision L / February 2020 Page 69 of 200 6. Select the Teach Too l . 7. S elect (double click) on the necessary tool. 8. Set the Path Speed . 9. Set the Tool On to “ Wait ” or “ Distance ” and …
Machine Operation Manual
Revision L /
February 2020
Page 68 of 200
Edit Windows
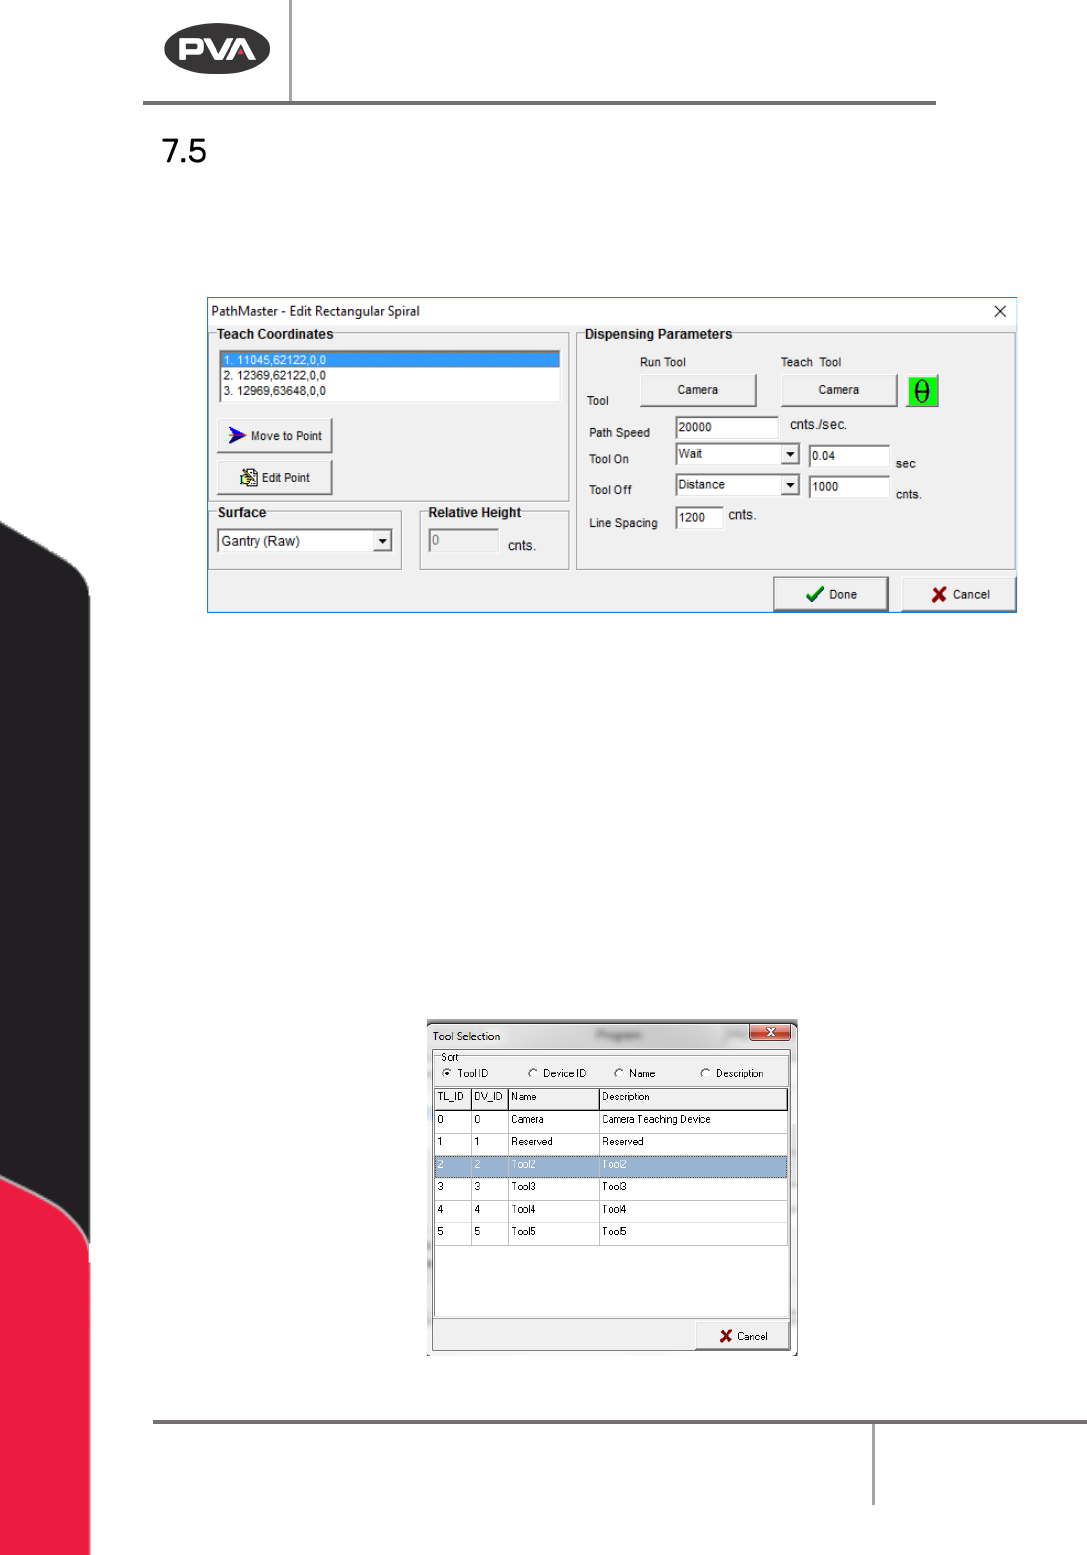
The operator can change a path segment after it has been created. Double click on the
path segment to show the edit window. The Coordinates box is shown in the upper left-
hand corner of the edit window. All the programmed coordinates are shown.
Figure 67: Example Edit Window
Use the options shown as necessary to edit the paths. Not all options will be shown in
every edit window.
1. Select Move to Point to move to the point highlighted in the coordinates box.
2. Select Edit Point to open the point highlighted in the Coordinates box in the edit
window.
3. Set the Tool Height to “Use the Current Z Height” or “Use Calibrated Z Height,” or, if
the function has surfaces, select the
Surface from the drop-down menu. If
necessary, set the
Relative Height in millimeters.
4. Select the Run Tool.
5. Select (double click) on the necessary tool.
Figure 68: Tool Selection

Machine Operation Manual
Revision L /
February 2020
Page 69 of 200
6. Select the Teach Tool.
7. Select (double click) on the necessary tool.
8. Set the Path Speed.
9. Set the Tool On to “Wait” or “Distance” and set the time or distance.
10. Set the Tool Off to “Wait” or “Distance” and set the time or distance.
11. Set the Line Spacing.
12. Select “Done” to save the changes, or “Cancel” to exit and not save changes.
Important Reminders
• To Insert Code – When PathMaster® programming functions are used to insert code,
the code is inserted above the current highlighted location on the screen. The
operator must make sure the new path is put in the correct position.
• To Insert Tool Functions – Commands to move the tools are NOT automatically
inserted into the path programs. If a tool must change position (up/down, rotary)
the correct function must be inserted manually with the Tool programming
function. Refer Section 2.9.
• To Download Files – The operator must activate the EMERGENCY STOP button when
downloading files to the controller.
Machine Operation Manual
Revision L /
February 2020
Page 70 of 200
Workcell Interaction
For PathMaster® to operate correctly it must work with the workcell. The workcell must be
in Manual mode to teach a path program online with PathMaster®. Refer to the workcell
manual for more information.
NOTE: Playback of a path is only possible if workcell is in Manual mode.
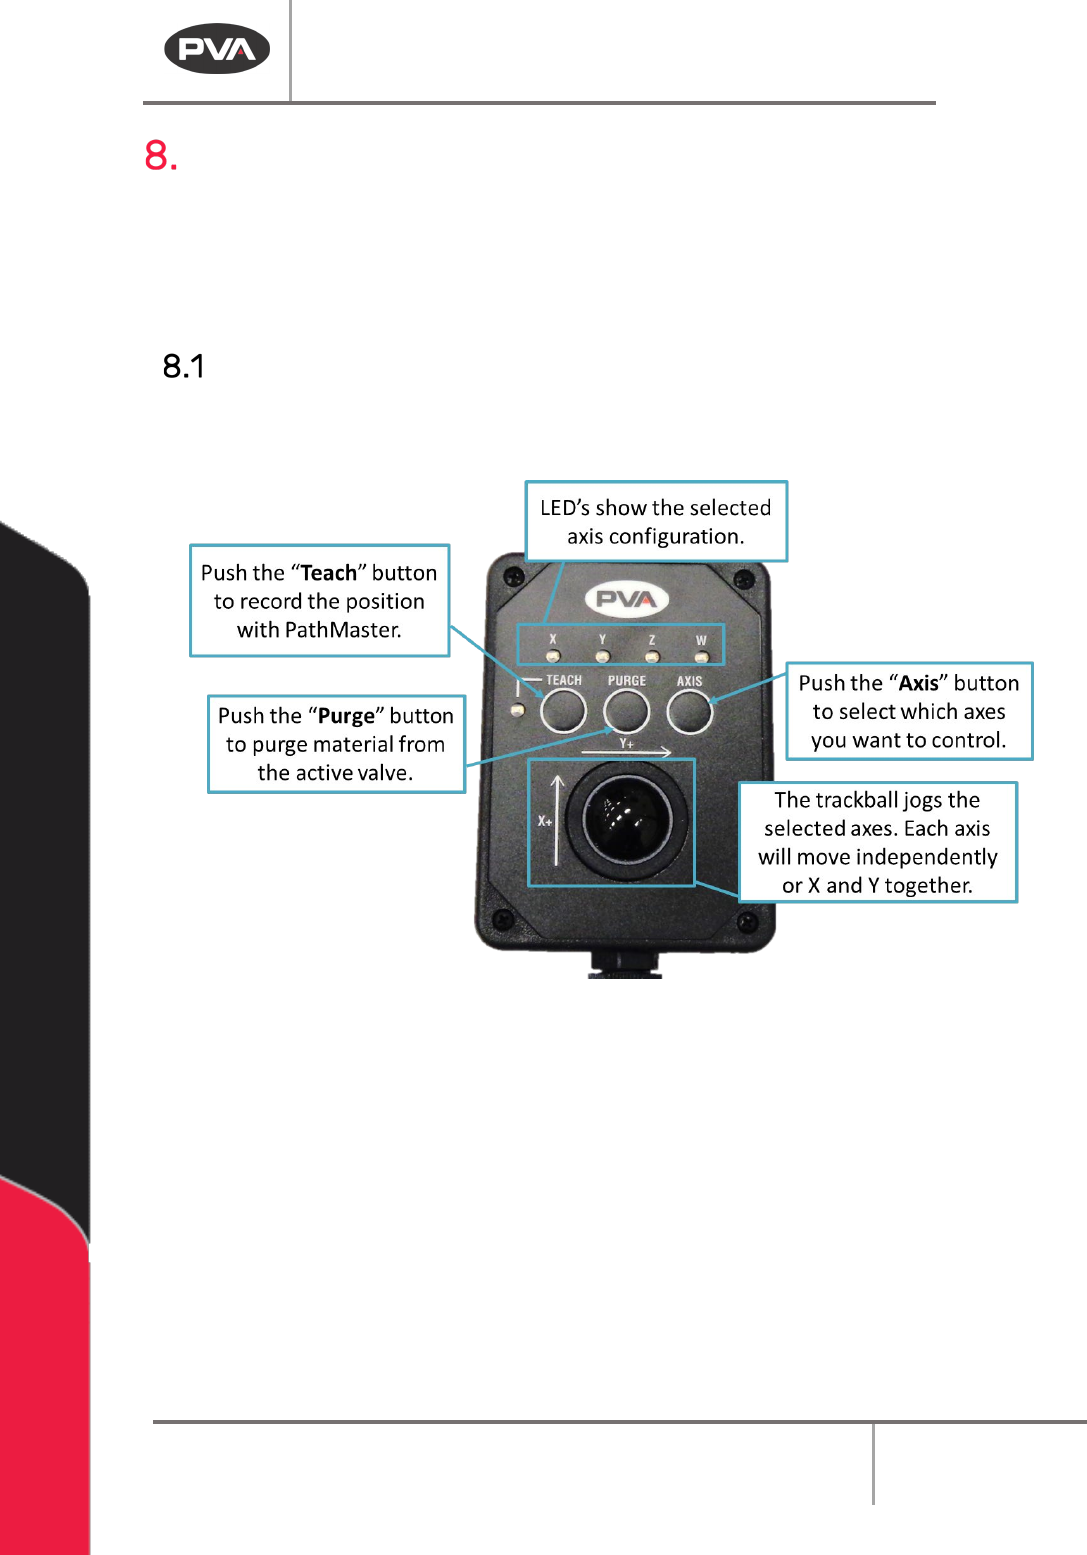
Teach Pendant
PVA workcells come with a teach pendant. Each teach pendant has a Trackball, Teach
button, Purge button, Axis selection button, and LED indicators for selected axes and
teach function.
Figure 69: Teach Pendant
LED’s – The X, Y, Z and W LED’s show the selected axis configuration. The Teach LED shows
a position was correctly recorded by PathMaster®. The light tower buzzer will “beep” when
the Teach LED illuminates.
NOTE: W-axis trackball control is locked if the Teach Tool is enabled, unless the PathMaster
Tool Offset window is open (Setup-> Machine Parameters-> “Tool Offsets”). This so the
operator does not teach an accidental theta position with the teach tool.