PathMaster-REV-L-4.5-1.pdf - 第75页
Machine Operati on Manual Revision L / February 2020 Page 75 of 200 Figure 74 : Fiducial Win dow 7. S elect “ Edit Position ” to change the positi on of the fi ducial. 8. Select “ Teach Position ” to teach the lo cation …
Machine Operation Manual
Revision L /
February 2020
Page 74 of 200
Figure 72: Corrected Space
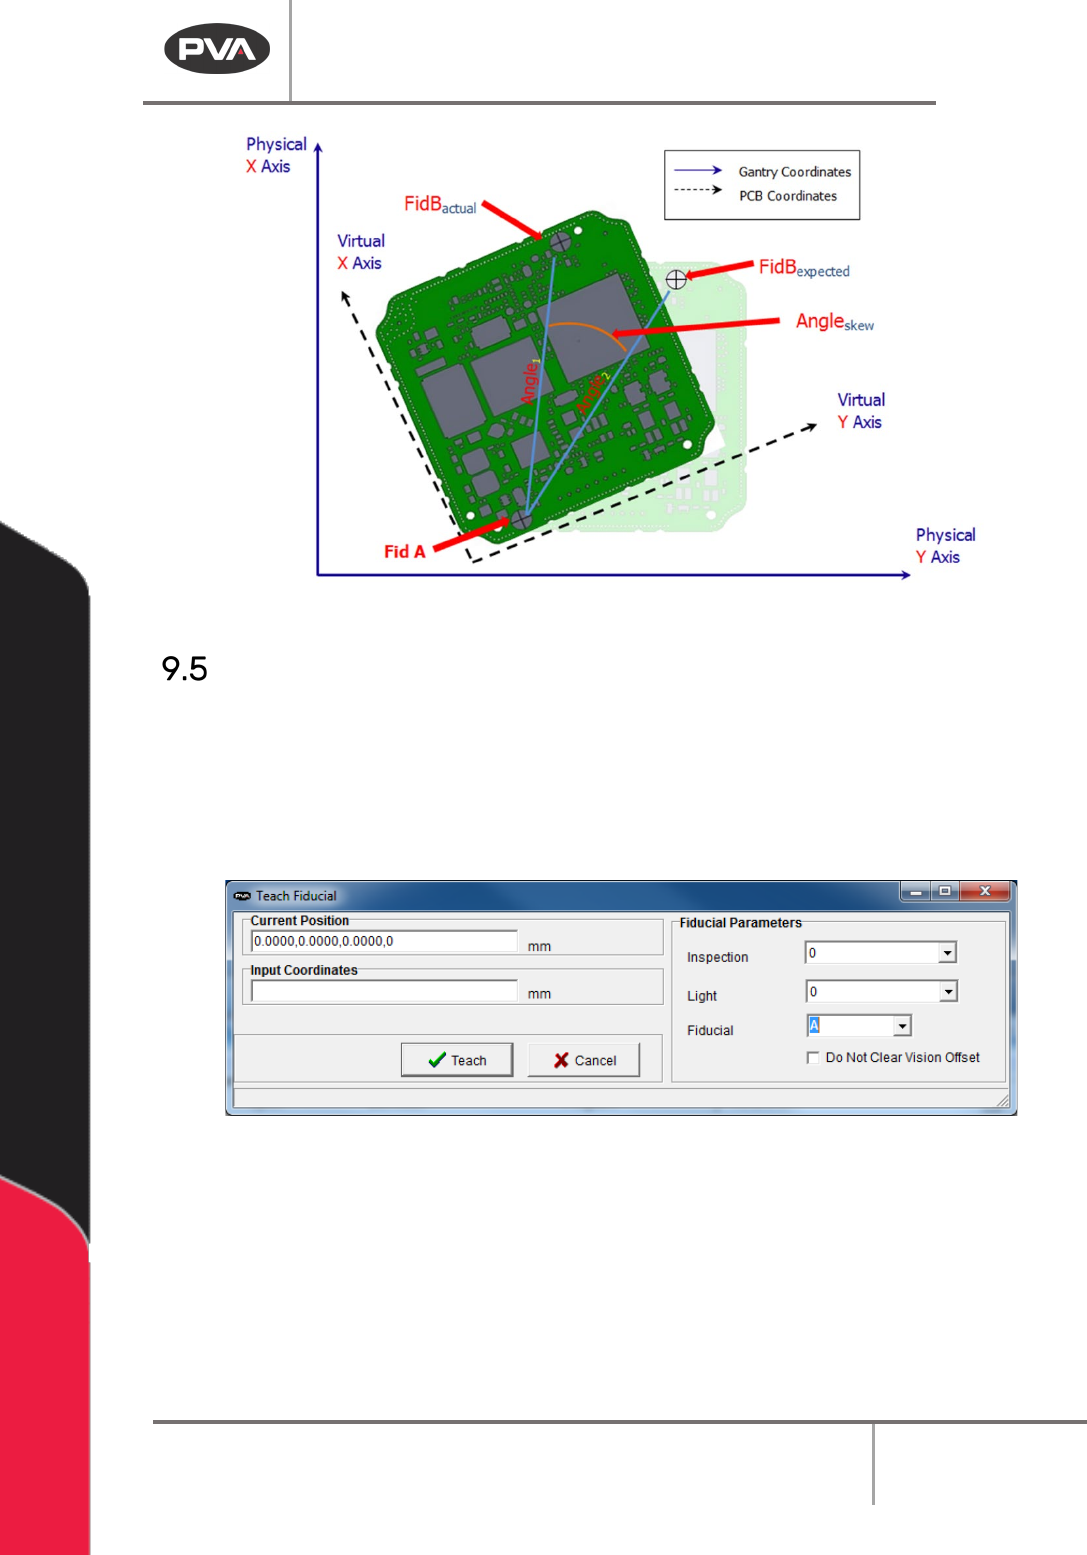
Teaching Fiducials
1. Select the Fiducial function.
2. Select the necessary Inspection and Light.
3. Select the Fiducial. Fiducial A must be programmed first.
4. Teach Fiducial A.
Figure 73: Teach Fiducials
The fiducials will show on the edit screen in blue.
5. Double click on the fiducial function to edit the fiducial.
6. Select “Teach” to save changes made under Fiducial Parameters.
Machine Operation Manual
Revision L /
February 2020
Page 75 of 200
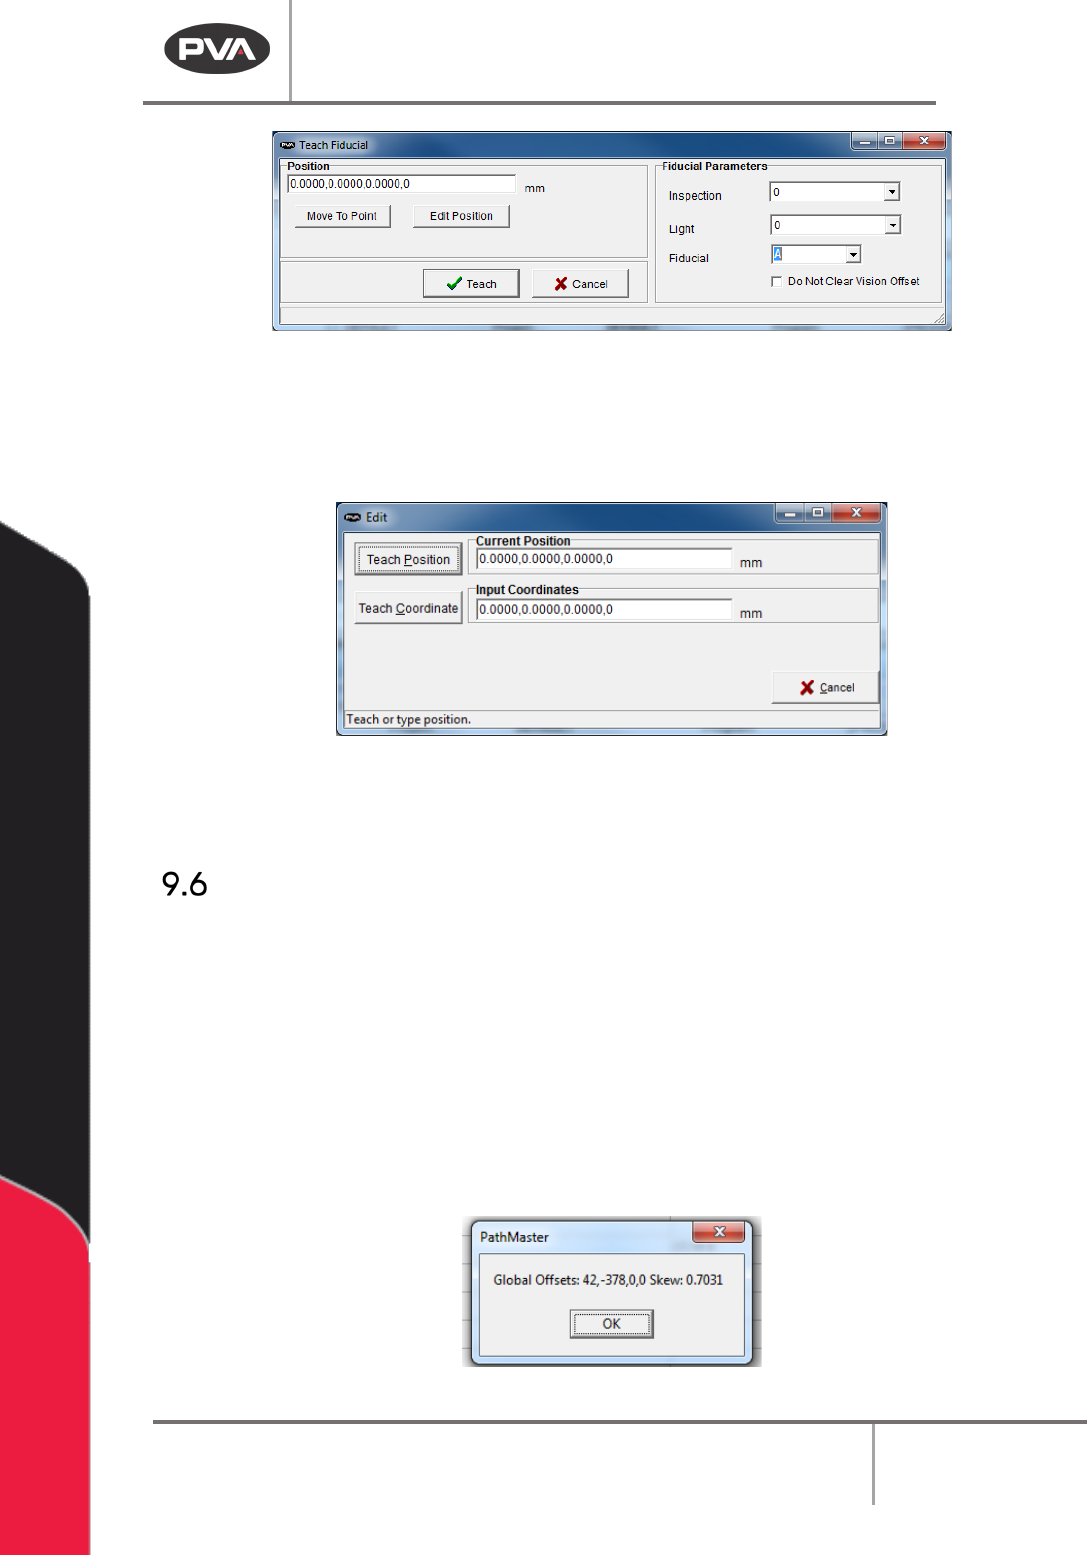
Figure 74: Fiducial Window
7. Select “Edit Position” to change the position of the fiducial.
8. Select “Teach Position” to teach the location of the end effector, or put the
coordinates in the
Teach Coordinate box and select “Teach Coordinate”.
Figure 75: Edit Fiducial
9. Select “Teach” when you are done to exit and save the changes you have made, or
select “
Cancel” to exit and not save changes.
Run Fiducials
Run fiducials before any online programming.
1. Select Run Fiducials from the programming toolbar.
2. The status will show in a window, either pass or fail.
NOTE: If the fiducials have not been run and an online programming tool is selected, you
will be asked if you want to continue without the fiducials run, paths that contain a fiducial
that has not been run will not allow surface editing.
3. Double click on the Position section of the Lower Status Bar to see the current XY
offset and skew angle.
Figure 76: Global Offset and Skew

Machine Operation Manual
Revision L /
February 2020
Page 76 of 200
Programming Functions
General Function Parameters and Buttons
The following function definitions apply to 2D path, 3D path, Arc, Circle, and Area tools.
Current Position – If there is communication with the controller, the current position is
shown in the text box. Use the teach pendant on the workcell to change the position.
Input Coordinates –Enter the target position manually.
Dispensing Parameters – Select parameters for the current dispense and the active tool.
Tool On Wait – The pause after the tool is turned on before the dispense path starts.
Tool Off Wait – The pause after the path is finished and the tool is off, but before the tool
moves to the next point.
Tool On Distance – The distance of the path traveled before the tool turns on.
Tool Off Distance – The distance of the path traveled when the tool is turned off, but
before the path is finished.
Z Retract (Relative) – Distance to raise the Z-axis after certain moves are completed.
Teach – Records the current point.
Surface- Drop down menu to select the end-effector height. Menu options depend on the
function.
• Gantry (Raw) uses the Z coordinate exactly as it was taught.
• Gantry (Relative) uses the Z coordinate that was taught and subtracts the “Relative
Height” numeric field’s current value.
• Calibrated Z uses the Run Tool Reference Z for the current run tool and subtracts
the global “
Relative Height” set for that tool in Tool Configuration.
• Use Last uses the Z height of the previous Surface used in the Polyline.
• Custom Surface uses the XY coordinates of the Surface command that shares the
same name and uses the Z height and the current run tool’s “
Calibrated Z” to set the
dispense Z height.
Use Current Z Height – This will teach all coordinates at the current end-effector height.
Use Calibrated Z Height – This will teach all coordinates at the end-effector height taught
during teaching offsets. The final calibrated height is the tool offset Z Height minus the
“Relative Height” parameter set for the tool in Tool Configuration.
Done – Adds all edits to the program.
Cancel – Exit without changes to the program.