2OM-1075-002.pdf - 第183页
AHB01ESPP • • • • • Operation Procedure (1) T o find the overall shifting tendency of the P .C.B. patterns at first, press the [ENABLE] button on the operation panel in 2 seconds after the [Auto Move (High, Mid, or Low)]…

AHB01ESPP
*7 "Operation Mode" Group Box
When the [ENABLE] button on the operation panel is pressed in 2
seconds after an operation mode is selected and the [ON] button
(entitled "MOVE") is pressed, the head moves to the specified posi-
tion.
[Auto Move (High)], [Auto Move (Mid)], and [Auto Move (Low)]
Buttons
When this button is selected, the machine performs its continu-
ous operation.
Every time the button is pressed, the label on the button changes
in the order of "Auto Move (High)" Æ "Auto Move (Mid)" Æ "Auto
Move (Low)", indicating that the running speed will be changed
according to the selection.
[Step Move] Button
When this button is selected, the machine performs a step op-
eration.
*8 [TEACH] Button
When this button is selected, a teaching operation is performed at
the current position.
*9 [P.C.B. Transfer Manual Mode] Button
When this button is pressed, the "P.C.B. Transfer Manual Mode"
sheet appears.
Refer to "4.1.1 "P.C.B. Transfer Adj." Tab" in "Section 6" for details.
*10 [Cancel] Button
When pressed, this button cancels the taught data that is saved
temporarily.
*11 [End] Button
When pressed, this button saves the results (new placement coor-
dinates) of teaching and ends the teaching session.
*12 Control Button
When the [ENABLE] button on the operation panel is pressed in 2
seconds after the [ON] button (entitled "MOVE"), the machine is
activated.
When the [ON] button (entitled "STOP") is pressed, the machine
stops after a cycle of operation.
0308-002 5-25-22
5.4 "Place Pos Teach" Tab

AHB01ESPP
••
••
• Operation Procedure
(1) To find the overall shifting tendency of the P.C.B. patterns at first,
press the [ENABLE] button on the operation panel in 2 seconds
after the [Auto Move (High, Mid, or Low)] button (*7) and the [ON]
button (*12 entitled "MOVE") or after the [Step Move] button (*7) and
the [ON] button (*12 entitled "MOVE"). The X/Y beam starts moving.
(2) While the X/Y beam is moving, check the condition of the compo-
nent outline and the pattern in the recognition window.
When the patterns of a certain step are specifically shifted to one
side, it is required to teach the P-data. When the overall patterns of
a unit P.C.B. are uniformly shifted to one side, the O-data must be
taught.
(3) Move to the objective step for teaching.
The following two methods are provided for movement to the objec-
tive step for teaching.
• Move to the objective step for teaching through a continuous op-
eration and stop the movement with the [STOP] button on the
operation panel.
The speed of the automatic (continuous) operation can be
specified by selecting the [Auto Move (High)], the [Auto Move
(Mid)], or the [Auto Move (Low)] button in the "Operation
Mode" group box (*7).
• Make the objective step for teaching appear with the vertical scroll
bar in the step data area and select the step. Then, press the
[ENABLE] button on the operation panel in 2 seconds after the
[Step Move] button (*7) and the [ON] button (*12 entitled "MOVE").
(a) When the [Desig Step] button (*6) is pressed, the
desired step can be keyed in directly.
(b) The steps in the step data area are not displayed in
the order of component placement. They are dis-
played in the order of "U1, P1, O1 Æ U1, P2, O1 Æ
… Æ U1, P1, O2 Æ … Æ U2, P1, O1 Æ … Æ Un,
Pn, On".
5.4 "Place Pos Teach" Tab
0308-002 5-25-23
Note
Note
AHB01ESPP
(4) Check how the component outline and the land pattern or the com-
ponent is captured in the recognition window and select the [1-Pt] or
the [2-Pt] button in the "Teach Point" group box (*2).
Component Outline Staying inside Recognition Window
Select the [1-Pt] button (Center of Component) in the "Teach Point"
group box.
Part of Component Outline Staying outside Recognition Win-
dow
Select the [2-Pt] button (Diagonal Corners of Component) in the
"Teach Point" group box.
In the case of "2-Point Teaching", the second point is automatically
selected after the first point is taught completely.
(5) Confirm that the cursor is located at the objective step for teaching.
(6) Confirm that the proper button is selected in the "Teach Point" group
box and press the [ENABLE] button on the operation panel in two
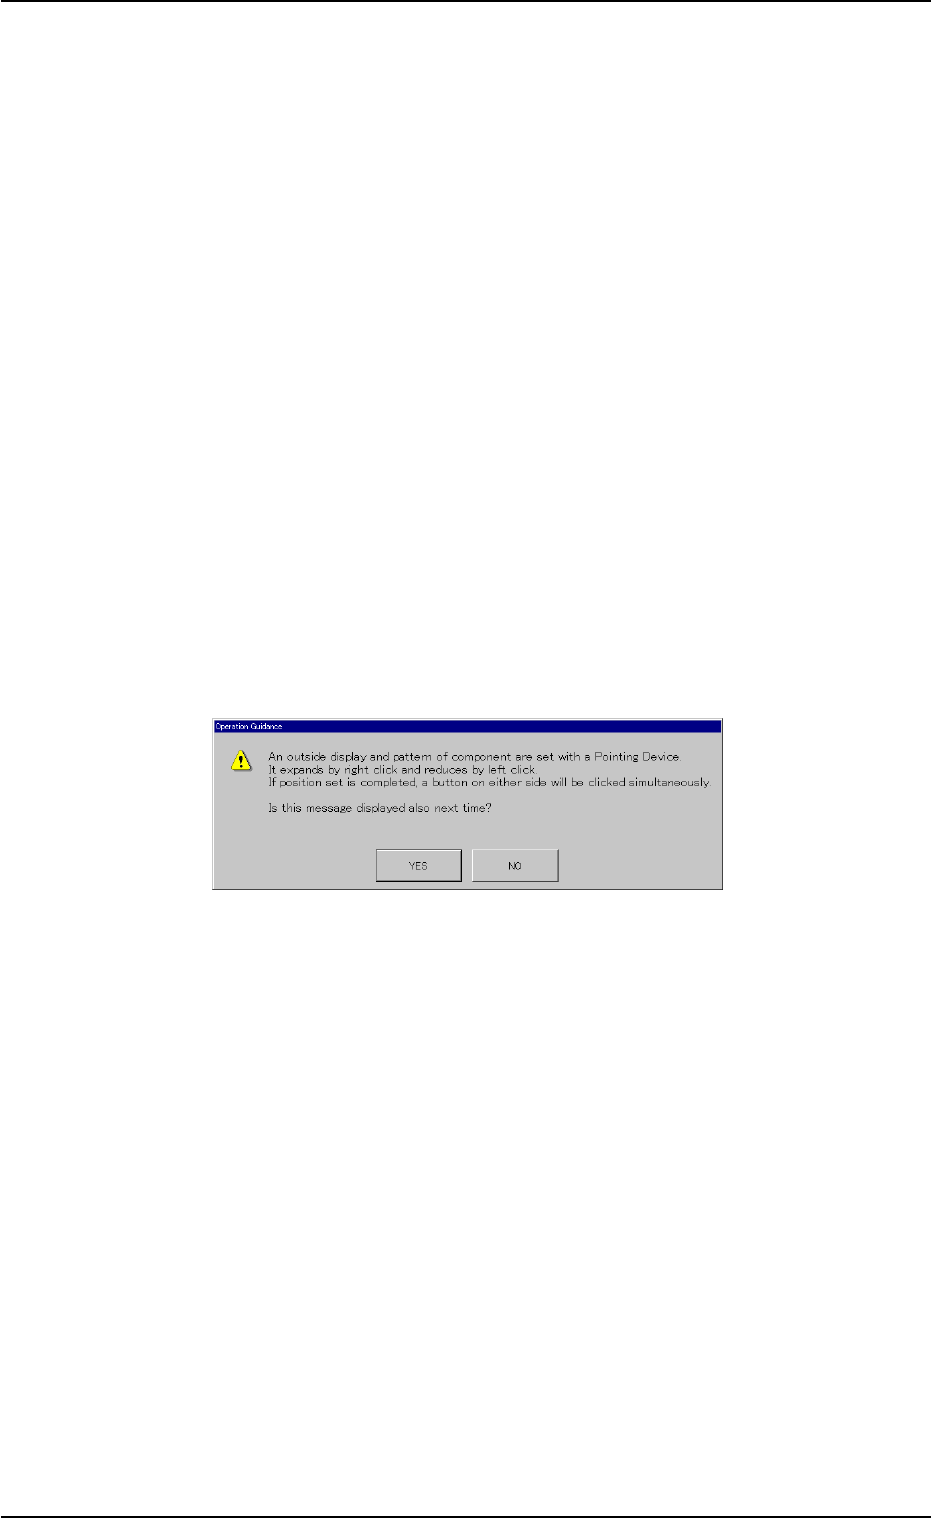
seconds after the [TEACH] button (*8).
The "Operation Guidance" dialog box opens.
Fig. 2E23-8 "Operation Guidance" Dialog Box
(7) Press the [YES] button in the "Operation Guidance" dialog box.
0308-002 5-25-24
5.4 "Place Pos Teach" Tab