2OM-1075-002.pdf - 第364页
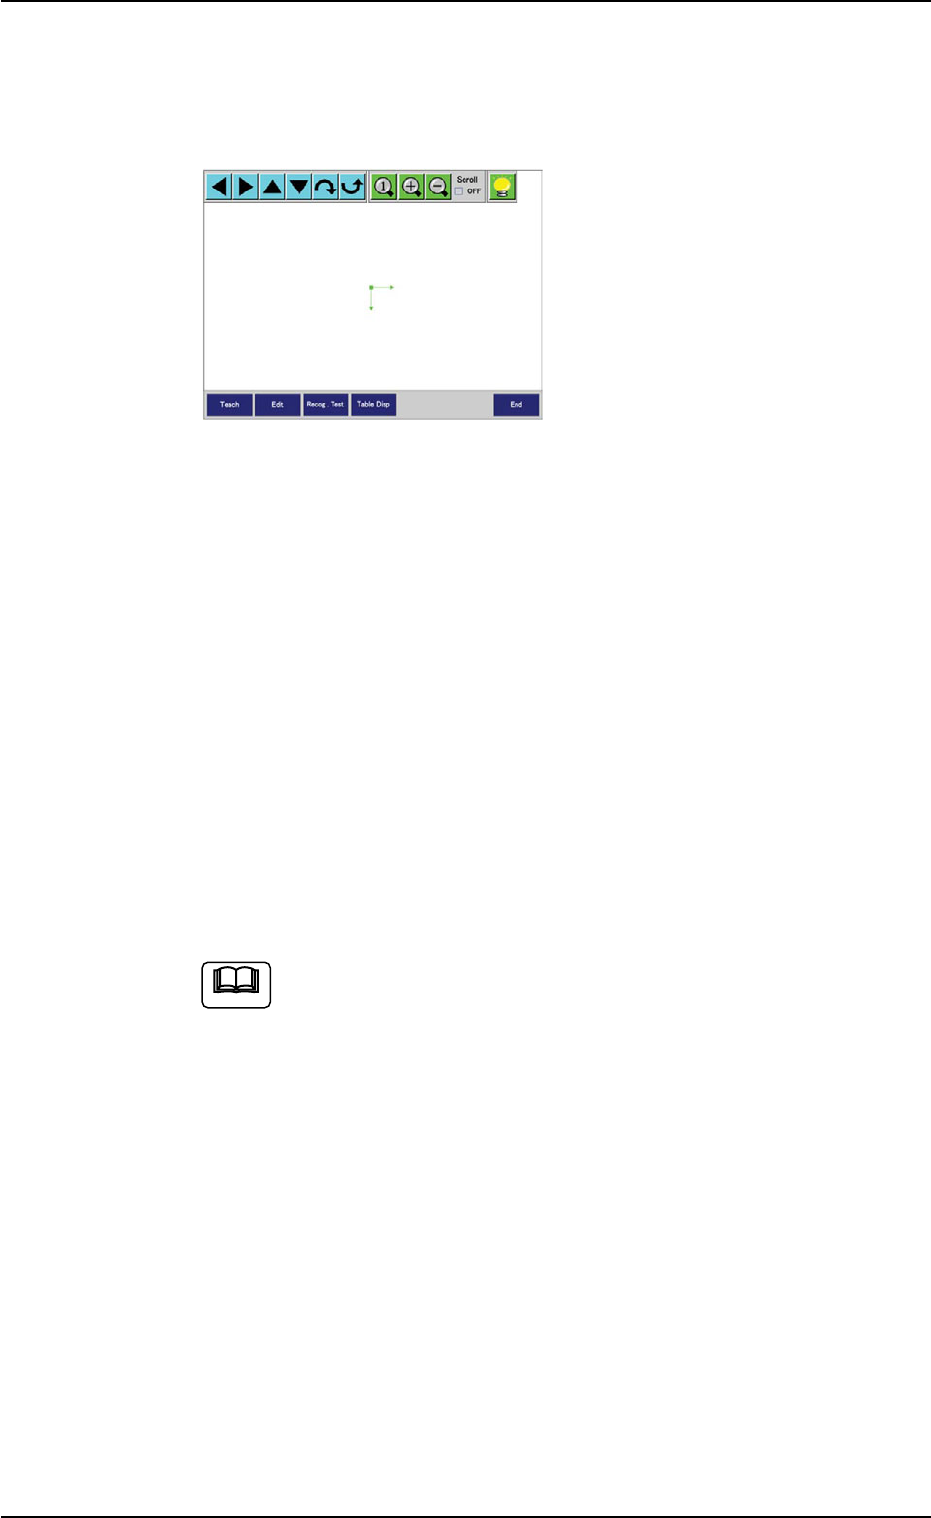
AHB01ESPP As for the other lead groups, perform the similar operations and press the [End] button after the registration is completed. The window in Step (17) opens. (17) A window opens, indicating that the teaching oper…
AHB01ESPP
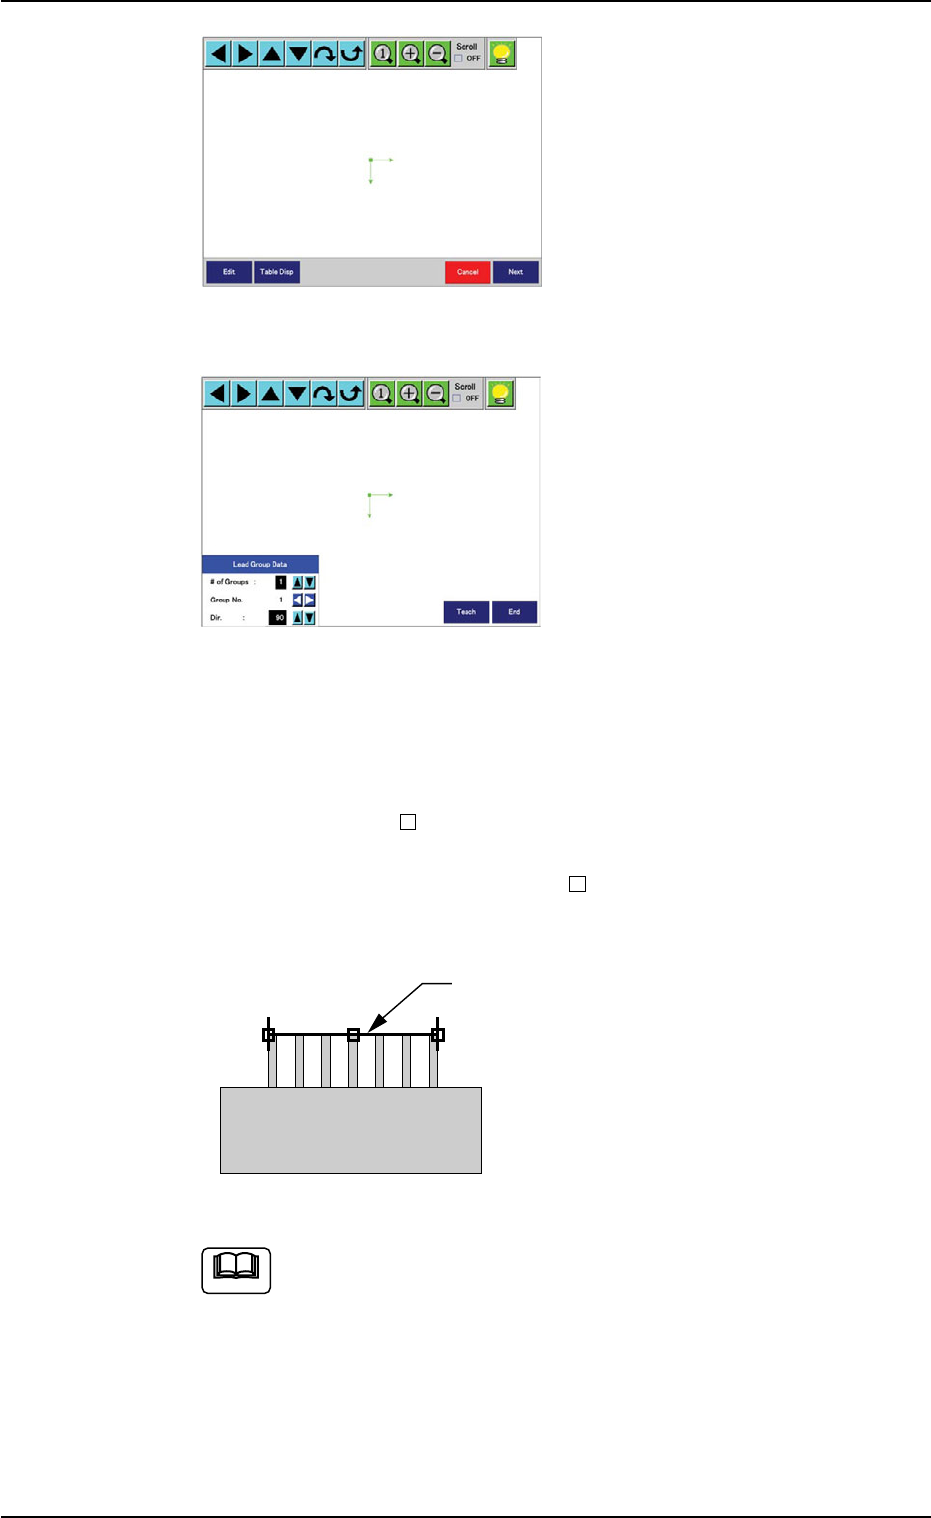
(15) Enter the mold size with the
[Edit] or the [Table Disp] but-
ton, adjust the position and
angle of the graphic roughly,
and press the [Next] button.
The ball teaching operation
starts.
The window in Step (17)
opens.
(16) A window for partial lead
teaching operations opens.
This window makes it pos-
sible to perform teaching
operations on each lead
group.
First of all, set the number
of lead groups to be regis-
tered. (Up to 8 groups)
Then, select the group No.
(starting with "1" in normal
cases) and the direction of
the lead groups to be regis-
tered.
Click the hot spots "
" located at the left, right, and central sides
of the yellow ruler and align the ruler with the ends of the arrayed
leads (lead group). The right and left
must be aligned with the
leads located at both ends of the group.
Press the [Teach] button.
Up to 4 lead types can be registered. However, when more
than 5 groups are taught and the lead types are all differ-
ent (regarded as different data), it means that more than 4
types are handled and no data will be saved for any groups
exceeding the maximum number of types.
In this case, the message "Since the num of lead types
was reached 5 (Max:4), the taught data has not been
saved." is issued.
Fig. 2F104
Fig. 2F104-1
Ruler
Fig. 2F104-2
Note
0308-004 6-131
5.2 Library Teaching
AHB01ESPP
As for the other lead groups, perform the similar operations and
press the [End] button after the registration is completed.
The window in Step (17) opens.
(17) A window opens, indicating
that the teaching operation is
completed.
Check that the correct data
is specified and perform a
visual confirmation by laying
the graphic over the cap-
tured image of the compo-
nent. At the same time, use
the [Table Disp] button to
verify the data. Refer to
"5.2.8 Helpful Hints for Pa-
rameter Verification" for de-
tails.
To correct the data, use the [Edit] or the [Table Disp] button for the
correction.
To perform the teaching operation again, press the [Teach] button.
Refer to "5.2.9 Helpful Hints for Correction & Teaching" for details.
To confirm whether or not recognition operations are possible with
the created data, press the [Recog.Test] button.
The "Comp Recog (Manual)" sheet opens.
When the component cannot be recognized, correct the data and
perform a recognition test again.
When the [Return] button is pressed in the "Comp Recog
(Manual)" sheet, the "Recognition" window opens automati-
cally.
When the recognition test is completed normally or the param-
eters are created or modified, the created parameters are saved,
exiting from the recognition test session.
The "Comp Library" tab sheet opens.
Fig. 2F104-3
Note
0308-004 6-132
5.2 Library Teaching
AHB01ESPP
••
••
• Data Correction
Operation Procedure
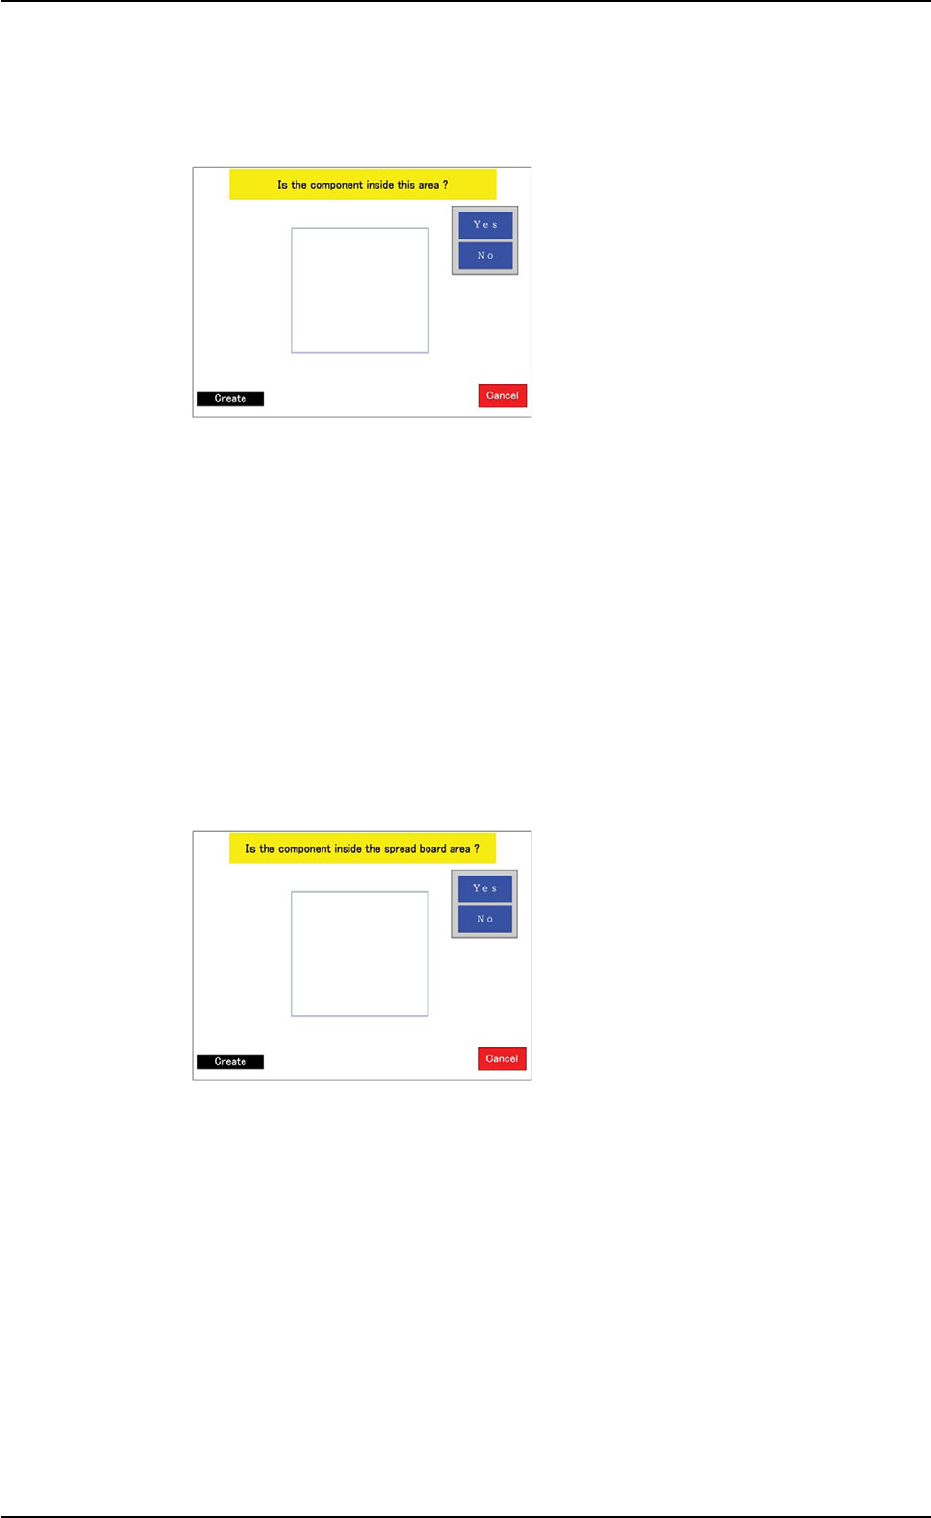
(1) When the teaching operation
starts, a window opens and
shows an image of the com-
ponent to determine if the
size of the component is
proper or not for a teaching
operation with the minimum
view function.
When the machine is not
equipped with the minimum
view function (option), this
window does not open. In
this case, the window in
Step (2) opens.
Confirm that the whole image of the component is inside the light
blue frame.
When the [Yes] button is pressed, "MIN VIEW" is selected and the
window in Step (3) opens.
When the [No] button is pressed, the window in Step (2) opens.
(2) A window opens and shows
an image of the component
to determine if the size of
the component is proper or
not for a teaching operation
with the minimum view func-
tion.
When the thickness (t + Ut)
of the component exceeds
"5 mm", this window does
not open. Instead, the win-
dow in Step (3) opens.
Confirm that the whole image of the component is inside the light
blue frame.
When the [Yes] button is pressed, "MIN VIEW" is selected and the
window in Step (3) opens.
When the [No] button is pressed, the window in Step (2) opens.
0308-004 6-133
5.2 Library Teaching
Fig. 2F104-4
Fig. 2F104-5