2OM-1075-002.pdf - 第466页
AHB01ESPP • How to load the data from the floppy disk to the hard disk of the machine Loading Procedure (1) Insert the floppy disk (the disk where the data is saved) into the drive of the service panel. (2) Press the des…
AHB01ESPP
(5) Press the [OK] button.
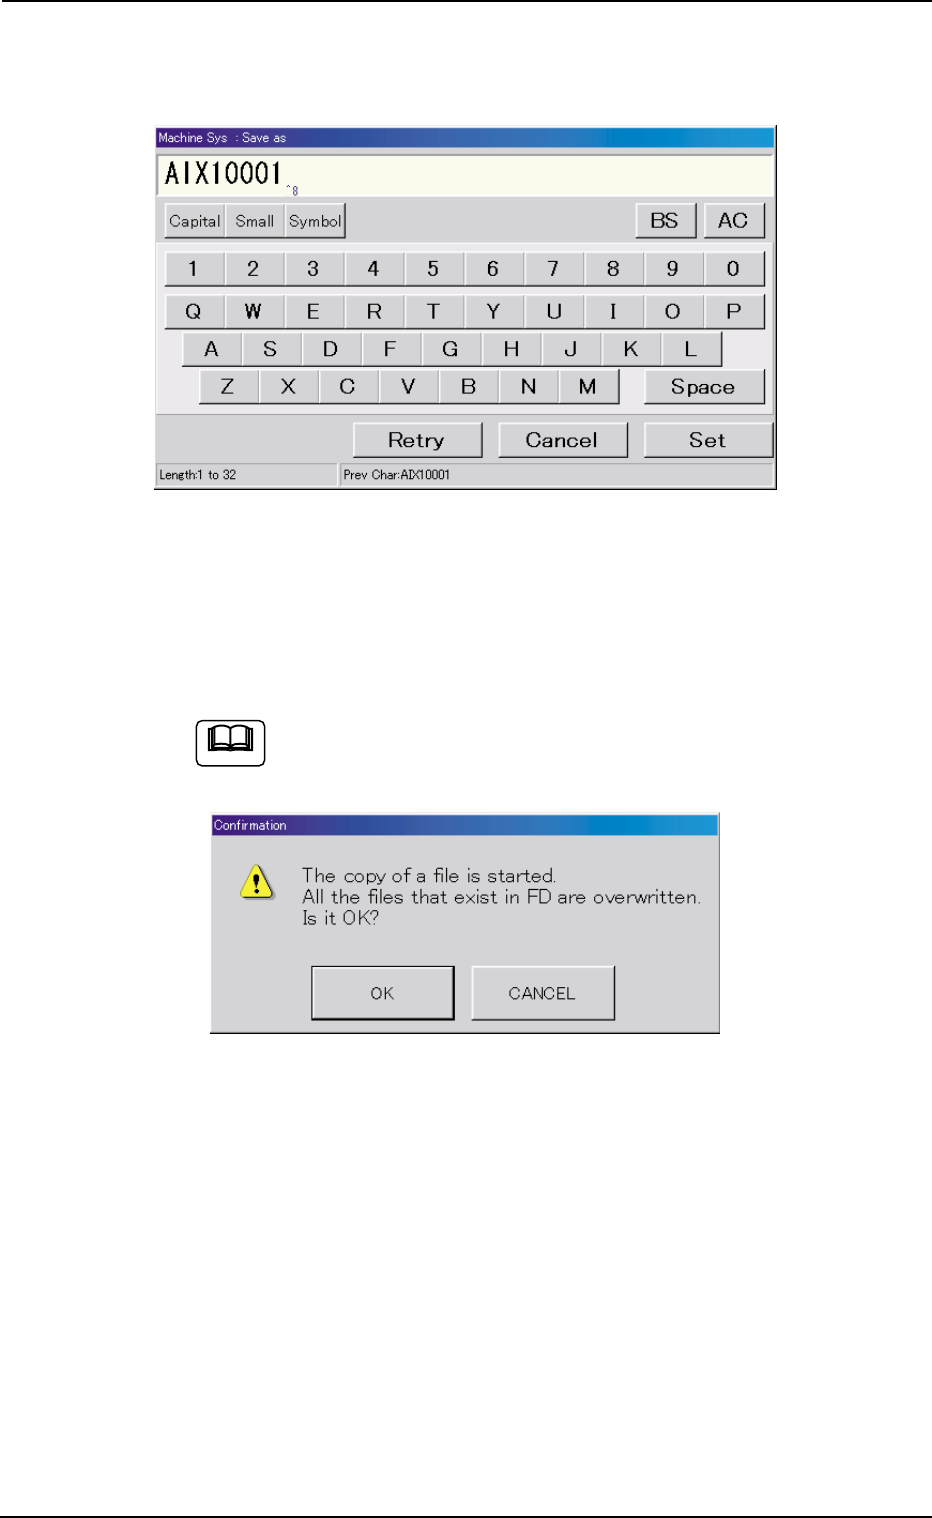
"Machine Sys : Save as" edit window opens.
Fig. 2F150 "Machine Sys : Save as" Edit Window
(6) Enter a file name and press the [Set] button.
"Now Processing" message box appears, indicating that the data
saving is being processed.
When the [SAVE >>] button is pressed in Step (4), the fol-
lowing "Confirmation" dialog box opens.
Fig. 2F151 "Confirmation" Dialog Box for Confirmation to Overwriting
When the [OK] button is pressed, the file having the same name on
the floppy disk is replaced with the newly saved one.
Note
0206-002 6-227
8.1 "Save / Load" Tab
AHB01ESPP
• How to load the data from the floppy disk to the hard disk of the
machine
Loading Procedure
(1) Insert the floppy disk (the disk where the data is saved) into the drive
of the service panel.
(2) Press the desired data type button and select the files to be loaded.
(3) Press the [FD Search] button. The names of the retrieved files are
displayed in the "List of Files on Floppy Disk" pane.
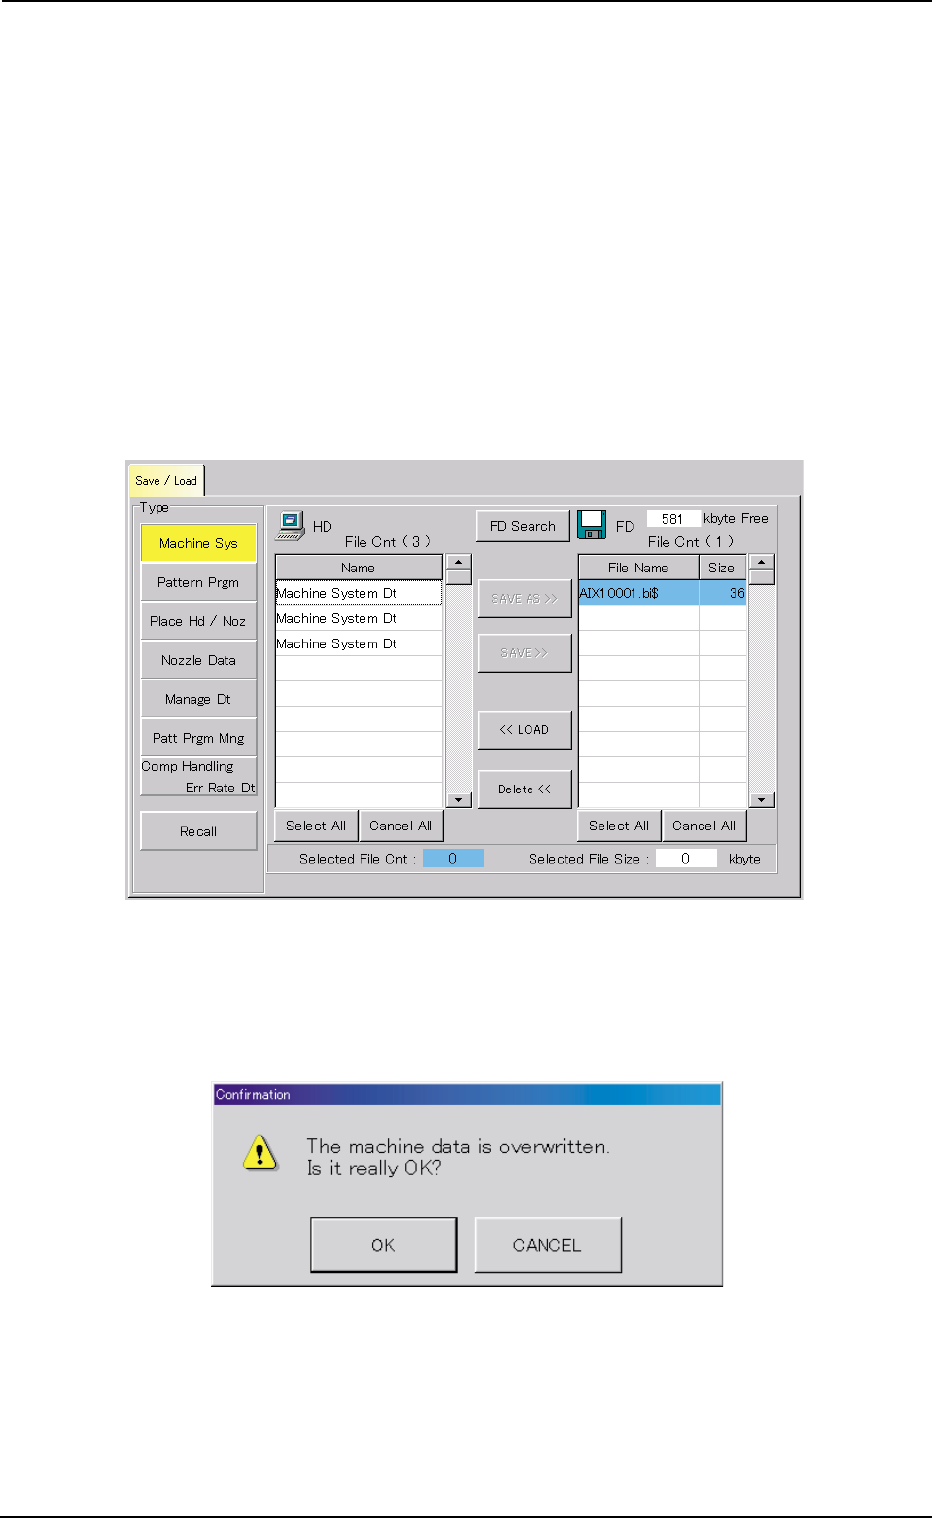
(4) Select the files of data to be loaded to the hard disk of the machine.
The selected lines of files turn sky blue.
Fig. 2F152 Selection of Data (to be loaded to the hard disk of the machine)
(5) When the [<< LOAD] button is pressed, the following "Confirma-
tion" dialog box opens.
Fig. 2F153 "Confirmation" Dialog Box for Confirmation to Loading
(6) When the [OK] button is pressed, the loading starts.
When the selected files are loaded successfully, the loaded file
names are displayed in the "List of Files on Hard Disk" pane.
0206-002 6-228
8.1 "Save / Load" Tab
AHB01ESPP
• How to delete the data from the floppy disk
Delete Procedure
(1) Insert the floppy disk (the disk where the data is saved) into the drive
of the service panel.
(2) Press the desired data type button to specify the type of the data to
be deleted.
(3) Press the [FD Search] button.
The names of the retrieved files are displayed in the "List of Files on
Floppy Disk" pane.
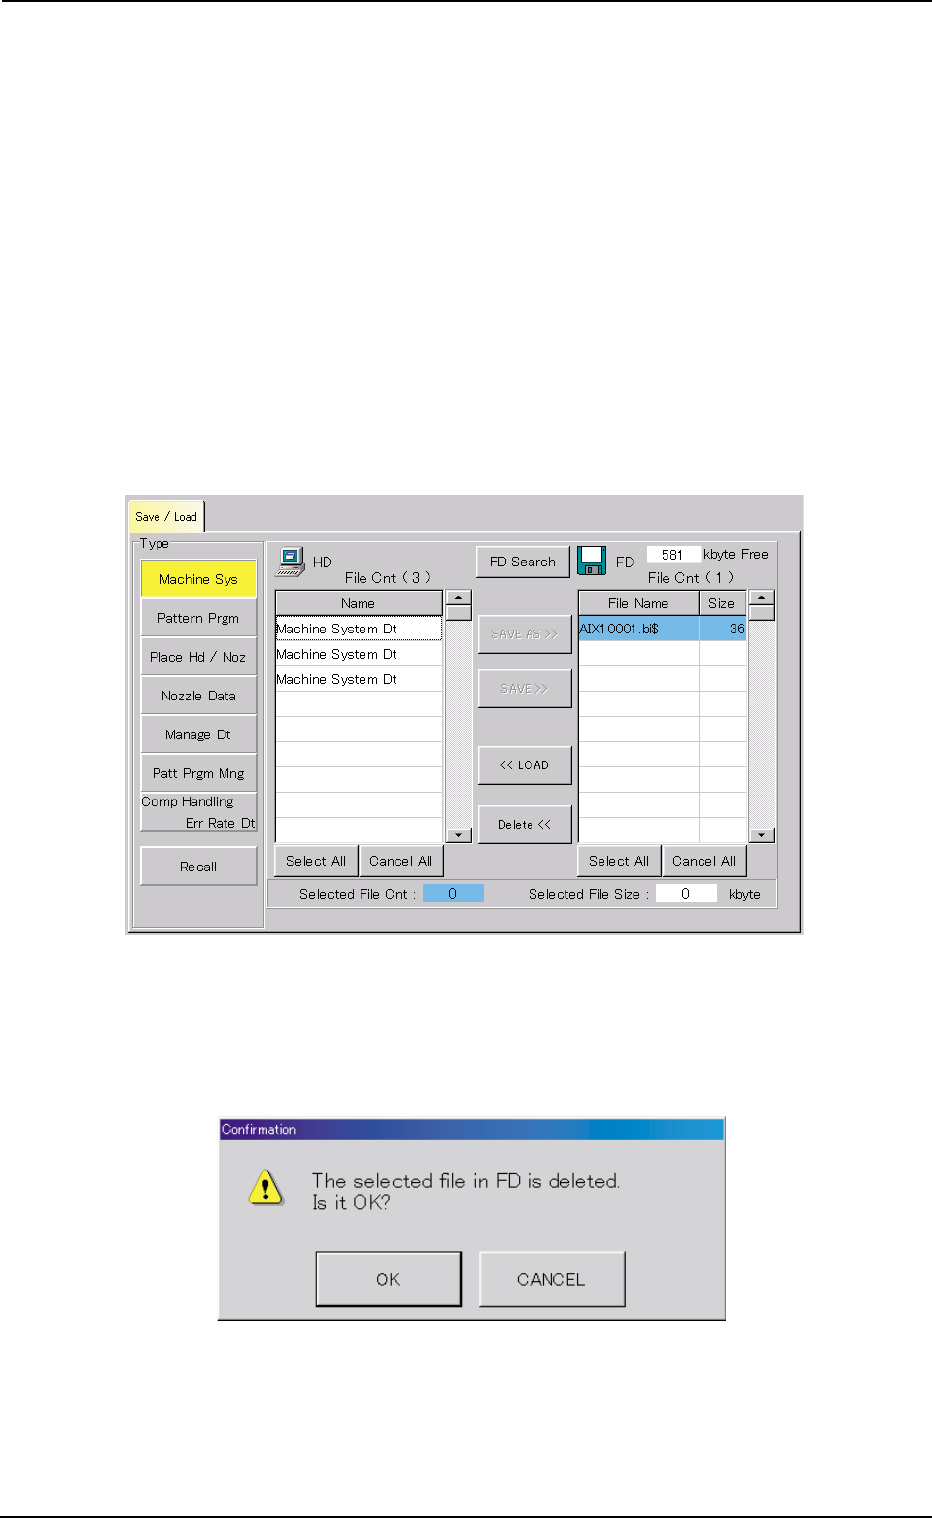
(4) Select the file(s) of the data to be deleted.
The line of the selected file name (data) turns sky blue.
Fig. 2F154 Selection of Data Deleted
(5) When the [Delete <<] button is pressed, the following "Confirma-
tion" dialog box opens.
Fig. 2F155 "Confirmation to Deleting" Dialog Box
(6) When the [OK] button is pressed, the deletion starts.
0206-002 6-229
8.1 "Save / Load" Tab