2OM-1075-002.pdf - 第211页
AHB01ESPP 7.2.2 Conveyor Width Setup Operation Follow the steps below to perform a setup operation for the conveyor width. Fig. 2E41 "Product Change" T ab Sheet for "X/Y T able Chute Width" Operation …
AHB01ESPP
7.2.1 All Device Overall Setup Operation
Follow the steps below to perform the all device overall setup operation.
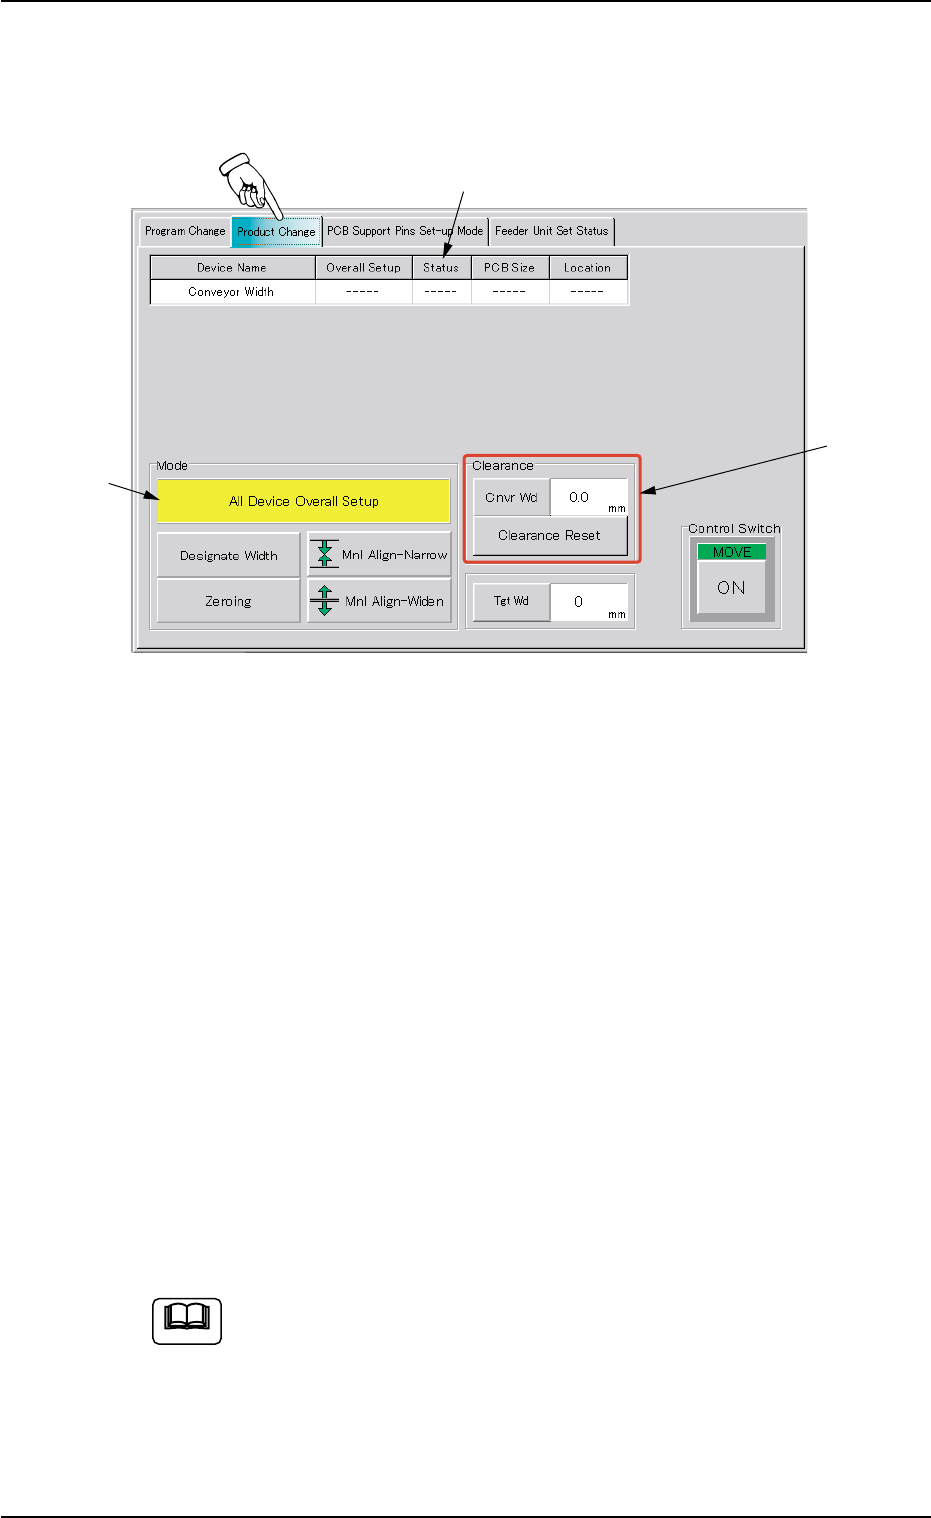
Fig. 2E40 Tab Sheet with [All Device Overall Setup] Button Selected
Operation Procedure
(1) Press the [All Device Overall Setup] button (*1).
(2) Enter a numerical value as clearance data (*2) in the "Cnvr Wd" text
box in the "Clearance" group box and press the [Clearance Reset]
button.
(3) Press the [ON] button (entitled "MOVE) in the "Control Switch" group
box and then the [ENABLE] button on the operation panel in 2 sec-
onds. The all device overall setup operation starts and the following
is indicated in the "Status" text box (*3) of each device.
"Compl" : The setup operation is completed and the device is
located at the position "P.C.B. Width + Clearance".
"NOT" : The device is located at the position "P.C.B. Width +
Clearance" but the current position is not managed.
"---" : The current position or program is indefinite.
"---"(red) : "NOT SET" is set for the setup data.
(a) When the current pattern program is indefinite, zeroing op-
eration is implemented and the automatic setup operation
is performed continuously.
(b) When the current pattern program is definite, the automatic
setup operation is performed, regarding the target position
as "P.C.B. size Y [mm] (Vertical)" in the pattern program.
7.2 "Product Change" Tab
*1
*2
*3
Note
0206-003 5-48

AHB01ESPP
7.2.2 Conveyor Width Setup Operation
Follow the steps below to perform a setup operation for the conveyor
width.
Fig. 2E41 "Product Change" Tab Sheet for "X/Y Table Chute Width"
Operation Procedure
(1) Press the [Tgt Wd] button to open the "Tgt Wd" edit window. Enter a
target value and press the [Set] button. The target value will be speci-
fied.
Fig. 2E42 "Tgt Wd" Edit Window
7.2 "Product Change" Tab
0206-003 5-49

AHB01ESPP
(2) Select the [ON] button (entitled "MOVE") and press the [ENABLE]
button on the operation panel in 2 seconds. The conveyor width is
changed to the target one.
(3) When the conveyor width must be adjusted according to the result
of P.C.B. transfer check operation, select the [Mnl Align-Narrow] or
the [Mnl Align-Widen] button and press the [ON] button (entitled
"MOVE"). After that, press the [ENABLE] button on the operation
panel in 2 seconds.
The manual alignment operation for the conveyor width is imple-
mented in the "Narrow" or "Wide" direction as long as the [ENABLE]
button is held down.
(4) To update the clearance data after the completion of the adjustment,
press the [Clearance Reset] button.
"Clearance" is changed to "Current Width - P.C.B. Size Y (Width)".
Note: When the data exceeds "±5.0 mm", this operation becomes
unavailable.
7.2 "Product Change" Tab
0107-001 5-50