2OM-1075-002.pdf - 第207页
AHB01ESPP Status : When the [ON] button (*5) is pressed, the setup operation starts and the status of the device is indicated. "Compl" : The setup operation is completed and the de- vice is located at the posit…
AHB01ESPP
7.2 "Product Change" Tab
The corresponding tab sheet enables the operator to perform overall
setup operations or manual setup operations on each device.
••
••
• Sheet Layout
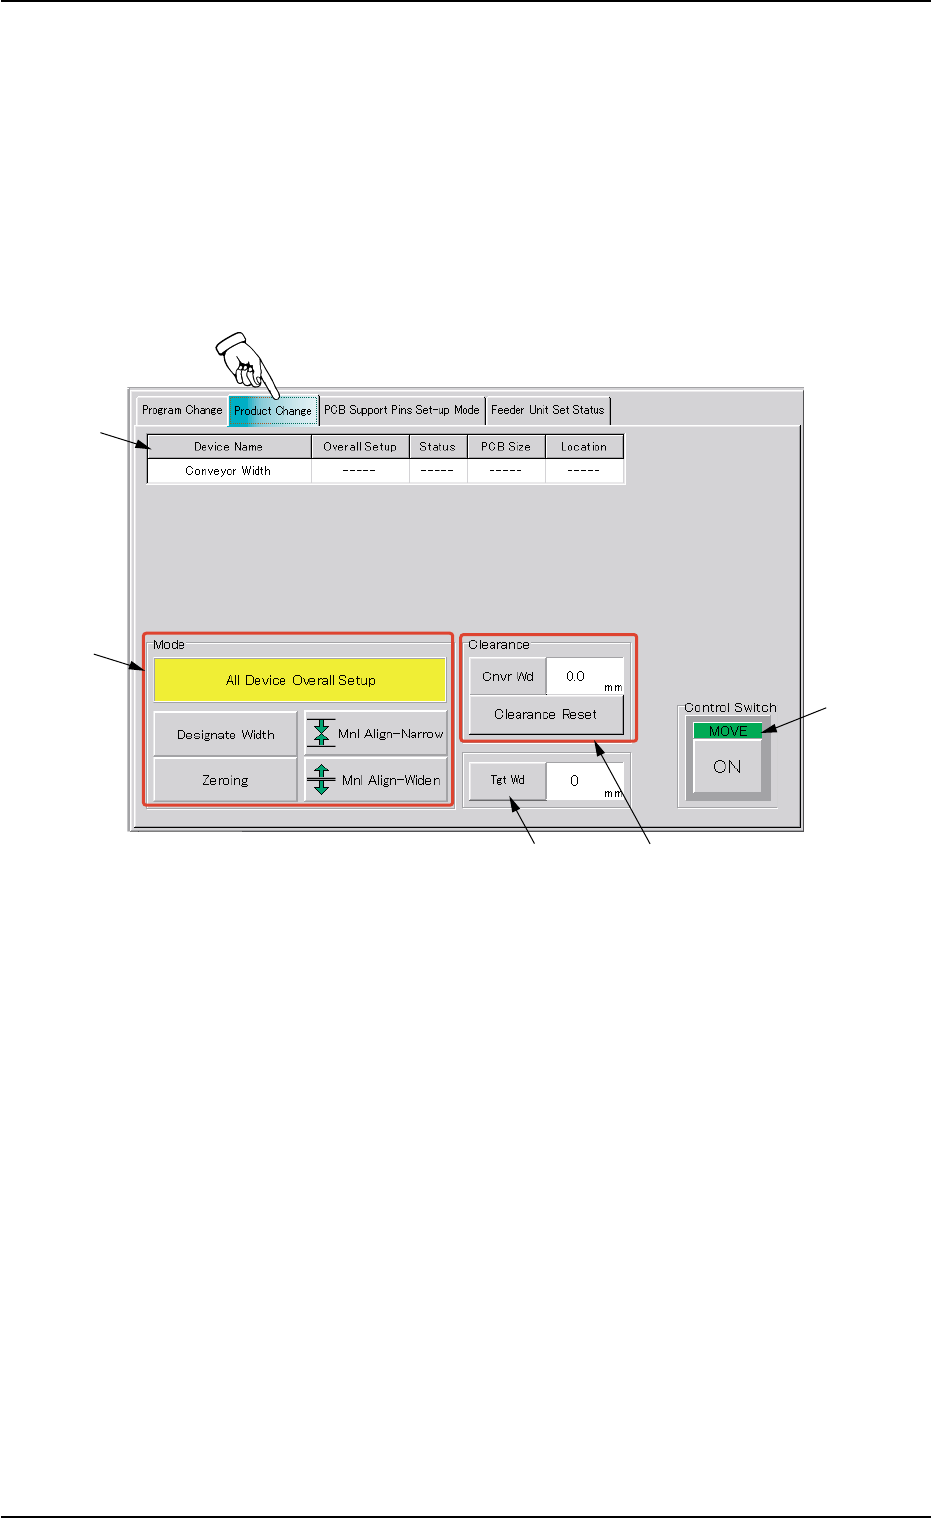
When the "Product Change" tab is pressed in the "PRGM. CHG." win-
dow (submenu), the following tab sheet appears inside the window.
Fig. 2E37 "Product Change" Tab Sheet
••
••
• Sheet Composition
*1 Device Information
Device Name : The following name represents the item that can
be set up.
Conveyor Width
Overall Setup : "On" or "Off" appears in the text box.
7.2 "Product Change" Tab
*1
*2
*4
*3
*5
0206-003 5-44

AHB01ESPP
Status : When the [ON] button (*5) is pressed, the setup
operation starts and the status of the device is
indicated.
"Compl" : The setup operation is completed and the de-
vice is located at the position "P.C.B. Size
(Width) + Clearance".
"NOT" : The device is located at the position "P.C.B. Size
(Width) + Clearance" but the current position is
not managed.
"-----" : The current position or program is indefinite.
"-----" (red) : "NOT SET" is set for the setup data.
PCB Size : Displayed is the P.C.B. dimension (width) in the
current pattern program data.
When the current pattern program is indefinite, "-
----" appears.
Location : The currently managed width appears in the text
box.
"-----" appears when the current location is indefi-
nite or is not managed.
*2 "Mode" Group Box
A setup mode can be selected.
The background color of the selected button turns yellow.
*3 "Clearance" Group Box
This data is used to give some leeway to the conveyor width, com-
pared with the P.C.B. size in the pattern program.
The actual conveyor width becomes "P.C.B. Size (width) + Clear-
ance".
[Cnvr Wd] Button : When this button is pressed, the
"Cnvr Wd" edit window opens.
[Clearance Reset] Button : When this button is pressed after the
clearance value is changed, the
changed value is specified.
7.2 "Product Change" Tab
0107-001 5-45
AHB01ESPP
••
••
• Entry Operation of Clearance Data
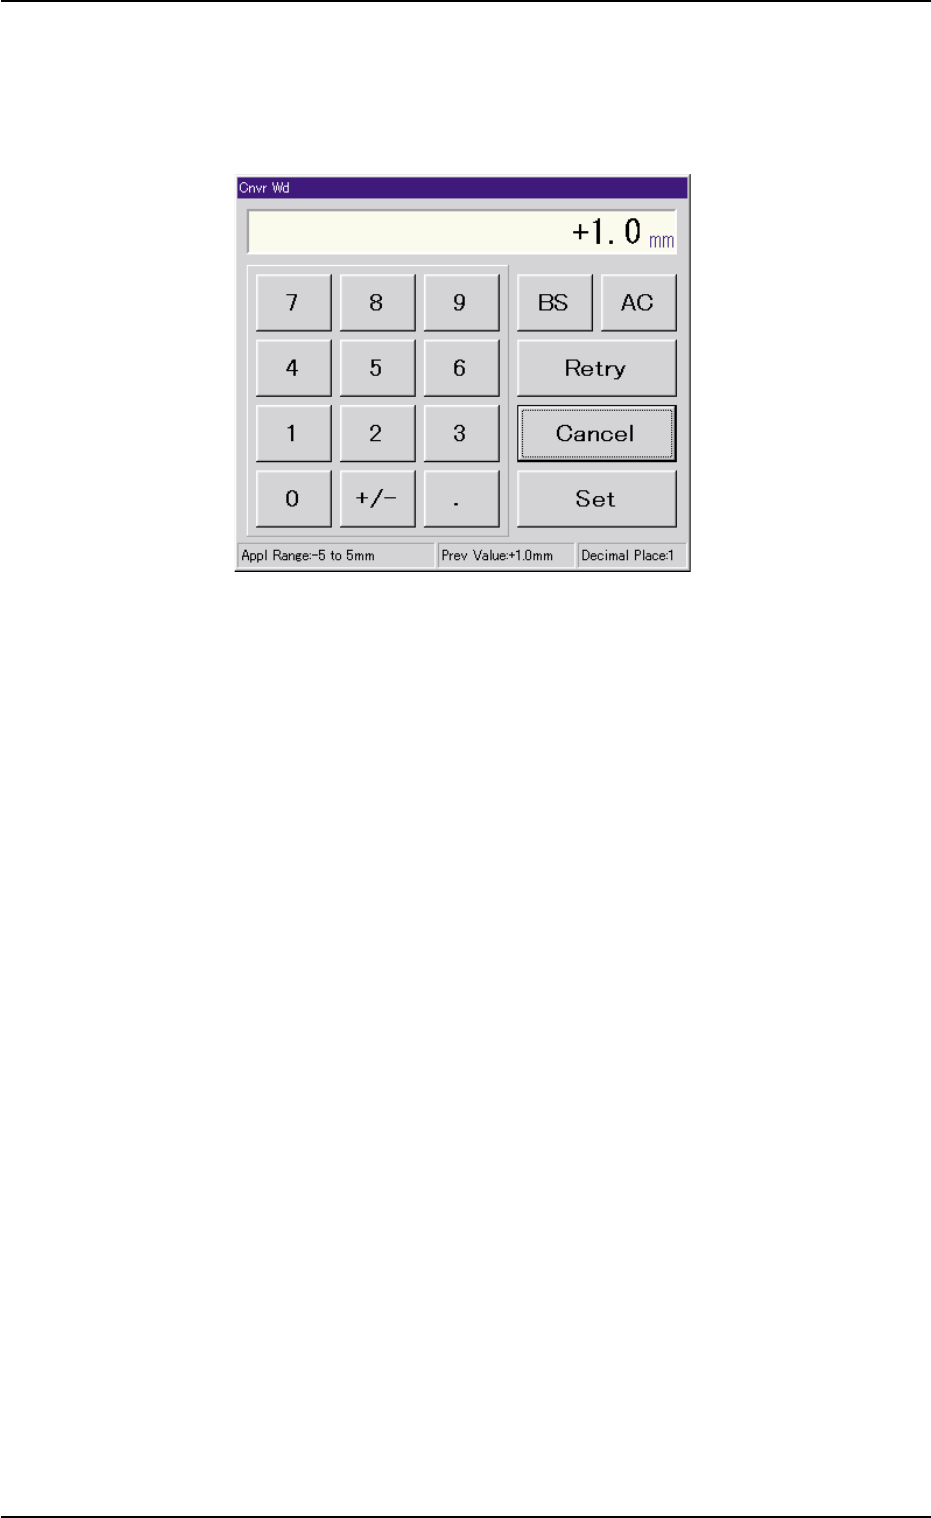
(1) When the [Cnvr Wd] buton is pressed, the "Cnvr Wd" edit window
opens. Enter a clearance value in the range of "-5 to +5 mm" and
press the [Set] button.
Fig. 2E38 "Cnvr Wd" Edit Window
(2) Press the [Clearance Reset] button.
7.2 "Product Change" Tab
0206-002 5-46