JX-350_EPU使用说明书.pdf - 第145页
EPU Instruction M anual C hapter 4 Creating a Production Progr am 4- 97 4.2.1.3 Setting t he optimiz ation conditi ons The optim ization result may vary depending on the sett ings on the “ Component supply count ” dialog…
EPU Instruction Manual Chapter 4 Creating a Production Program
4-96
4.2.1.2 Active feeder in Component supply count
The initial value of the component supply count (used or unused) is set for mechanical
and electric feeders with various tape width levels.
The settings become effective only when component data is created newly.
For example, if there are only electric feeders available, the initial values of the
mechanical feeders are set at “Unused”. As a result, it is not necessary to change the
component supply count every time component data is created.
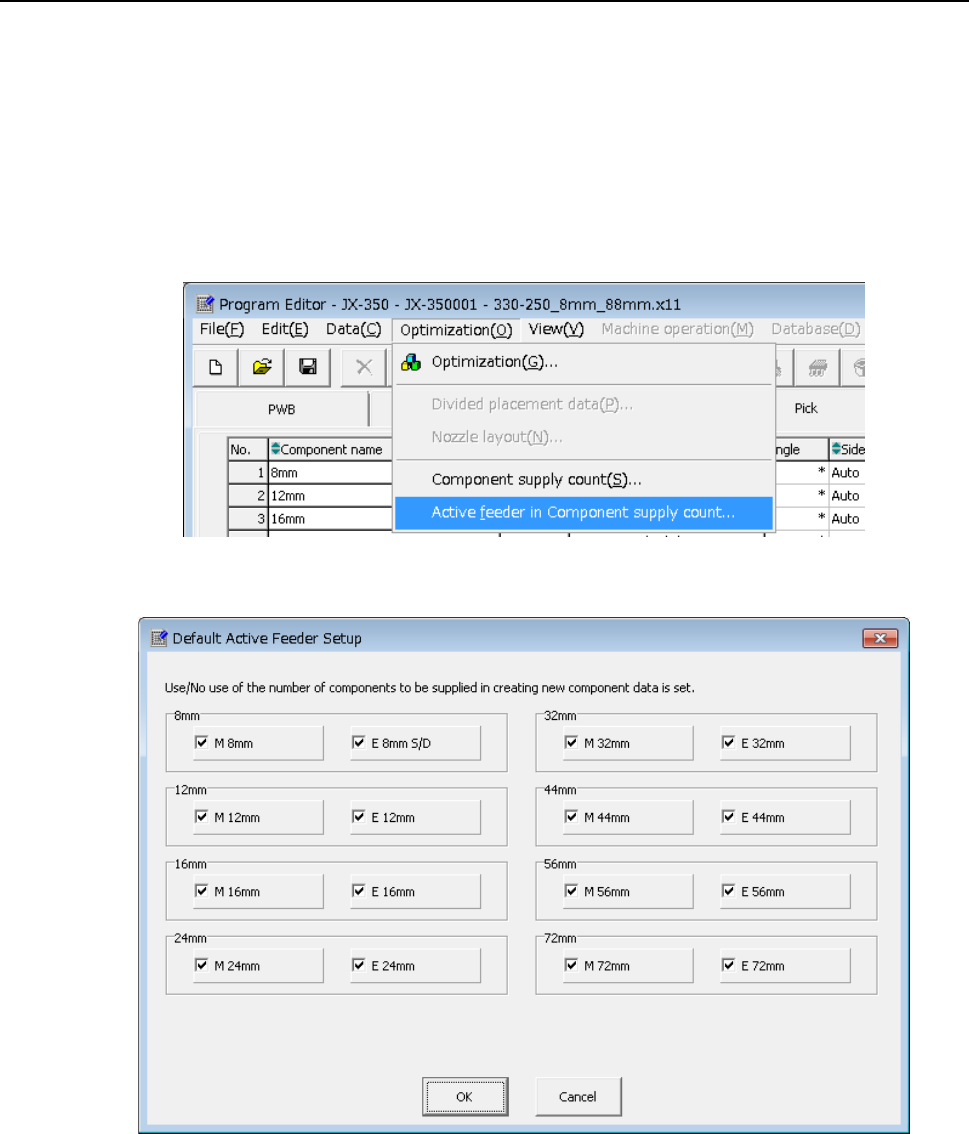
① Click [Optimization] from the menu bar and click [Active feeder in Component supply
count].
② The following “Default Active Feeder Setup” screen will appear.
Check on feeder types you want to use. Conversely, check off feeder types you do
not want to use.
You cannot check off all feeder type check boxes at once.
The settings you have changed become effective when new component data is
created.
If you create new component data after you have changed the settings and the check
box for the feeder type with relevant tape width is checked off, the initial value of the
component supply count is set to “Unused”.
EPU Instruction Manual Chapter 4 Creating a Production Program
4-97
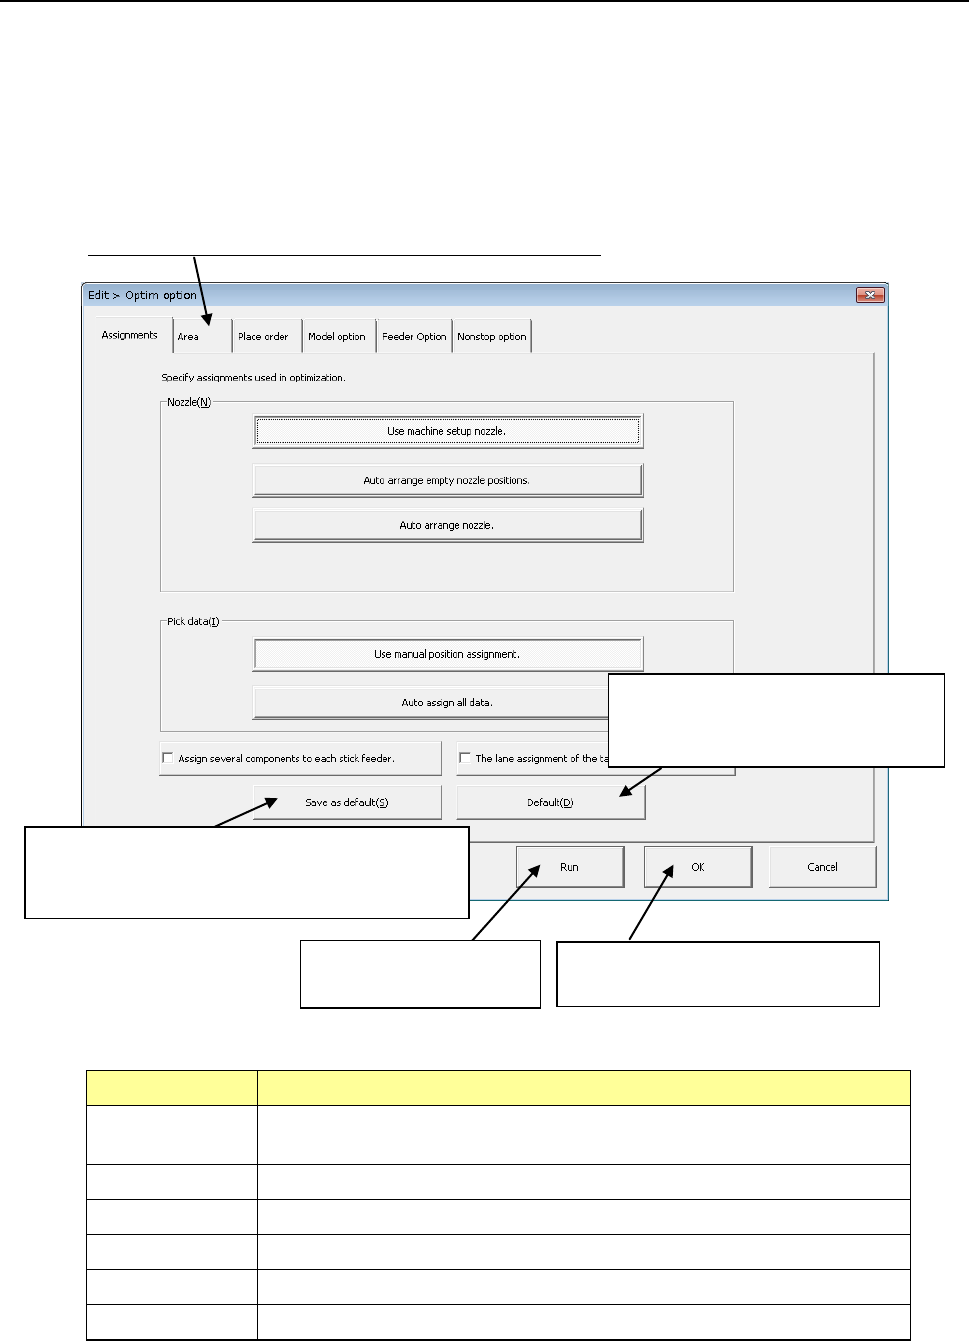
4.2.1.3 Setting the optimization conditions
The optimization result may vary depending on the settings on the “Component supply
count” dialog box described above and those on the “Optimization” dialog box described
below. Set the optimization conditions of a production program only after understanding
the descriptions below well.
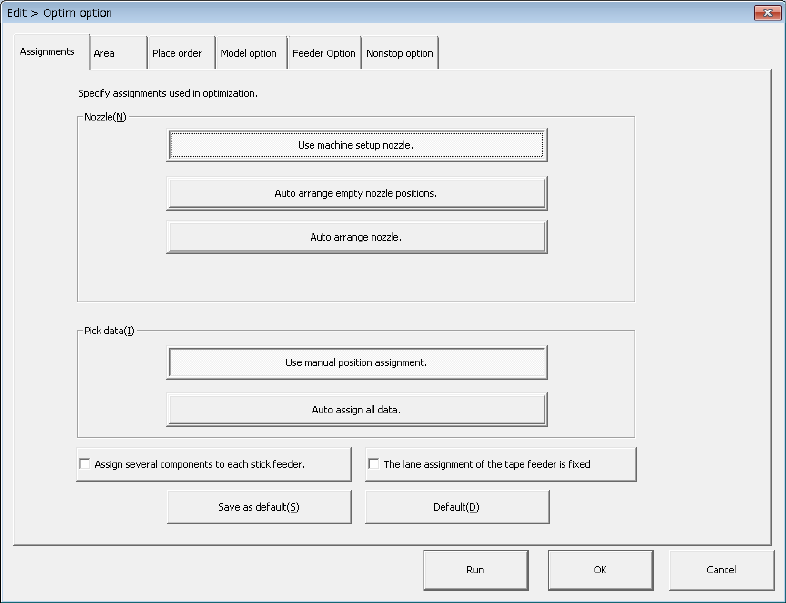
When you click the [Optimization]/[Optimization] commands from the menu bar, the
“Assignments” screen appears.
Set the six categories of conditions including the “Assignments” option.
Click this tag to change the screen for the corresponding option.
Option Description
Assignments Specifies the option to be checked with the Optimization utility when it assigns a
nozzle or Pick data.
Area Specifies the area to which a feeder can be assigned.
Place order Specifies the option to be used for changing the component placement order.
Model option Specifies the option unique to the model.
Feeder option Specify the options related to the feeder layout.
Non-stop option JX-350 is not applicable to the non-stop option.
This button registers new settings as the initial
values. The new settings will be displayed in the
beginning when the system is booted the next time.
This button invalidates your registered
settings and restores the standard
settings (initial values of the machine).
This buttons executes the
optimization function.
This button stores your settings, and
closes this screen.
EPU Instruction Manual Chapter 4 Creating a Production Program
4-98
(1) “Assignments” option
Set "Nozzle layout" and "Feeder layout" intended for dividing (optimizing) the program
data.
1) Nozzle
Select which nozzle layout you want to use, the nozzle layout set on the “EPU
setup” menu or the optimized nozzle layout.
a) Use machine setup nozzle:
The nozzle settings on the “EPU setup” menu will be used as they are. The
current nozzle layout can be used as it is. This option does not need any
changeover time, and thus select this option for flexible manufacturing.
b) Auto arrange empty nozzle positions:
The permanent nozzles set on the “EPU setup” menu are used as they are,
and the nozzles required as the result of optimization are assigned to the
empty area of the ATC. If your system has enough nozzles to do this
operation, select this option. Note that you have to change the settings on
the “EPU setup” menu to set the additionally assigned nozzles if you select this
option.
c) Auto arrange nozzle.
The nozzle layout is optimized with ignoring the settings of the nozzles made
on the “EPU setup” screen.
In this case, the production tact becomes speedier but nozzle re-layout and
EPU setup setting changes are required. Accordingly, preparation may take
more time.