JX-350_EPU使用说明书.pdf - 第46页
EPU Instructi on Manual Chapter 3 E PU setup 3- 20 ◊ T o delete a nozzl e already set, press the [DEL] or [SP ACE] key . • W hen you click the <O K> button, EPU saves your change, then returns to the “S tat ion pro…
EPU Instruction Manual Chapter 3 EPU setup
3-19
3.7.2 Explanation of buttons
3.7.2.1 Previous Station
This button saves your change of a station profile that is being currently edited, then
displays the profile of the previous station on the screen.
◊
This button does not function if a station that is being edited is the first station.
3.7.2.2 Next Station
This button saves your change of a station profile that is being currently edited, then
displays the profile of the next station on the screen.
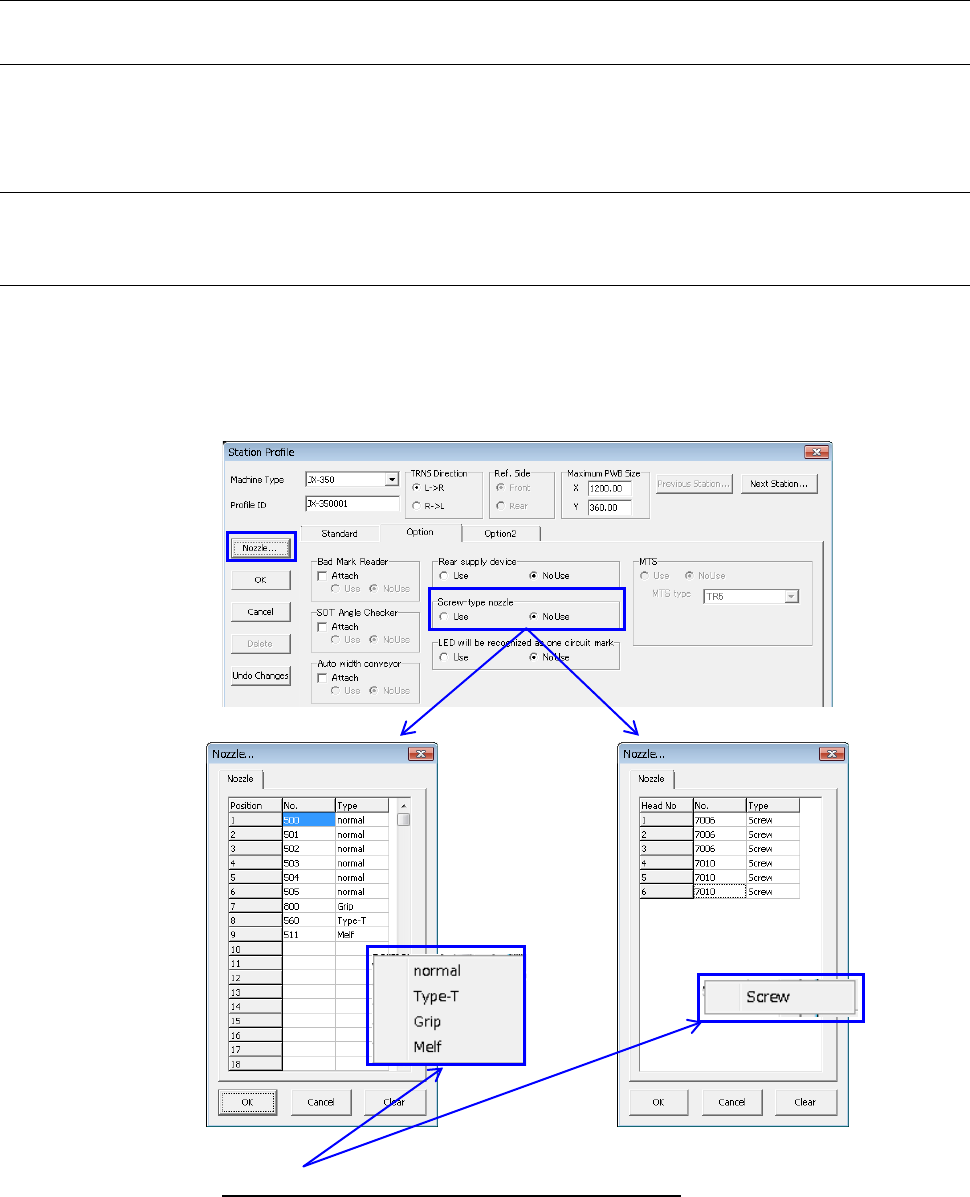
3.7.2.3 Nozzle
This button allows you to assign the nozzle number and nozzle type to an ATC.
The nozzles you set here are referred with the Optimization function provided by the
Program Editor.
The display and the number of settable nozzles may vary depending on “Screw-type
nozzle” setting on the [Option] tab.
No use Use
◊
When you click “Type” column with the mouse right button, the nozzle type menu
appears on the screen as shown below.
Number of settable nozzles:
Screw type nozzle No Use: 26 pcs.
Use: 6 pcs.
EPU Instruction Manual Chapter 3 EPU setup
3-20
◊
To delete a nozzle already set, press the [DEL] or [SPACE] key.
• When you click the <OK> button, EPU saves your change, then returns to the
“Station profile” screen.
• When you click the <Clear> button, the nozzle setting currently being displayed is
cleared.
• When you click the <Cancel> button, EPU discards your change, then returns to
the “Station profile” screen.
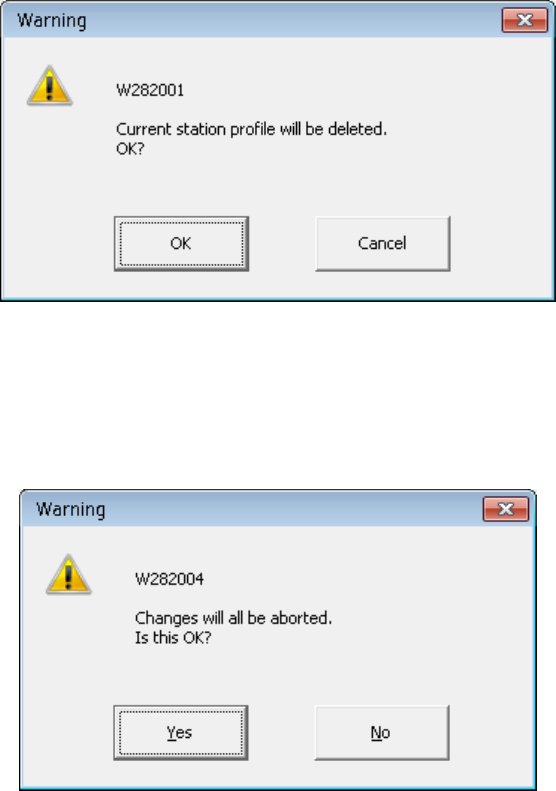
3.7.2.4 Delete
The station profile being displayed now can be deleted with the [Delete] button. However, the
[Delete] button can be pressed for other than the active station profile. When the [Delete]
button is pressed, the following confirming message is displayed.
3.7.2.5 Undo changes
The station profile can be returned to the state at the first stage of the display by pressing the
[Undo Changes] button.
The following confirming message is displayed before it is undone.
EPU Instruction Manual Chapter 3 EPU setup
3-21
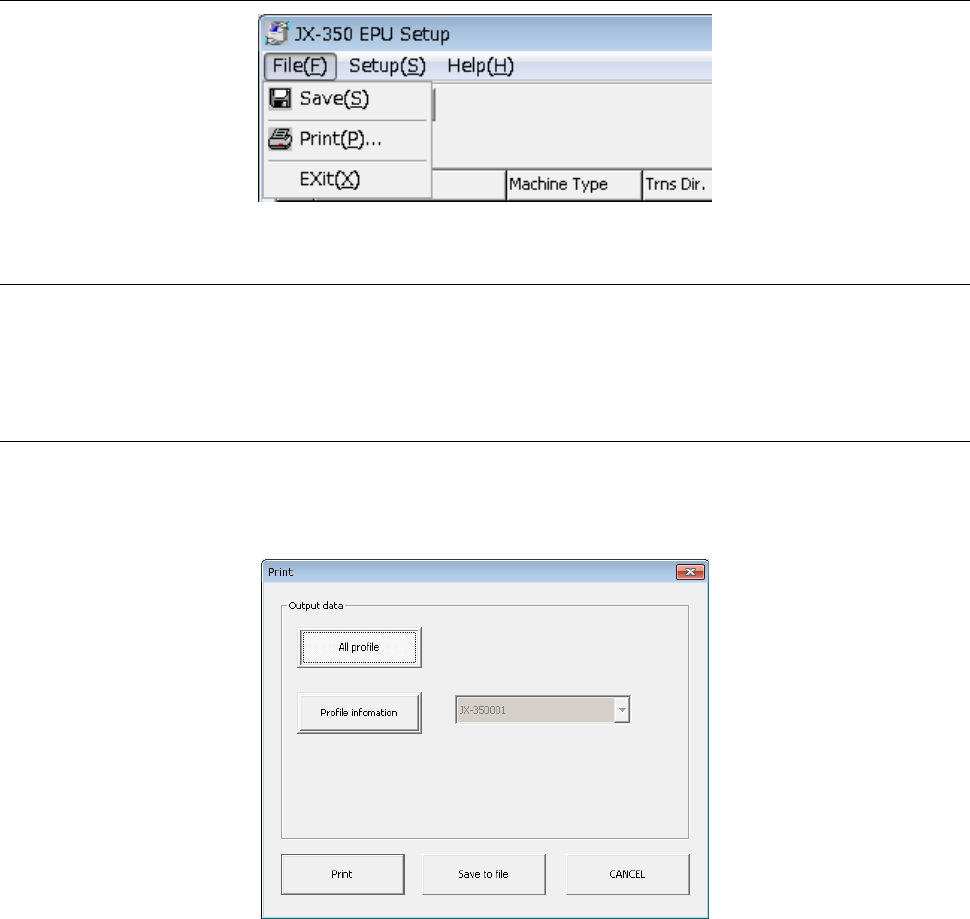
3.8 File
3.8.1 Save
This command saves your settings with the EPU Setup module.
When you select the [Save] command on the [File] menu, the current settings are saved.
3.8.2 Print
This command prints the settings made with the EPU Setup module. Select the [Print]
command on the [File] menu.
When you select the [Print] command, the following dialog box appears on the screen.
<All Profile>: Outputs information on all stations currently set.
<Profile Info.>: Prints information on the station whose profile ID is specified in the
combo box.
<Print> button: Starts printing data set up with the EPU Setup utility.
<Save to file> button: Saves the data set with the EPU Setup utility as a text file.
<Cancel> button: Closes the dialog box without printing any data.