JX-350_EPU使用说明书.pdf - 第15页
EPU Instructi on Manual Chapter 2 Inst allation 2-9 ⑥ Confirm the destin a tion where the EPU is ins talled, and click the [ I nstall ] button. ⑦ The installation begins. If th e co mpu ter v ir us detection software has…
EPU Instruction Manual Chapter 2 Installation
2-8
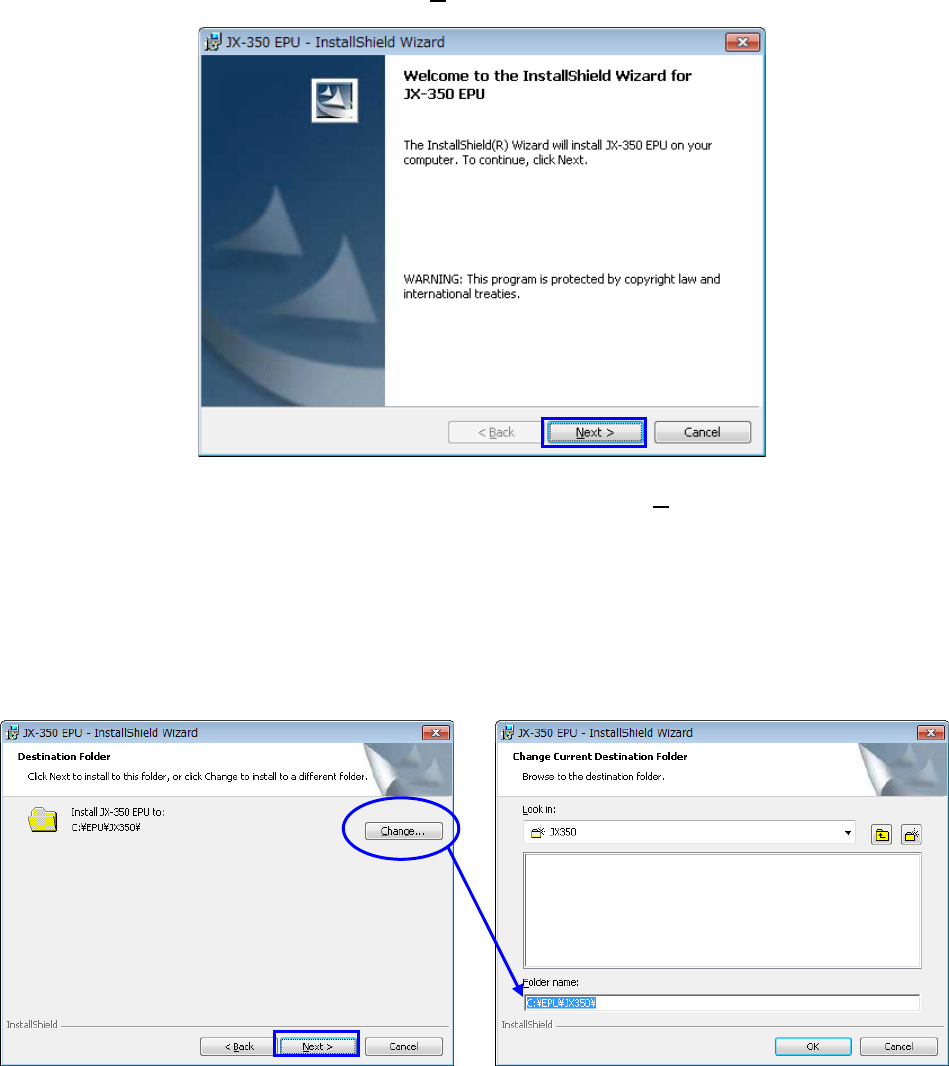
④ Next, the installer of "JX-350 EPU" starts.
Confirm the message, and click the [ Next> ] button.
⑤ Specify the folder where the EPU is installed, and click the [ Next >] button.
- The displayed path is the default folder used when EPU is installed.
The folder you set here as the destination for installing the EPU will become the
working directory of the EPU program also.
- When you use Windows Vista / Windows 7 / Windows10, you do not specify a folder
under C:\Program Files or C:\Windows for the installation destination folder. Create
a folder as shown in the example below and install EPU.
EPU Instruction Manual Chapter 2 Installation
2-9
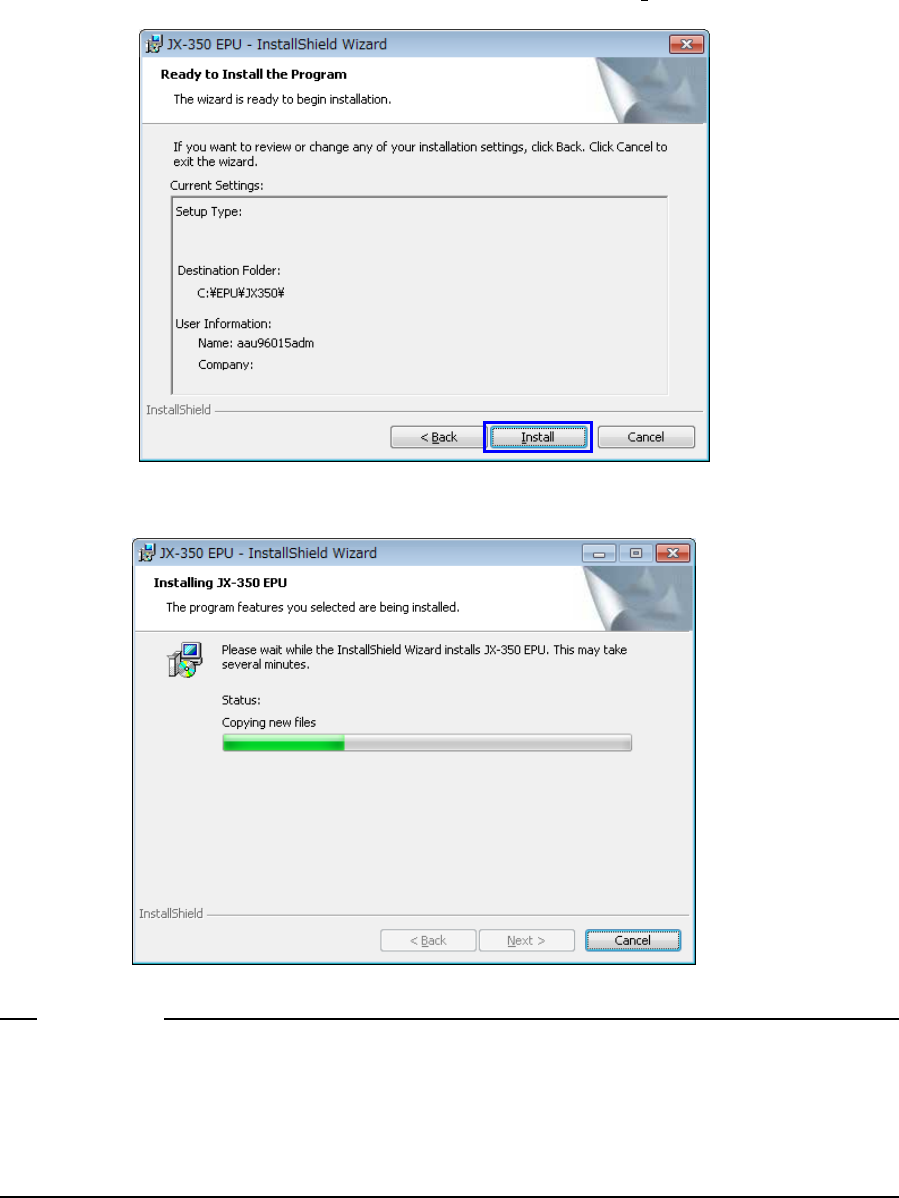
⑥ Confirm the destination where the EPU is installed, and click the [ Install ] button.
⑦ The installation begins.
If the computer virus detection software has already been installed in relevant PC when
installing EPU, the message showing the warning about the installation may appear
depending on the computer virus detection software. However, this message does not
affect the installation process and software, so select [Allow].
Notes:
EPU Instruction Manual Chapter 2 Installation
2-10
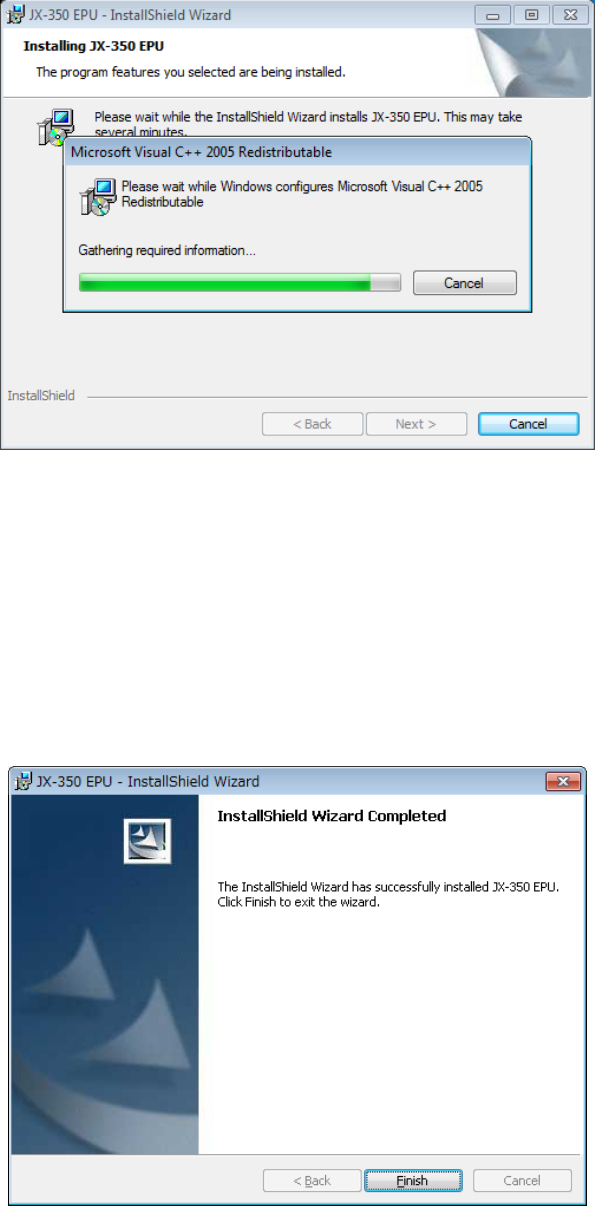
⑧ Next, "Microsoft VisualC++ 2005 Redistributable" is installed.
* The installation is skipped when it has been already installed.
⑨ When all the installations end, the following screen appears. The installation work is
completed when you press the "Finish" button.
♦ The installation procedure finishes at this point.
The EPU group is created under the [Program] menu item displayed on the [Start] menu.
The short cut is automatically registered in [Start]/[Program].
♦ Similarly, the "JX-350 EPU" folder is made on the desktop, where the short cut to the
"EPU Launcher" is generated.