88192277-01-19 - Micron Technical Reference V9 Volume 4.pdf - 第153页
TRANSPORTATION - MINOR RELOCATION MACHINE HEIGHT AND LEVELLING Chapter Issue 4, May 19 Technical Reference Manual 41.11 MACHINE HEIGHT AND LEVELLING Leg Spacers (Camera Linear Drive Machine Only) The mounting feet on t h…

TRANSPORTATION - MINOR RELOCATION
TRANSIT BRACKET REMOVAL
41.10 Technical Reference Manual Chapter Issue 4, May 19
the three actuator shafts.
9. Using a 5mm Allen key, remove the rear chase transit bracket (12) by
removing the M6 cap head screw (13) and M6 washer (14).
10. Loosen the M8 nut (3) that secures the left chase transit bracket (5) to the
chase on the front and rear transit brackets.
11. Unscrew the M8 chase studs (1) from the chase and remove from the
machine.
12. Remove the two left chase transit brackets (5) from the machine.
13. Remove the two right hand chase studs (1) by loosening the two M8 nuts
(3) that secure the chase studs (1) to the chase.
14. Loosen the nylon screws (5) on the cover frame transit bracket (1) block (6)
assembly on to the carriage rail.
15. Remove the M5 cap head screws (7)
16. Loosen the M5 cap head screws (2) to allow movement.
17. Remove the cover frame transit bracket (1) and the block (6) as an assembly
from the carriage rail.
18. Refit/close any disturbed covers.
This concludes the transit bracket and screw removal procedure. Transit brack-
ets, screws and associated fasteners should be stored for future reuse.
TRANSPORTATION - MINOR RELOCATION
MACHINE HEIGHT AND LEVELLING
Chapter Issue 4, May 19 Technical Reference Manual 41.11
MACHINE HEIGHT AND LEVELLING
Leg Spacers
(Camera Linear
Drive Machine
Only)
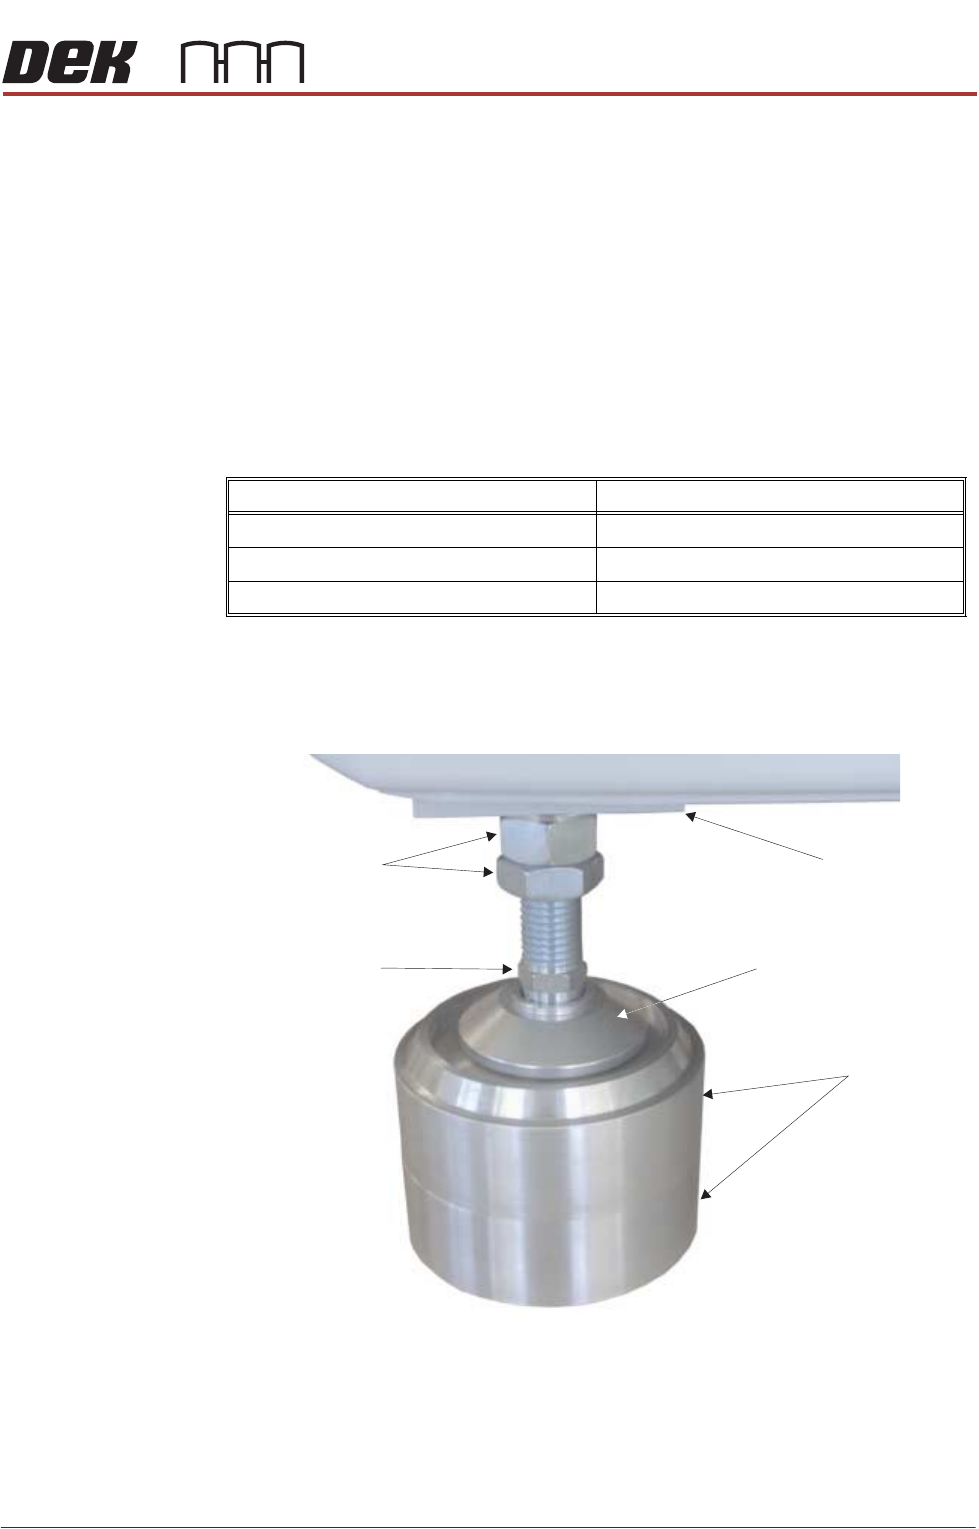
The mounting feet on the camera linear drive machine must be kept as short as
possible to reduce vibration and oscillation.
To achieve the height required, 8 leg spacers (maximum of two per foot) are
supplied. The leg spacers interlock together and the machine foot locates in the
recess of the top leg spacer.
1. Using the table below, determine the amount of leg spacers to achieve the
required machine height:
NOTE
The amount of exposed thread of the machine leg should be kept to a
minimum to ensure machine accuracy remains within limits.
2. Place the correct number of leg spacers under each mounting foot. Do not
place leg spacers under the centre rear mounting foot. Lower the machine
ensuring that each foot is located inside the recessed top, figure below
refers.
NOTE
Do not attempt to manoeuvre the machine into position whilst mounted on
the leg spacers. The machine must be lifted, moved and lowered ensuring
that the leg spacers are moved with the machine.
Transport Height Leg Spacers Required
840mm - 895mm 0
896mm - 940mm 1
941mm - 980mm 2
Leg Spacers
(2 shown)
Machine Mounting Foot
M24 Locking Nuts
Machine Frame
Leg Adjusting Nut
TRANSPORTATION - MINOR RELOCATION
MACHINE HEIGHT AND LEVELLING
41.12 Technical Reference Manual Chapter Issue 4, May 19
Type 1, 2, 3 and 5 Before operation, the machine must be installed at the correct height and
levelled.
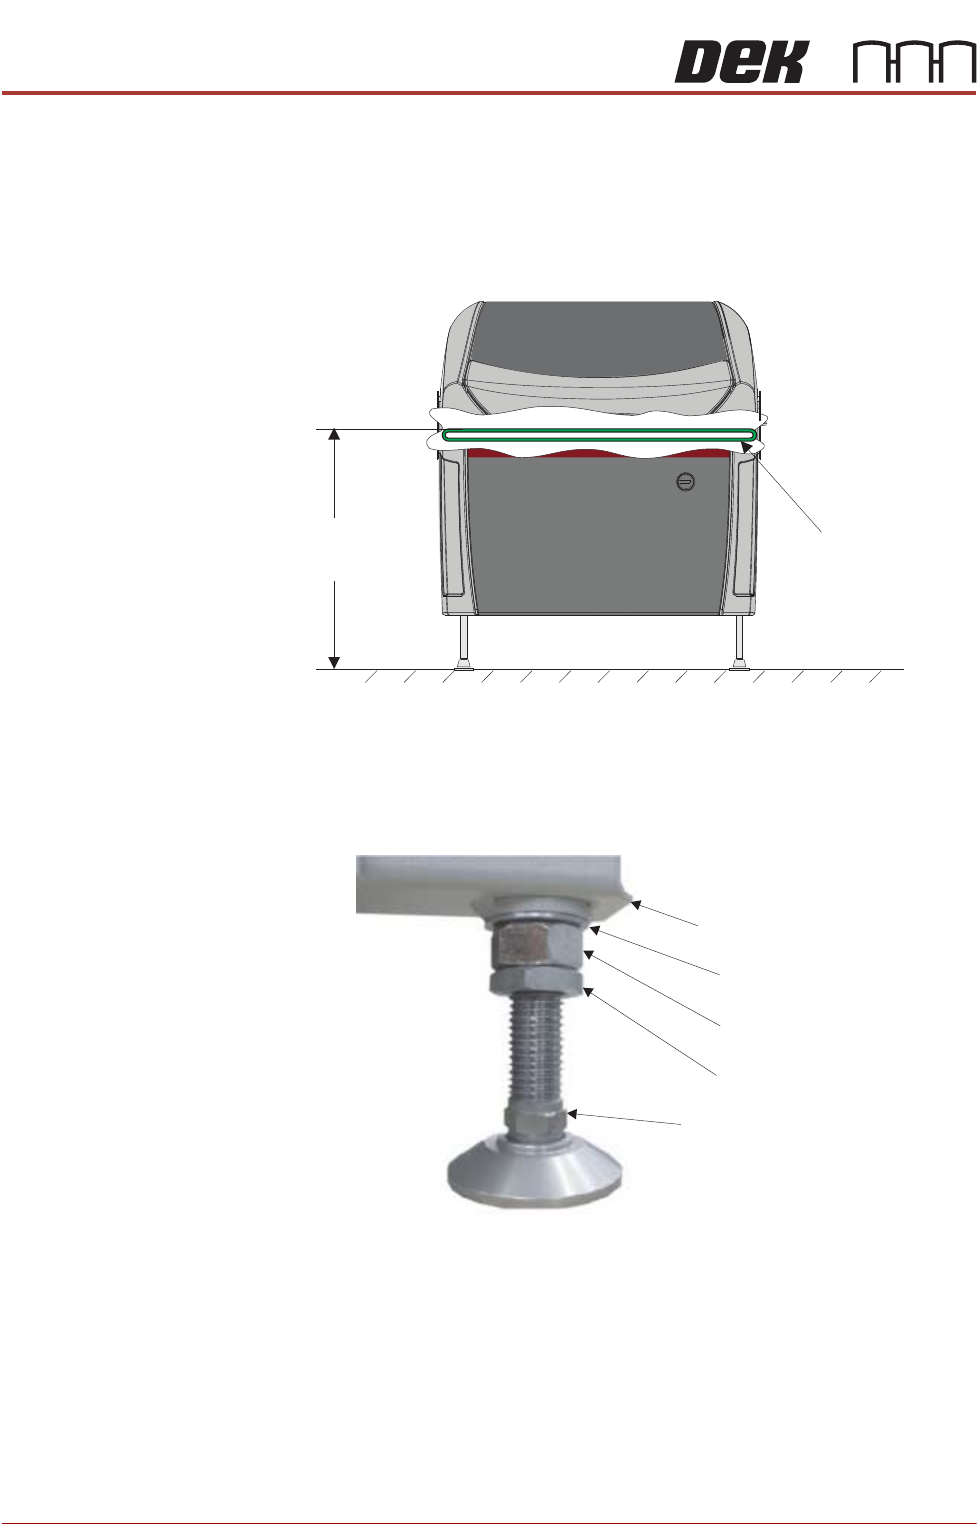
The height of the machine is governed by the external machines that it is to be
connected to and ranges from 840mm to 980mm. The height is measured from
the floor to the top of the transport belts.
The transport height may be adjusted as low as 830mm by removing the M24
full nut on each of the legs. In the event of the transport height being adjusted
above 839mm at a later date, the M24 full nut must be refitted.
NOTE
To achieve reliable DEK SPC testing and Cp/Cpk results, the machine legs must
be secured correctly to the frame to increase the rigidity of the machine.
Height to Top
of Transport Belts
840mm to 980mm
View on Front of Machine
Transport Belts
M24 Washer
Machine Frame
M24 Full Nut
M24 Half Nut
Leg Adjusting Nut