88192277-01-19 - Micron Technical Reference V9 Volume 4.pdf - 第47页
STINGER ELEMENTS Chapter Issue 4, Nov 19 Technical Reference Manual 38.5 ELEMENTS The assembly comprises: • Auger and auger drive motor • 10cc Syringe and dispense nozzle • Z-axis motor • Laser light sensor • Consumable …
38.4 Technical Reference Manual Chapter Issue 4, Nov 19
STINGER
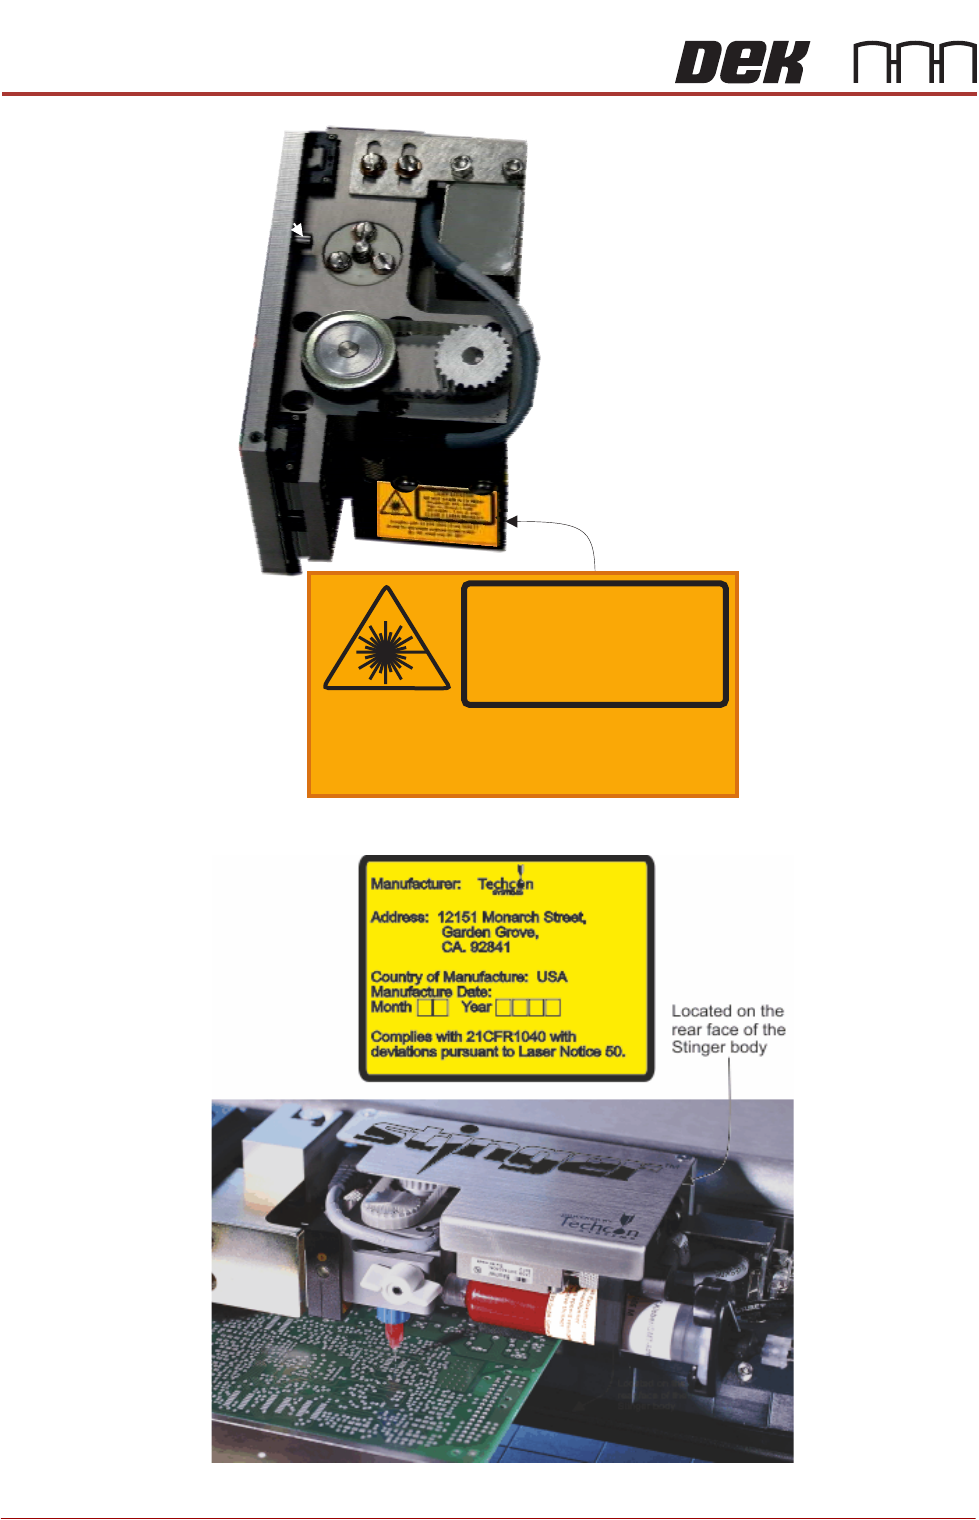
EQUIPMENT LABELS AND NOTICES
LASER RADIATION
DO NOT STARE IN TO BEAM
Wavelength: 620 . . . . 680nm
Max. av. Output: <1mW
IEC 60825 - 1, Ed, 2, 2007
CLASS 2 LASER PRODUCT
DO NOT STARE IN TO BEAM
Wavelength: 620 . . . . 680nm
Max. av. Output: <1mW
IEC 60825 - 1, Ed, 2, 2007
CLASS 2 LASER PRODUCT
Complies with 21CFR 1040.10 and 1040.11
except for deviations pursuant to laser notice
No. 50. dated June 24. 2007
Complies with 21CFR 1040.10 and 1040.11
except for deviations pursuant to laser notice
No. 50. dated June 24. 2007
Mounting Assembly (beneath the top cover)
STINGER
ELEMENTS
Chapter Issue 4, Nov 19 Technical Reference Manual 38.5
ELEMENTS
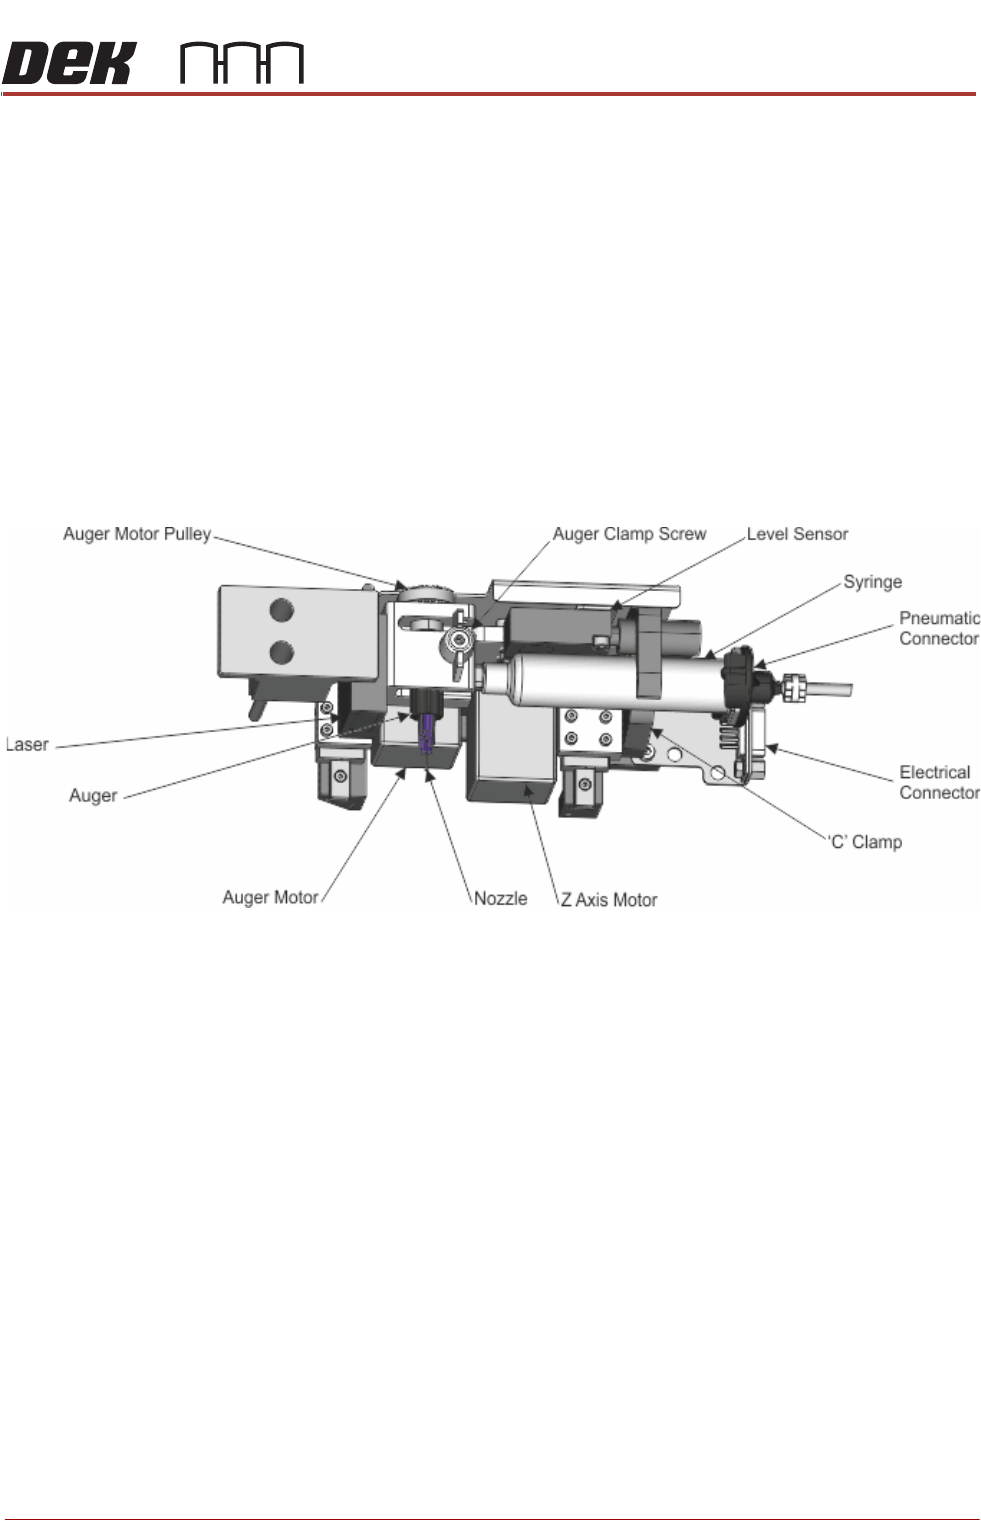
The assembly comprises:
• Auger and auger drive motor
• 10cc Syringe and dispense nozzle
• Z-axis motor
• Laser light sensor
• Consumable low level sensor
• Pneumatic regulator
• Electrical and pneumatic control interface
• Purge Station (optional)
The syringe attaches to an auger valve at the outlet end and to a pneumatic
supply at its input. A ‘C’ shaped clamp holds the unit in position at the rear and
it is fixed at the front with a plastic clamp screw.
A slightly positive air pressure is pulsed at the rear of the syringe to ensure the
auger valve is not starved of adhesive and a consistent supply is maintained.
The pulses are programmed in software to correspond with the auger feed
movement phases of the dispense cycle.
Adhesive Delivery
Mechanism
The delivery mechanism consists of an Archimedes screw fitted in the auger
valve. A stepper motor and pulley assembly (not shown) rotate the screw in the
auger valve. This action, combined with the positive air feed at the rear of the
syringe, ensure a consistent level of dispense when used in the correct operat-
ing conditions (temperature/humidity). The auger is purged with adhesive after
a syringe has been replaced.
The drive rotates for a pre-programmed number of steps in the feed direction.
The adhesive flows out of the nozzle onto the product surface, forming a dot. At
the end of each dispense, the motor can be reversed, this allows the auger to
draw adhesive back into the nozzle to avoid ‘stringing’. The number of motor
38.6 Technical Reference Manual Chapter Issue 4, Nov 19
STINGER
ELEMENTS
steps, speed, and direction are programmable parameters.
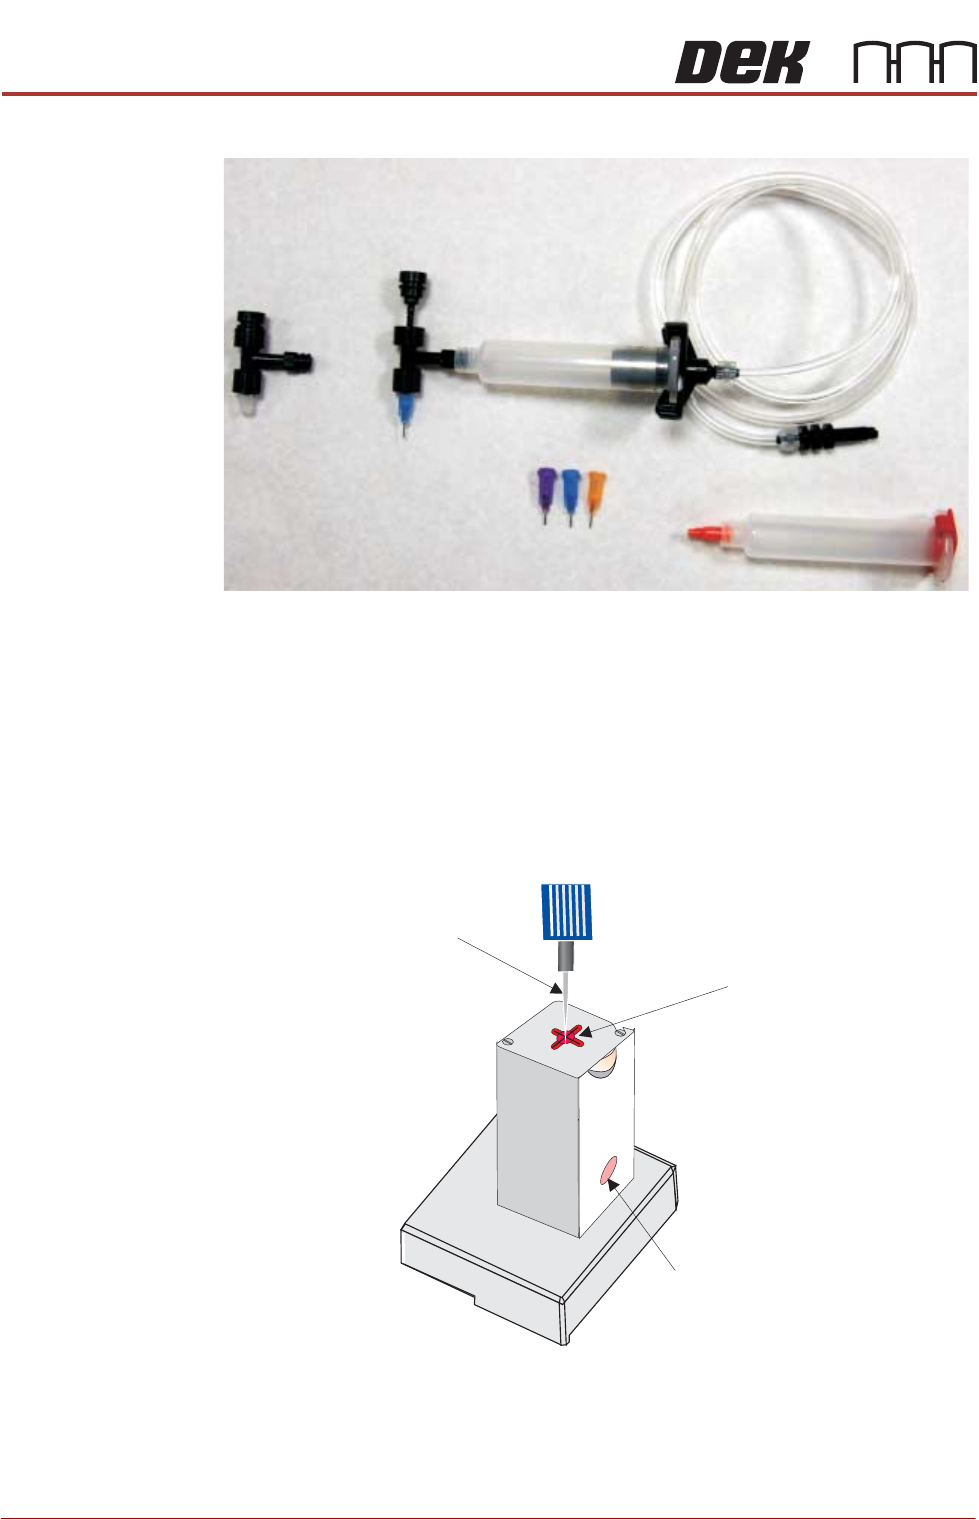
Nozzles At the bottom of the auger valve a nozzle is fitted. Nozzles come in different
sizes to suit the process. They are identified by body colour: Purple tip i.d.=
0.51mm (inside diameter at the tip), Blue = 0.41mm tip i.d, Orange = 0.33mm
tip i.d. and Red = 0.25 tip i.d.
Purge Station An optional purge station can be used to collect the purged adhesive. Parame-
ters are set up to centre the needle in the wiper target. The needle is fed into
the purge station. Purging commences when the start purge button is selected
and continues until the stop purge button is selected. If a purge station isn’t
used, purging takes place on a suitable area on the product.
Capacitive Level
Sensor
The capacitive level sensor detects the change in capacitance of the surround-
ing near field area. When a full cartridge is fitted, the capacitive field remains
constant. As the adhesive in the syringe is depleted, there is no change in
capacitance until it reaches the point where the sensor is located. The capac-
Auger Valve
Auger Valve
(showing screw)
Nozzles
Complete Assembly
(including air connection)
Syringe
Nozzle
Wiper
Target
Purge Station
Waste Container (pot)