88192277-01-19 - Micron Technical Reference V9 Volume 4.pdf - 第163页
TRANSPORTATION - MINOR RELOCATION MACHINE HEIGHT AND LEVELLING Chapter Issue 4, May 19 Technical Reference Manual 41.21 3. Lower the machine and check that mounting foot (1) and (2) are sitting on the floor and foot (3) …
TRANSPORTATION - MINOR RELOCATION
MACHINE HEIGHT AND LEVELLING
41.20 Technical Reference Manual Chapter Issue 4, May 19
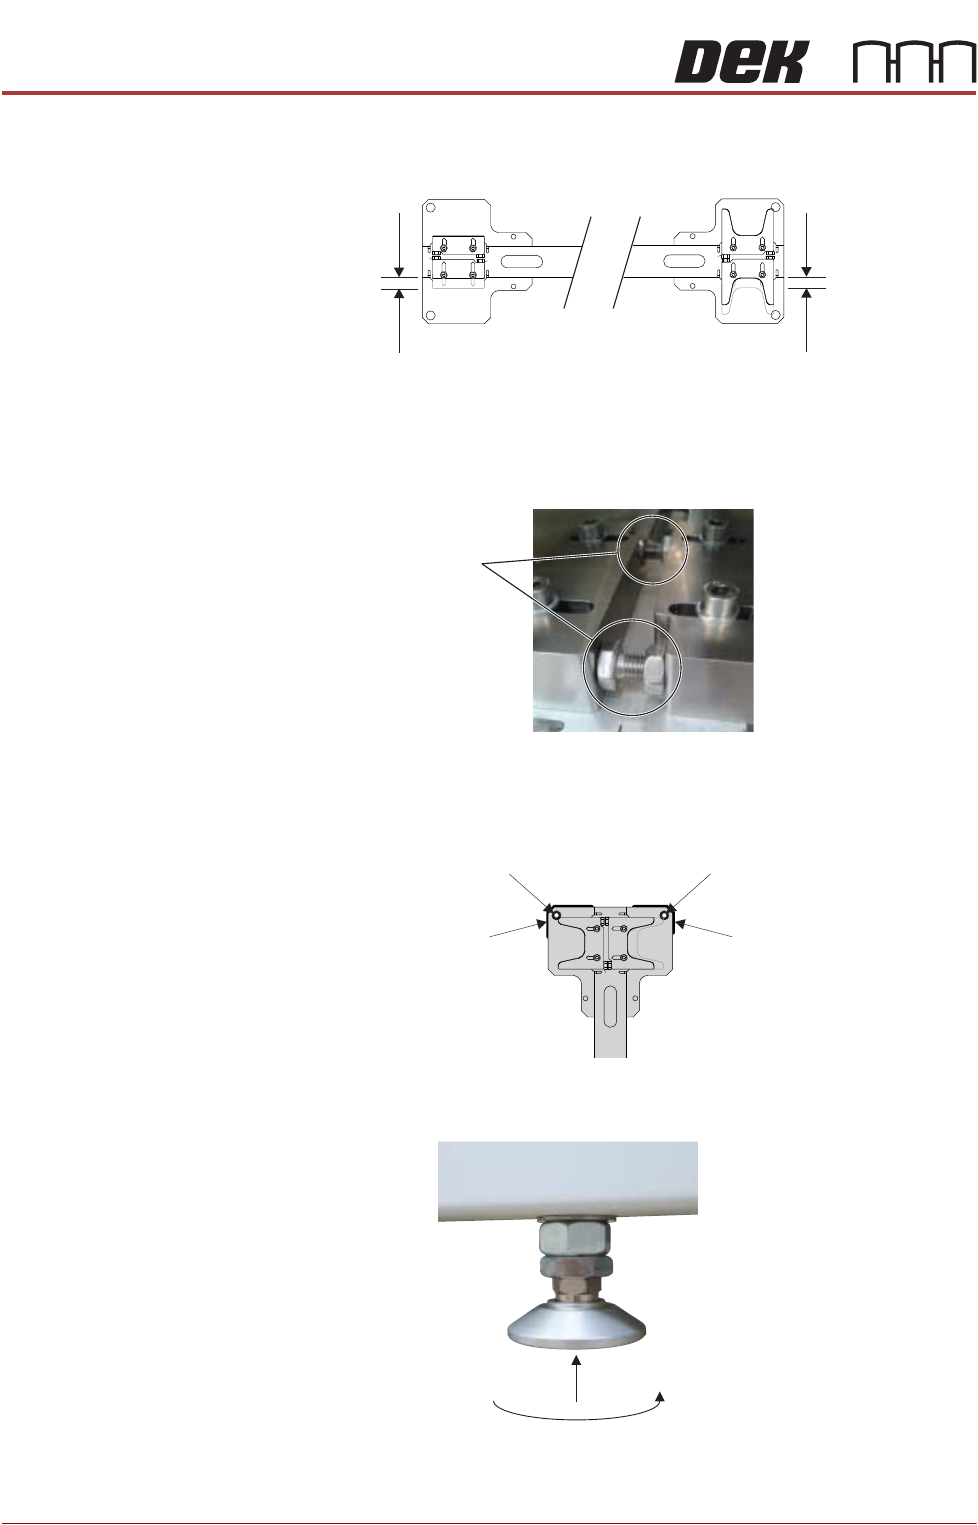
32. Position the locator blocks for Machine B to achieve maximum adjustment,
and ensure parallel to the locator blocks for Machine A.
33. Fully tighten the fixing screws for the Machine B location blocks.
34. Rotate the stopper bolts by hand until they make contact with the opposing
block, and then secure them using the locknuts.
35. Using a permanent marker pen, draw around the outline of each corner and
the corner holes of the floor plate to provide 8 reference marks, this will
highlight any movement during installation.
Levelling and
Positioning
(Machine B)
1. Raise the rear centre mounting foot (5) to the highest position to avoid
contact with the floor plate.
2. Move Machine B into position so that it is roughly aligned to its downline
conveyor.
ADJUSTMENT
LOCATION BLOCK
ADJUSTMENT
V-BLOCK
Stopper Bolts
Reference MarkReference Mark
Reference Mark Reference Mark
TRANSPORTATION - MINOR RELOCATION
MACHINE HEIGHT AND LEVELLING
Chapter Issue 4, May 19 Technical Reference Manual 41.21
3. Lower the machine and check that mounting foot (1) and (2) are sitting on
the floor and foot (3) and foot (4) are sitting on the floor plate.
4. Raise Machine A and move it out of position to gain access to the rear of
Machine B.
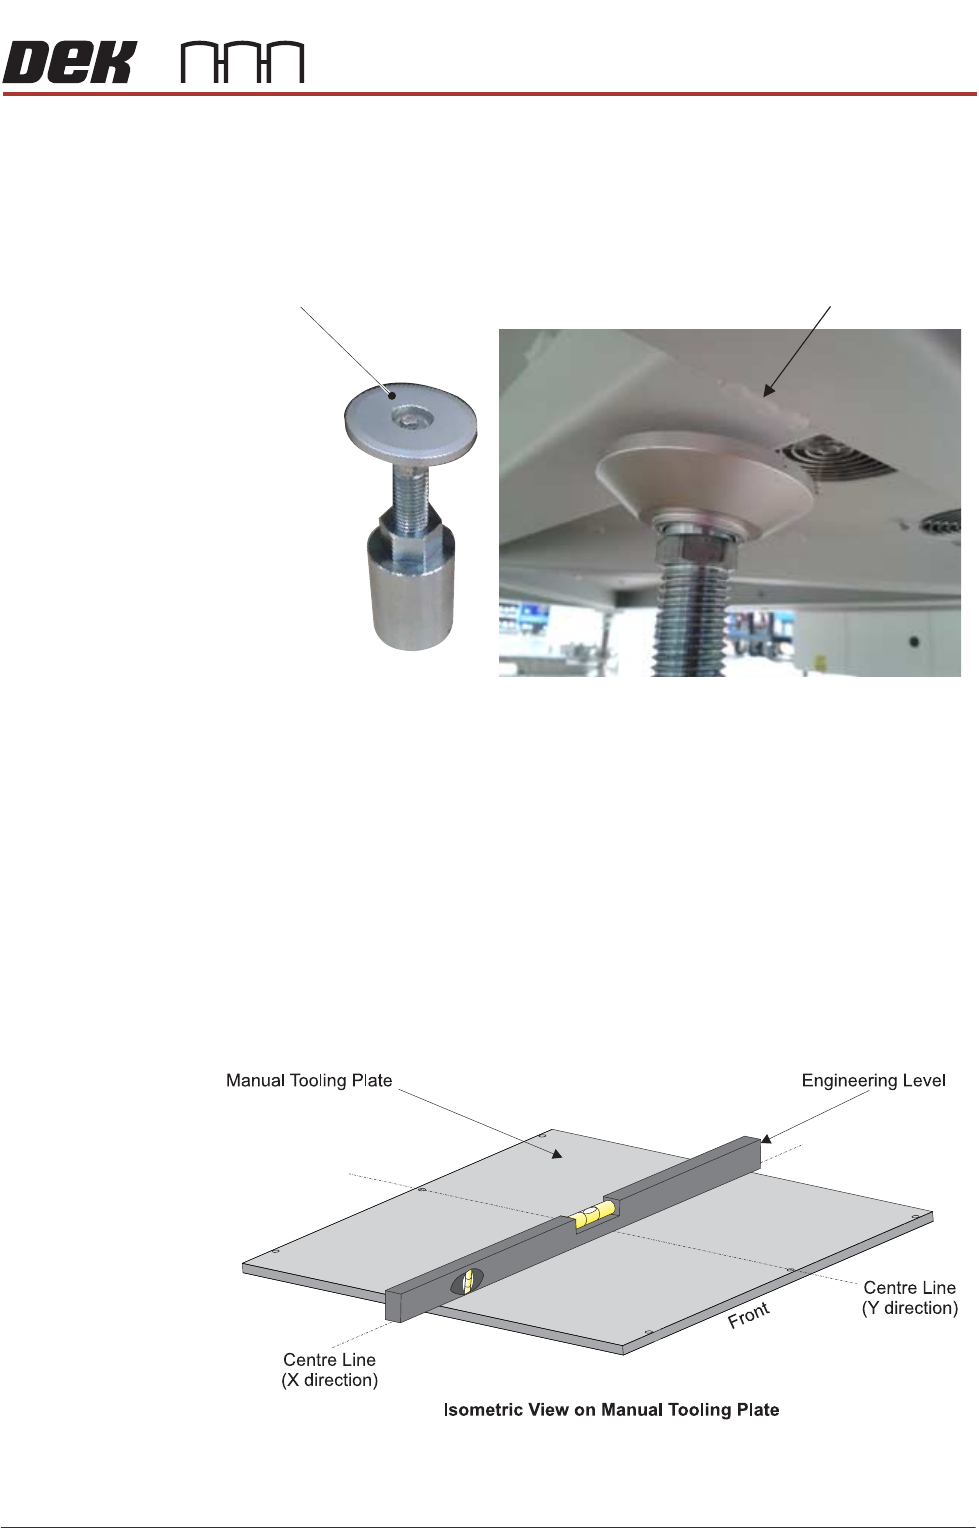
5. Place foot (6) under the front of machine B in the centre.
6. Check the orientation of foot (6) as shown above.
NOTE
Avoid the seam weld to ensure the machine is properly supported.
7. Raise the front centre levelling foot (6) to make contact with the machine.
8. Raise the front left foot (1) and front right foot (2) so they are not in contact
with the floor and the machine is supported on the centre mounting foot (6).
9. Apply pneumatic power to the machine to set the rails to the correct height
for machine levelling.
10. Place an engineering level on top of the manual tooling plate along the front
row of screws running from left to right.
11. Adjust the rear left mounting foot (3) and foot (4) to level the machine in the
X direction.
Seam WeldLevelling Foot (6)
Front below FrameView Machine
TRANSPORTATION - MINOR RELOCATION
MACHINE HEIGHT AND LEVELLING
41.22 Technical Reference Manual Chapter Issue 4, May 19
12. Move the engineering level along the centre row of screws running from front
to back.
13. Change the orientation of the Level and adjust the front centre mounting foot
(6) to level the machine in the Y direction.
14. Adjust the front centre mounting foot (6) to level the machine in the Y
direction.
15. Repeat Steps 11 to 14 until the machine is level in both directions.
16. Carefully lower the front left mounting foot (1) so that it is in contact with the
floor.
17. Recheck the machine level has not been disturbed.
18. Carefully lower the front right mounting foot (2) so that it is in contact with
the floor.
19. Recheck the machine level has not been disturbed.
20. Lower the front centre mounting foot (6) so it is not in contact with the
machine.
21. Remove the front centre mounting foot (6) and store in a safe place.
22. Tighten mounting feet locknuts.
23. Recheck the machine is level.
24. Recheck the machine height has not been disturbed.
25. Remove the engineering level from the machine.
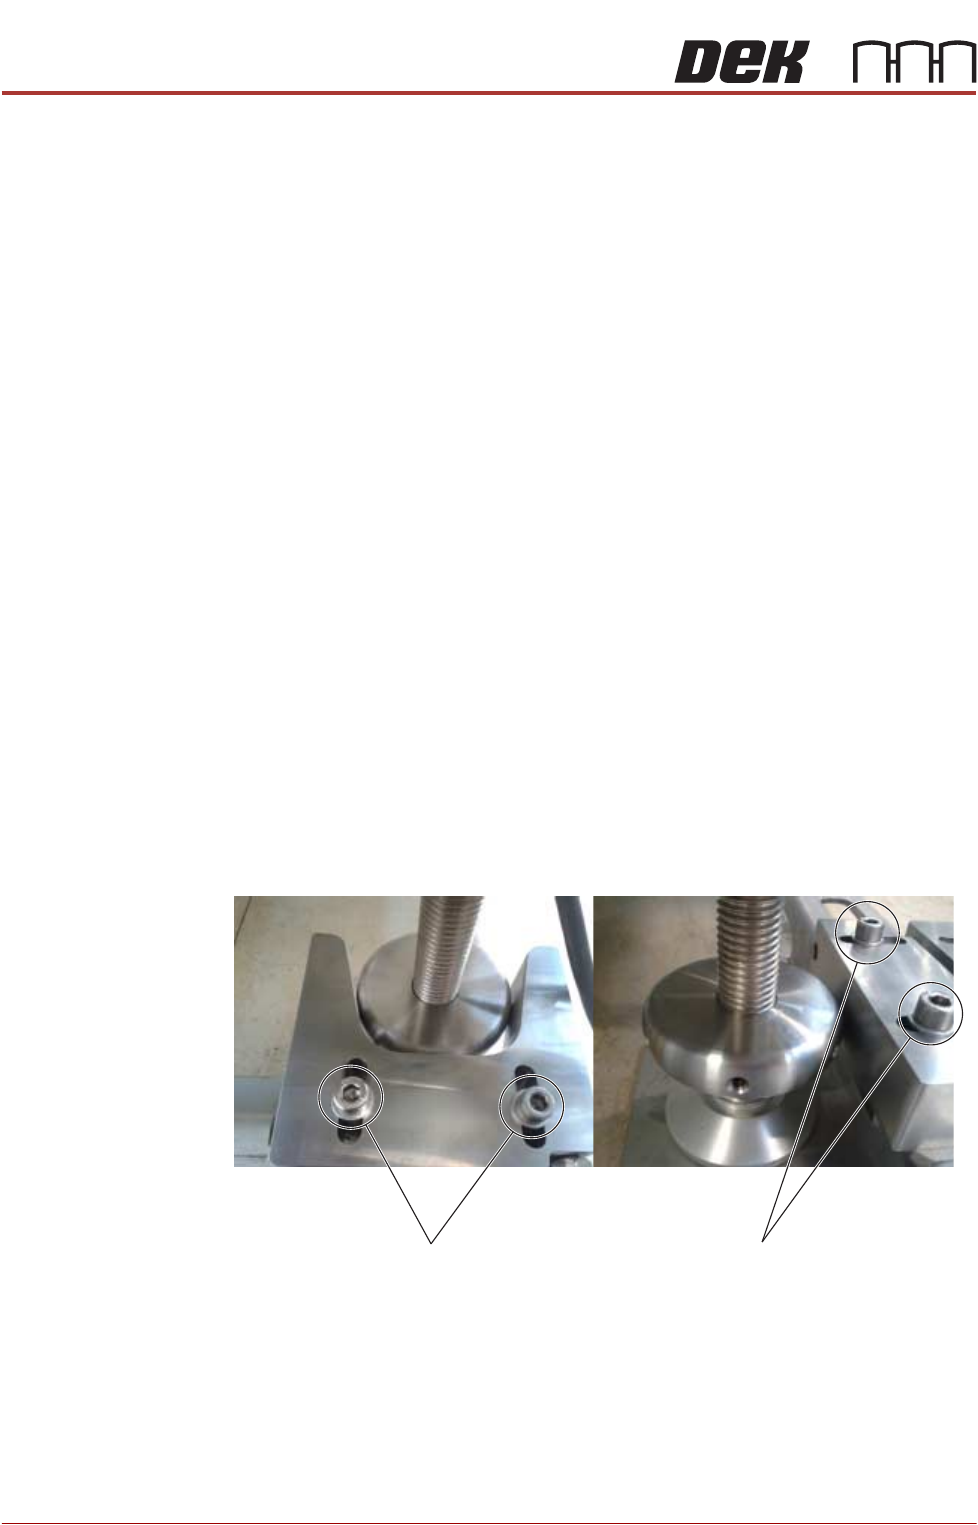
26. Position the V-block so contact is made with the locating collar on foot (4).
27. Position the location block so contact is made with the locating collar on foot
(3).
28. Fully tighten the fixing screws securing both location blocks.
29. Position the locator blocks for Machine B to achieve maximum adjustment,
and ensure parallel to the locator blocks for Machine A.
V-Block
Fixing Screws
Location-Block
Fixing Screws