2OM-1104-001.pdf - 第61页
* 6 Squeegee Spd. Make the ten-key window appear and enter values in the "Back." and "For ." text boxes. Fig. 3B87-1 "Print" T ab Sheet (2) * 7 Screen Distance Make the ten-key window appear…
2.3 "Print" Tab
• Sheet Layout
When you push "Print" tab in the "Pattern Program" edit window, the
following tab sheet appears.
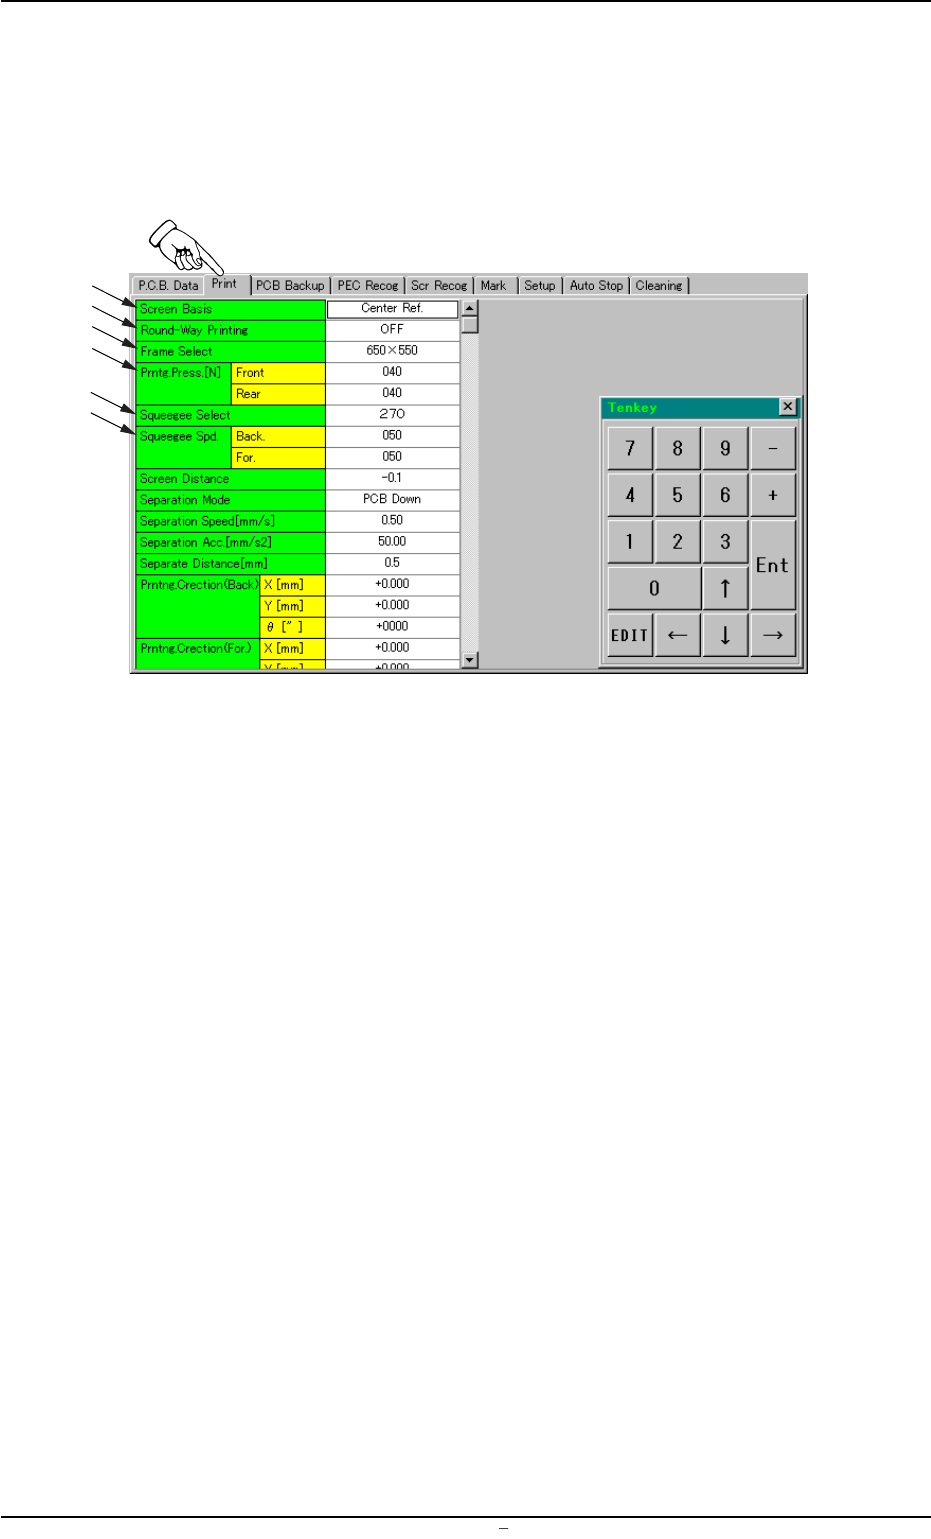
Fig. 3B87 "Print" Tab Sheet (1)
• Sheet Composition
*1 Screen Basis
Push the text box twice. The text box changes to a combo box.
Push the down arrow to open the drop-down list. Select "Center
Ref.", " Front Ref.", or " Rear Ref." from the list box.
*2 Round-Way Printing
Push the text box twice. The text box changes to a combo box.
Push the down arrow to open the drop-down list. Select "OFF" or
"ON" from the list.
*3 Frame Select
Specify the dimensions of the screen frame.
Push the text box. The text box changes to a combo box. Push the
down arrow to open the drop-down list. Select "650×550",
"550×550", "600×550" or "550×650" from the list.
*4 Prntg. Press. [N]
Make the ten-key window appear and enter values in the "Front"
and "Rear" text boxes.
*5 Squeegee Select
Push the text box twice. The text box changes to a combo box.
Push the down arrow to open the drop-down list. Select "350" or
"270" from the drop-down list.
2.3
"
Print
"
Tab
0009-002 Chapter 1 2 36 AFU01EDTP
*1
*2
*3
*4
*5
*6
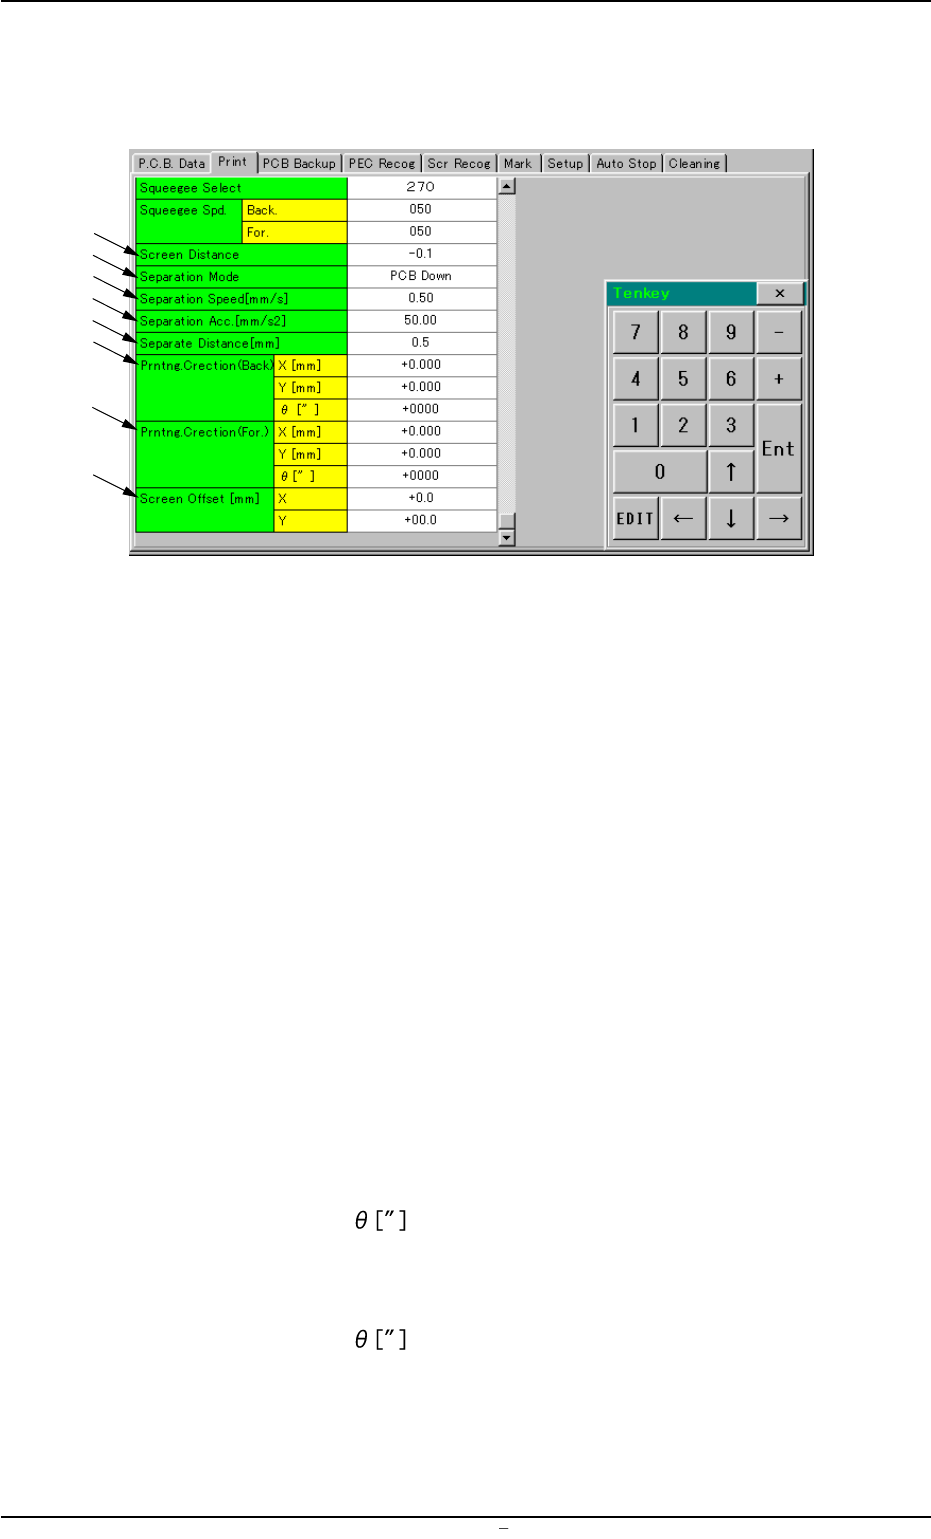
*6 Squeegee Spd.
Make the ten-key window appear and enter values in the "Back."
and "For." text boxes.
Fig. 3B87-1 "Print" Tab Sheet (2)
*7 Screen Distance
Make the ten-key window appear and enter a value in the text box.
*8 Separation Mode
Push the text box twice. The text box changes to a combo box.
Push the down arrow to open the drop-down list. Select "PCB Down"
or "Squeegee Up" from the drop-down list.
*9 Separation Speed [mm/s]
Make the ten-key window appear and enter a value in the text box.
*10 Separation Acc. [mm/s2]
Make the ten-key window appear and enter a value in the text box.
*11 Separate Distance [mm]
Make the ten-key window appear and enter a value in the text box.
*12 Prntng. Correction (Back.)
Make the ten-key window appear and enter values in the "X [mm]",
"Y [mm]", and "
" text boxes.
*13 Prntng. Correction (For.)
Make the ten-key window appear and enter values in the "X [mm]",
"Y [mm]", and "
" text boxes.
*14 Screen Offset [mm]
Make the ten-key window appear and enter values in the text boxes.
0009-002 Chapter 1 2 37 AFU01EDTP
*7
*8
*9
*10
*11
*12
*13
*14
2.3
"
Print
"
Tab
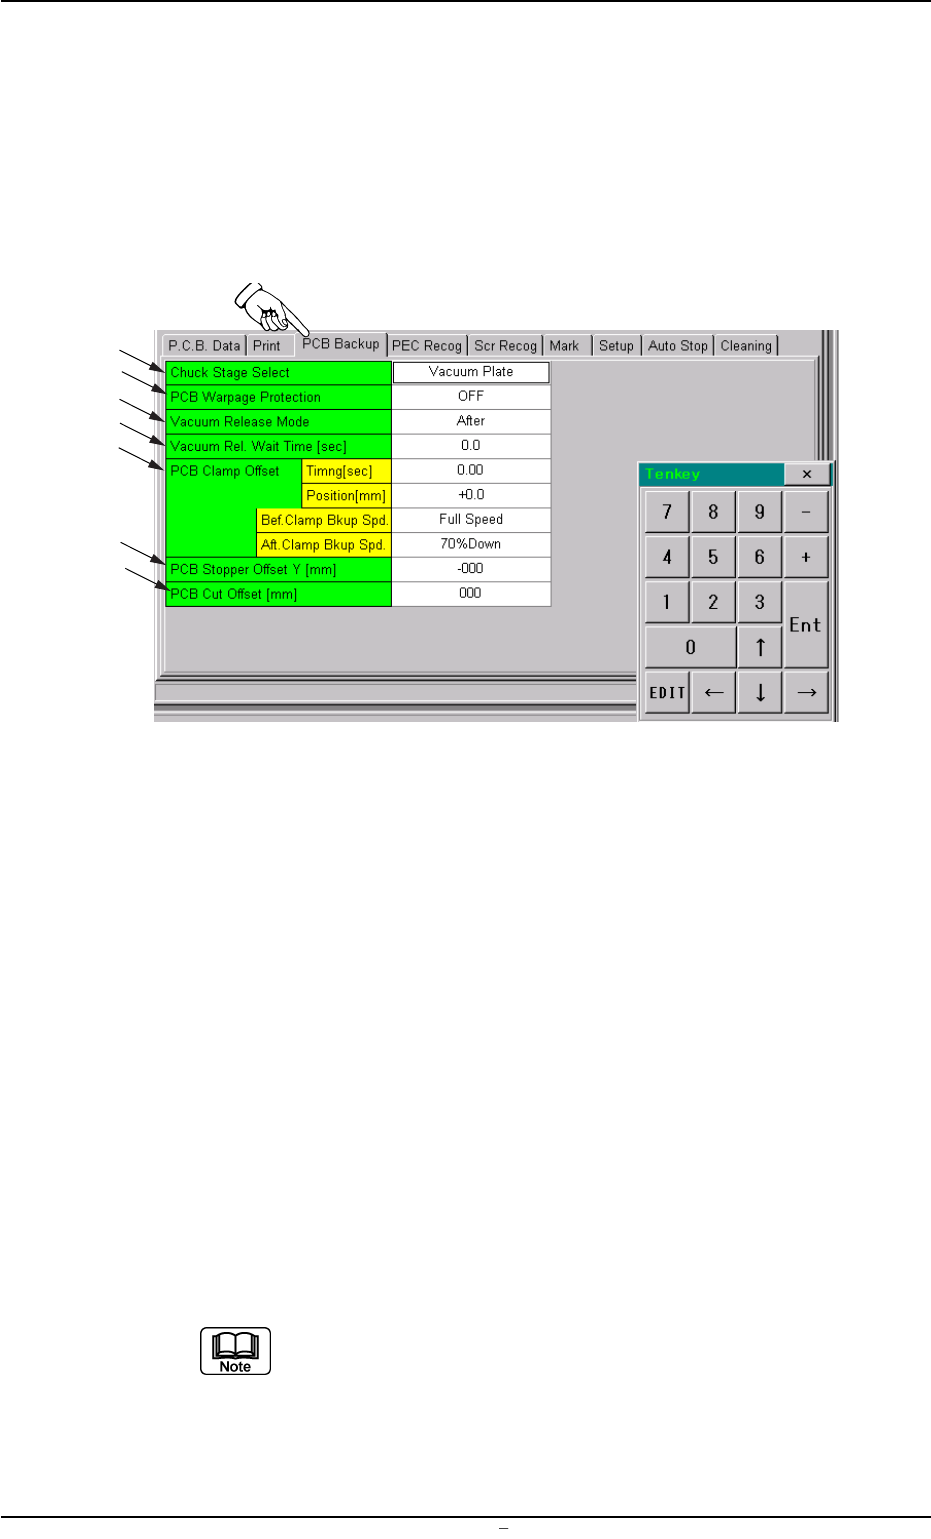
2.4 "P.C.B. Backup" Tab
This tab sheet can be used to specify how to support a P.C.B.
• Sheet Layout
When you push the "PCB Backup" tab in the "Pattern Program" edit
window, the following tab sheet appears.
Fig. 3B88 "PCB Backup" Tab Sheet
• Sheet Composition
*1 Chuck Stage Select
Push the text box twice. The text box changes to a combo box.
Push the down arrow to open the drop-down list. Select "Backup
Jig", "Backup Pin", or "Vacuum Plate" from the drop-down list.
*2 PCB Warpage Protection
Push the text box twice. The text box changes to a combo box.
Push the down arrow to open the drop-down list. Select "OFF" or
"ON" from the drop-down list.
*3 Vacuum Release Mode
Push the text box twice. The text box changes to a combo box.
Push the down arrow to open the drop-down list. Select "Before" or
"After" from the drop-down list.
The value can be changed only when "Vacuum Plate" is
selected in the "Chuck Stage Select" text box *1.
2.4 “P.C.B. Backup” Tab
*1
*2
*7
*6
*4
*5
*3
0106-002 Chapter 1 2 38 AFU01EDTP