FlexTRAK OH Material Handler Manual.pdf - 第162页
FlexTRAK-OH Material Handli ng System IOM Manual Material Handler Operation 4-74 © 2023 Nordson C orporation 10. Fine - tune the following settings ( Figure 4- 123 ). a. Trigger – During camera s etting sel ect None . Th…
FlexTRAK-OH Material Handling System IOM Manual Material Handler Operation
© 2023 Nordson Corporation 4-73
You will receive the following prompt (Figure 4-121).
Figure 4-121 Device State Changed
8. Click Yes to upload program for editing.
9. Select
Editor from the top right corner of the editing window (Figure 4-122) to open a
window where you can fine-tune the settings (Figure 4-123).
Figure 4-122 FrontRunner Editing Window
FlexTRAK-OH Material Handling System IOM Manual Material Handler Operation
4-74 © 2023 Nordson Corporation
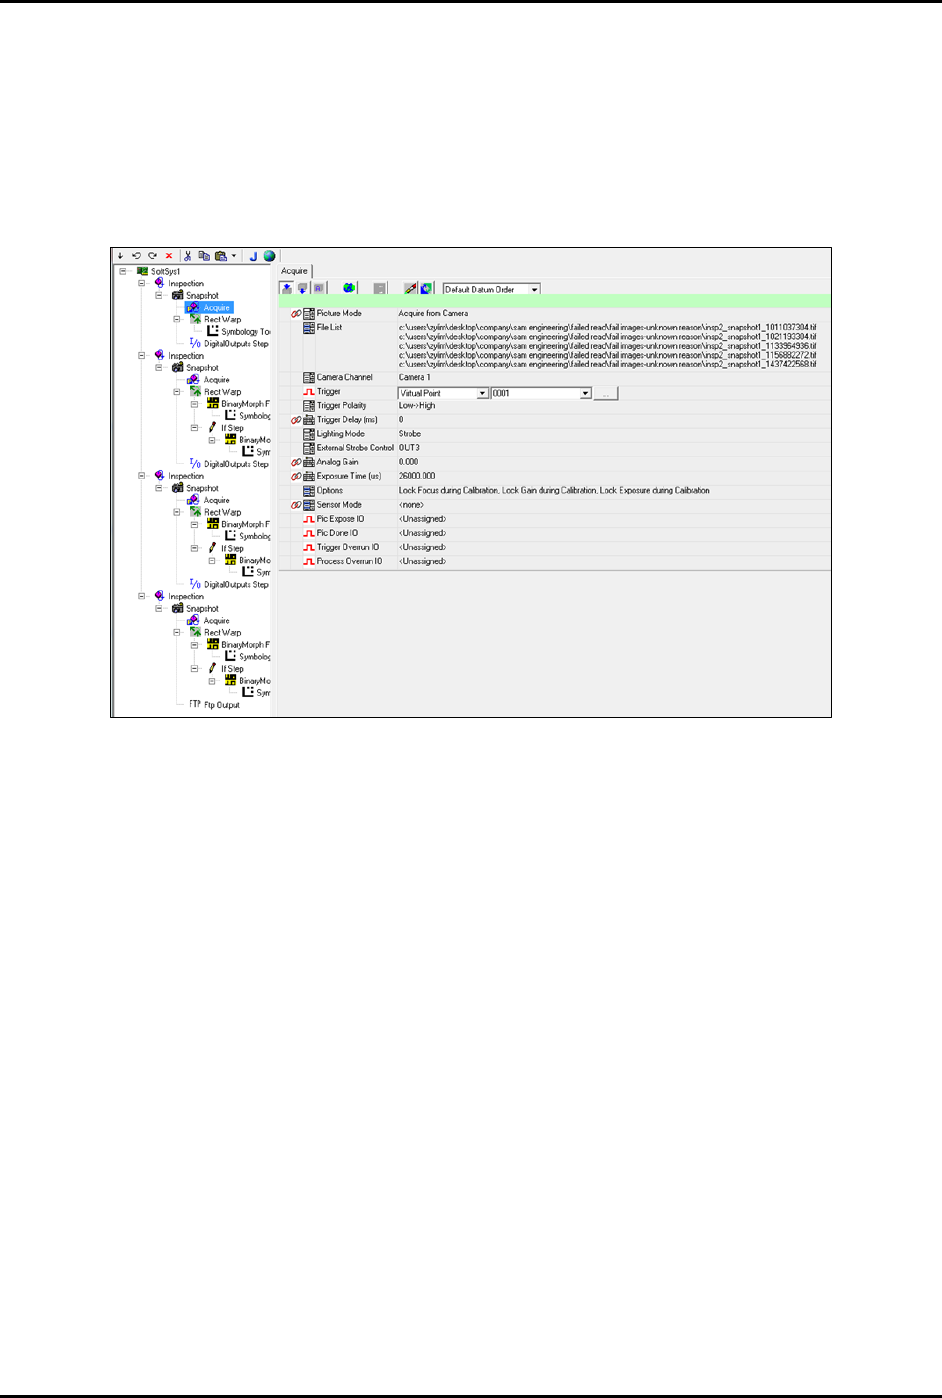
10. Fine-tune the following settings (Figure 4-123).
a. Trigger – During camera setting select
None. This is necessary to capture current
image. Then, set to "Virtual Point, 0001."
b. Analog Gain – Set to zero, which is the optimum value to achieve lowest noise.
c. Exposure Time – Exposure time of camera on image.
d. Focus – Distance between the strip barcode and barcode reader.
Figure 4-123 Editor – Fine Tune Settings
11. When the magazine is in the On position for capturing and Step 10a is complete, proceed to
Step 12.
12. Click
Trigger to capture current image.
The strip will display on the screen.
13. Adjust the axis position (upper/lower) to ensure the strip barcode is able to capture the
green box on the screen (rect warp).
It is recommended to position the strip barcode at the center of the rect warp for
optimum capture result.
NOTE Do not enlarge the rect warp box until top strip barcode is able to capture the
screen. After the rect warp box size is changed, the symbology tool size needs
to change as well.
14. When all focus settings are done, set Trigger to
Virtual Point 0001 as explained in Step 10a
above.
FlexTRAK-OH Material Handling System IOM Manual Material Handler Operation
© 2023 Nordson Corporation 4-75
15. Proceed to save configuration.
NOTE If the following save settings are not followed properly, the edited setting will
be missing after a camera reboot or power cycle.
a. Click
Download to Camera and then open Manage Jobs (Figure 4-124).
Figure 4-124 Download to Camera and Manage Jobs
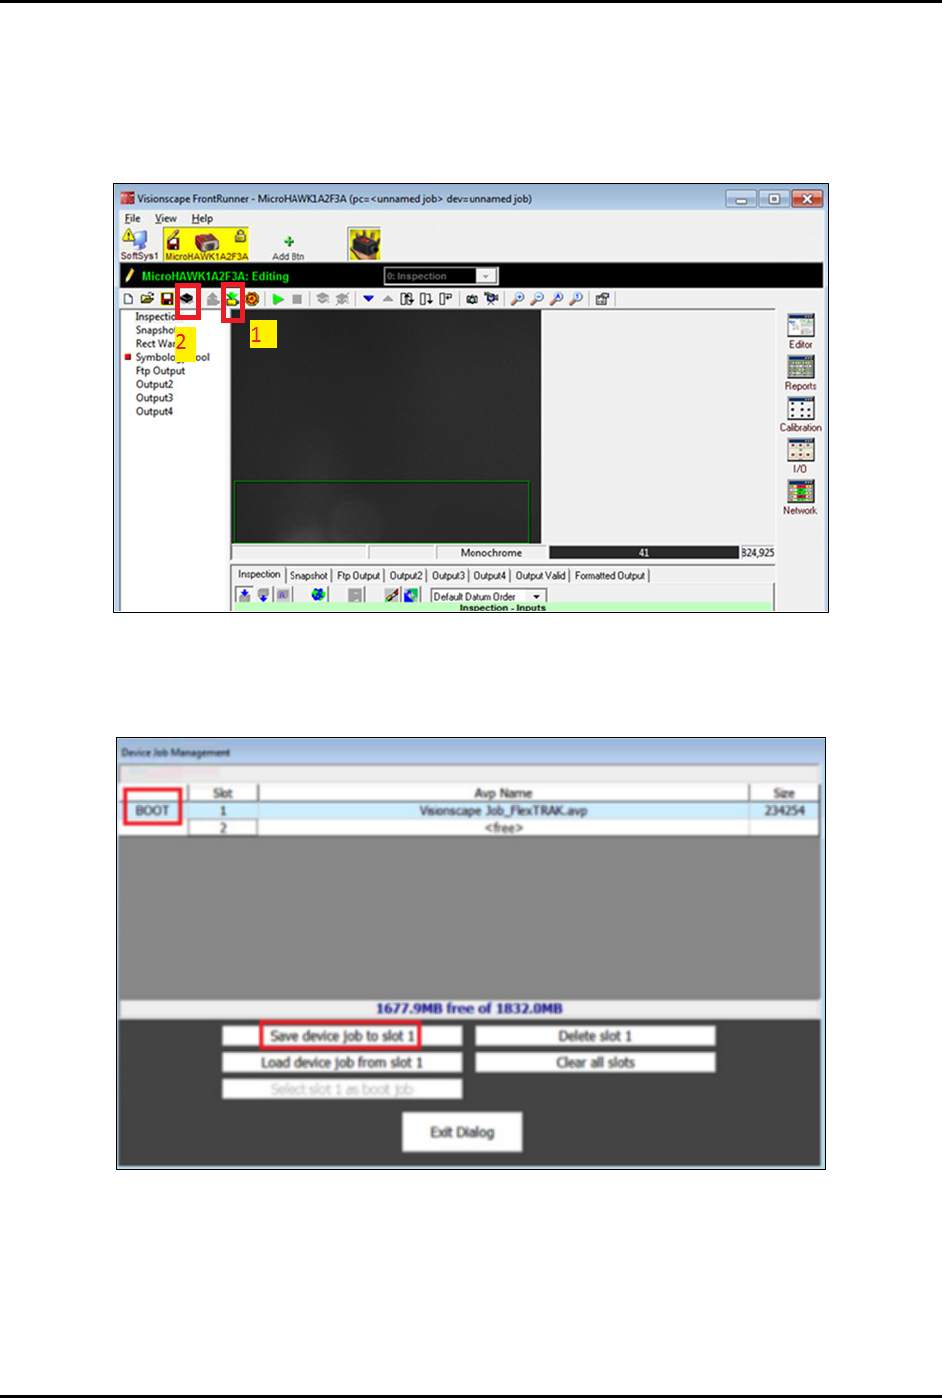
b. In the following image, BOOT means currently running that job slot, clicking Save
device job to slot
will overwrite the previous job (Figure 4-125).
Figure 4-125 Save Device to Job Slot