FlexTRAK OH Material Handler Manual.pdf - 第64页
FlexTRAK-OH Material Handli ng System IOM Manual Installation 3-14 © 2023 Nordson C orporation f. Repeat Step d and e to install strip claw 2 asse mbly onto th e strip transfer claw m odule – claw 2 linkage ( Figu re 3- …
FlexTRAK-OH Material Handling System IOM Manual Installation
© 2023 Nordson Corporation 3-13
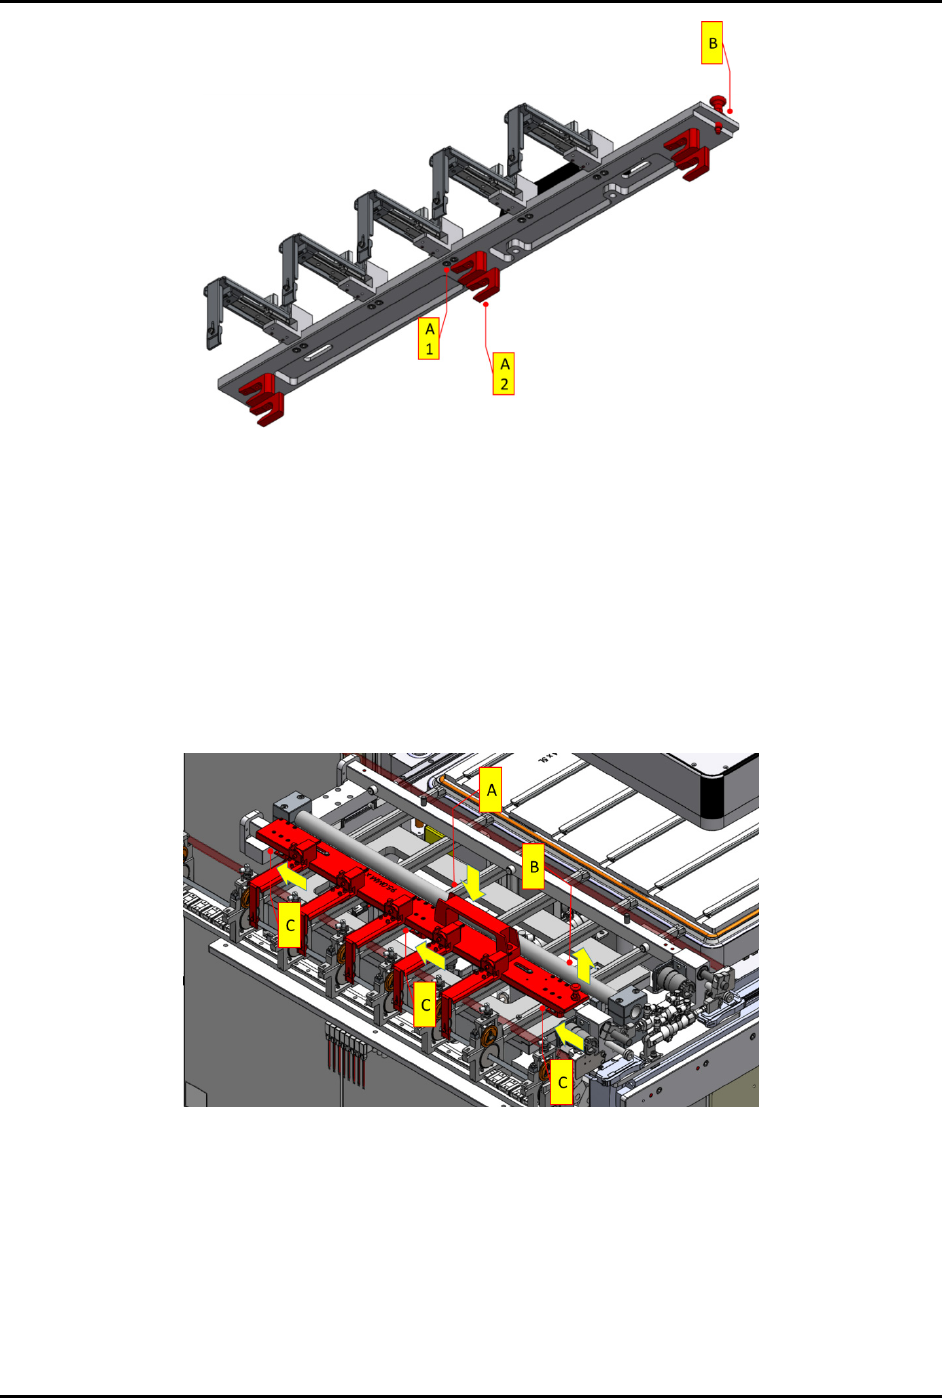
Figure 3-23 Claw Module Components
c. Ensure all sensor cables, connection sockets, air tubes, and the vacuum manifold are in
good condition.
All fingers on the claw module should be able to move freely.
d. Install strip claw 1 assembly onto the strip transfer claw module – claw 1 linkage
(Figure 3-24).
e. Holding the handle (A), pull up and hold locking plunger (B). Then push forward the
claw (C) via the handle guided by the CAM follower guides.
The CAM follower guides are labeled A1 and A2 (Figure 3-23).
Figure 3-24 Installation of Strip Claw 1
FlexTRAK-OH Material Handling System IOM Manual Installation
3-14 © 2023 Nordson Corporation
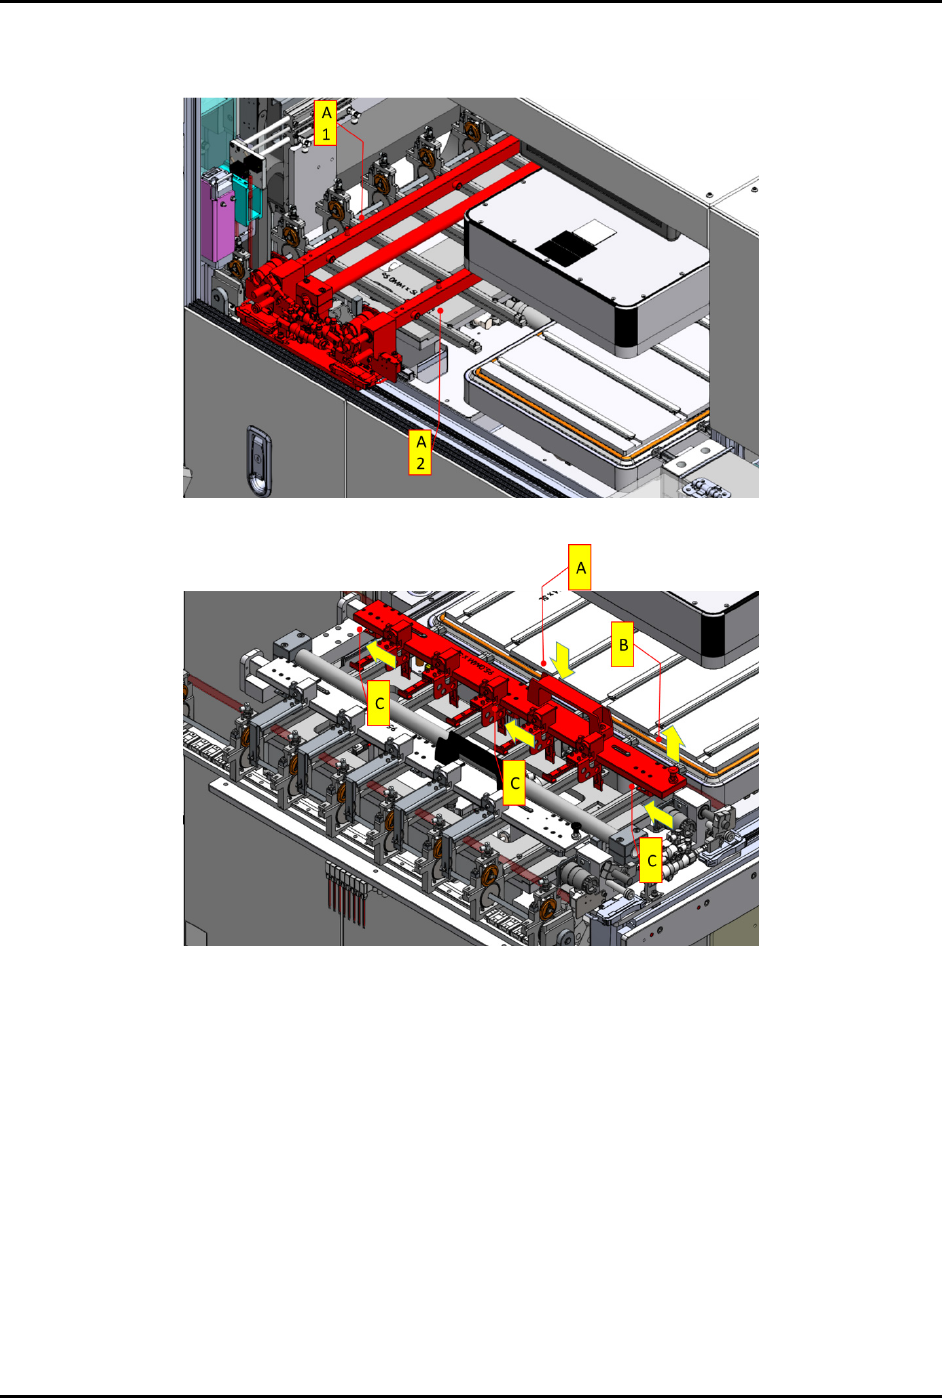
f. Repeat Step d and e to install strip claw 2 assembly onto the strip transfer claw module
– claw 2 linkage (Figure 3-25 and Figure 3-26).
Figure 3-25 Position of Claw 1 (A1) and Claw 2 (A2) Linkage on the Strip Transfer Claw Module
Figure 3-26 Installation of Strip Claw 2
8. When all the above settings are completed, perform final integration checking on the
conversion kit. Ensure all parts are tightened properly.
FlexTRAK-OH Material Handling System IOM Manual Installation
© 2023 Nordson Corporation 3-15
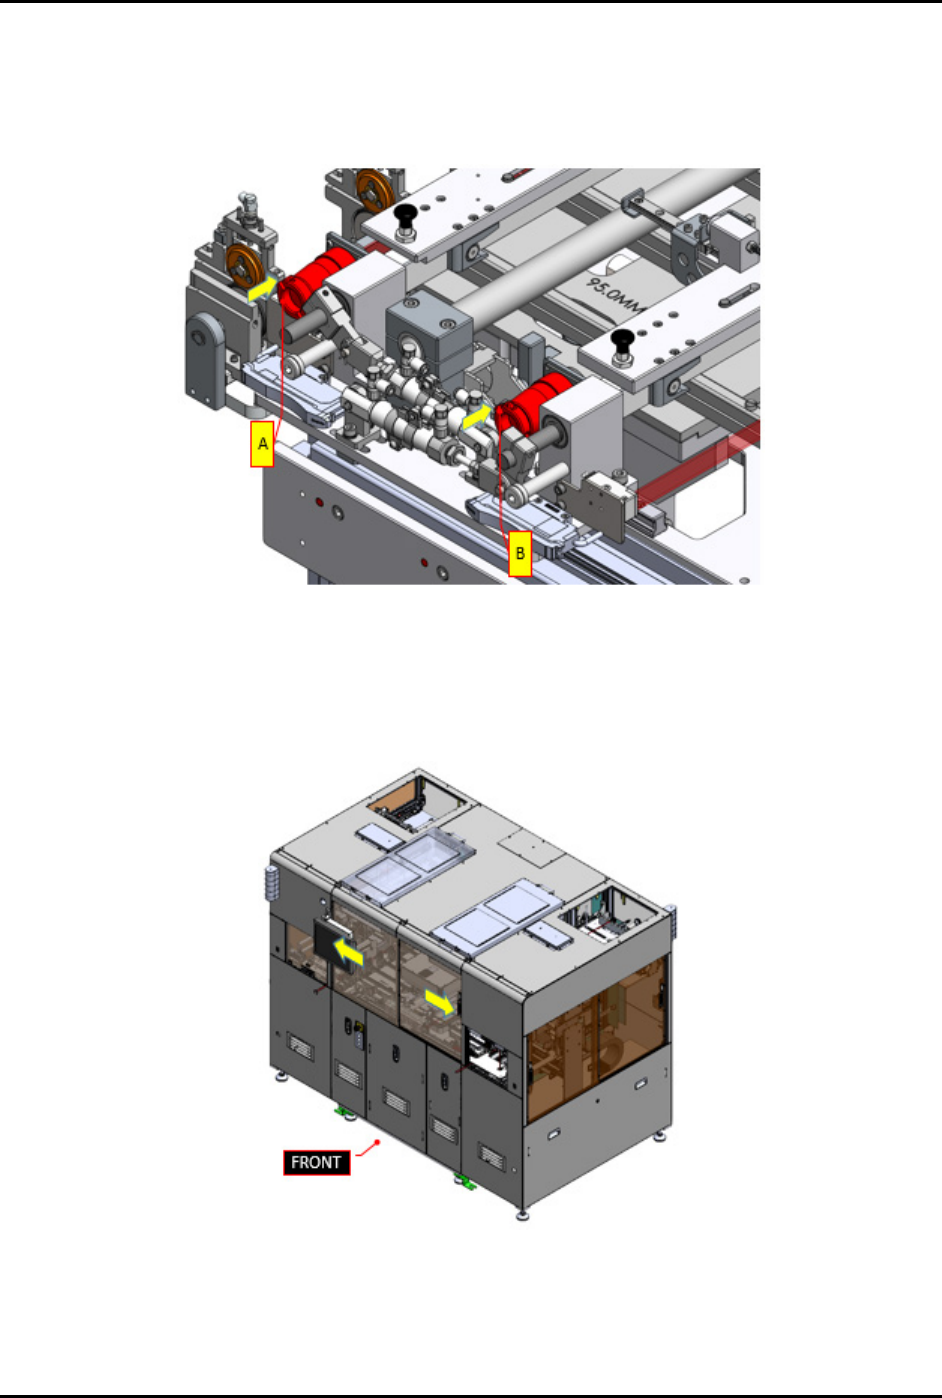
9. Safely plug in claw 1 circular connector (A) and claw 2 circular connector (B) into the
machine (Figure 3-27).
10. Ensure there is no damage at all claw 1 and claw 2 sensor cables, vacuum tube fittings, and
vacuum air manifold feeding.
Figure 3-27 Plug In Circular Connectors
11. Close the front sliding door (Figure 3-28).
12. Press RESET on the pilot switch (Figure 2-9) to acknowledge and clear the current alarm
indicating the front sliding door is open.
Figure 3-28 Close Front Sliding Doors