FlexTRAK OH Material Handler Manual.pdf - 第69页
FlexTRAK-OH Material Handli ng System IOM Manual Installation © 2023 Nordson C orporation 3-19 b. Select the Settings tab and th en select Communication Settings > Custom Commands ( Figure 3- 36 ). Figure 3- 36 DataMa…
FlexTRAK-OH Material Handling System IOM Manual Installation
3-18 © 2023 Nordson Corporation
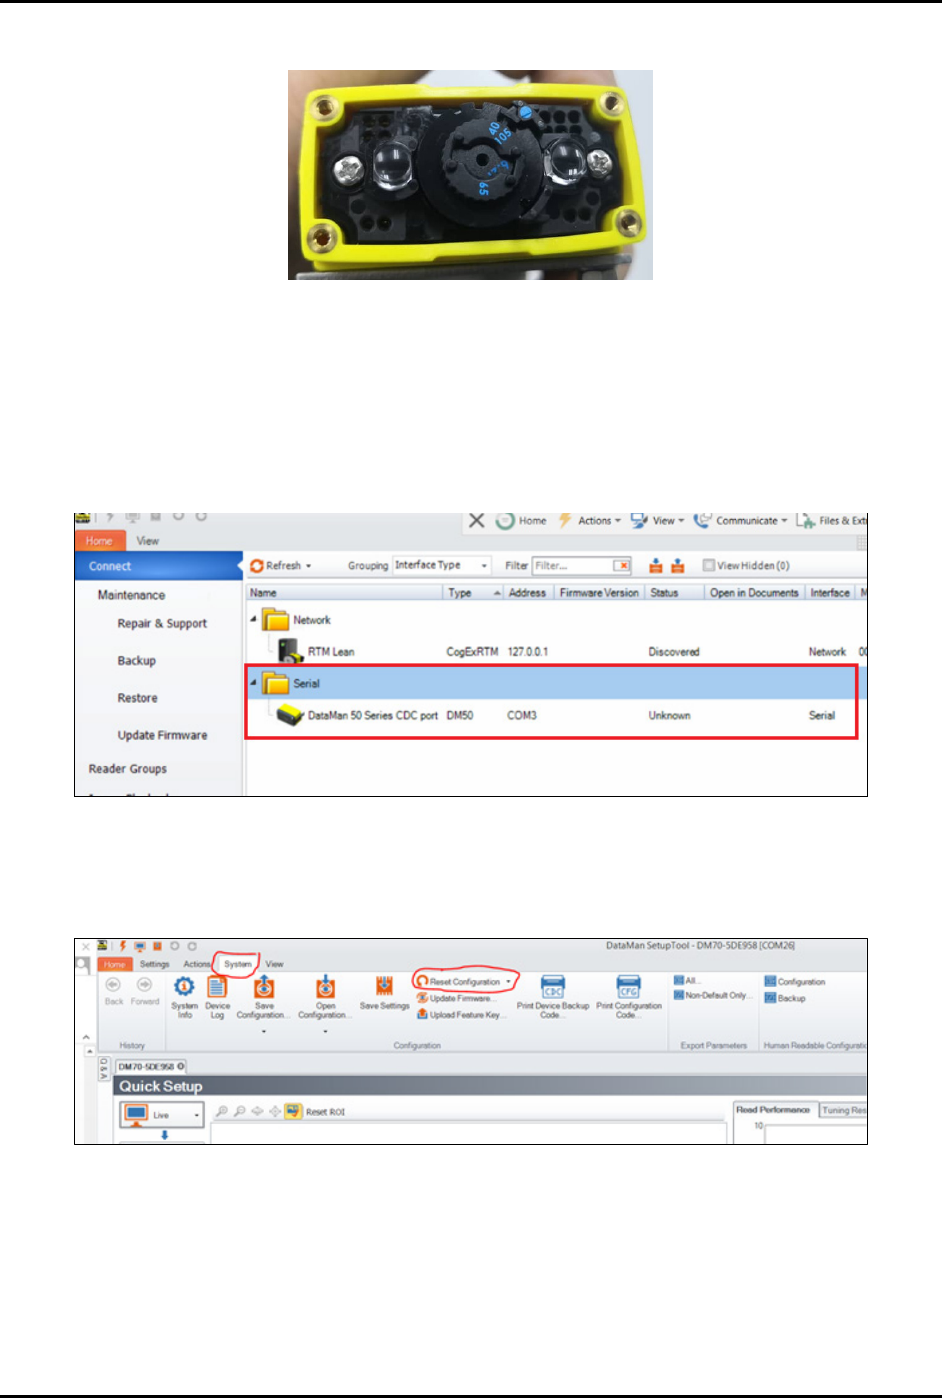
c. Adjust the lens focal length to 105 mm (Figure 3-33).
Figure 3-33 Adjust Lens Focal Length
2. Connect a Type C USB to the scanner
To configure the software:
1. Start the DataMan software.
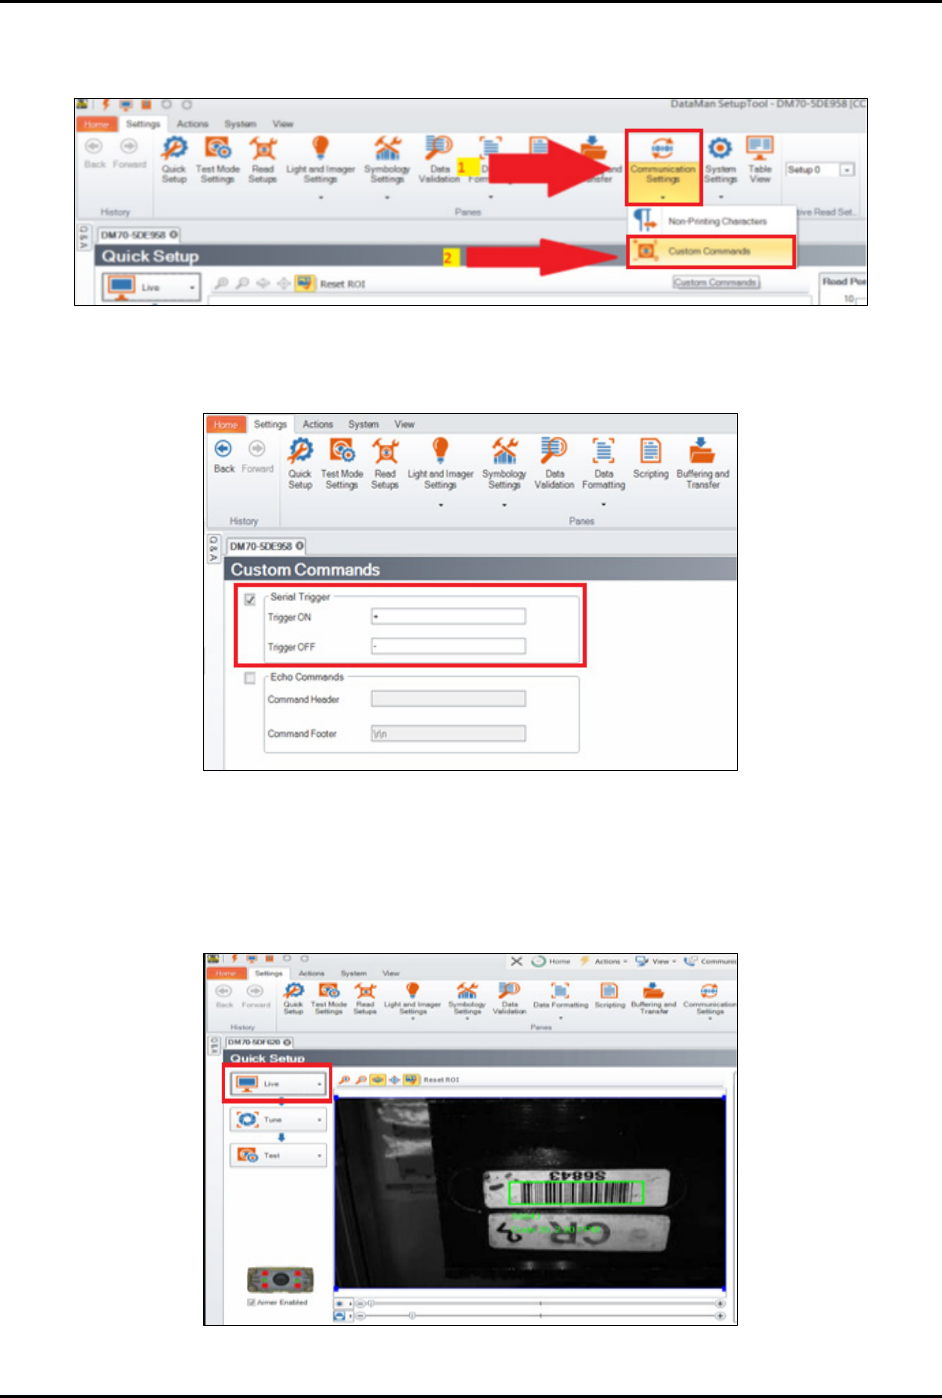
2. Click on the DataMan option to connect the scanner to the software (Figure 3-34).
Figure 3-34 Connect Software to Magazine Scanner
3. Configure the communication settings between the scanner and PLC:
a. In DataMan software, select
System > Reset Configuration (Figure 3-35).
Figure 3-35 DataMan Software – Reset Configuration
FlexTRAK-OH Material Handling System IOM Manual Installation
© 2023 Nordson Corporation 3-19
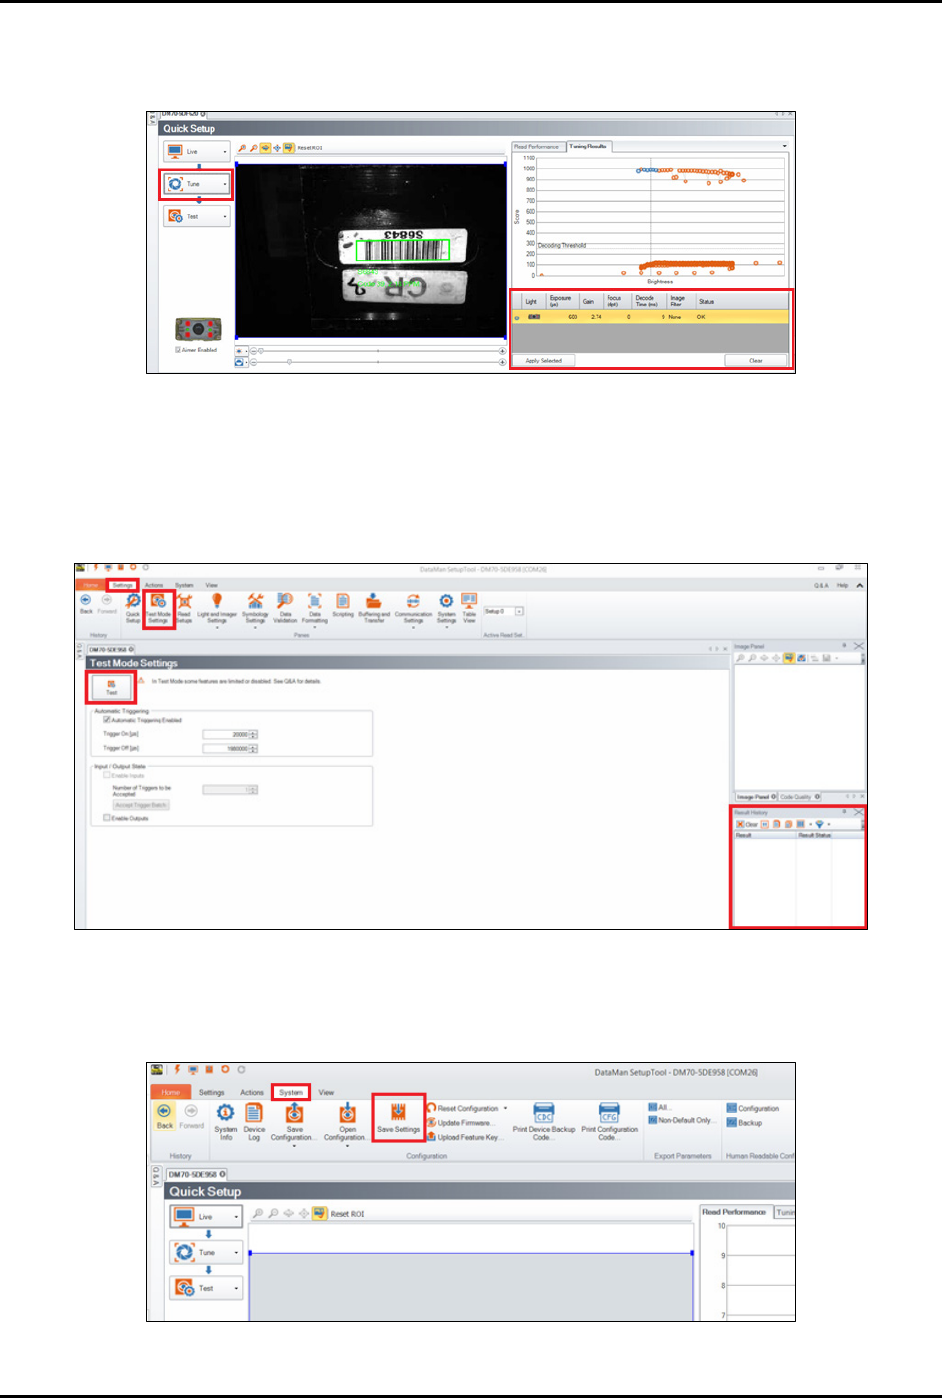
b. Select the Settings tab and then select Communication Settings > Custom
Commands
(Figure 3-36).
Figure 3-36 DataMan Software – Communication Settings
4. Enable the Serial Trigger option (Figure 3-37).
Figure 3-37 Enable Serial Trigger Option
5. Autotune the brightness.
a. Click
Live at the left panel to check the barcode position.
b. Adjust the scanner bracket to align the barcode position with the scanner (Figure 3-38).
Figure 3-38 Align Barcode with the Scanner
FlexTRAK-OH Material Handling System IOM Manual Installation
3-20 © 2023 Nordson Corporation
c. Select Tune.
The system will autotune the brightness in order to get an optimum tuning result.
Figure 3-39 Autotune the Brightness
6. Select System > Test Mode Settings to test the setting result (Figure 3-40).
7. Click
Test on the left panel.
The result status will display on Result History window on bottom right panel.
Figure 3-40 DataMan Software – Test and Result History
8. When done, select System > Save Settings to save the current settings to the scanner
(Figure 3-41).
Figure 3-41 DataMan Software - Save Settings