1OM-1064-002.pdf - 第119页
3. Confirmation and Procedure of Power Supply Main Power Lamp (2) Power Breaker ON Set the power breaker crank located at the front side of the machine to “ON” ( ). The main power lamp illuminates. (The lamp extinguishes…
3. Confirmation and Procedure of Power Supply
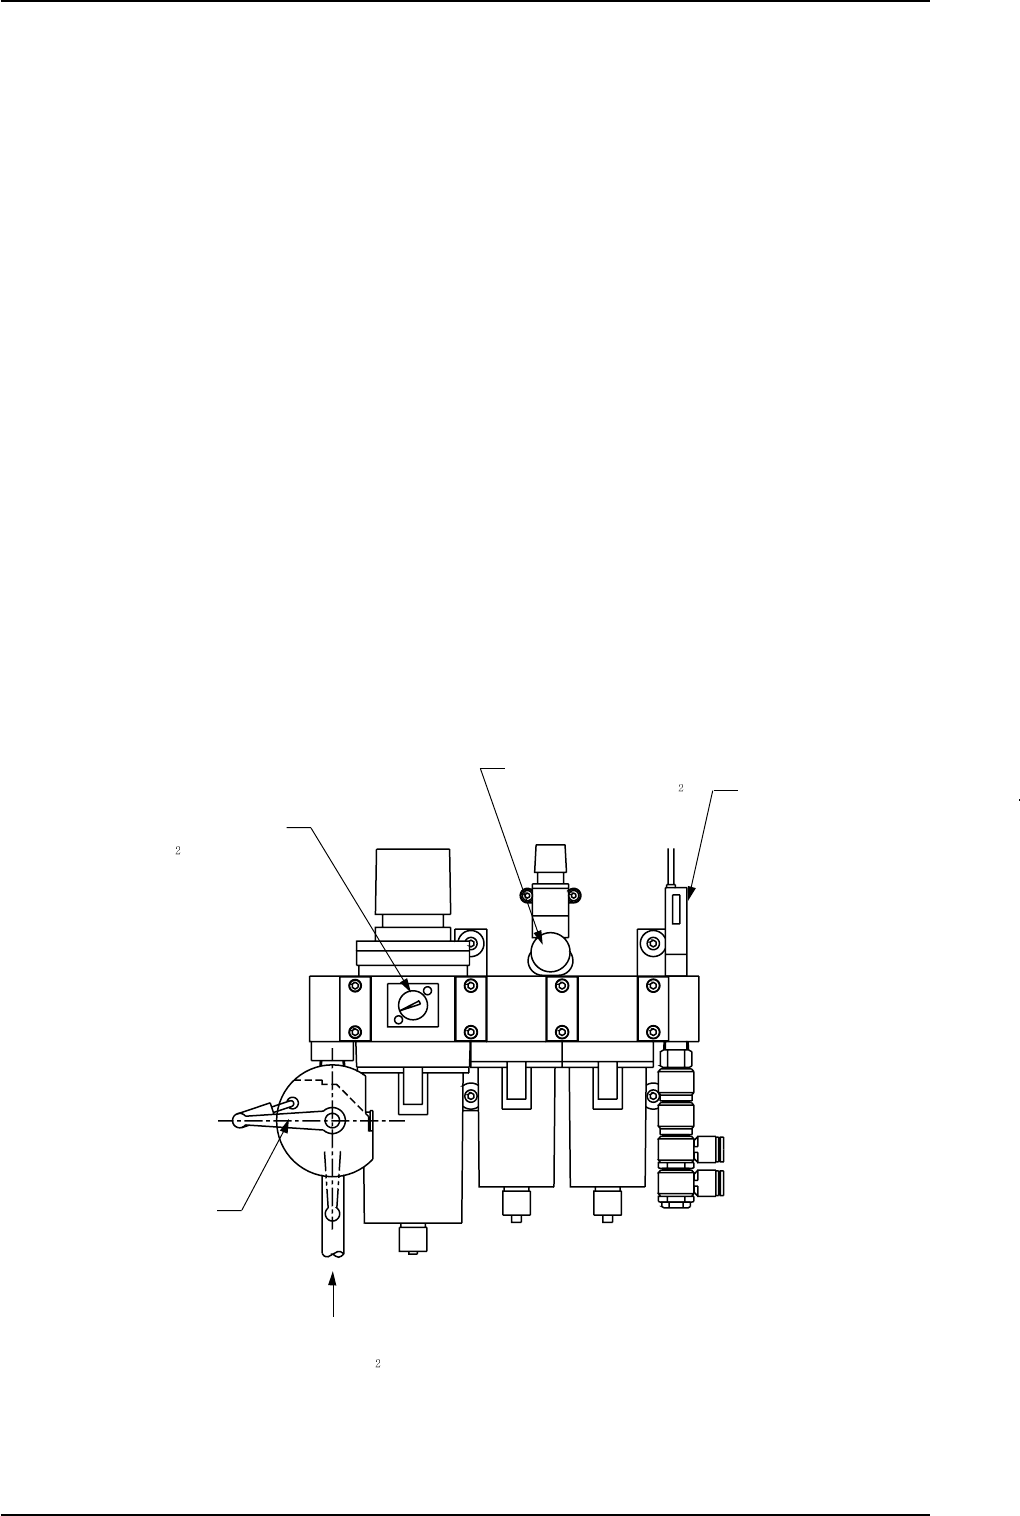
Pressure Switch 0.39 MPa
(4 kgf/cm
2
)
Air Blowing Pressure
0.015 MPa (0.15 kgf/cm
)
Supplied Air: 0.49 to 0.69 MPa
(5 to 7 kgf/cm
)
Main Pressure 0.49 MPa
(5 kgf/cm
)
Main Valve
3. Confirmation and Procedure of Power Supply
(1) Confirmation of Power and Air Sources
Confirm that power and air are supplied to the machine.
• Power Source : 200 V AC, 3-Phase
• Air Source: Air Pressure : 0.49 to 0.69 MPa (dry and clean air)
(5 to 7 kgf/cm
2
)
Set Pressure : Main Pressure : 0.49 MPa (5 kgf/cm
2
)
Air Blowing Pressure: 0.015 MPa
(0.15 kgf/cm
2
)
Note: Do not change the set pressure. Otherwise, accurate placement
cannot be expected.
• Use of Dry and Clean Air
If moisture, oil, or dust enters the penumatic equipment (an air cylin-
der, etc.) of the component placement machine, it may result in a break-
down of the machine.
Moisture, oil, or dust entrained in the vacuum route will also cause an
error in the component pick-up and placement operation.
[Dry and Clean Air]
Moisture : Dew Point -17°C or lower (Atmospheric Pressure)
Oil : 0.1 mg/m
3
or less (ANR)
Dust : Solid Material 0.01 µm or less
Fig. 2.17
9910-001 2-20 Tg0246-PM-OP

3. Confirmation and Procedure of Power Supply
Main Power Lamp
(2) Power Breaker ON
Set the power breaker crank located at the front side of the machine to
“ON” (
).
The main power lamp illuminates.
(The lamp extinguishes when the crank is set to “OFF”.)
Fig. 2.18
9910-001 2-21 Tg0246-PM-OP
3. Confirmation and Procedure of Power Supply
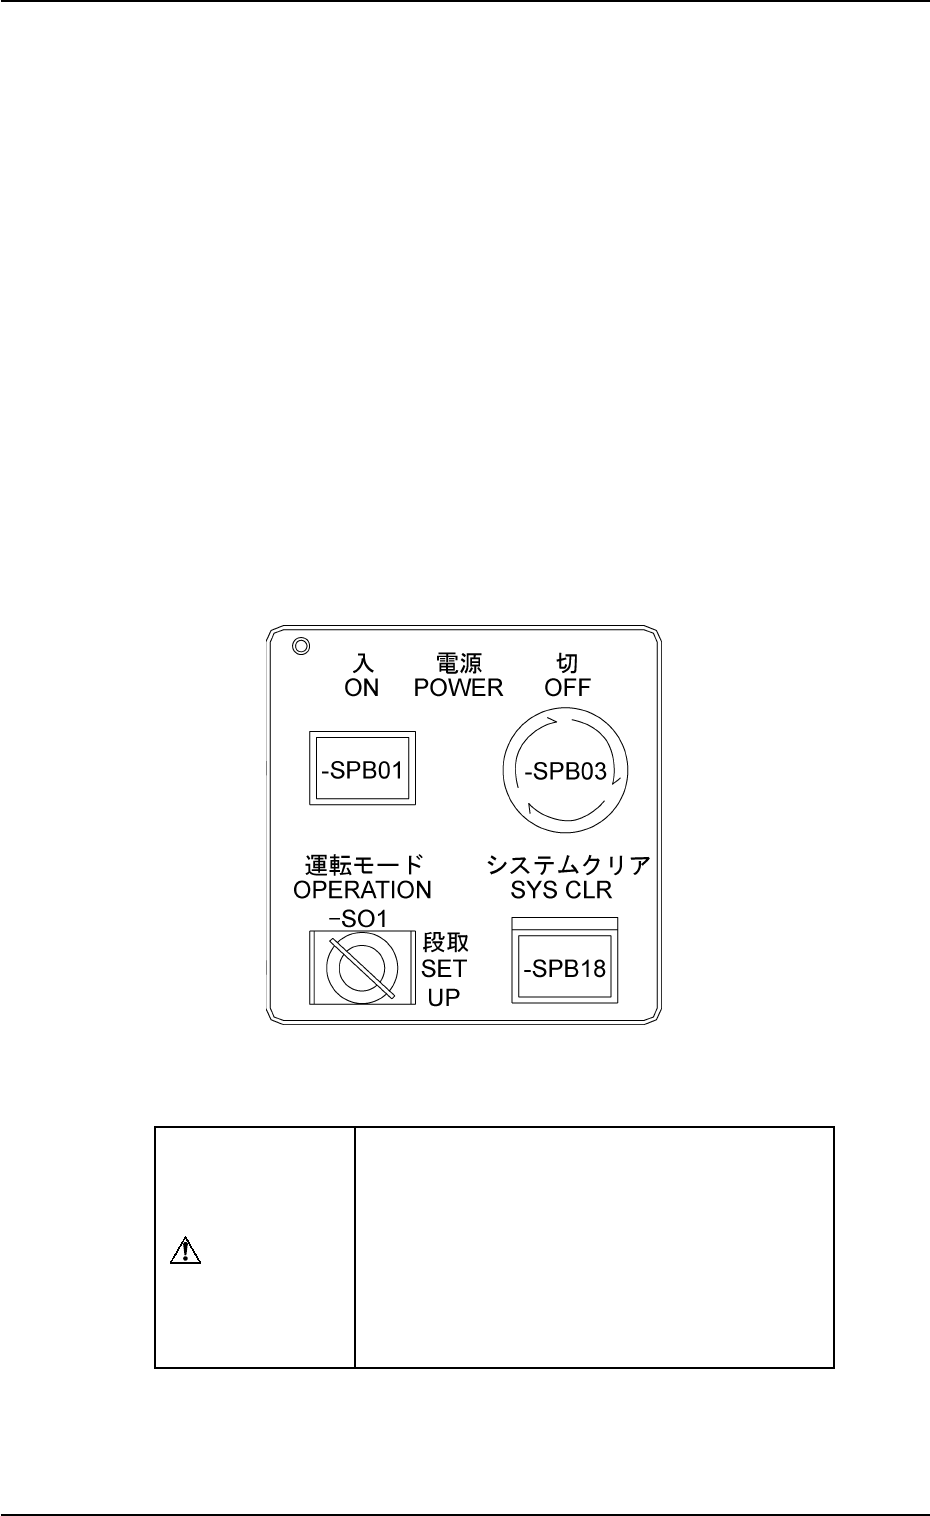
(3) Power Supply
Press and hold the [POWER ON] button on the operation panel for a few
seconds.
Notes: (a) Power cannot be supplied unless the main power lamp lo-
cated at the upper right corner of the power breaker box is
“ON”.
(Power Supply: Check that power (200 V AC, 3-phase) is
correctly supplied to the machine.)
(b) When the [POWER OFF] button is held down, the machine
cannot be powered up.
(Check that both [POWER OFF] buttons on the front and
rear sides are not held down.)
(c) After the [POWER ON] button is pressed, the machine can-
not be set in the automatic operation mode immediately be-
cause the recognition unit performs self-diagnostics opera-
tion for a while (approx. 5 to 6 minutes).
Wait until the recognition unit is set in its ready mode.
Front and Rear Operation Panels
0004-002 2-22 Tg0246-PM-OP
Fig. 2.19
CAUTION
After the machine has been stopped for a long
period of time, follow the steps below to
smoothly start up the machine and perform the
automatic operation.
• Secure stable environmental condition for the
machine. (Room Temperature etc.)
• Perform the test operation for approx. 30
minutes.