Programming_mail.pdf - 第12页
I- 4 Programming Manual Part I Basic Operation 1.1.4 Changing the Magni fi cation The magni fi cation can be changed by pressing ↑ and ↓ in Enlarged View Screen . The same operation is available by scrolling wheel of mouse…
I-3
Programming Manual
Part I Basic Operation
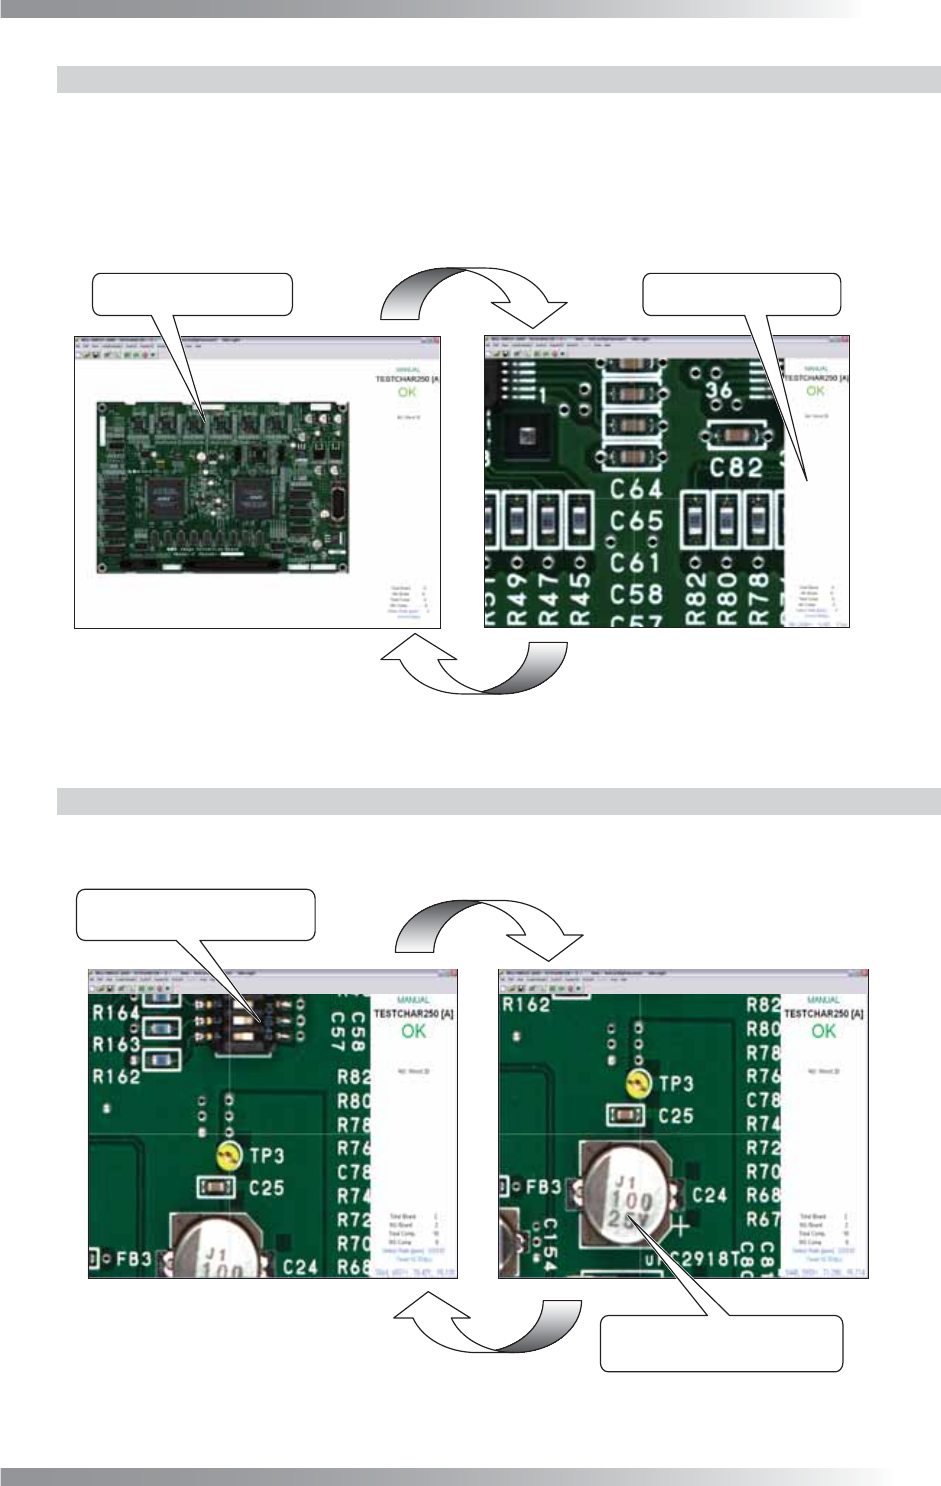
1.1.2 Switching Between Enlarged View Screen and Full View Screen
Enlarged View Screen
Left-click on the image in Full View Screen. The image is enlarged by centering on the clicked point.
Full View Screen
Left-click the index frame in Enlarged View Screen to go back to Full View Screen.
Full View Screen
Zoom In
Zoom Out
Enlarged View Screen
Left-click the index frame.
Left-click the area to view.
Figure 1-3 Full View Screen and Enlarged View Screen
1.1.3 Area Moving in the Enlarged View Screen
Left-click on the image to move the view area. The area centered on the clicked point is displayed.
If it reaches to the image edge, the screen returns to Full View Screen.
Left-click the lower side of the
screen to move downward.
Area Move
Area Move
Left-click the upper side of the
screen to move upward.
Figure 1-4 Moving in the Enlarged View Screen
I-4
Programming Manual
Part I Basic Operation
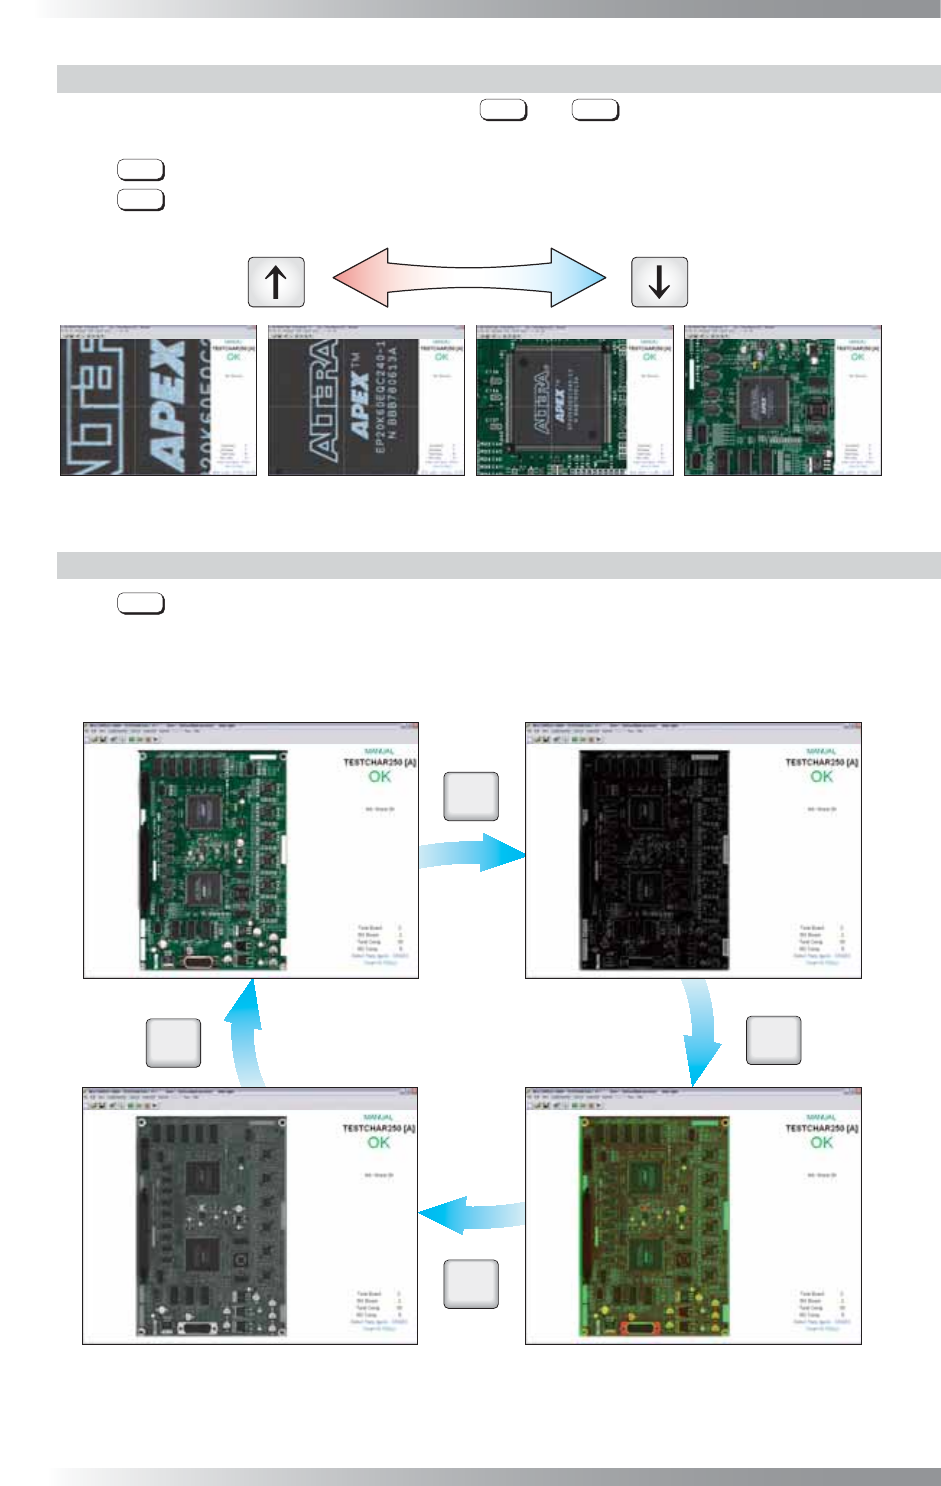
1.1.4 Changing the Magnifi cation
The magnifi cation can be changed by pressing
↑
and
↓
in Enlarged View Screen.
The same operation is available by scrolling wheel of mouse.
Press
↑
or scroll wheel of mouse upward to zoom in the image.
Press
↓
or scroll wheel of mouse downward to zoom out the image.
Magnification
Up Down
3UHVV³Ĺ´ 3UHVV³Ļ´
Figure 1-5 Changing the Magnifi cation
1.1.5 Switching Between the Images
Press
D
to switch images among TopLight (Coaxial Overhead Light), SideLight, and LowLight.
<<Full View Screen>>
Press “D”
Press “D”
Press “D”
Press “D”
(a) SideLight Image
(b) LowLight Image
(c) TopLight (Coaxial Overhead Light) Image
(d) Multi-Lighting Image
㹂
㹂
㹂
㹂
Figure 1-6 Switching Images in the Full View Screen
I-5
Programming Manual
Part I Basic Operation
<<Enlarged View Screen>>
㹂
㹂
㹂
㹂
Press “D”
Press “D”
Press “D”
Press “D”
(a) SideLight Image (b) LowLight Image
(c) TopLight (Coaxial Overhead Light) Image (d) Multi-Lighting Image
Figure 1-7 Switching Images in the Enlarged View Screen
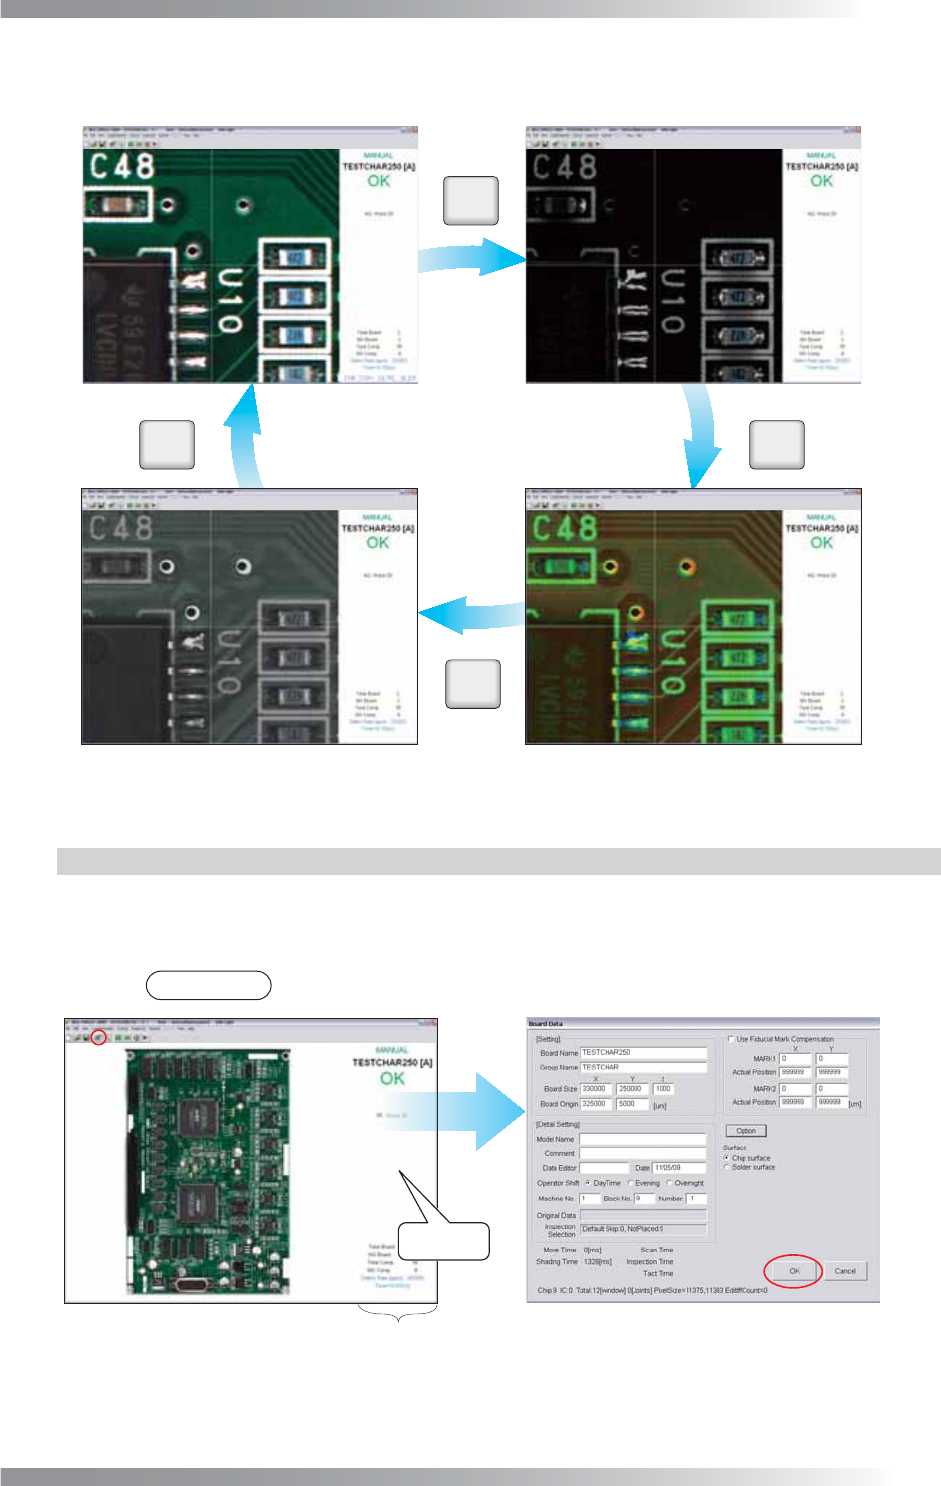
1.1.6 Board Setting
Open the Board Data dialog shown in Figure 1-8 to verify the PCB size, set or edit the PCB data.
Press the Board Setting button on the tool-bar or right-click the index frame to open the dialog.
After all the settings are completed, press OK.
NOTE
The above operation is available in Full View Screen and Enlarged View Screen.
Right-click
Index Frame
Figure 1-8 Board Data Edit