Programming_mail.pdf - 第64页
II- 20 Programming Manual Part II Inspection Data 1.2 Sub Boar d Deployment and Submark 1.2.1 Sub Board Deployment Here describes how to copy sub board data to another sub board. The procedure for copying the data of Sub…
II-19
Programming Manual
Part II Inspection Data
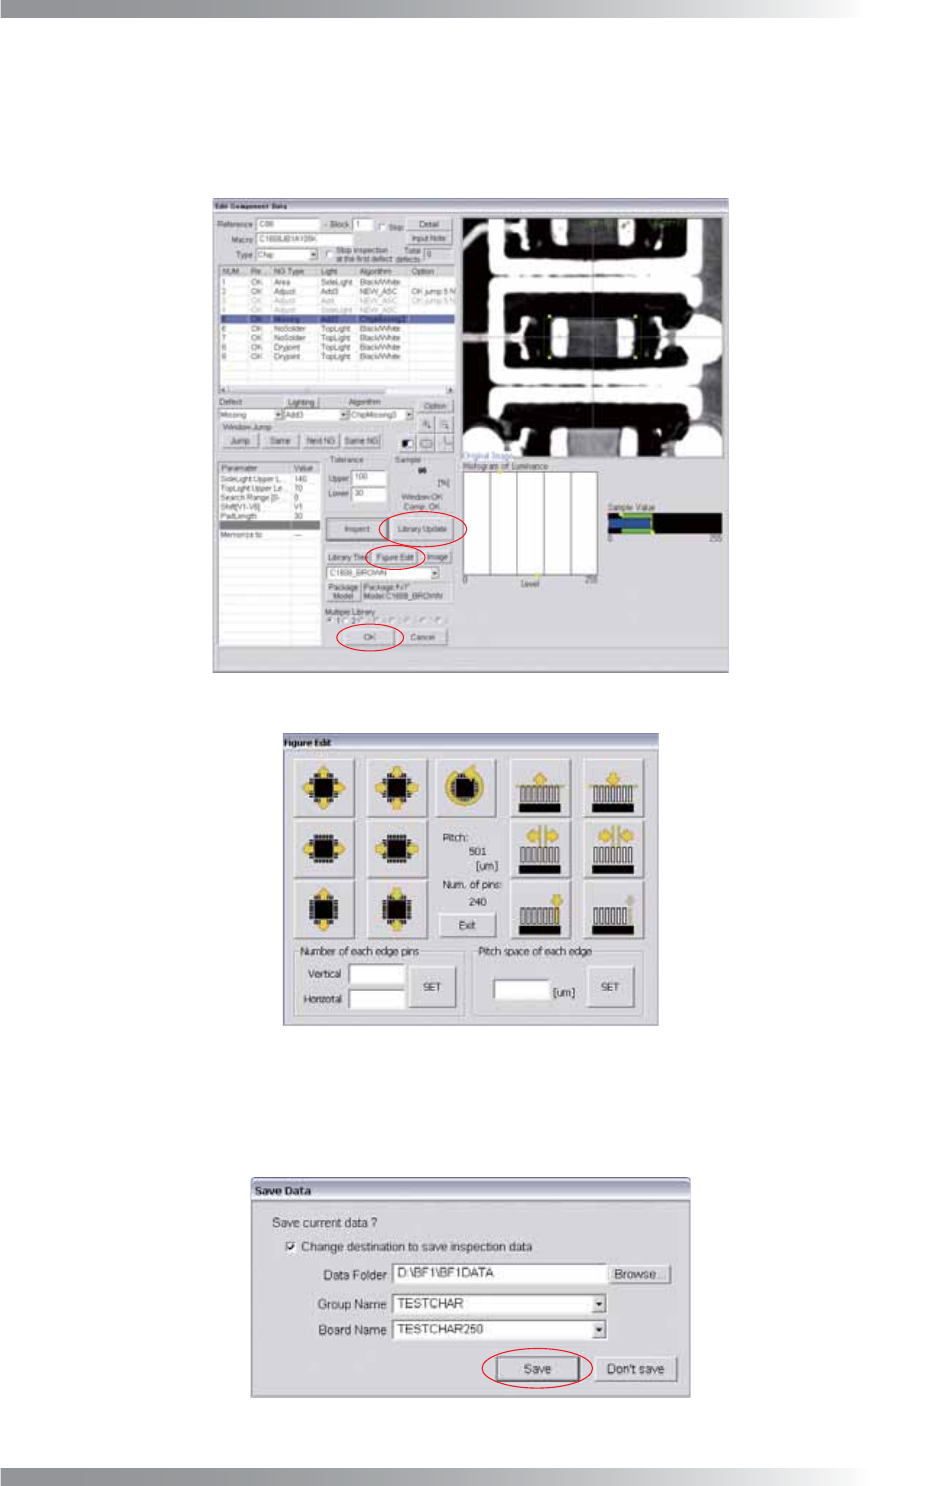
Step45: The Edit Component Data dialog of a template library is appeared. Press Figure Edit in the lower
side of the dialog. The dialog shown in Figure 1-33 appears. In the dialog, a component can be
zoomed in/out, expanded/shrank, or rotated in 90°. A number, clearance, and length of an IC lead
can also be adjusted. After all settings are completed, press Update and OK.
Figure 1-32 Edit Component Data Dialog
Figure 1-33 Figure Edit
Step46: After libraries are assigned to all components, press Finish in Figure 1-28. The dialog shown in
Figure 1-34 appears. Press Save. If necessary, check Change destination to save inspection
data, and specify the directory to save.
Figure 1-34 Save Data

II-20
Programming Manual
Part II Inspection Data
1.2 Sub Board Deployment and Submark
1.2.1 Sub Board Deployment
Here describes how to copy sub board data to another sub board.
The procedure for copying the data of Sub Board 1 to Sub Board 2 on a different X-axis point is
described below as an example.
Step1: Make sure of the distance to the target by the following procedure.
Select a component data on Sub Board 1 and move it to the same component data on
Sub Board 2 by mouse-dragging.
MARK1
MARK2
Sub Board 1 Sub Board 2
Sub Board 3 Sub Board 4
㻰㼕㼟㼠㼍㼚㼏㼑
Move a component data from sub board 1 by mouse-dragging.
Figure 1-35 Distance 1
Step2: The dialog shown in Figure 1-36 appears.
Make sure of the value of Distance X and press Cancel.
NOTE
If copying the sub board data to a different Y-axis point, make sure of the value of Distance Y.
Figure 1-36 Distance 2
II-21
Programming Manual
Part II Inspection Data
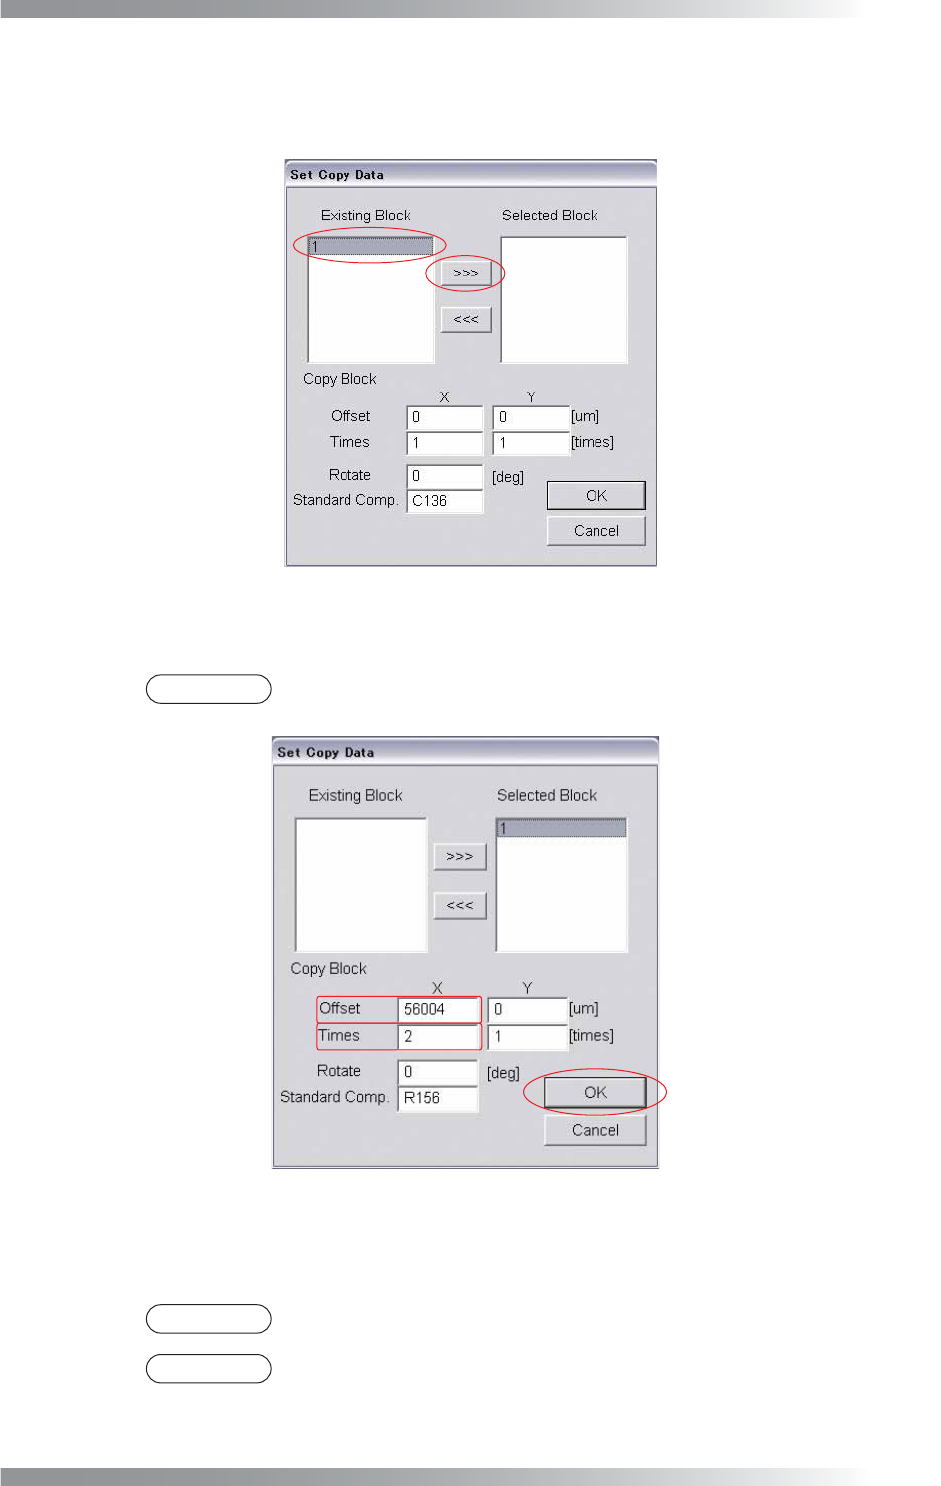
Step3: Select Edit > Block from the menu-bar.
Step4: Select a sub board number from Existing Block and press >>> to move it to Selected Block.
Figure 1-37 Set Copy Data 1
Step5: Enter the Distance X value obtained in Step 2 to X of Offset.
NOTE
If copying the sub board data to a different Y-axis point, enter the Distance Y value
to Y of Offset.
Figure 1-38 Set Copy Data 2
Step6: Enter 2 to X of Times and press OK. The Sub Board 1 data will be copied to the separate
X-axis point. Specify the coordinates in Offset.
NOTE
If copying the sub board data to a different Y-axis point, enter 2 to Y of Times.
NOTE
If 3 is entered to X of Times and OK is pressed, the Sub Board 1 data will be copied
to two separate X-axis points. The one is copied to the coordinates specifi ed in Offset.
The other is copied to the coordinates calculated by doubling the Offset value.