Programming_mail.pdf - 第200页
V- 10 Programming Manual Part V Other Function Step3: Press Set it on image and the dialog shown in Figure 1-16 appears. Adjust the window size to extract component color by moving a slide-bar. After all the settings are…
V-9
Programming Manual
Part V Other Function
1.2.3 Auto Deployment of KPK
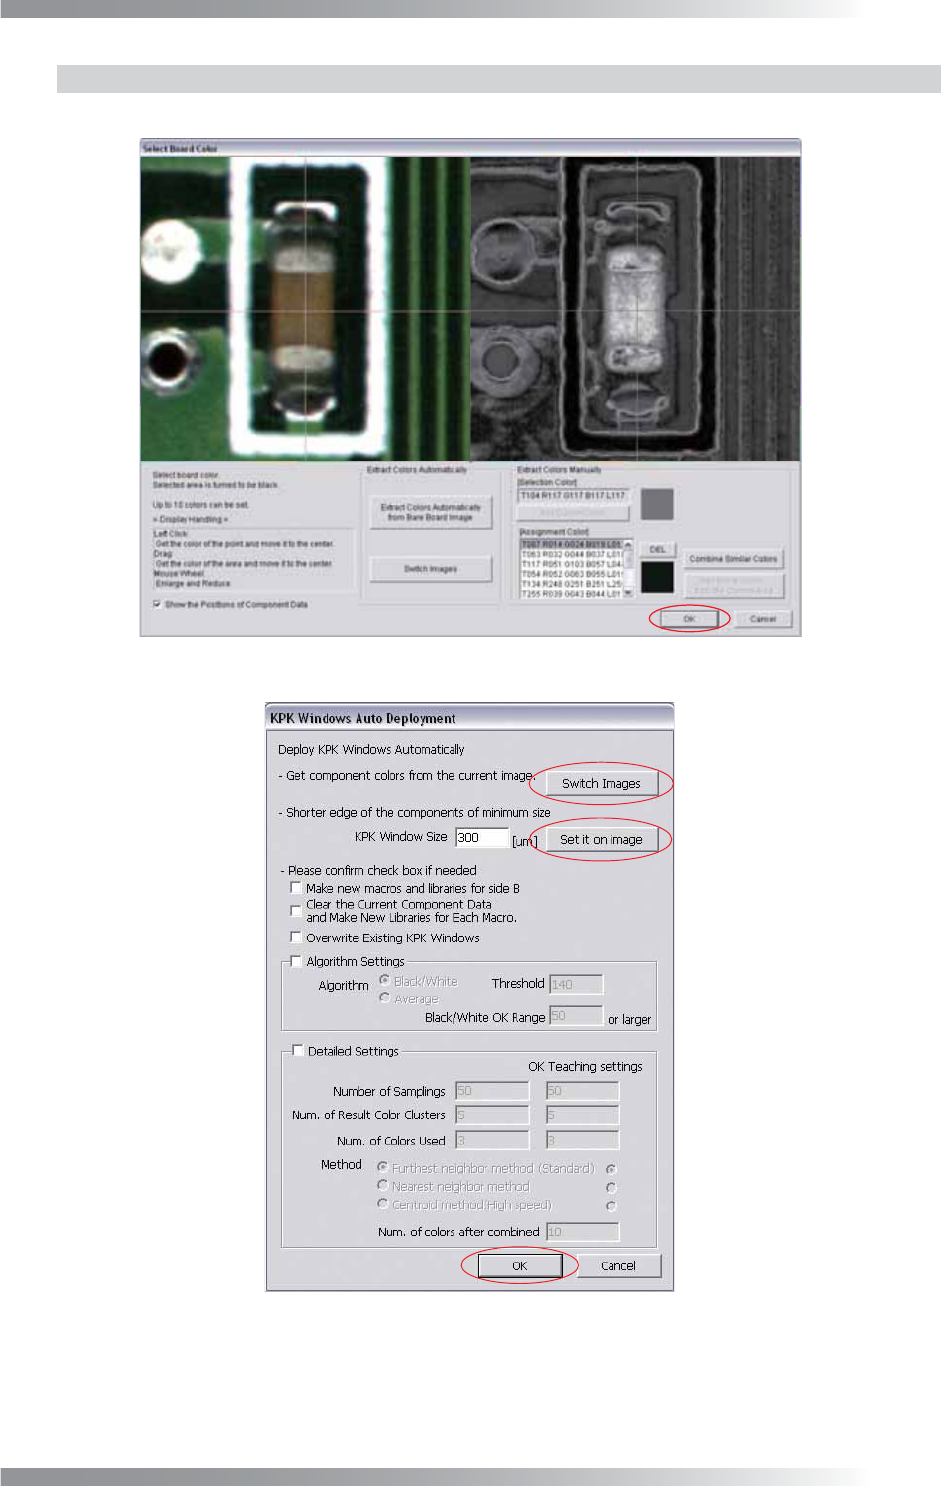
Step1: Register all NG colors and press OK. The dialog shown in Figure 1-15 appears.
Figure 1-14 Specify PCB Color
Figure 1-15 KPK Windows Auto Deployment
Step2: Press Switch Images and open OK PCB images.
V-10
Programming Manual
Part V Other Function
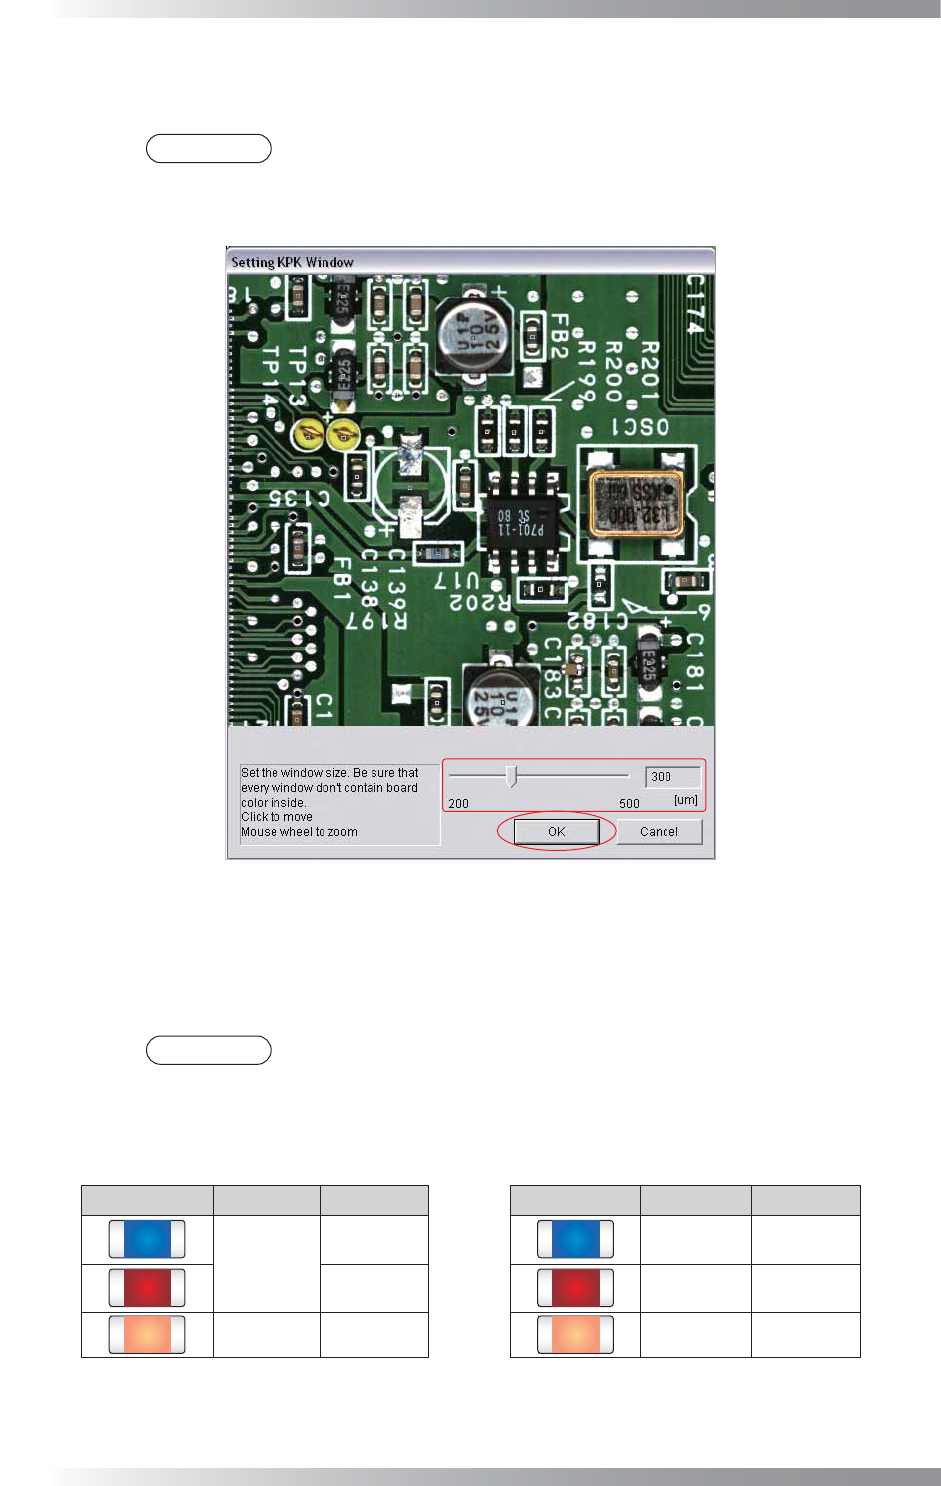
Step3: Press Set it on image and the dialog shown in Figure 1-16 appears. Adjust the window size to
extract component color by moving a slide-bar. After all the settings are completed, press OK.
NOTE
The specifi ed window size is common to all components data. Therefore, make the
window size to surround the component color only. If the window size is not appropriate,
PCB color or print color on the component might infl uence the inspection result.
Figure 1-16 KPK Window Size Setting
Step4: If there is only KPK data or KPK data should be assigned newly to each component without
deleting existing libraries, check Clear the Current Component Data and Make New
Libraries for Each Macro. Library name corresponds to macro name is assigned.
NOTE
Macro classifi es the component more fi nely than library. KPK judges missing component
by component colors. It is necessary to extract colors not by library unit, but by macro
unit. For the component with 1000C of library and 123 of macro, a library named
KPK_123 is created and assigned. Therefore, the existing library 1000C remains.
Component Library Macro Component Library Macro
1000C
123
KPK_123 123
456 KPK_456 456
1000R 789 KPK_789 789
Table 1-2 Library and Macro (Left Side: Before Changing, Right Side: After Selecting
Clear the current…
)
V-11
Programming Manual
Part V Other Function
Step5: When KPK data is opened in B-side for the double-side PCB, the check-box of Make new
macros and libraries for side B is displayed. Check Make new macros and libraries for
side B to have each macro and library data in each side. Macro and library name including
side information are assigned to components.
NOTE
For the component with 1000C of library and 123 of macro, a library named B_
KPK_123 is created and assigned. The existing library 1000C remains.
Component Library Macro Component Library Macro
1000C
123
B_KPK_123
B_123
456
B_KPK_456
B_456
1000R 789
B_KPK_789
B_789
Table 1-3 Library and Macro (Left Side: Before Changing, Right Side: After Selecting
Make new macros…
)
Step6: After all the settings are completed, press OK. KPK data will be automatically extracted.
CAUTION
This process might take a few minutes.
Step7: Inspect the data after extracting KPK data. KPK Debug dialog shown in Figure 1-17
appears. Refer to Part V 1.3.1 KPK Debug.
NOTE
KPK inspection window is extracted in second window (Type: Missing, Lighting:
OKNGColors, Algorithm: Black/White). If existing inspection data was extracted,
KPK window will be added in second window by interruption. Inspection window
shifts by one. Although, jump settings such as OKJump / NGJump will be
automatically updated in order properly by the inspection software.