Programming_mail.pdf - 第35页
I- 27 Programming Manual Part I Basic Operation Other Setup Check Marking and select one from the following items in Figure 2-6 Search Data ; F ALSENG, LIMITERR, MARKERR, NGBLOCK-1, NGMARK, OKBLOCK, or OKMARK. Press Edit…
I-26
Programming Manual
Part I Basic Operation
Plot Number Setup
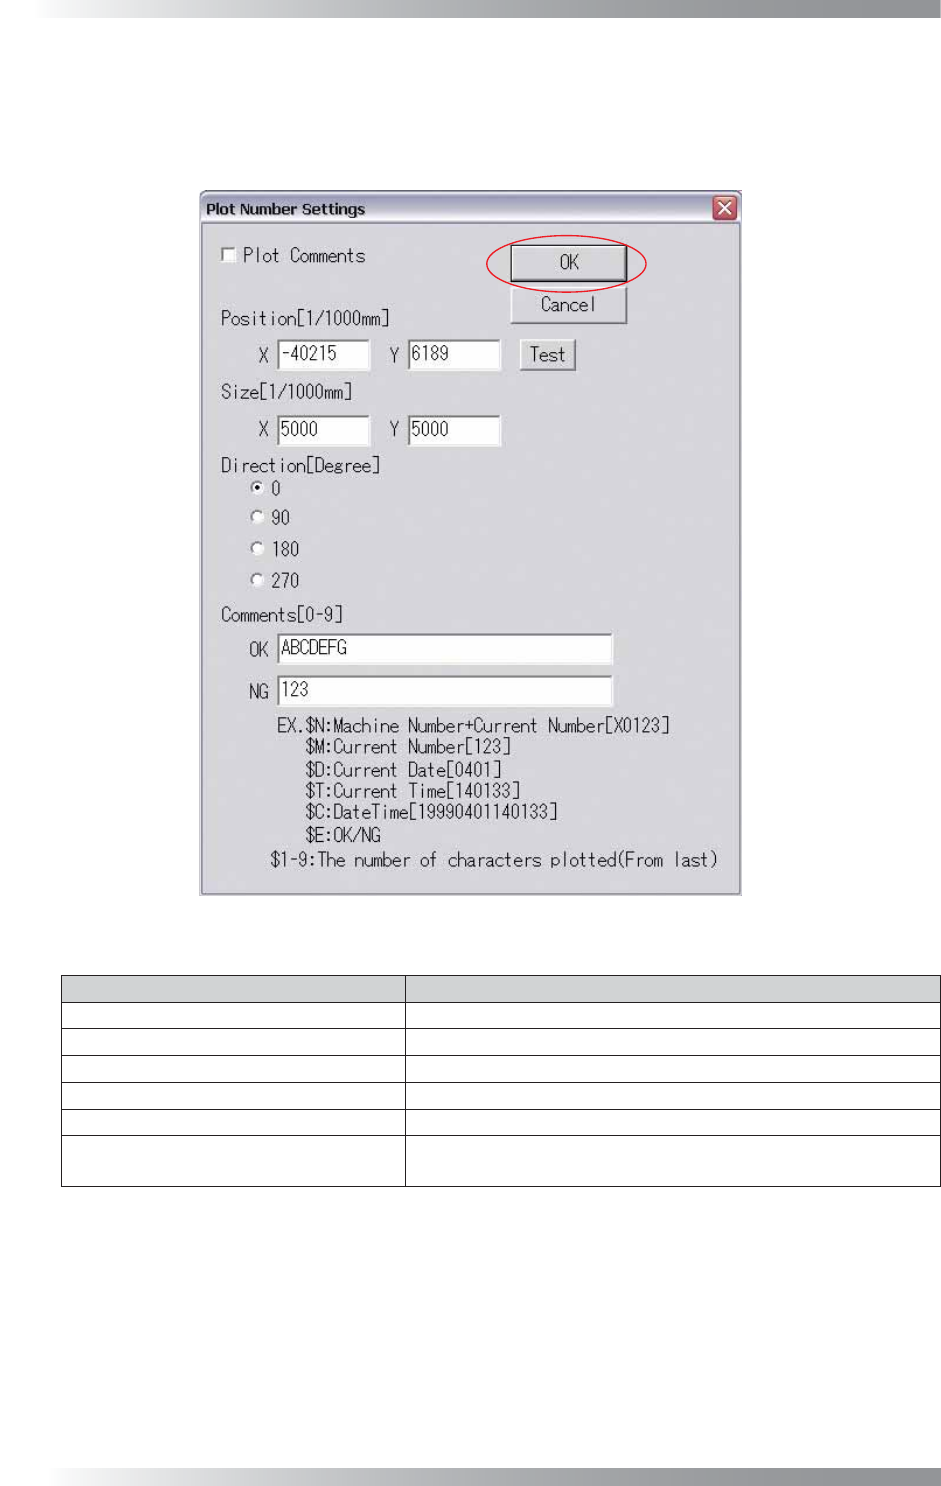
Check Marking in Figure 2-6 Search Data, select PLOTNUM (Plot Number) and press Edit.
The Plot Number Settings dialog shown in Figure 2-9 appears. Refer to Table 2-5 Plot Number
Settings and proceed the setup procedures. After all the settings are completed, press OK.
Figure 2-9 Plot Number Settings
Item Description
Plot Comments
If plotting comments, check Plot Comments.
Position [1/1000mm]
Specifi es the central position to start plotting.
Size [1/1000mm] Specifi es the size of characters to plot.
Direction [Degree]
Specifi es the direction of characters.
Comments [0-9] Enter comments.
Test
Tests whether plotting can be performed correctly on the board
based on the specifi ed setup.
Table 2-5 Plot Number Settings
I-27
Programming Manual
Part I Basic Operation
Other Setup
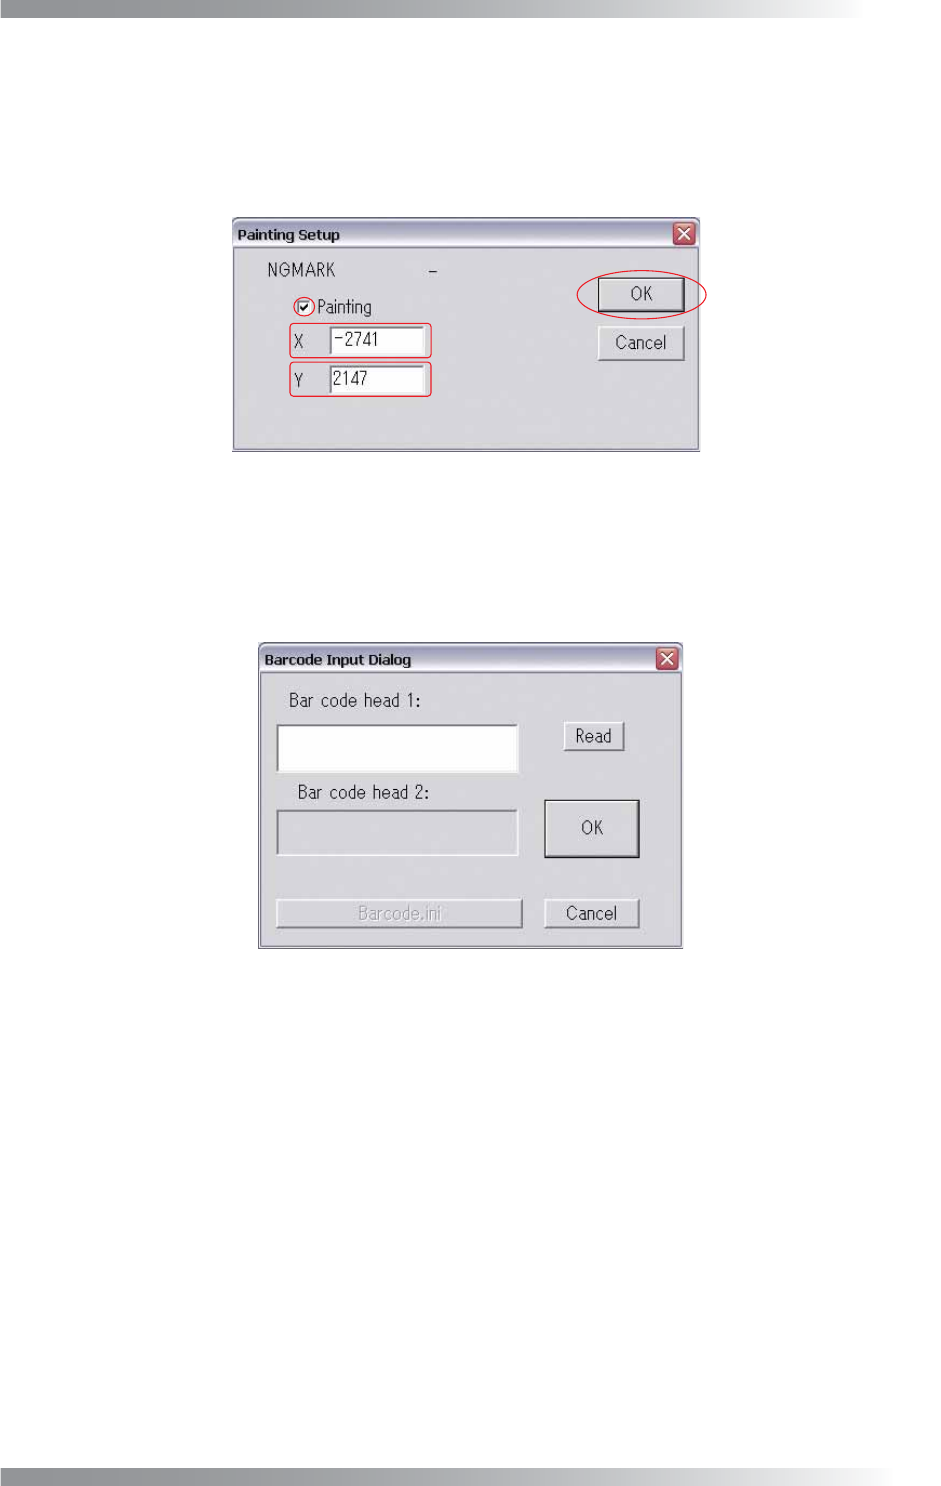
Check Marking and select one from the following items in Figure 2-6 Search Data; FALSENG,
LIMITERR, MARKERR, NGBLOCK-1, NGMARK, OKBLOCK, or OKMARK.
Press Edit. The Other Setup dialog shown in Figure 2-10 appears.
Check Painting. Enter coordinates of a marking location and press OK.
Figure 2-10 Other Setup
2.6 Barcode
Data read by a barcode-reader can be displayed if using an optional barcode-reader.
Press Barcode in Figure 2-1 Select System Setup. The Barcode dialog shown in Figure 2-11 appears.
Figure 2-11 Barcode
Press Read in Figure 2-11 Barcode to test the barcode reading function.
The value read is displayed in Barcode head 1.
I-28
Programming Manual
Part I Basic Operation
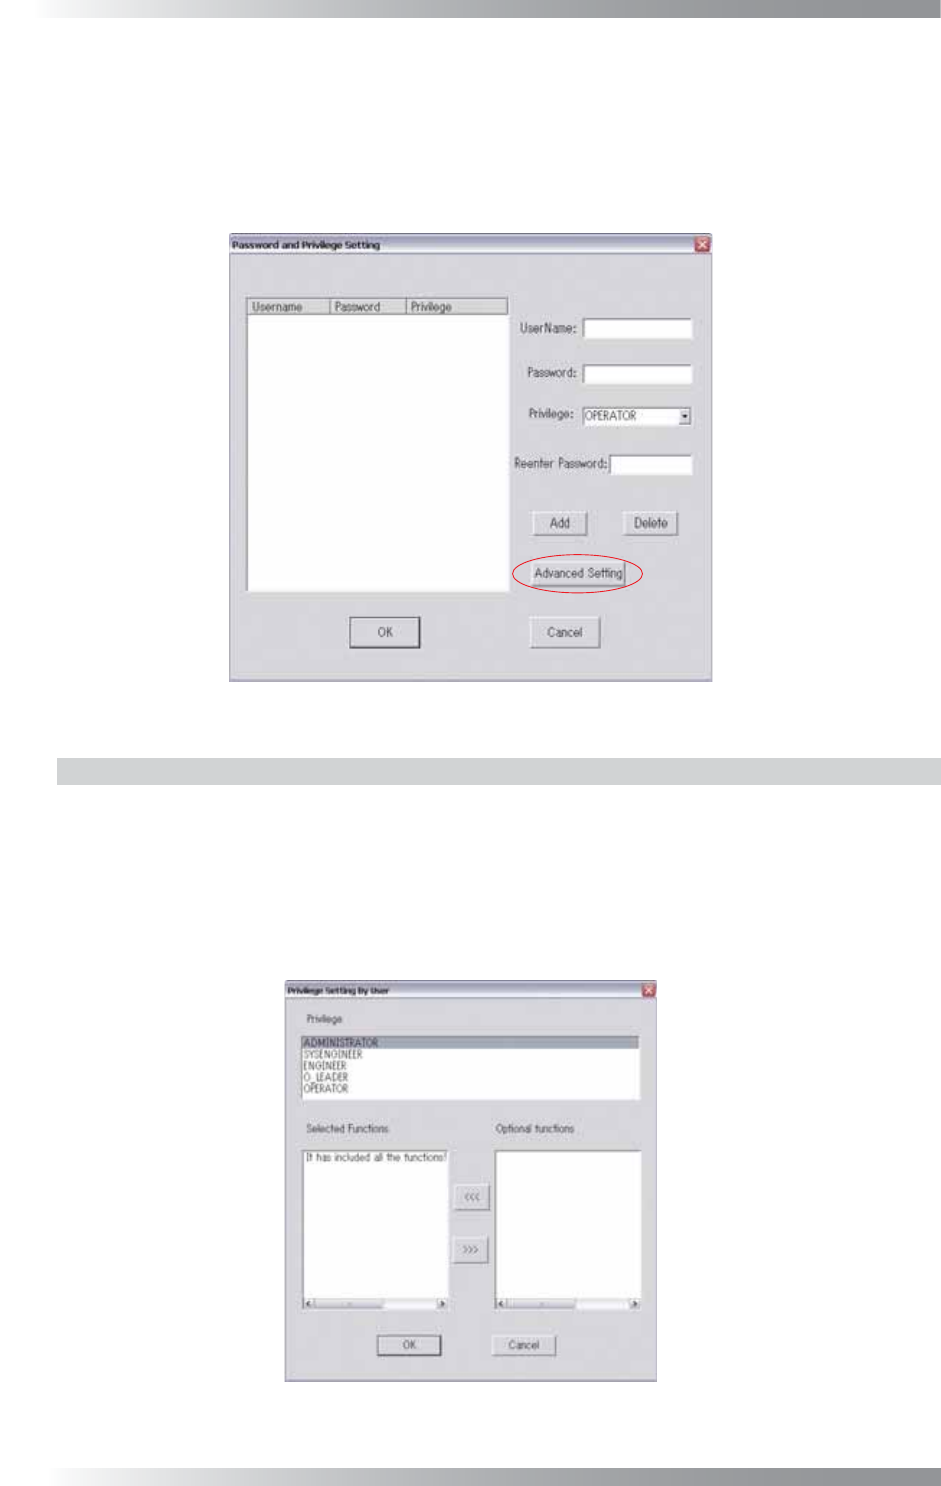
2.7 Privilege Setting
This section describes how to register a new user and user level.
Unexpected change of system setup or inspection data can be avoided with this function.
Press Privilege Setting in Figure 2-1 Select System Setup.
The Privilege Setting dialog shown in Figure 2-12 appears.
Figure 2-12 Privilege Setting
2.7.1 User Accessible Level
Accessible levels for users can be arranged into fi ve levels.
Operable functions in each level can be changed in the Advanced Setting dialog in Figure 2-13.
Press Advanced Setting in Figure 2-12 and the Advanced Setting dialog shown in Figure 2-13 appears.
Select a user accessible level in Privilege. Operable functions are displayed in Selected Functions.
Inoperable functions are displayed in Optional Functions.
Press <<< or >>> to move functions.
Figure 2-13 Advanced Setting