Programming_mail.pdf - 第157页
III- 83 Programming Manual Part III Inspection Algorithm Step9: Press Cut out . The selected image is displayed under Current Image . Enter the fi rst character to the text-box in the right side of Char: . Figure 2-6 OCR_…
III-82
Programming Manual
Part III Inspection Algorithm
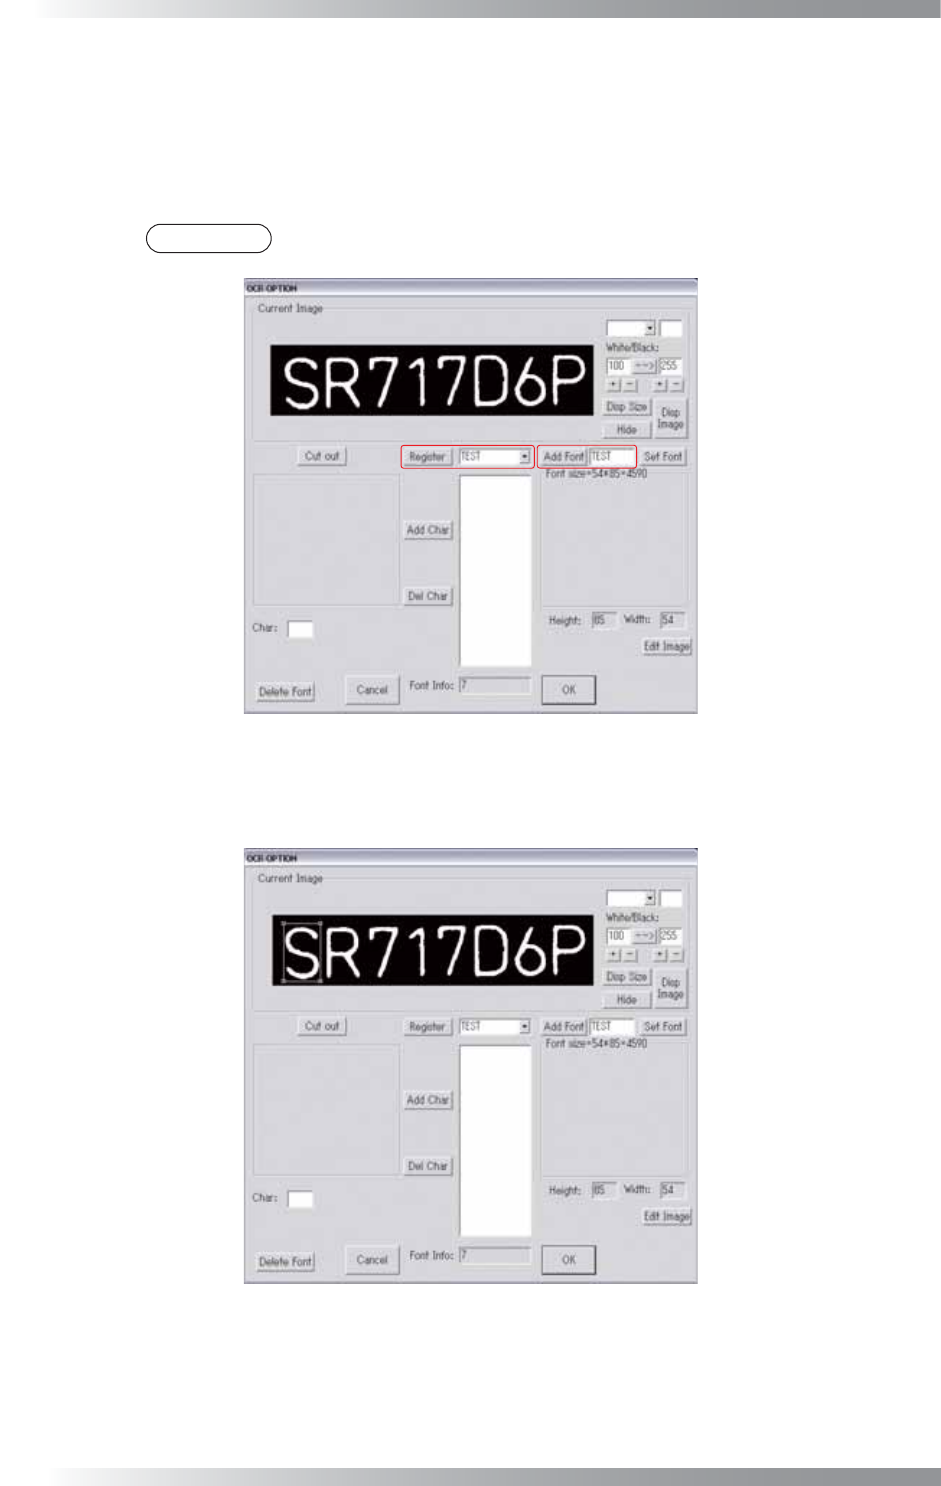
Step6: Adjust the brightness level by pressing + and - in the lower left of --> until the characters are
displayed visually clear.
Step7: Enter the arbitrary font name to the text-box at the right of Add Font. Press Add Font. The
font name is displayed in the drop-down list in the right side of Register.
NOTE
Enter the font name within eight characters by single-byte alphanumeric characters.
Figure 2-4 OCR_Pro 3
Step8: Left-click in the upper left part of the fi rst character.
Adjust the window size by dragging the mouse to the lower right side of the fi rst character.
Figure 2-5 OCR_Pro 4
III-83
Programming Manual
Part III Inspection Algorithm
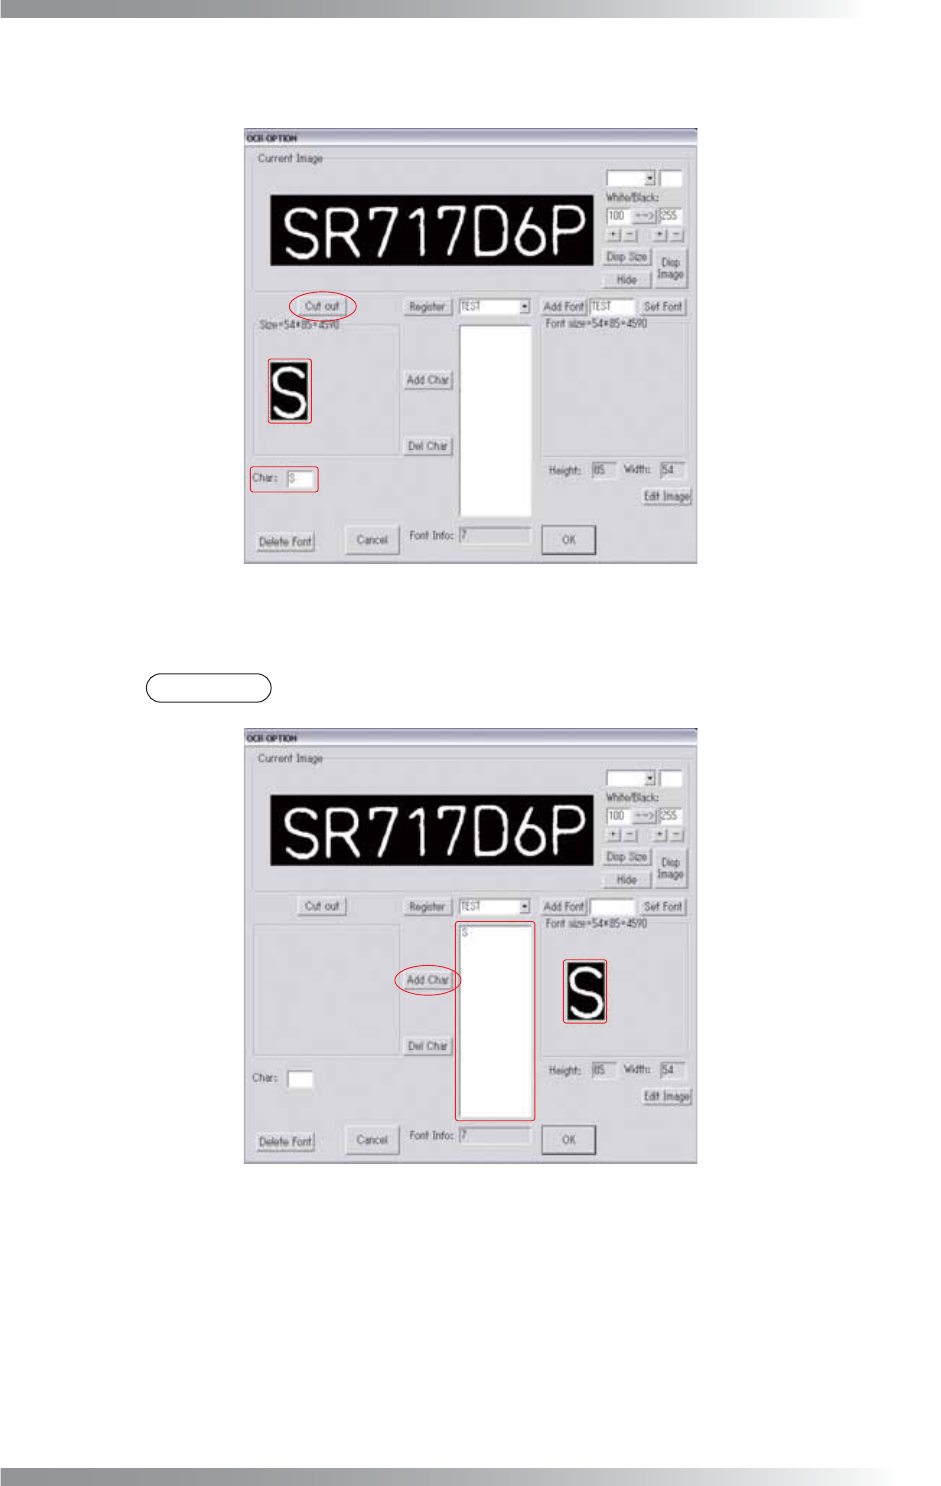
Step9: Press Cut out. The selected image is displayed under Current Image. Enter the fi rst
character to the text-box in the right side of Char:.
Figure 2-6 OCR_Pro 5
Step10: Press Add Char to register the character and the image as a font added in Step7.
NOTE
To delete characters, select character from the list-box and press Del Char.
Figure 2-7 OCR_Pro 6
III-84
Programming Manual
Part III Inspection Algorithm
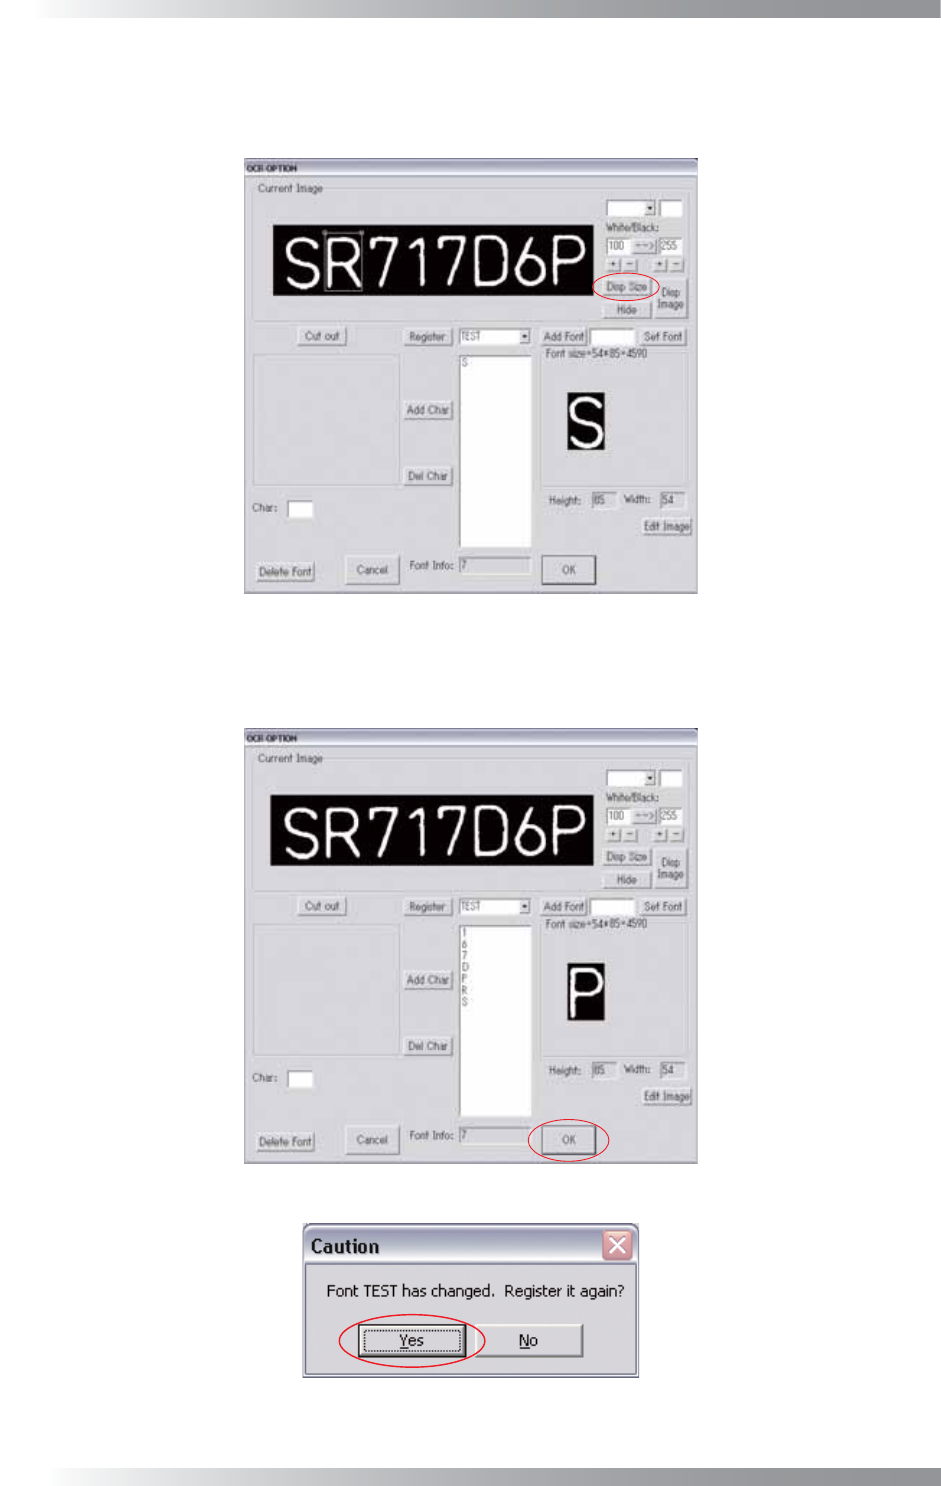
Step11: Press Disp Size, the window will be displayed again, and it to surround the second character.
Register the second character as follows Step9 and Step10. After the second character,
repeat the same procedure to register all characters.
Figure 2-8 OCR_Pro 7
Step12: All characters are registered. Press OK.
The dialog shown in Figure 2-10 appears. Press Yes.
Figure 2-9 OCR_Pro 8
Figure 2-10 OCR_Pro 9