Programming_mail.pdf - 第62页
II- 18 Programming Manual Part II Inspection Data Step44: The dialog shown in Figure 1-30 appears. Select an appropriate library for the component. Double-click the library to edit the inspection data. In case of making …
II-17
Programming Manual
Part II Inspection Data
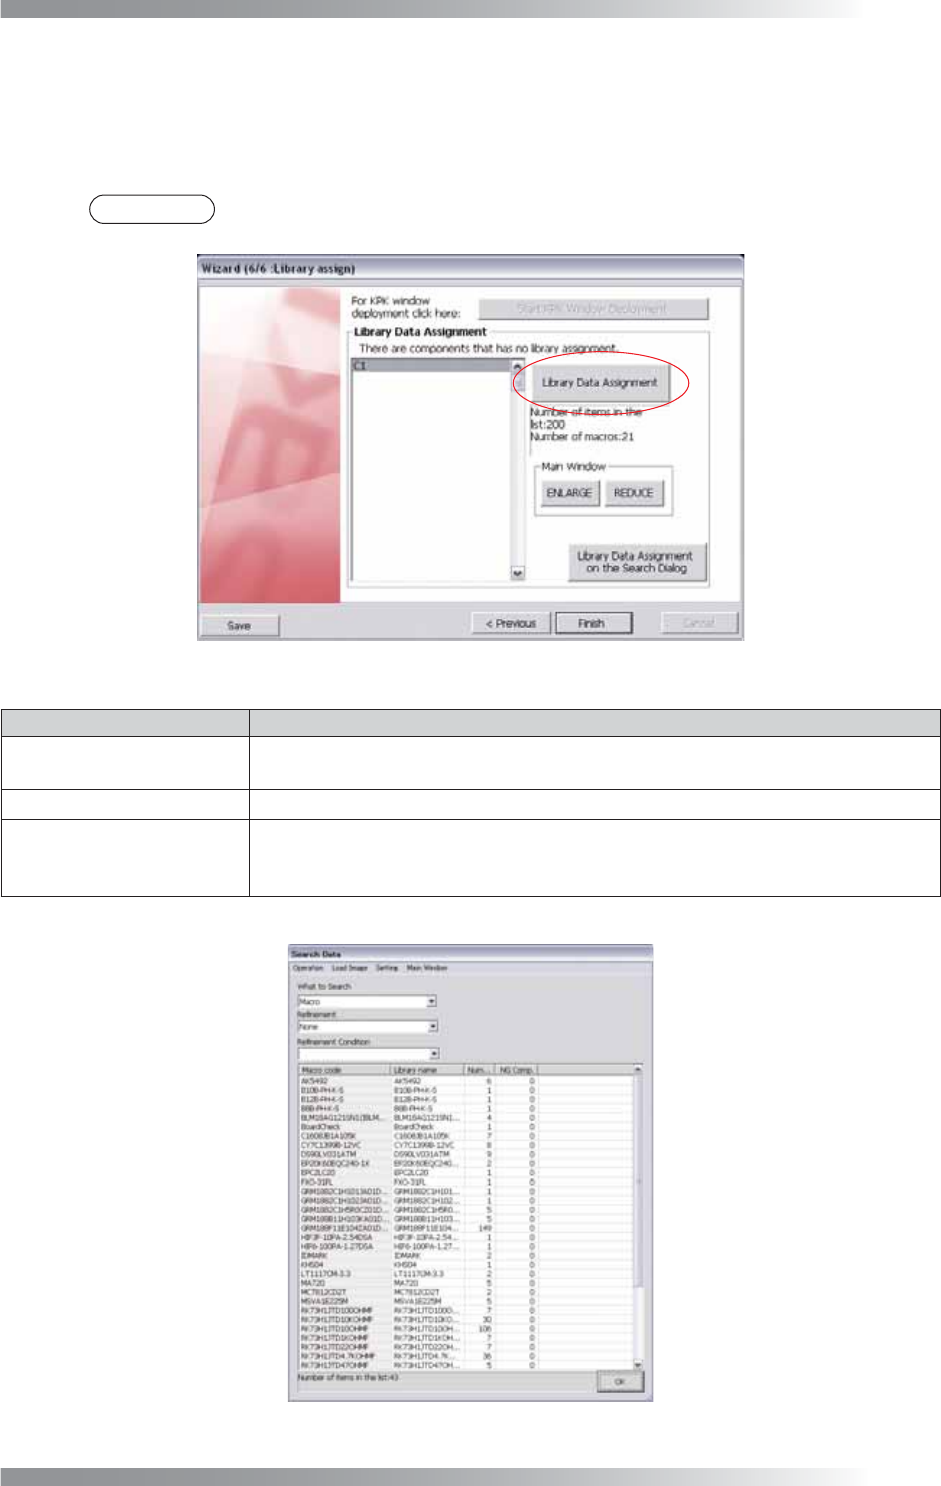
Step43: Assign a library to each component data. A library has information of inspection data. The time to
make the inspection data can be reduced by sharing the common library among the same
component type. The components assigned no libraries are displayed in the list-box. Select a
component and press Library Data Assignment.
NOTE
If there is no library which corresponds to the component, the new library should be made.
Refer to Part II 1.3 Auto Deployment of Inspection Data to make the inspection data easily.
Figure 1-28 Wizard 6
Item Description
Start KPK Window
Deployment
Press
Start KPK Window Deployment
to make a KPK inspection data.
For the detailed information of KPK, refer to
Part V 1 KPK
.
ENLARGE / REDUCE
Press
ENLARGE
or
REDUCE
to change magnifi cation percentage of an image.
Library Data Assignment
on the Search Dialog
The
Search Data
dialog appears. Press
Library Data Assignment on the Search
Dialog
and close the wizard. The dialog shown in Figure 1-29 appears.
In this case, assign a library in
Search Data
dialog.
Table 1-11 Other Items
Figure 1-29 Search Data
II-18
Programming Manual
Part II Inspection Data
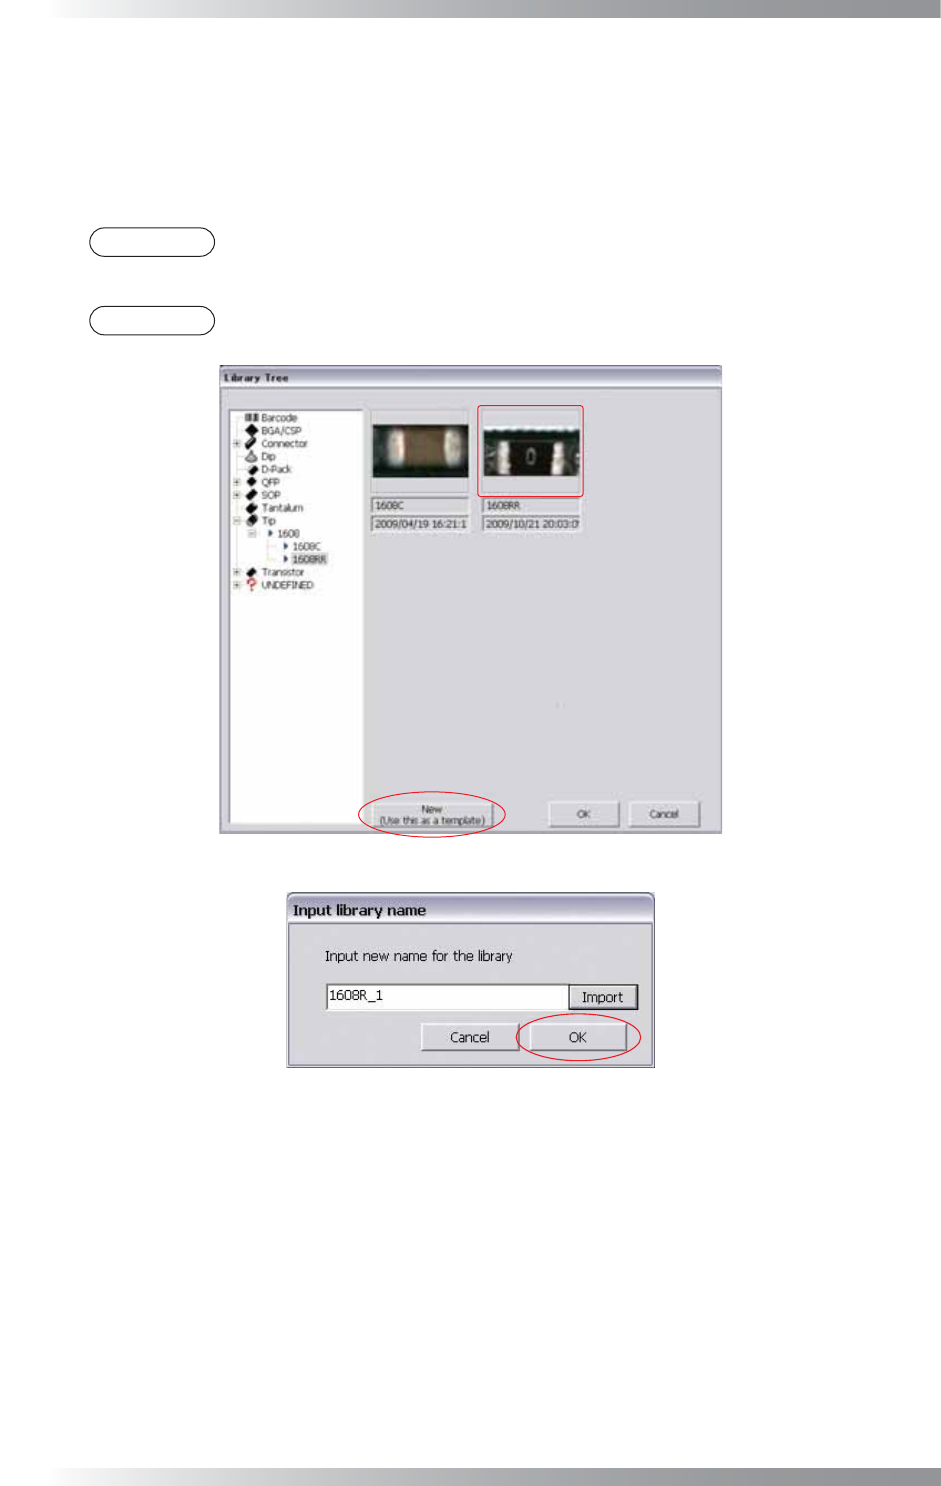
Step44: The dialog shown in Figure 1-30 appears. Select an appropriate library for the component.
Double-click the library to edit the inspection data. In case of making a new library, select an
existing library that can be a base of new library. After select the base library, press New(Use this
as a template). The base library is registered as template library. The dialog shown in Figure 1-31
appears. Enter the library name and press OK.
NOTE
In case of making a new library, select a library which can be applied to a lot of similar
components and set the library as a template.
NOTE
Press Import in Figure 1-31. A component name and macro name are displayed.
Figure 1-30 Assign Library
Figure 1-31 Input Library Name
II-19
Programming Manual
Part II Inspection Data
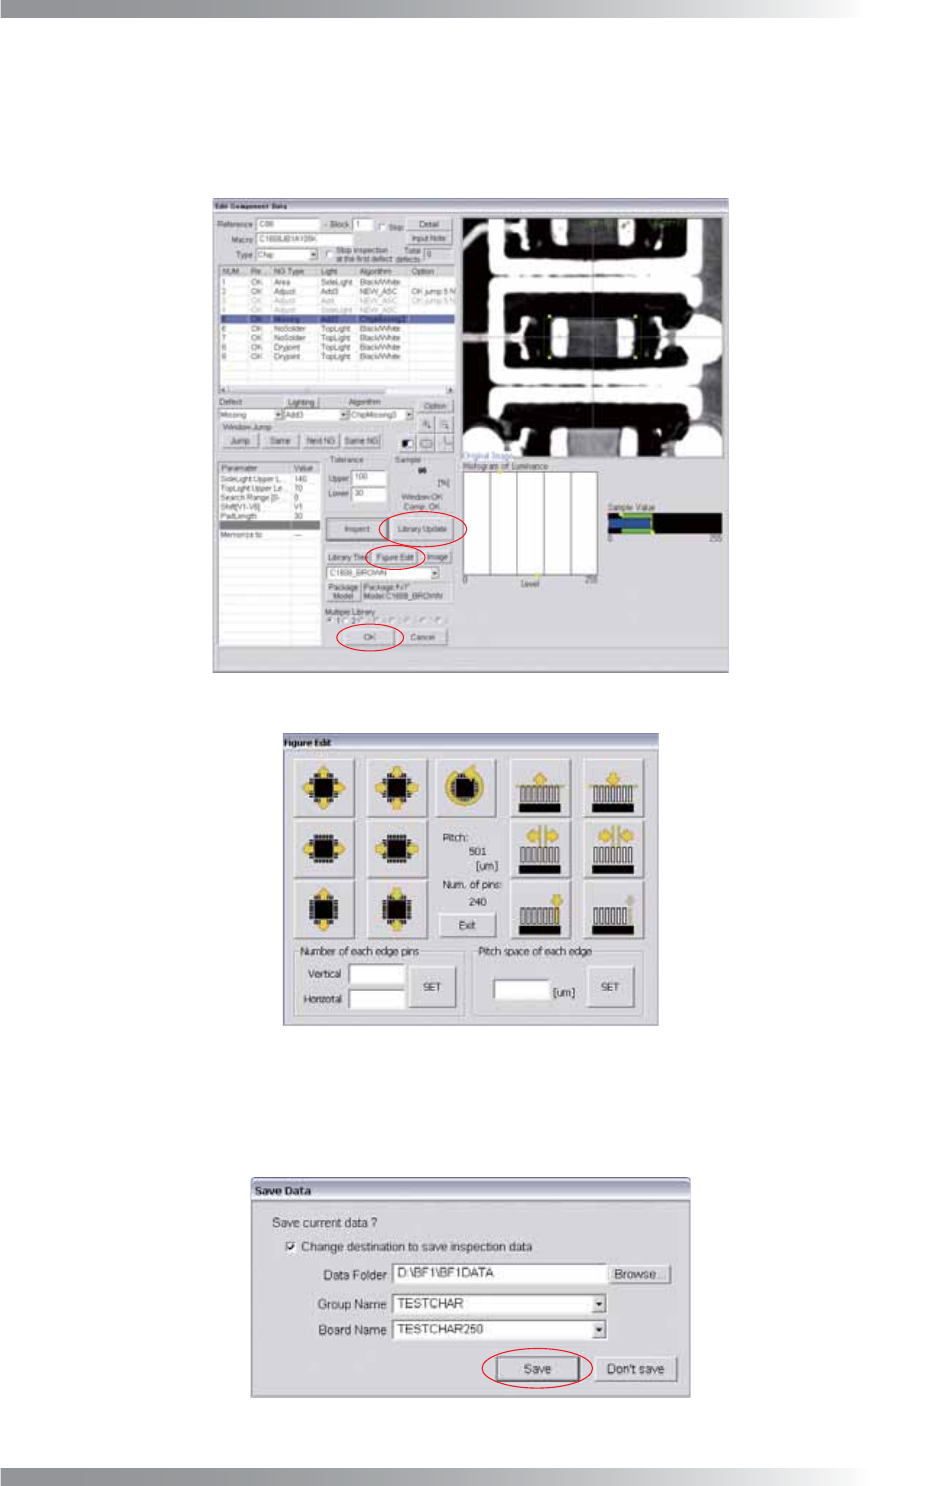
Step45: The Edit Component Data dialog of a template library is appeared. Press Figure Edit in the lower
side of the dialog. The dialog shown in Figure 1-33 appears. In the dialog, a component can be
zoomed in/out, expanded/shrank, or rotated in 90°. A number, clearance, and length of an IC lead
can also be adjusted. After all settings are completed, press Update and OK.
Figure 1-32 Edit Component Data Dialog
Figure 1-33 Figure Edit
Step46: After libraries are assigned to all components, press Finish in Figure 1-28. The dialog shown in
Figure 1-34 appears. Press Save. If necessary, check Change destination to save inspection
data, and specify the directory to save.
Figure 1-34 Save Data