Programming_mail.pdf - 第177页
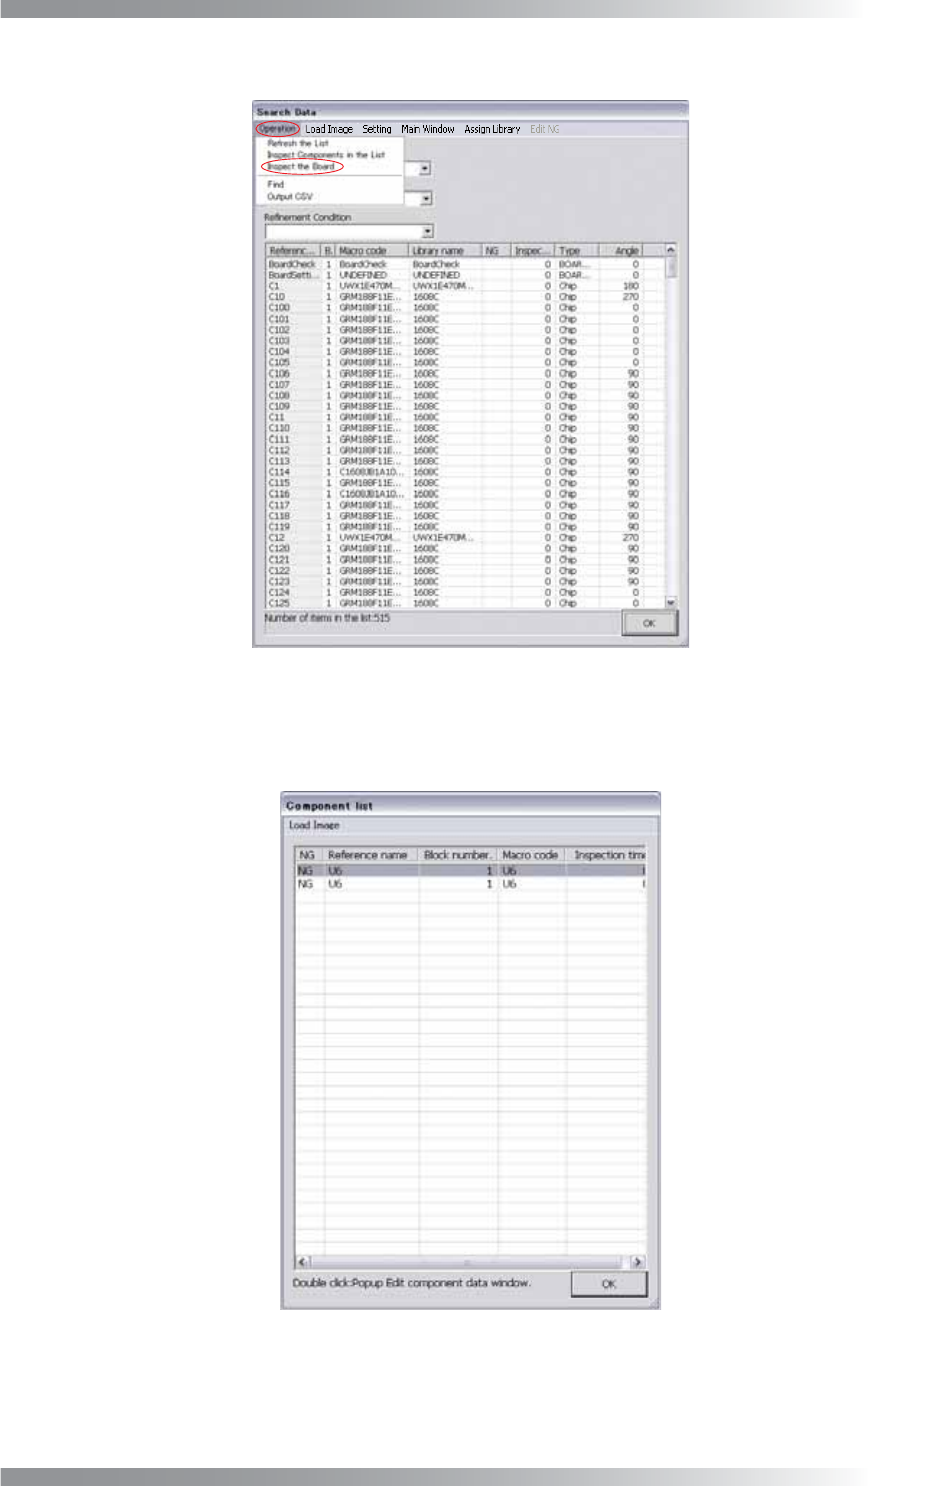
IV - 13 Programming Manual Part IV Option Setting Step2: Select Operation > Inspect the Board from the menu-bar to start the inspection. Figure 2-3 Inspect the Board Step3: Right-click the library and select Edit or d…
IV-12
Programming Manual
Part IV Option Setting
Item Description
Behavior when Double Clicked
Select an action taken when double-clicked.
Commonly-used Settings Displays frequently used functions in the search list.
Histories
Displays setting histories.
Table 2-3 Setting
Item Description
Select Component of the Main Window
Searches the component selected on the screen from the search list.
Point the Component Displays the component selected in the search list.
Whole Map Displays the PCB in the full-screen mode.
Enlarged Map Displays the PCB in the zoom mode.
Enlarge
Changes the zoom level.
Reduce
Table 2-4 Main Window
Item Description
Assign Library Assigns a library to the selected component.
Table 2-5 Assign Library
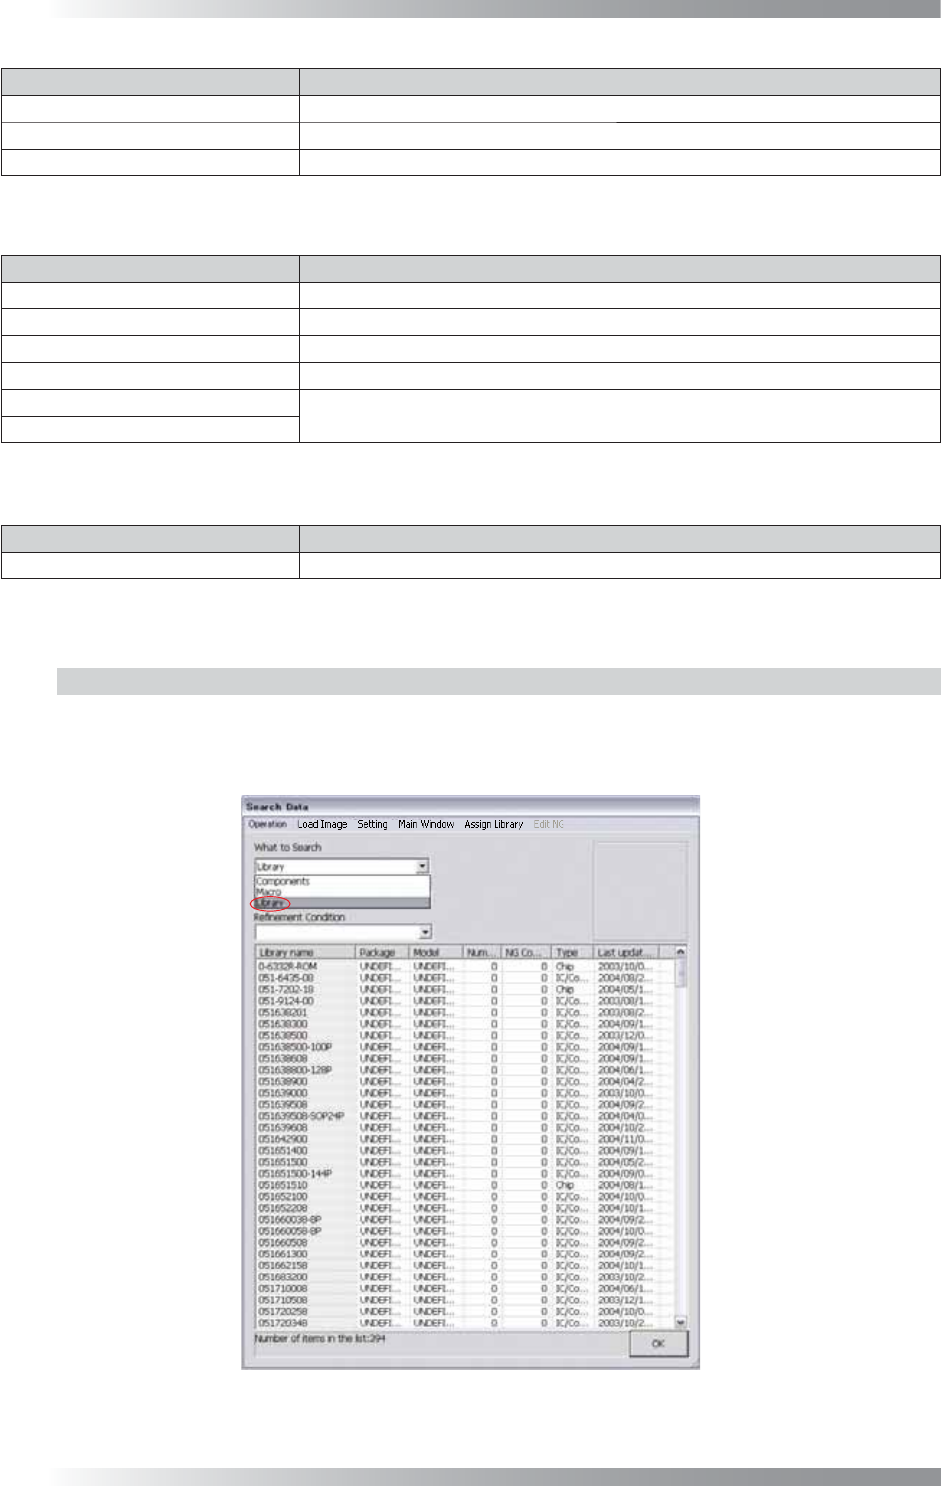
2.1.2 Inspection Data Debug
Inspection data can be debugged in the search screen.
Step1: Select Library from the What to Search drop-down list.
Figure 2-2 Library
IV-13
Programming Manual
Part IV Option Setting
Step2: Select Operation > Inspect the Board from the menu-bar to start the inspection.
Figure 2-3 Inspect the Board
Step3: Right-click the library and select Edit or double-click the library. The dialog shown in Figure 2-4
appears. Double-click the component to be edited. The Edit component data window appears.
Figure 2-4 Component list
Step4: Press Library Update after debugging the inspection data in the Edit component data
window to update the inspection data.
IV-14
Programming Manual
Part IV Option Setting
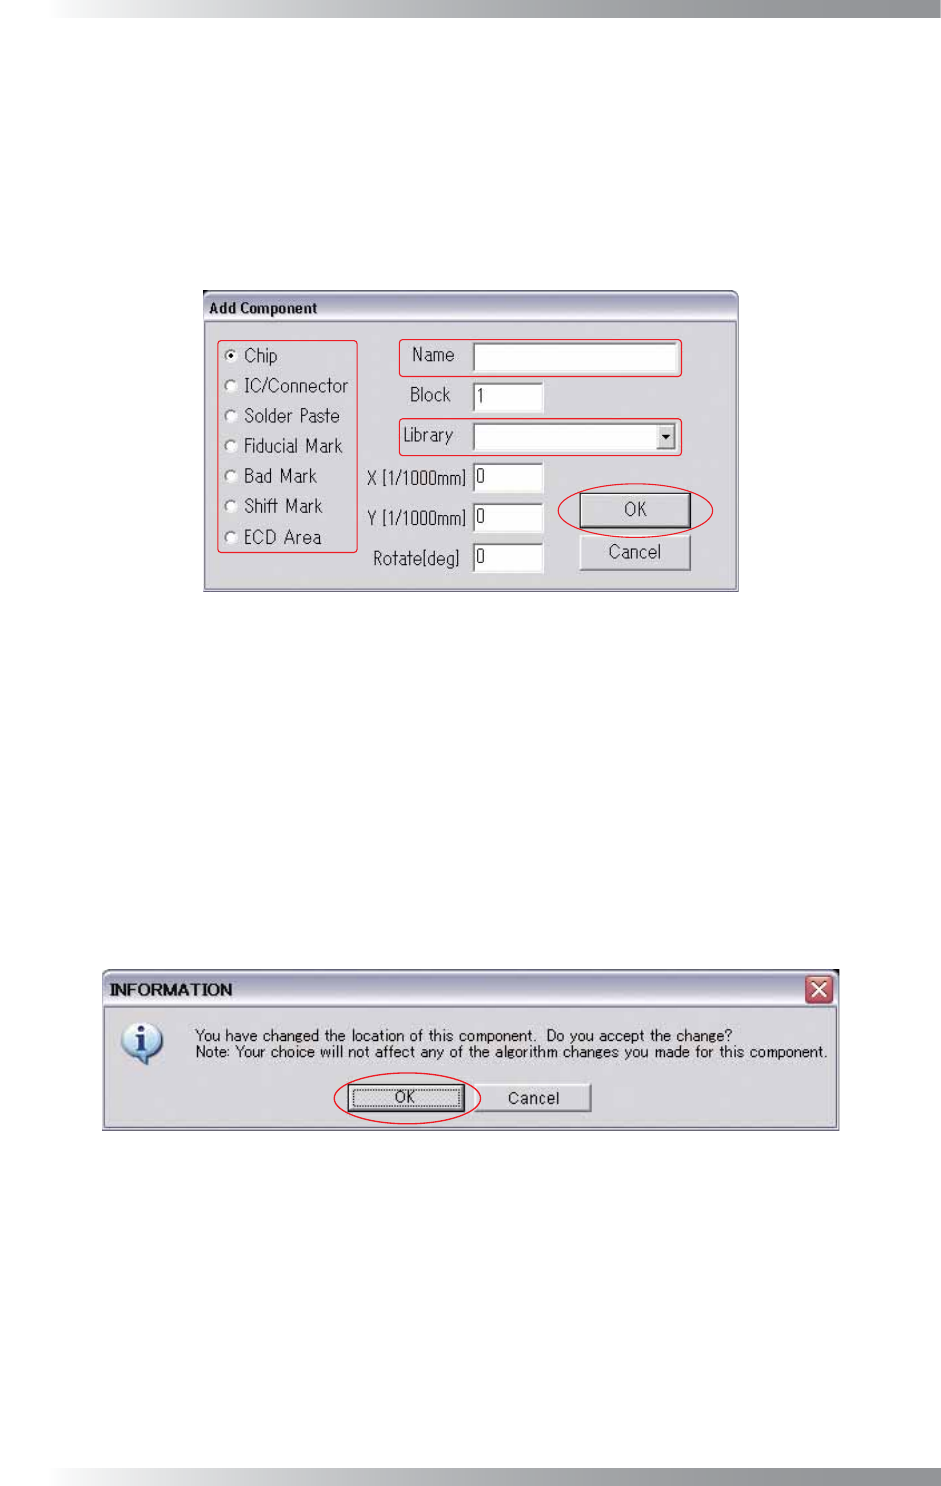
2.2 Add
Inspection data can be added freely even if there is no CAD data.
Step1: Left-click the point to add an inspection data. An inspection data will be added on the intersection
of the white cross line.
Step2: Select Edit > Add from the menu-bar. The dialog shown in Figure 2-5 appears.
Figure 2-5 Add
Step3: Make sure of the component type.
Step4: Enter the component name into the Name fi eld.
Step5: Select the library from the Library drop-down list.
Step6: Press OK. The Edit component data window will appear.
Step7: Press OK after making the inspection data in the Edit component data window. The dialog shown
in Figure 2-6 appears. Press OK.
Figure 2-6 Change the Location of This Component