sh030051g.pdf - 第74页
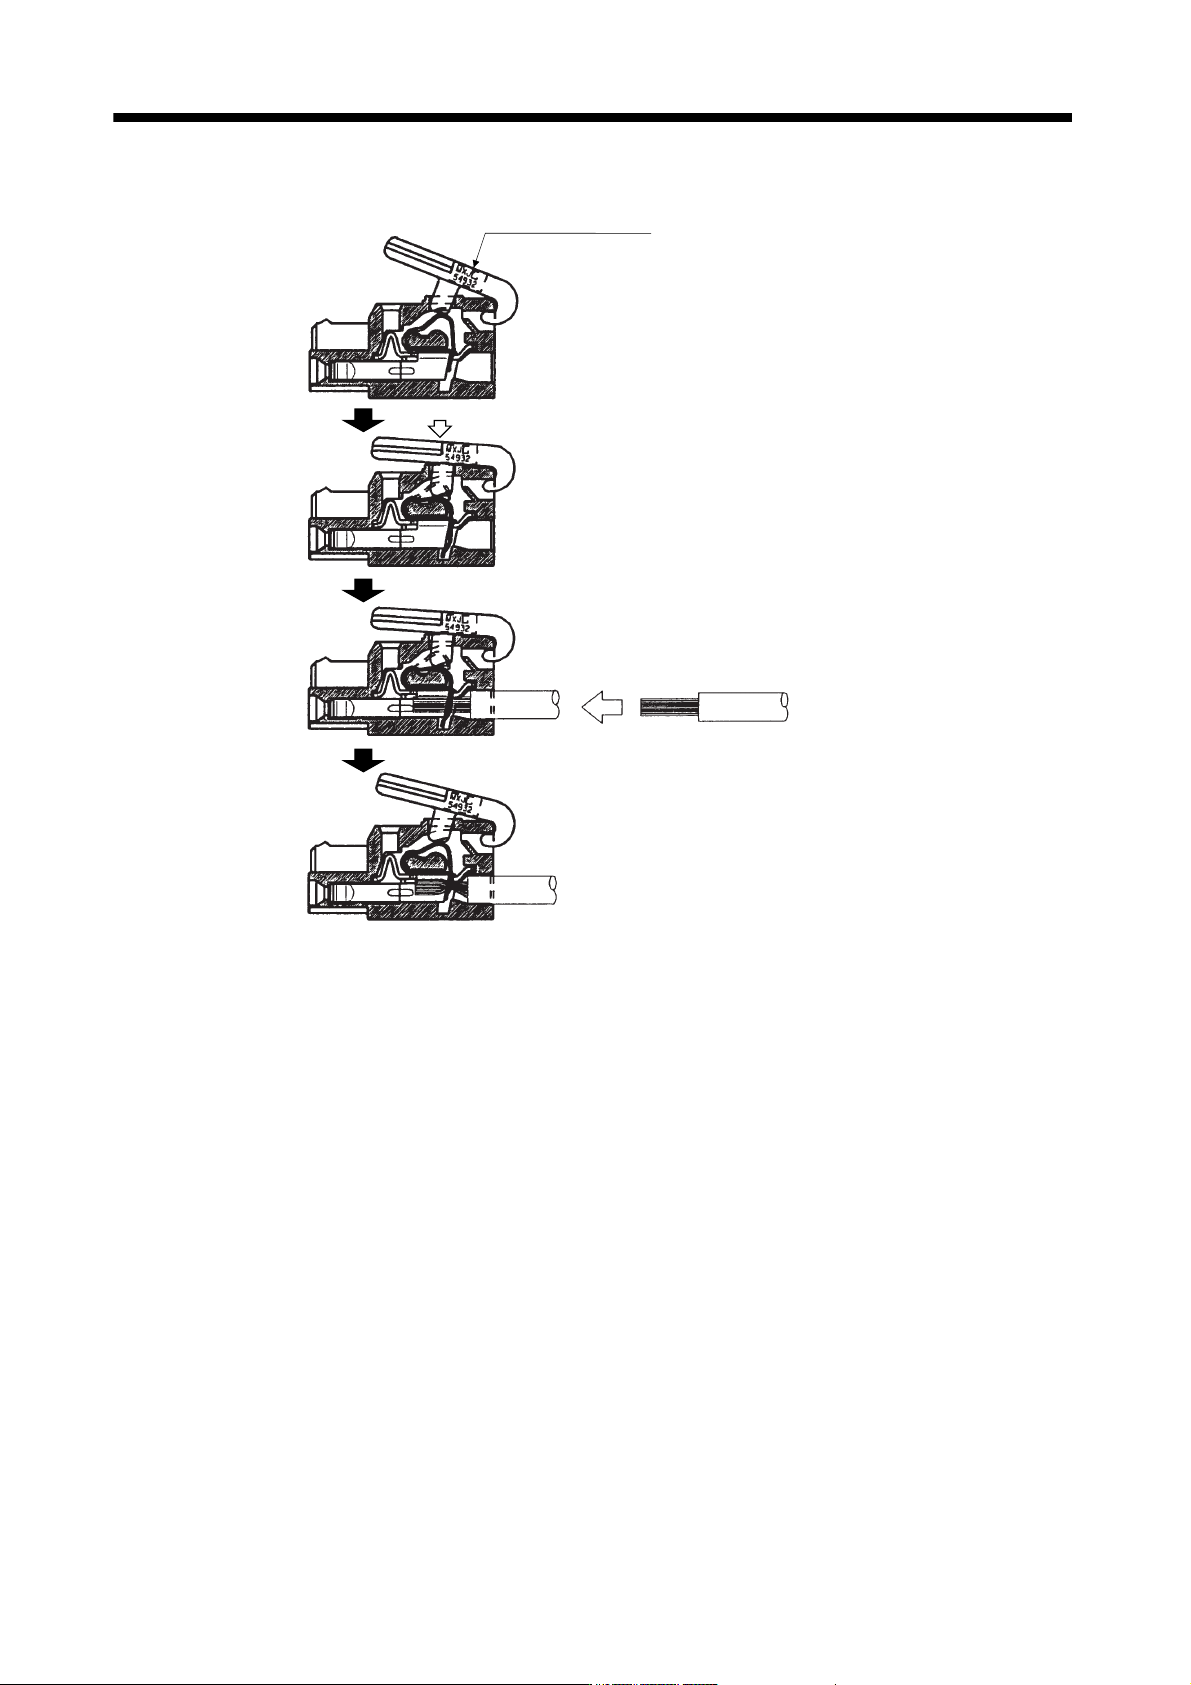
3 - 19 3. SIGNALS AND WI RING 2) Cable connection procedure 1) Attach the cable connection lever to the housing. (Detachable) 2) Push the cable connection lever in the direction of arrow. 3) Hold down the cable c onnecti…
3 - 18
3. SIGNALS AND WIRING
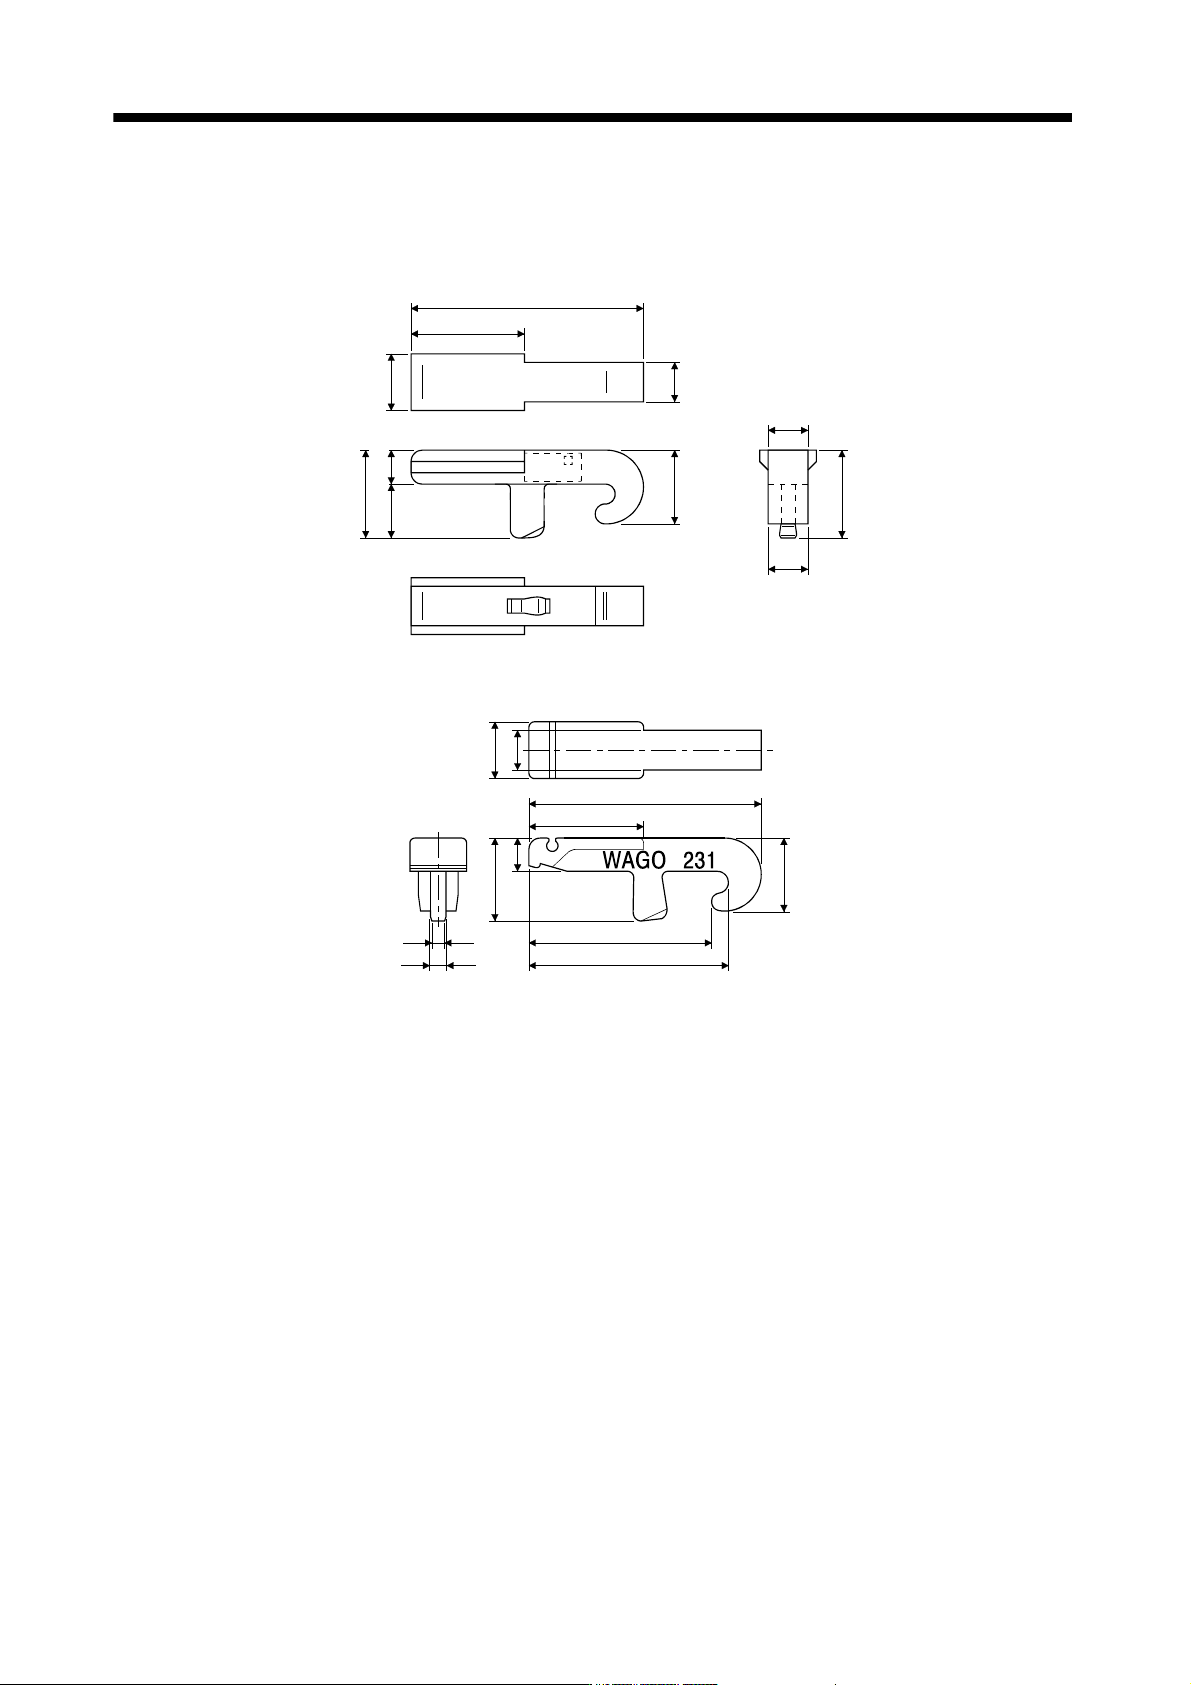
(a) When using the supplied cable connection lever
1) The servo amplifier is packed with the cable connection lever.
a) 54932-0000 (Molex)
[Unit: mm]
MXJ
54932
7.7
4.7
Approx. 3 4.9
10
20.6
3.46.5
Approx. 4.9
Approx. 7.7
Approx.3.4
b) 231-131 (WAGO)
[Unit: mm]
20.3
10
16
7.6
3
6.5
3.4
4.9
17.5
1.5
1.3
3 - 19
3. SIGNALS AND WIRING
2) Cable connection procedure
1) Attach the cable connection lever to the housing.
(Detachable)
2) Push the cable connection lever in the direction
of arrow.
3) Hold down the cable connection lever and insert
the cable in the direction of arrow.
4) Release the cable connection lever.
Cable connection lever
3 - 20
3. SIGNALS AND WIRING
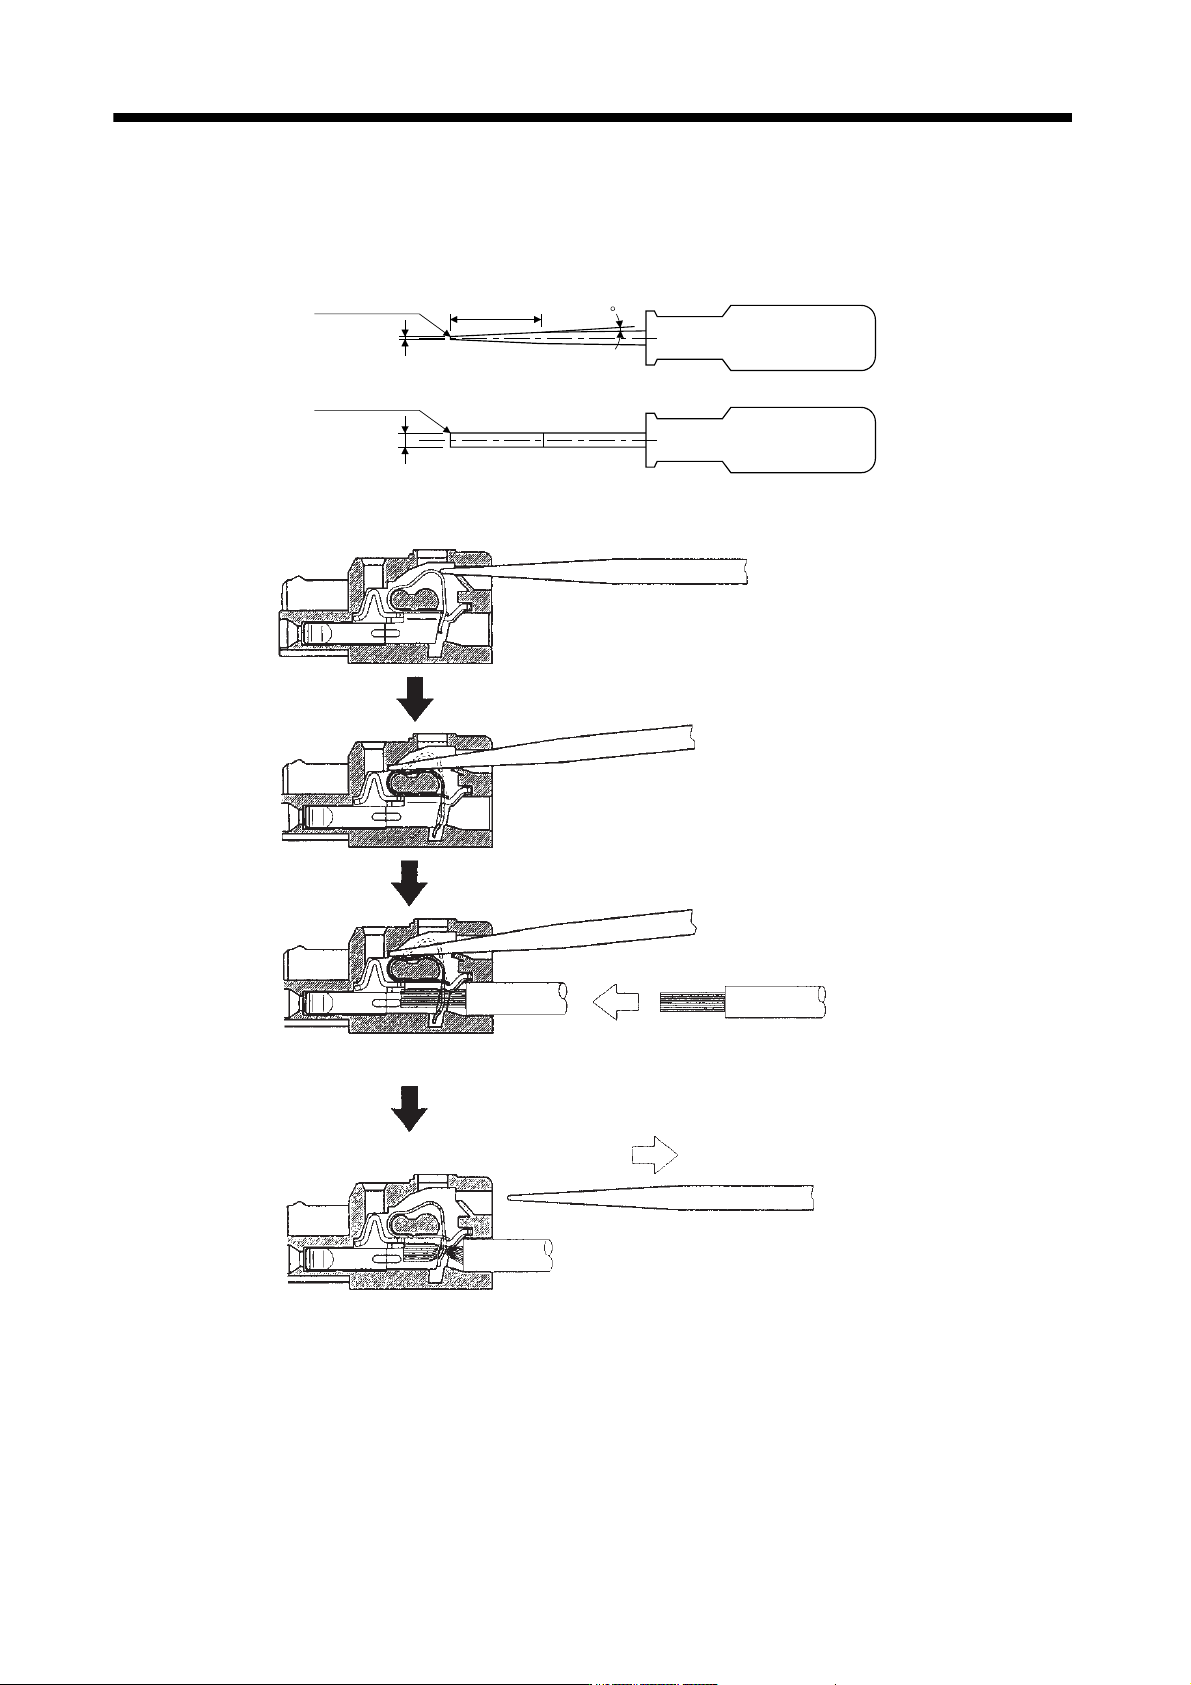
(b) Inserting the cable into the connector
1) Applicable flat-blade screwdriver dimensions
Always use the screwdriver shown here to do the work.
[Unit: mm]
3
0.6
Approx. R0.3
Approx. 22
3 to 3.5
Approx. R0.3
2) When using the flat-blade screwdriver - part 1
1) Insert the screwdriver into the square hole.
Insert it along the top of the square hole to insert it smoothly.
2) If inserted properly, the screwdriver is held.
3) With the screwdriver held, insert the cable in the direction
of arrow. (Insert the cable as far as it will go.)
4) Releasing the screwdriver connects the cable.