SM482PLUS_Admin(Eng_Ver2.8).pdf - 第161页
6-43 Board Definition 6.6.2. Barc ode Position Figure6.9 Order of ‘Barcode Position’ Dialog Box Execution

6-42
Multi-Functional Placer SM482(L) PLUS Administrator’s Guide
Memo When using LTS function and 1D barcode or using no barcode (only
using the IT functions), set as follows.
When using LTS function(When using no 1D barcode)
In the [Option] item of the “C:\SmartSM\bin\SmartSM.ini” file,
set the IQFEEDER to 0 and the LotTracking to 1.
When using 1D barcode and LTS function
In the [Option] item of the “C:\SmartSM\bin\SmartSM.ini” file,
set the QFEEDER to 1 and the LotTracking to 1.
When using no barcode (only using the IT functions)
In the [Option] item of the “C:\SmartSM\bin\SmartSM.ini” file,
set the IQFEEDER to 1 and the LotTracking to 0.
Run “SmartSM.exe” after completing modifications to the
configuration file.
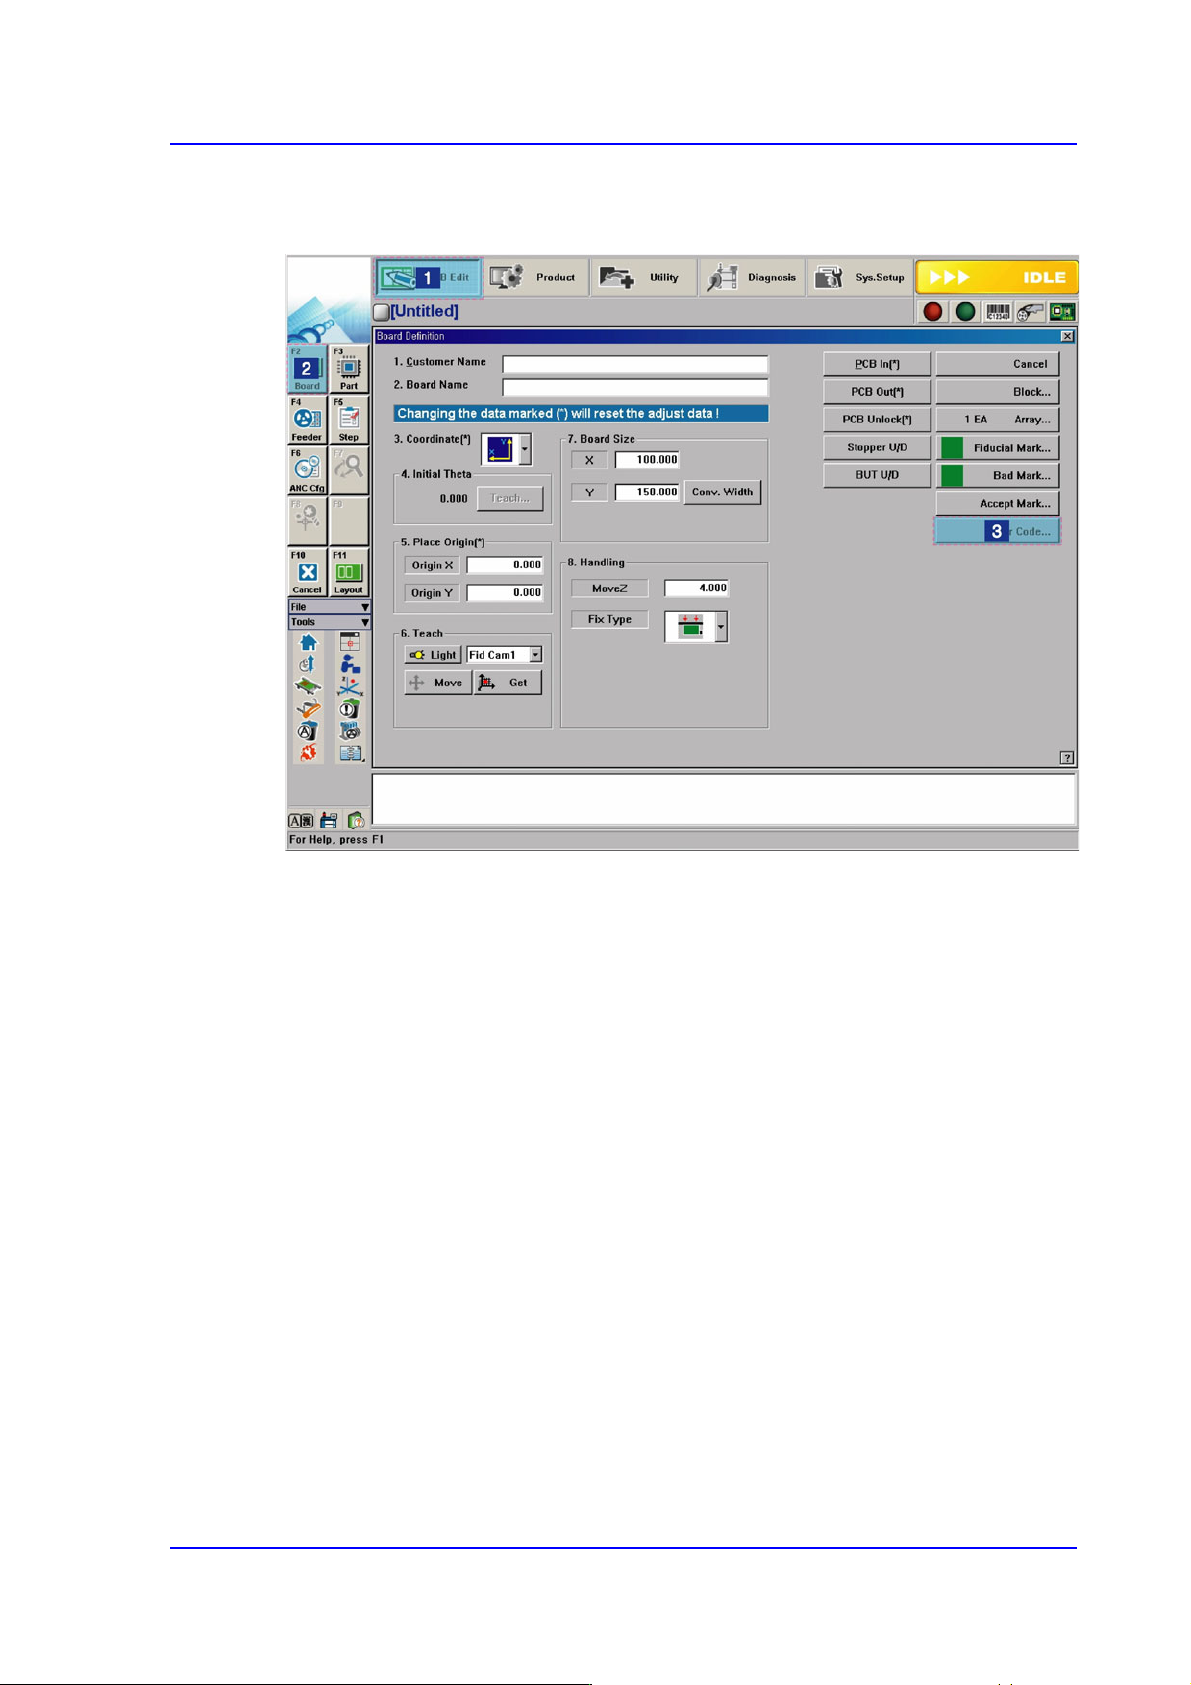
6-43
Board Definition
6.6.2. Barcode Position
Figure6.9 Order of ‘Barcode Position’ Dialog Box Execution
6-44
Multi-Functional Placer SM482(L) PLUS Administrator’s Guide
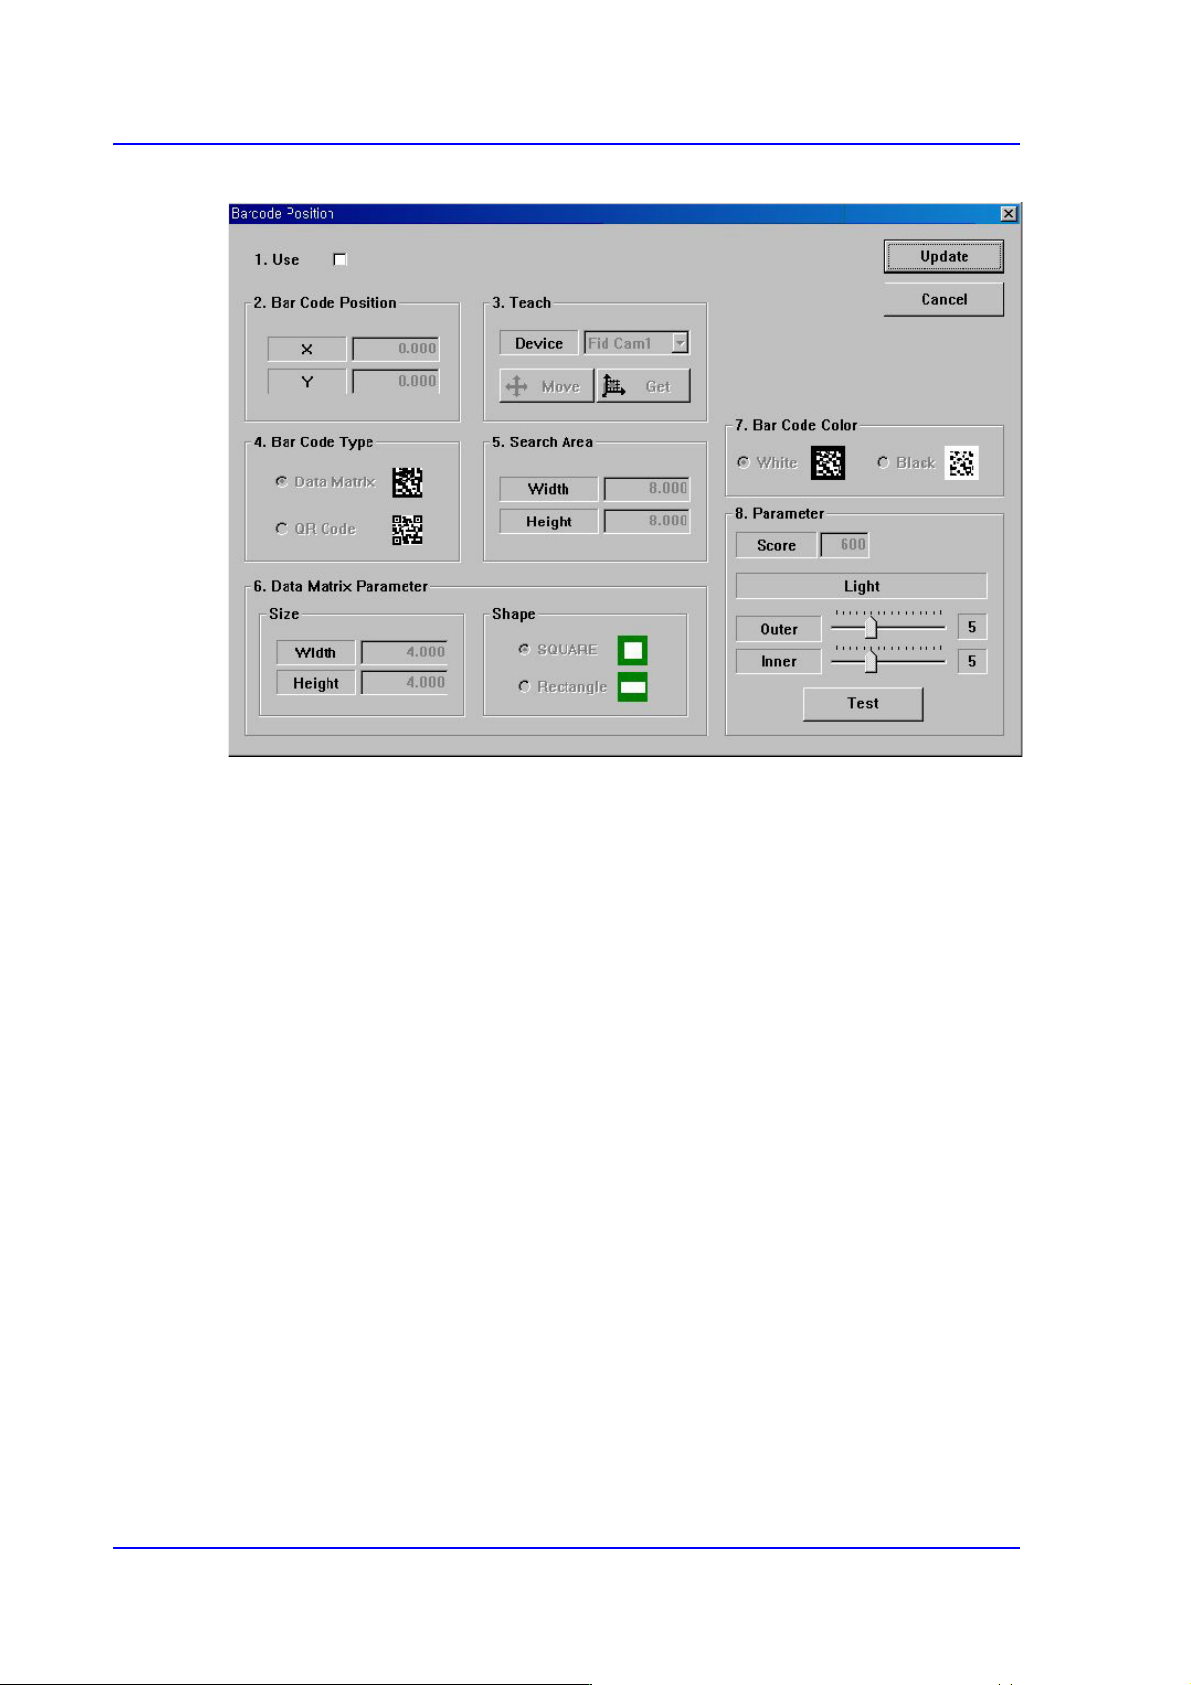
Figure6.10 Barcode Position’ Dialog Box
<1.Use> check box
Check the 2D barcode function to use it.
<2. Bar Code Position> group
Indicates the position of the 2D barcode.
<Board> Area
Teaches the 2D barcode position attached to a board using the fiducial camera
selected from the <3. Teach> area or performs setup for 2D barcode attachment to
a board.
<X/Y> edit box
Sets the X/Y coordinate of a 2D barcode.
<Z> edit box
When attaching a 2D barcode to a board, sets the Z-axis coordinate in order to
press and attach a 2D barcode to a board with a head spindle.
<Inspection> check box
Selecting this check box will recognize the 2D barcode attached to a board.
<Placing> check box
Selecting this check box will attach a 2D barcode to a board using the
machine.
<Part> caption box
Enabled when the <Placing> check box is selected. Displays the part supplied