SM482PLUS_Admin(Eng_Ver2.8).pdf - 第298页
9-10 Multi-Functional Placer SM482( L) PLUS Administrator’s Guide Converts externally created ASCII data into step data for this machine. If the <Import> button is clicked, the proce ss that converts the correspond…

9-9
Step Programming
<Clear Cycle> button
Initialize the placement cycle.
<Refresh Feeder> button
When the feeder setup has been changed in the “feeder” dialog box, clicking this
button will allow the feeder changed in the “Step” dialog box to be set up again.
<Refresh Nozzle> button
When the nozzle arrangement on the ANC has been changed, clicking this button will
allow the nozzle changed in the “Step” dialog box to be set up again.
<Place Parts> button
This function is provided to perform testing in preparation for operation or to
compliment some placement points during operation. It is used to place parts at the
placement point selected from the <Step> dialog box.
The number of placement points available with this function is maximum 150 points.
The conditions for enabling this button are as follows;
Login with authority level higher than that of the programmer
Completed PCB file download
PCB is loaded at the placement station on the conveyor.
<Parts Placed> check box
Select this check box to have placement work skipped for the corresponding part when
placing a PCB later by check-marking the placement point of the part, for which
placement testing has been completed, on the <PL> column using the <Place Parts>
button.
<POP Steps Only> check box
Selects only the placement point of the POP part among all placement points in order
to indicate it in the dialog box. This function can be used for the machine in which a
flux unit is installed.
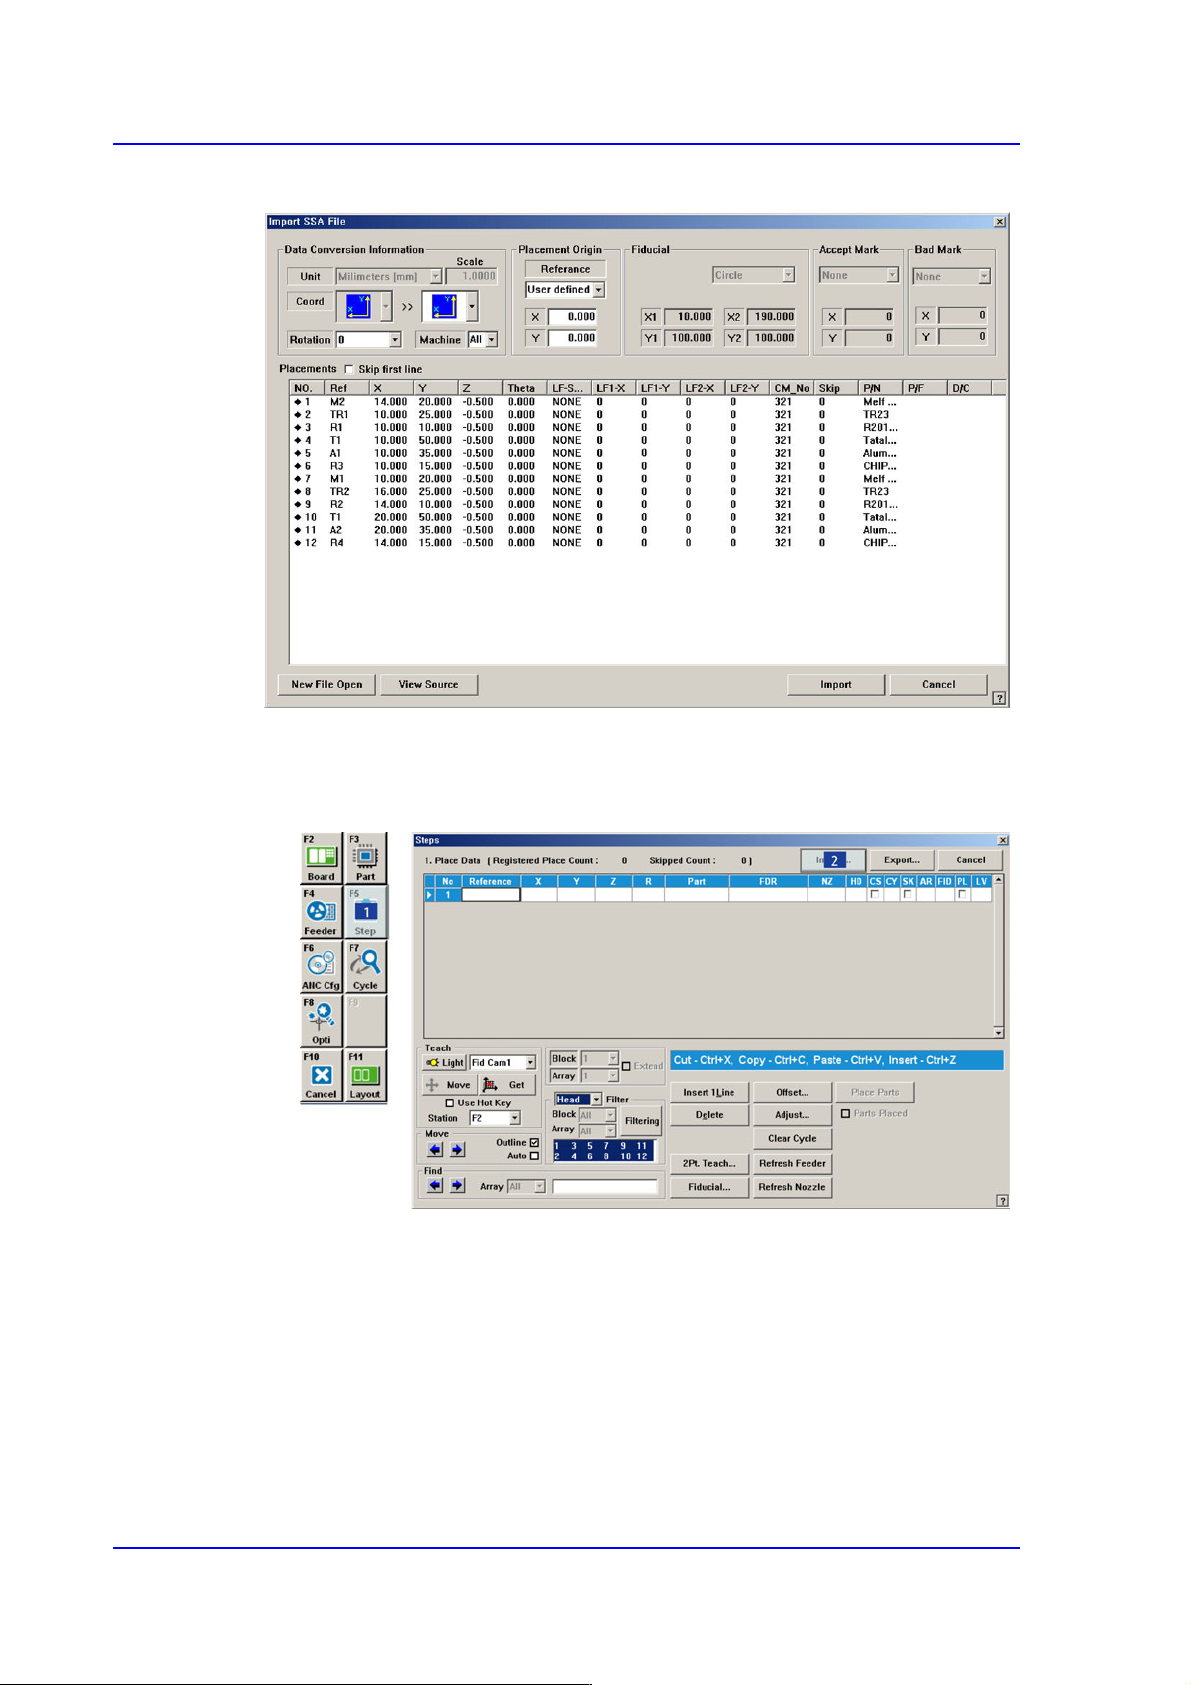
<Import…> button
9-10
Multi-Functional Placer SM482(L) PLUS Administrator’s Guide
Converts externally created ASCII data into step data for this machine.
If the <Import> button is clicked, the process that converts the corresponding data to
the step data is initialized.
Click the <Import> button in the <Steps> dialog box.
9-11
Step Programming
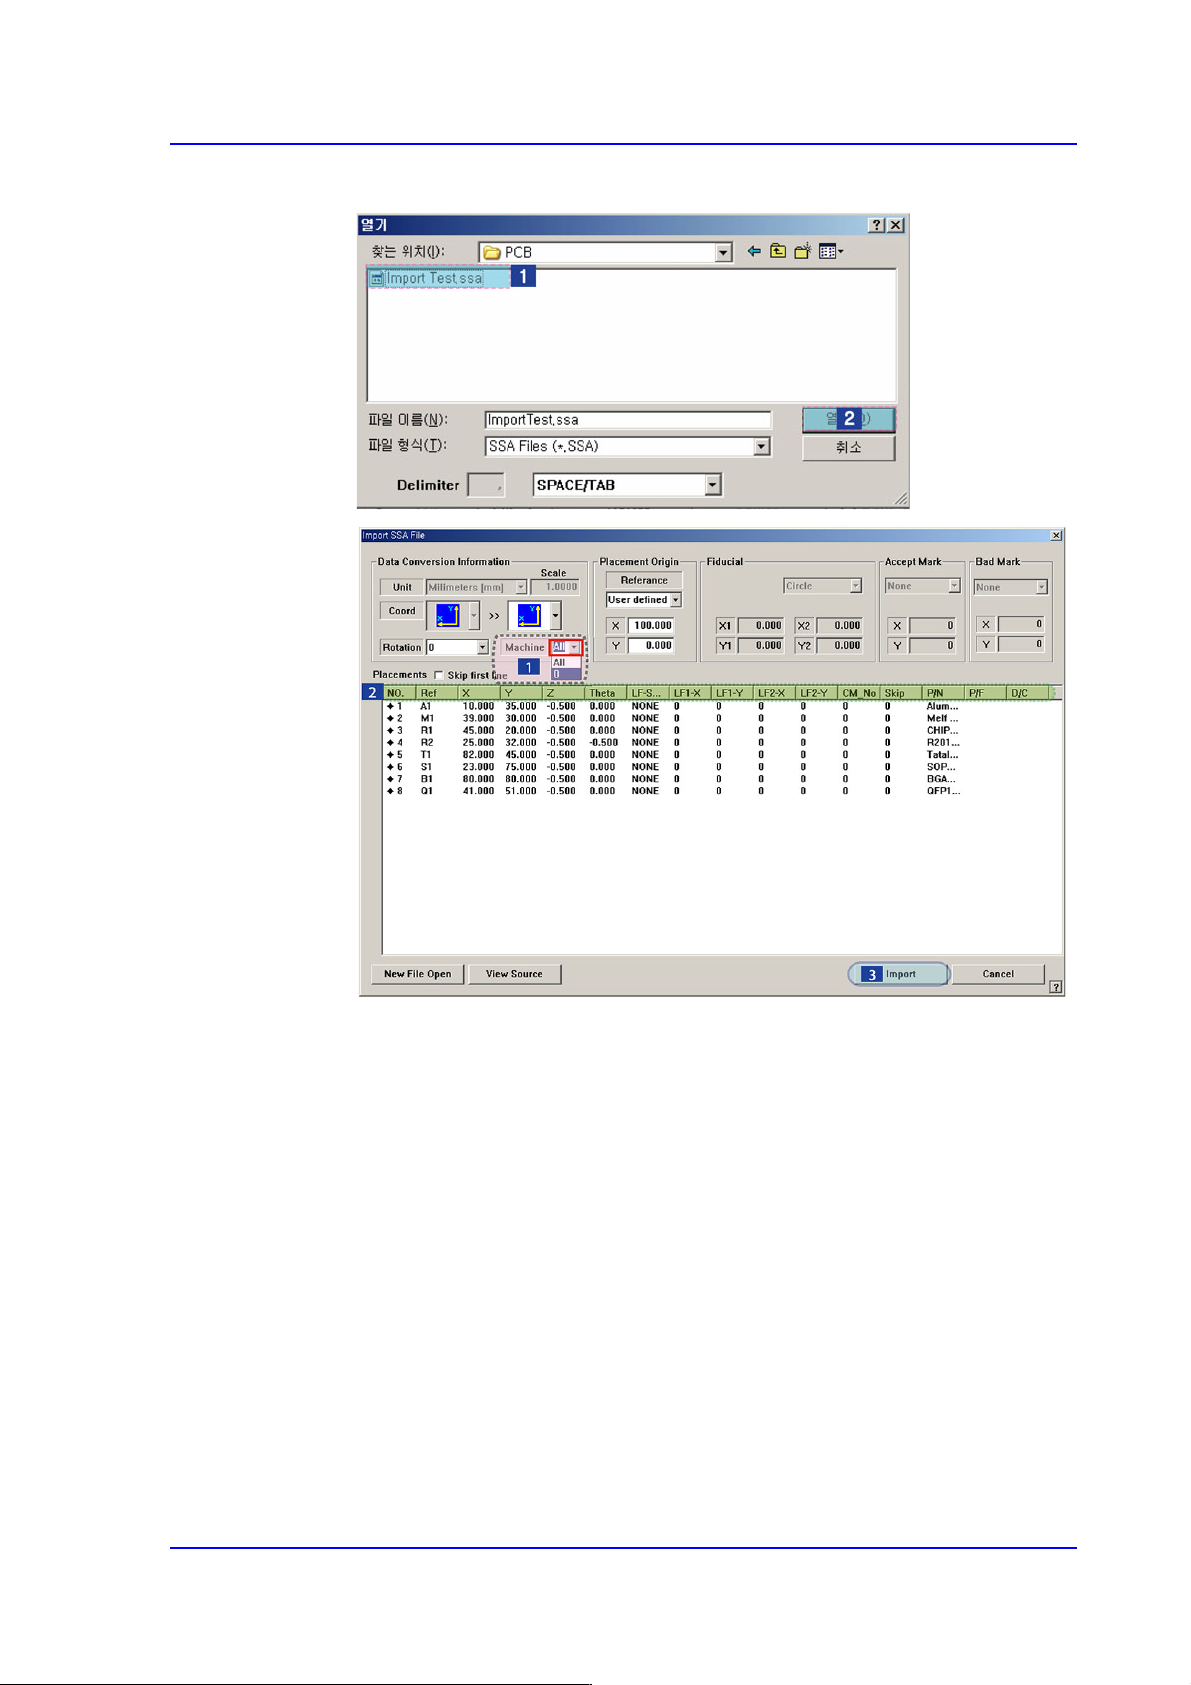
Locate and select the location and file name of the CAD file to be imported.
Select the machine to be operated using the imported SSA file.
Select the imported machine and confirm the name of the corresponding row of
placements. In the case of our standard format (SSA), the row value need not be
changed.
Executes Import.
When importing a file in a format other than our standard format, the
corresponding information is indicated in a comment column as follows. Place the
mouse point on the column whose name is to be changed and right click the mouse
to display the menu and select the corresponding name. At this time, when there is
no column name corresponding to the column to be imported, set the column
name in the comment column.