SM482PLUS_Admin(Eng_Ver2.8).pdf - 第282页
8-30 Multi-Functional Placer SM482( L) PLUS Administrator’s Guide (3) In order to teach the coordinates of each corners in the first pocket (1St-1, 1St-2), move the fiducial camera to the corresponding po sition, match t…
8-29
Feeder Setup
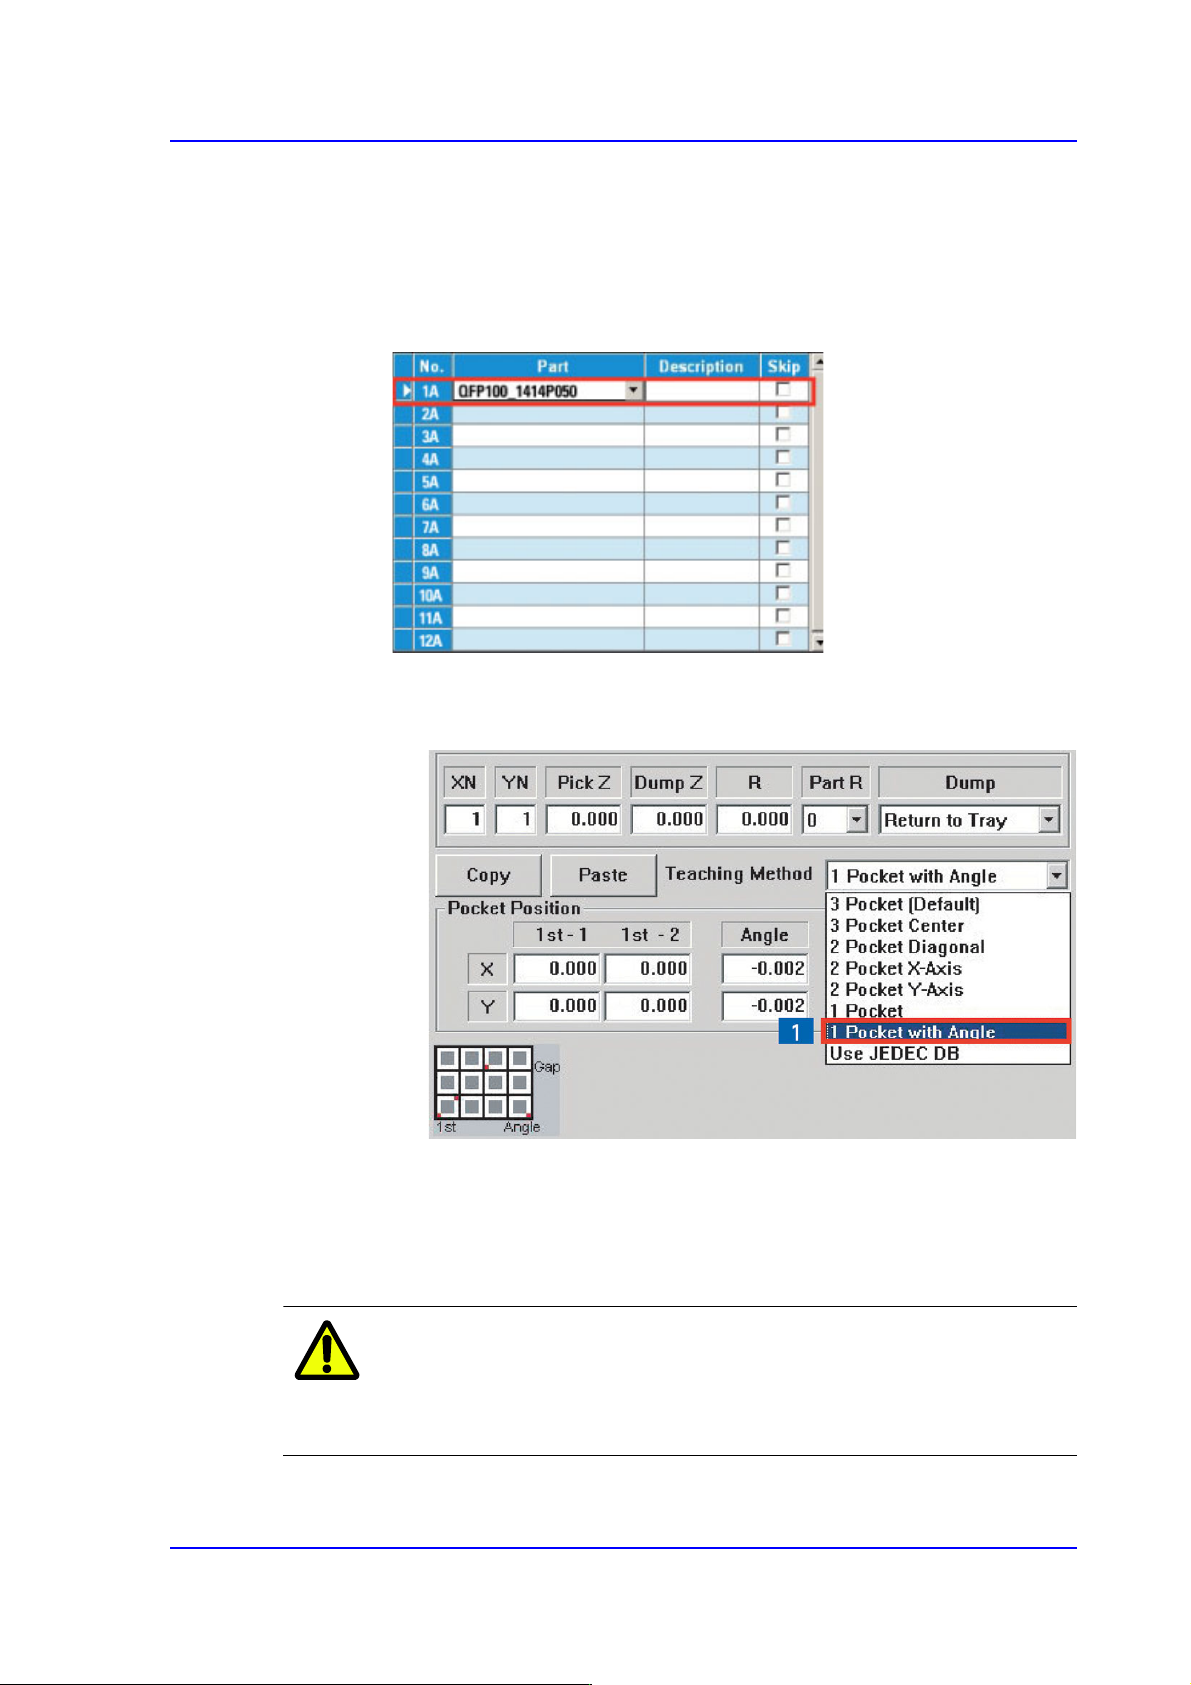
<1Pocket with Angle>
This is a teaching method that is useful when the the fiducial camera is movable to
a definite area of the tray and when the tray is installed on an angle, and not in
parallel with the X-axis of the tray. (When 2 Trays on a palette is applied)
1. Select the required tray feeder.
2. Perform pocket teaching in the following order.
(1) Select the [1 Pocket with Angle] in the scroll menu on the right.
(2) Enter the XN and YN values first to input the total number of pockets of
the tray.
XN: Total number of pockets in X direction
YN: Total number of pockets in Y direction
Caution Be sure to input the XN and YN values first before teaching
the coordinates of a pocket. If not, wrong data will be
inputted.
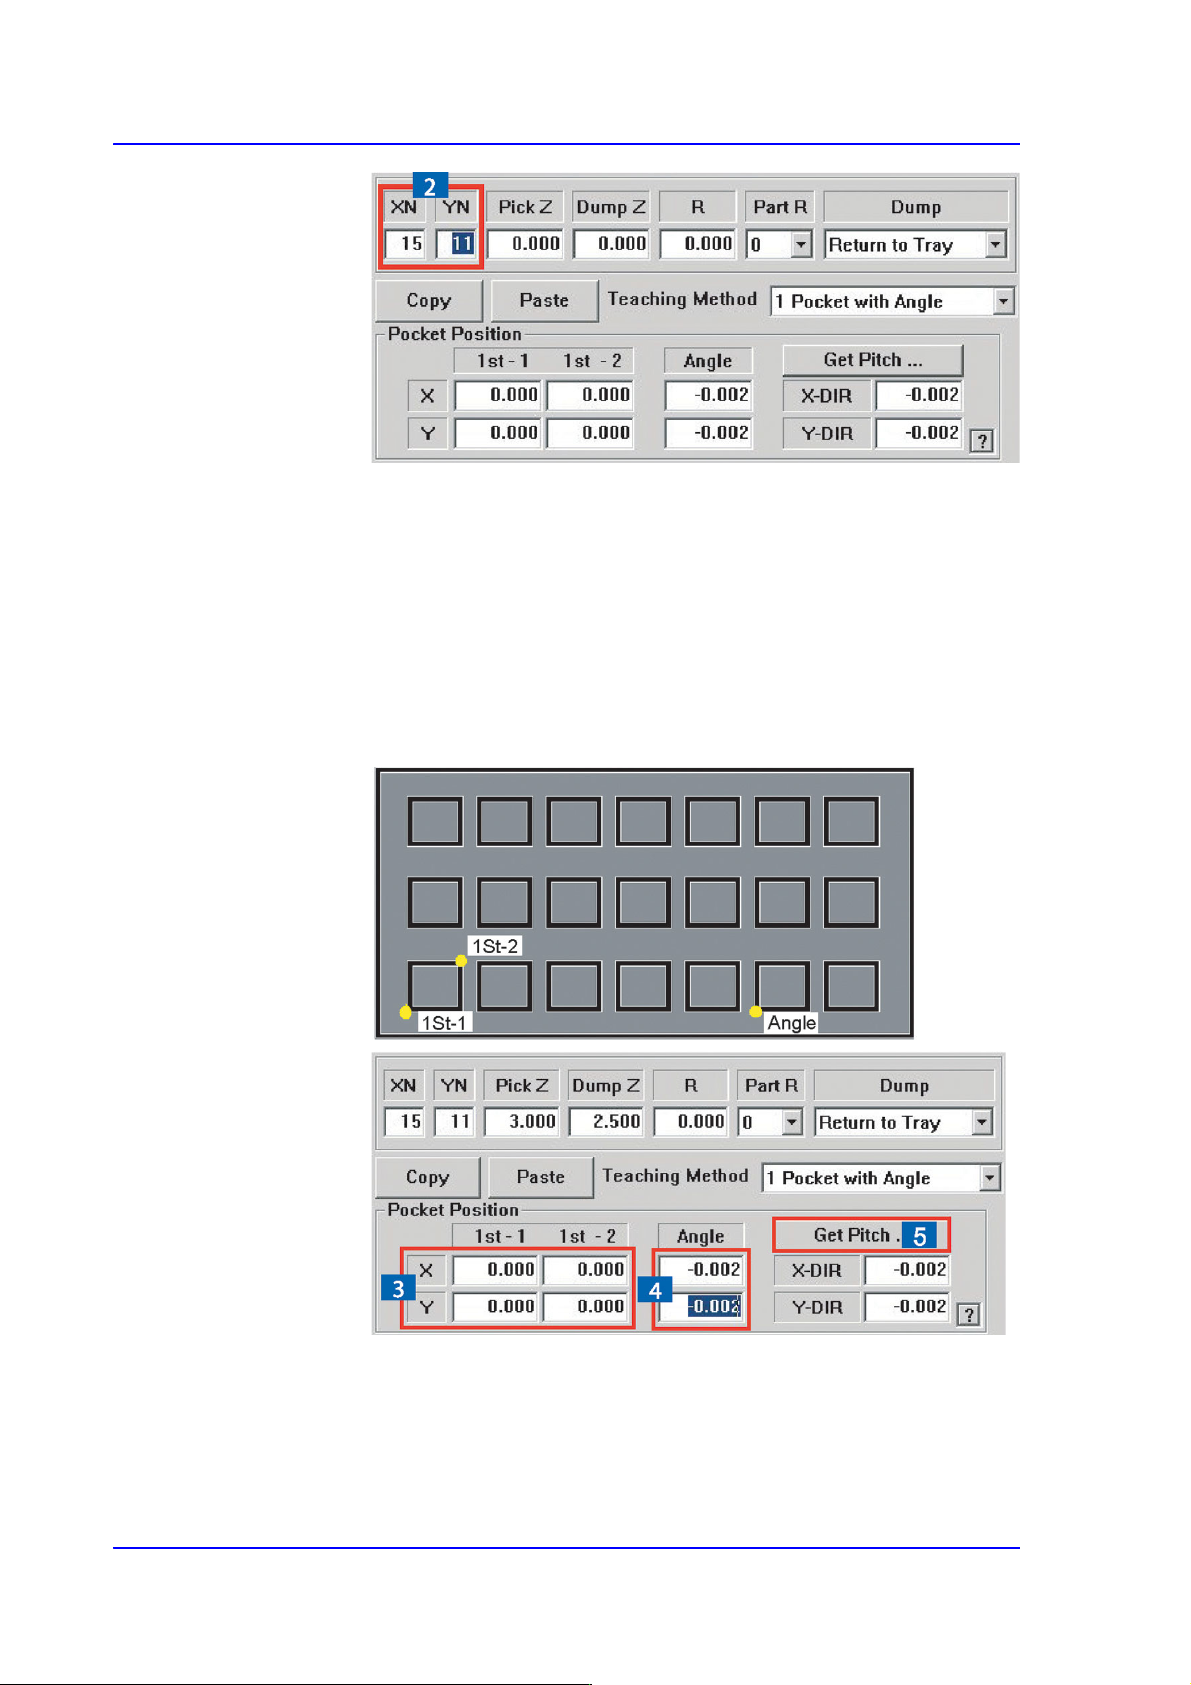
8-30
Multi-Functional Placer SM482(L) PLUS Administrator’s Guide
(3) In order to teach the coordinates of each corners in the first pocket (1St-1,
1St-2), move the fiducial camera to the corresponding position, match the
corresponding point to the center of the camera, and enter the coordinates
of the corresponding point by clicking the <Get> button.
(4) In order to obtain the accurate installation angle (slope) of the tray, move
the fiducial camera to the coordinates of the left lower corner of a pocket
in the first row, match the corresponding point to the center of the camera,
and enter the coordinates of the corresponding point by clicking the <Get>
button. [refer to the following figure]
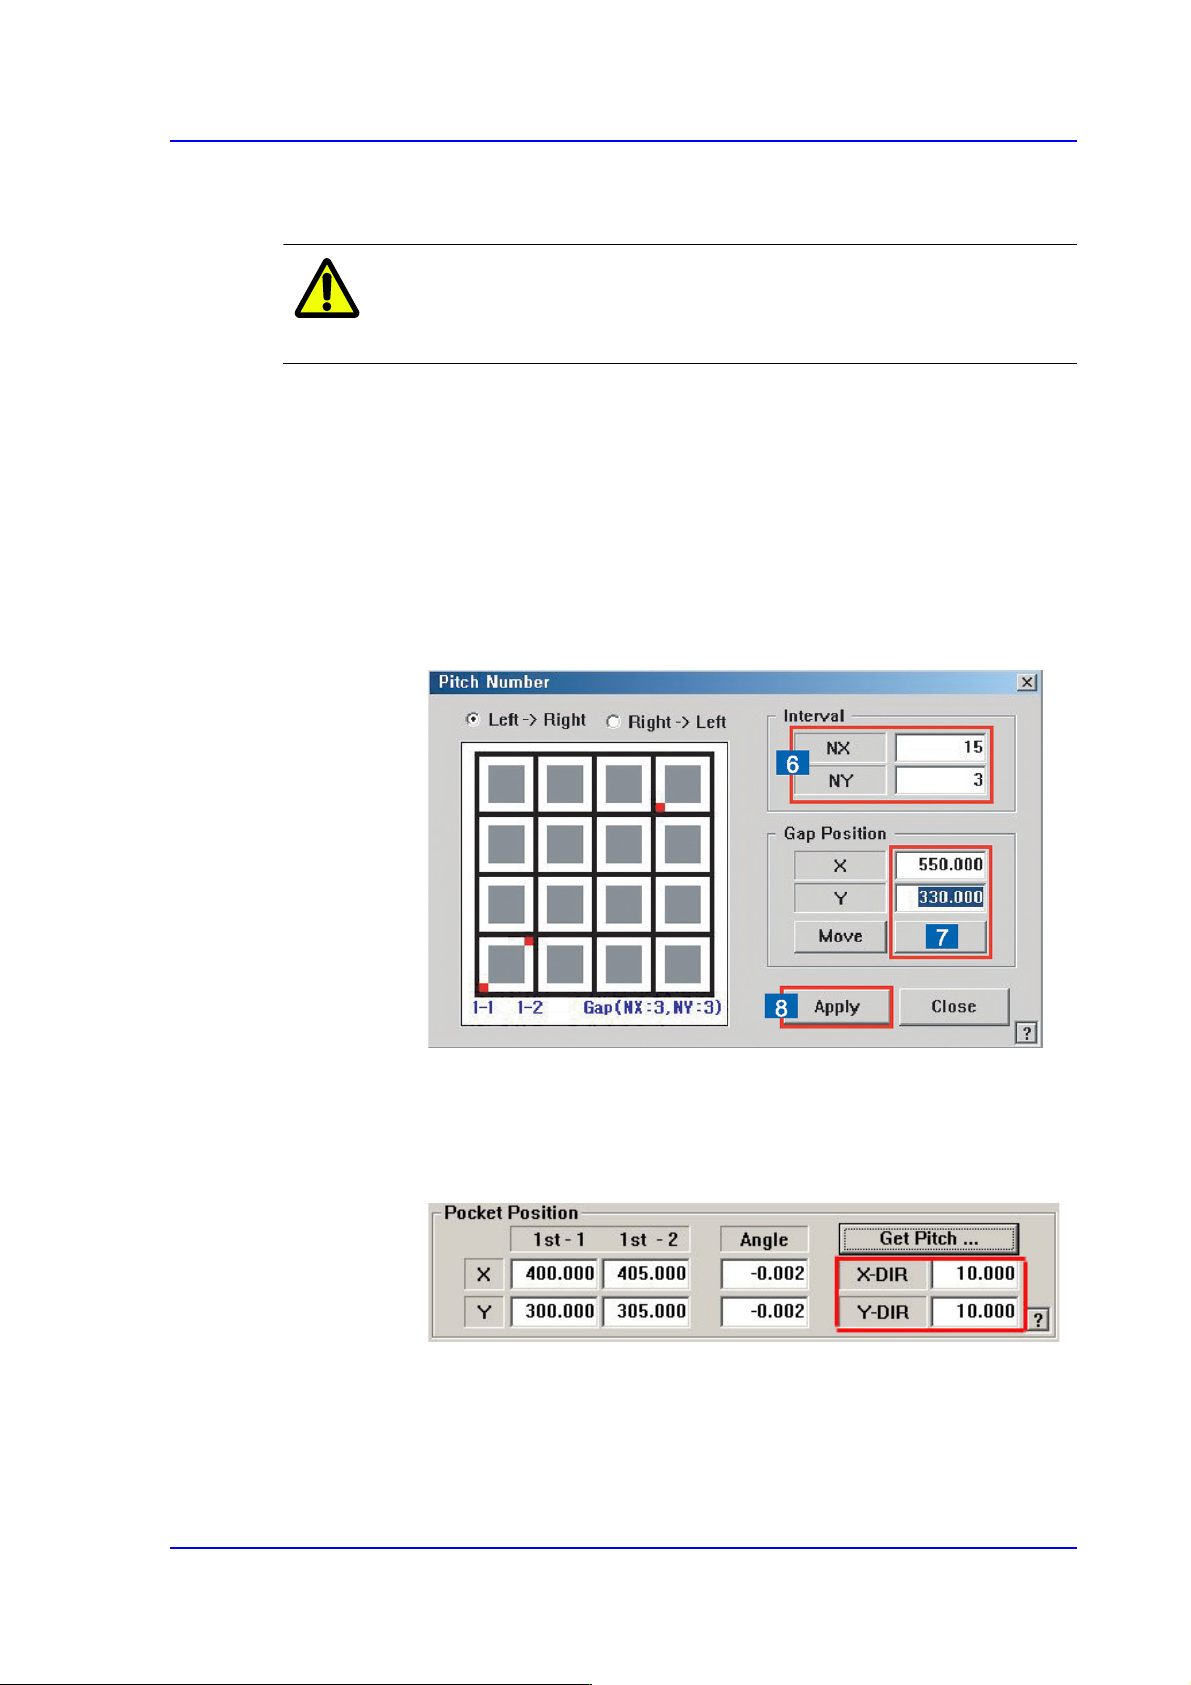
8-31
Feeder Setup
(5) Click <Get Pitch …> button to obtain the pitch interval between the
pockets.
Caution Be sure to perform in the order of “
(2)
>
(3)
>
(4)
>
(5)
”as
described above.
(6) Within the maximum moving distance the fiducial camera can reach,
select the pocket on which pitch teaching will be done. Selecting the
pocket located farther from the first pocket ensures higher accuracy of
pitch value.
Enter the NX and NY, the pocket interval from the first pocket to the pitch
teaching pocket.
NX =Row number of the pocket to be taught - 1
NY =Column number of the pocket to be taught - 1
(7) Input the pocket position by clicking the <Get> button.
(8) The final pitch can be obtained as follows by clicking the <Apply> button.
However, the pitch can be directly entered skipping the steps of (6)~(8)
when the pocket pitch is already known.