SM482PLUS_Admin(Eng_Ver2.8).pdf - 第567页
19-7 PM Manager The recorded actions can be checked from the History Screen. Figure19.6 Inquiry of Actions Taken Dur ing Checking from History Screen 19.4.6. Changing A ll Check Items to Check Completed Status (“OK”) All…
19-6
Multi-Functional Placer SM482(L) PLUS Administrator’s Guide
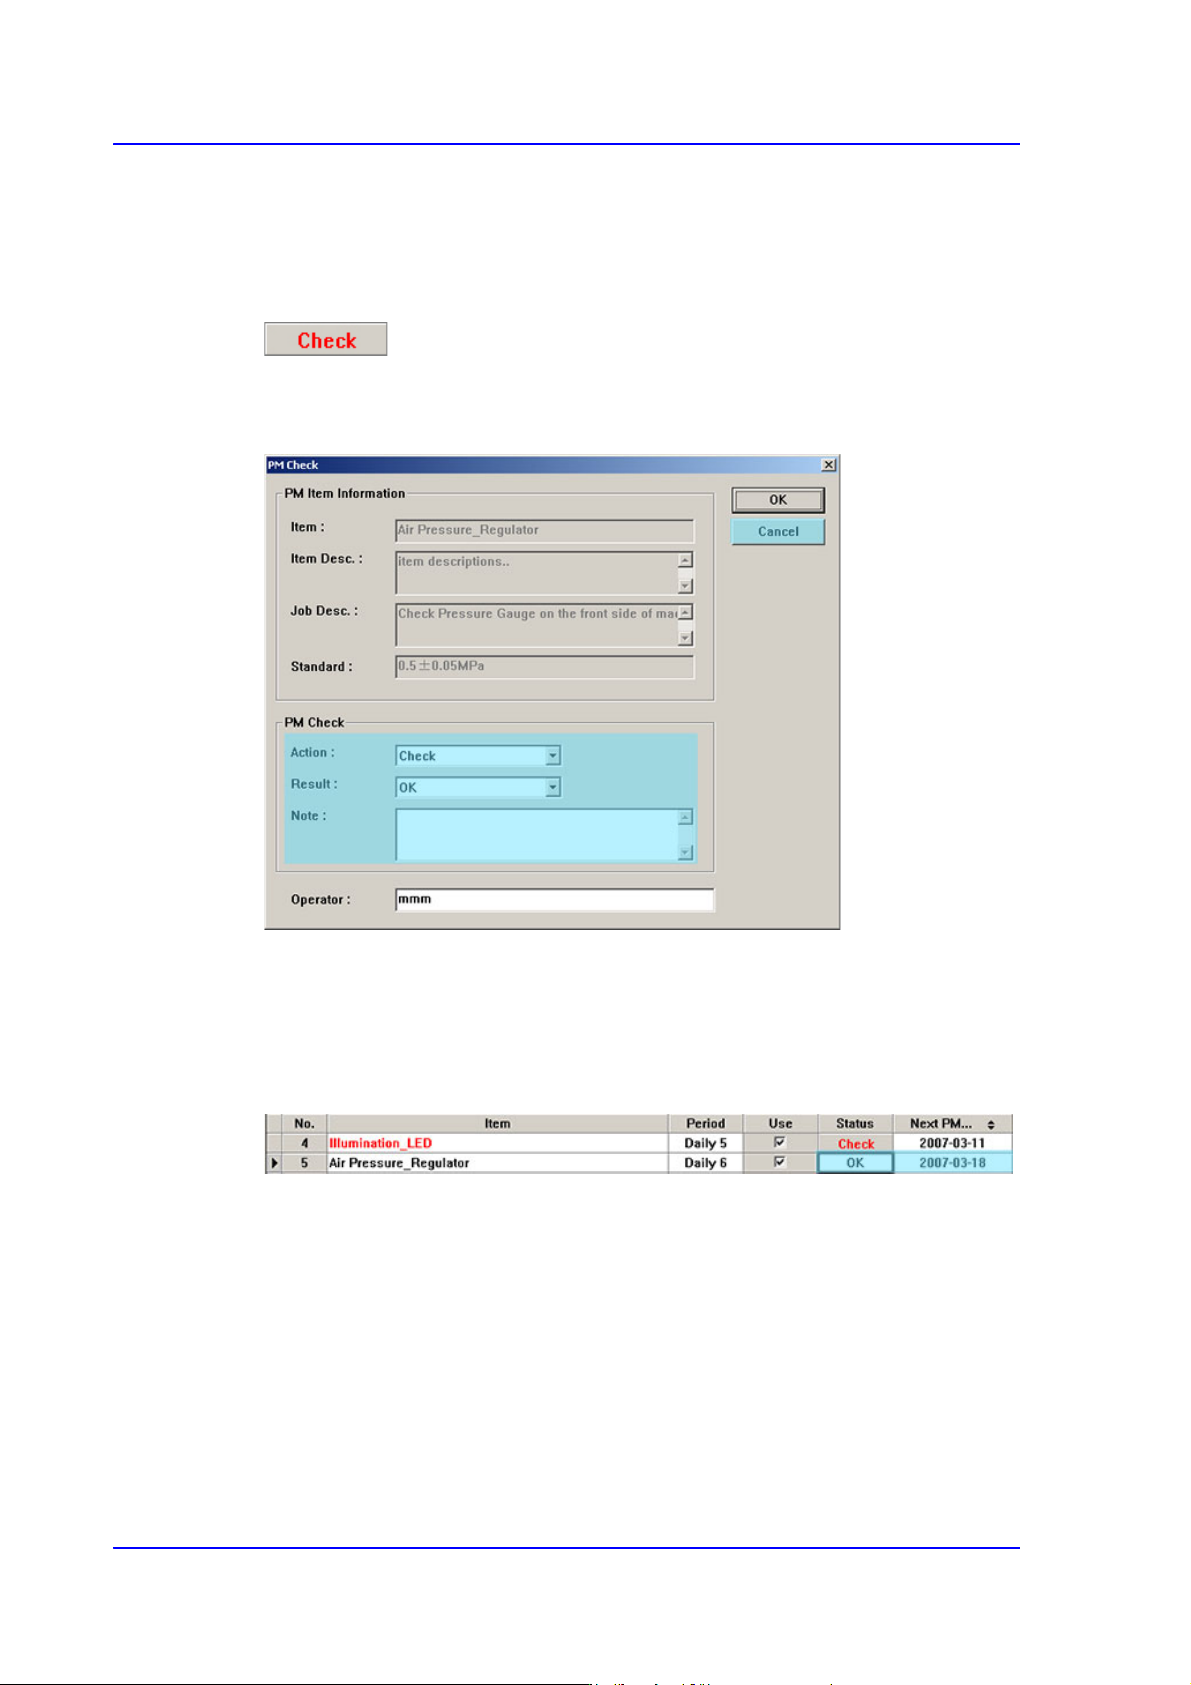
19.4.5. Recording Check Results
Record and store the check results in the “PM Check”. This can be performed in the
following manner.
Click <Check> button.
Execute ‘PM Check’ Dialog Box
Figure19.5 ‘PM Check’ Dialog Box of PM Manager
Record the measures taken during check (action, result and note) and click the <OK>
button.
For the items for which actions were taken in the <PM Check> group, the <Status>
column is changed from “Check” to “OK” and the date is updated to the PM Check
date in the <Next PM> column as shown below.
19-7
PM Manager
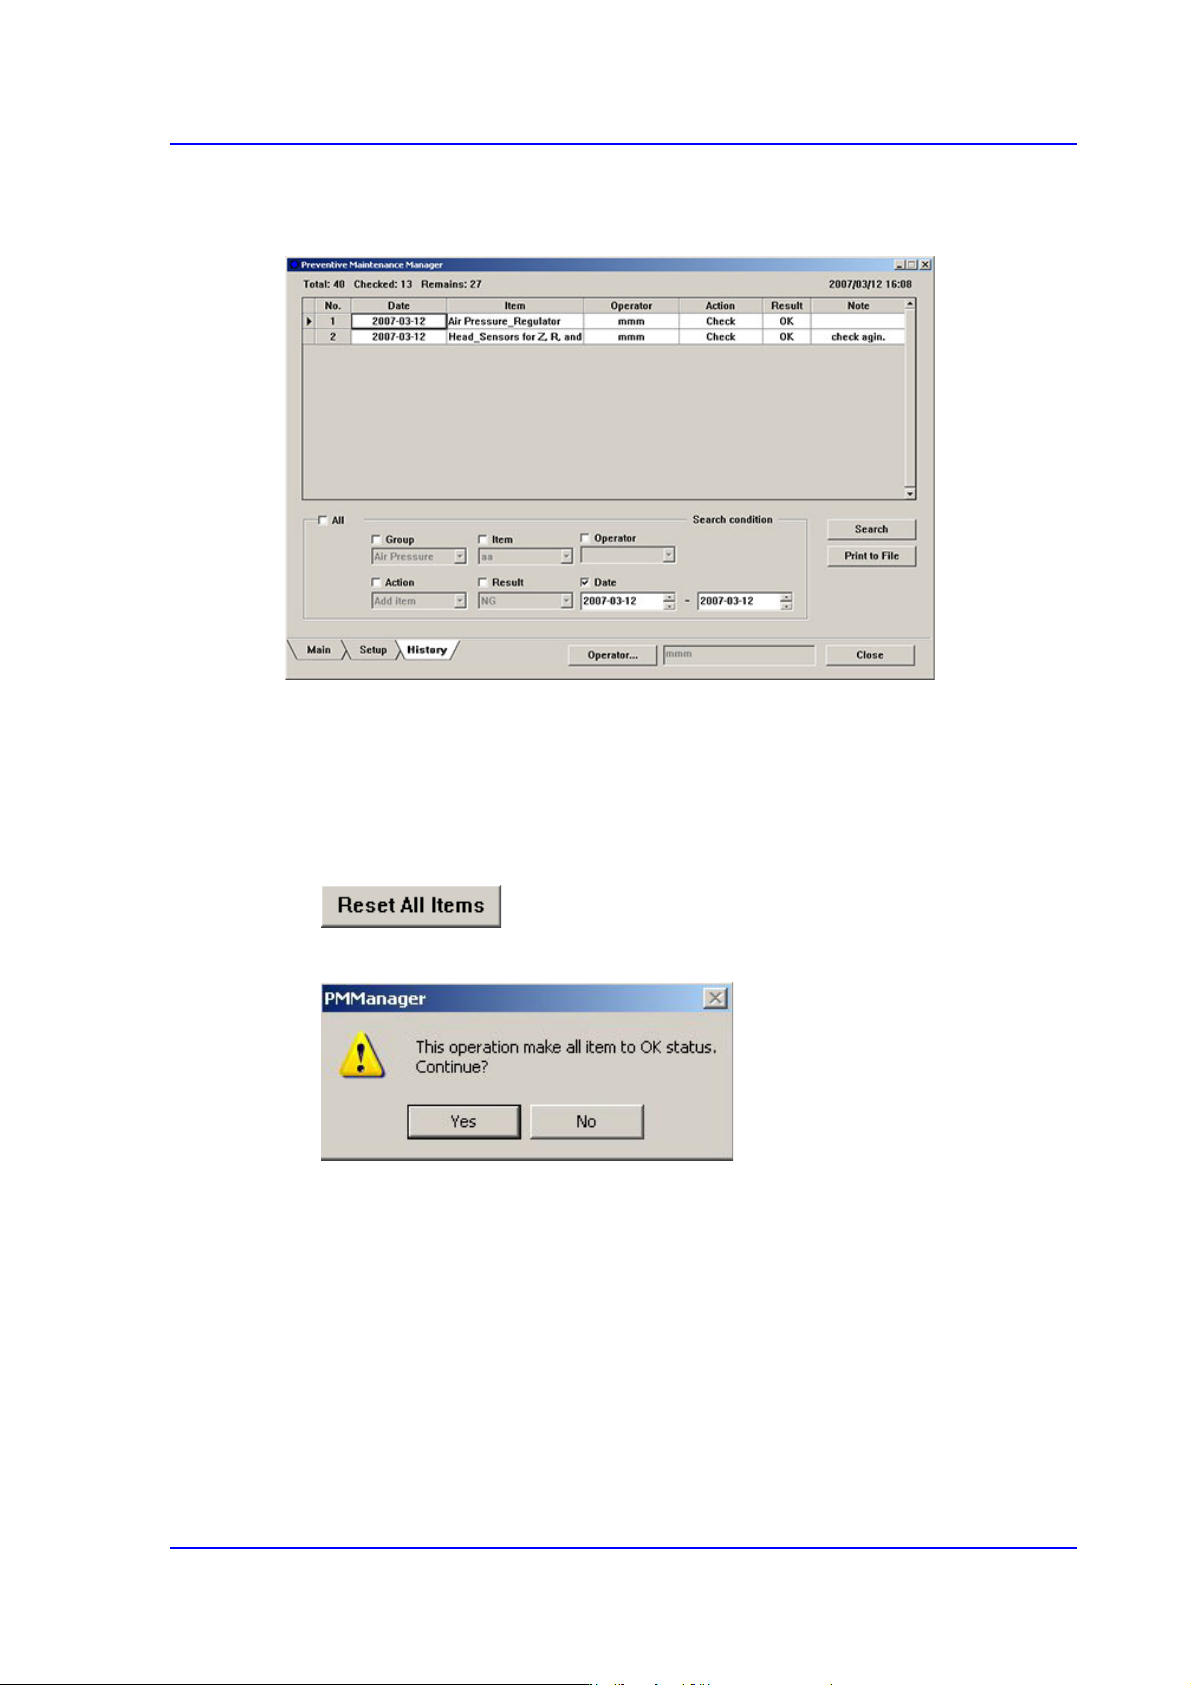
The recorded actions can be checked from the History Screen.
Figure19.6 Inquiry of Actions Taken During Checking from History Screen
19.4.6. Changing All Check Items to Check Completed Status (“OK”)
All check items can be changed to the check completed status simultaneously. This can be
performed in the following manner.
Click the <Reset All Items> button
When the PM Manager dialog box appears, click the <Yes> button.
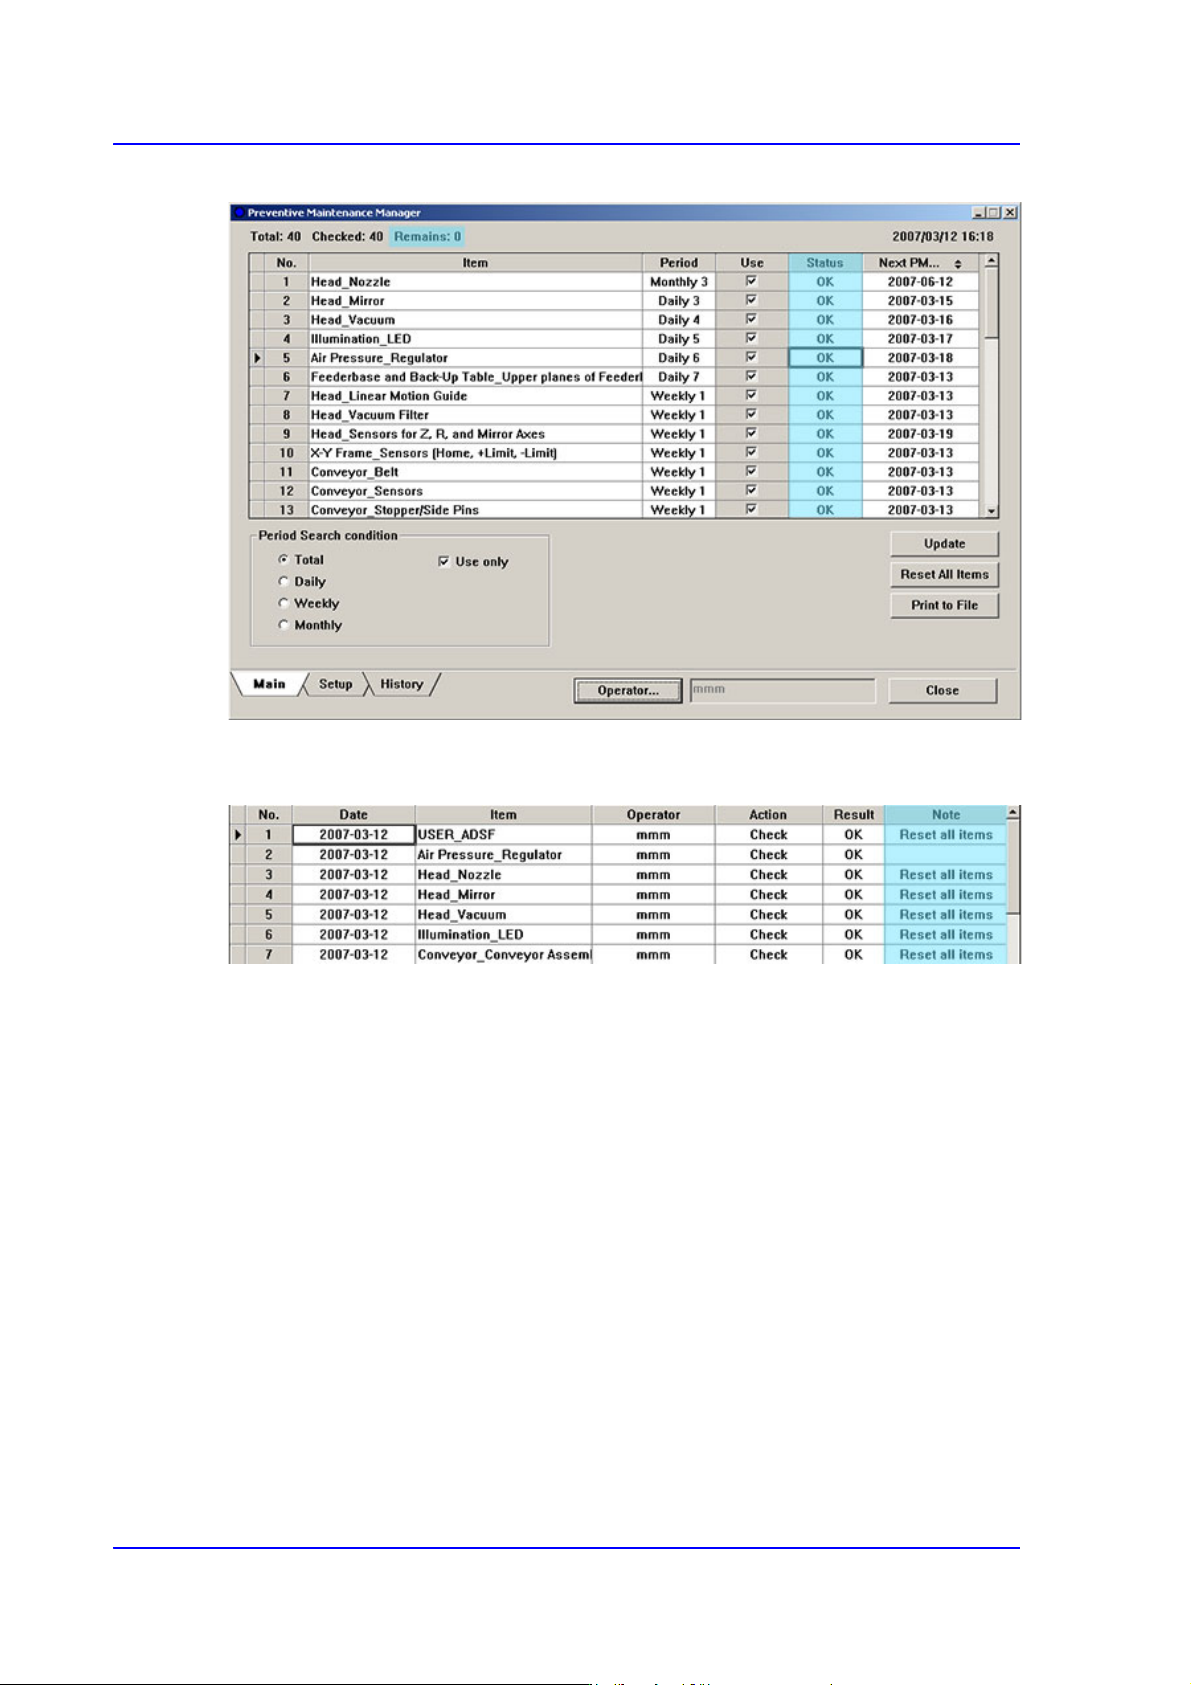
Once set as above, all check items in the Main Screen are changed to the check completed
status (“OK”), and the number of items to be inspected are indicated as “0”.
19-8
Multi-Functional Placer SM482(L) PLUS Administrator’s Guide
Figure19.7 Main Screen of PM Manager
The history of all changed items are recorded in the History Screen, and “Reset all items”
is indicated in the ‘Note’ column.