SM482PLUS_Admin(Eng_Ver2.8).pdf - 第570页
19-10 Multi-Functional Placer SM482( L) PLUS Administrator’s Guide 19.5. Setup Screen 19.5.1. Changing Check Period The check period of each check item c an be changed in the setup screen. Click the Combo Box button in t…
19-9
PM Manager
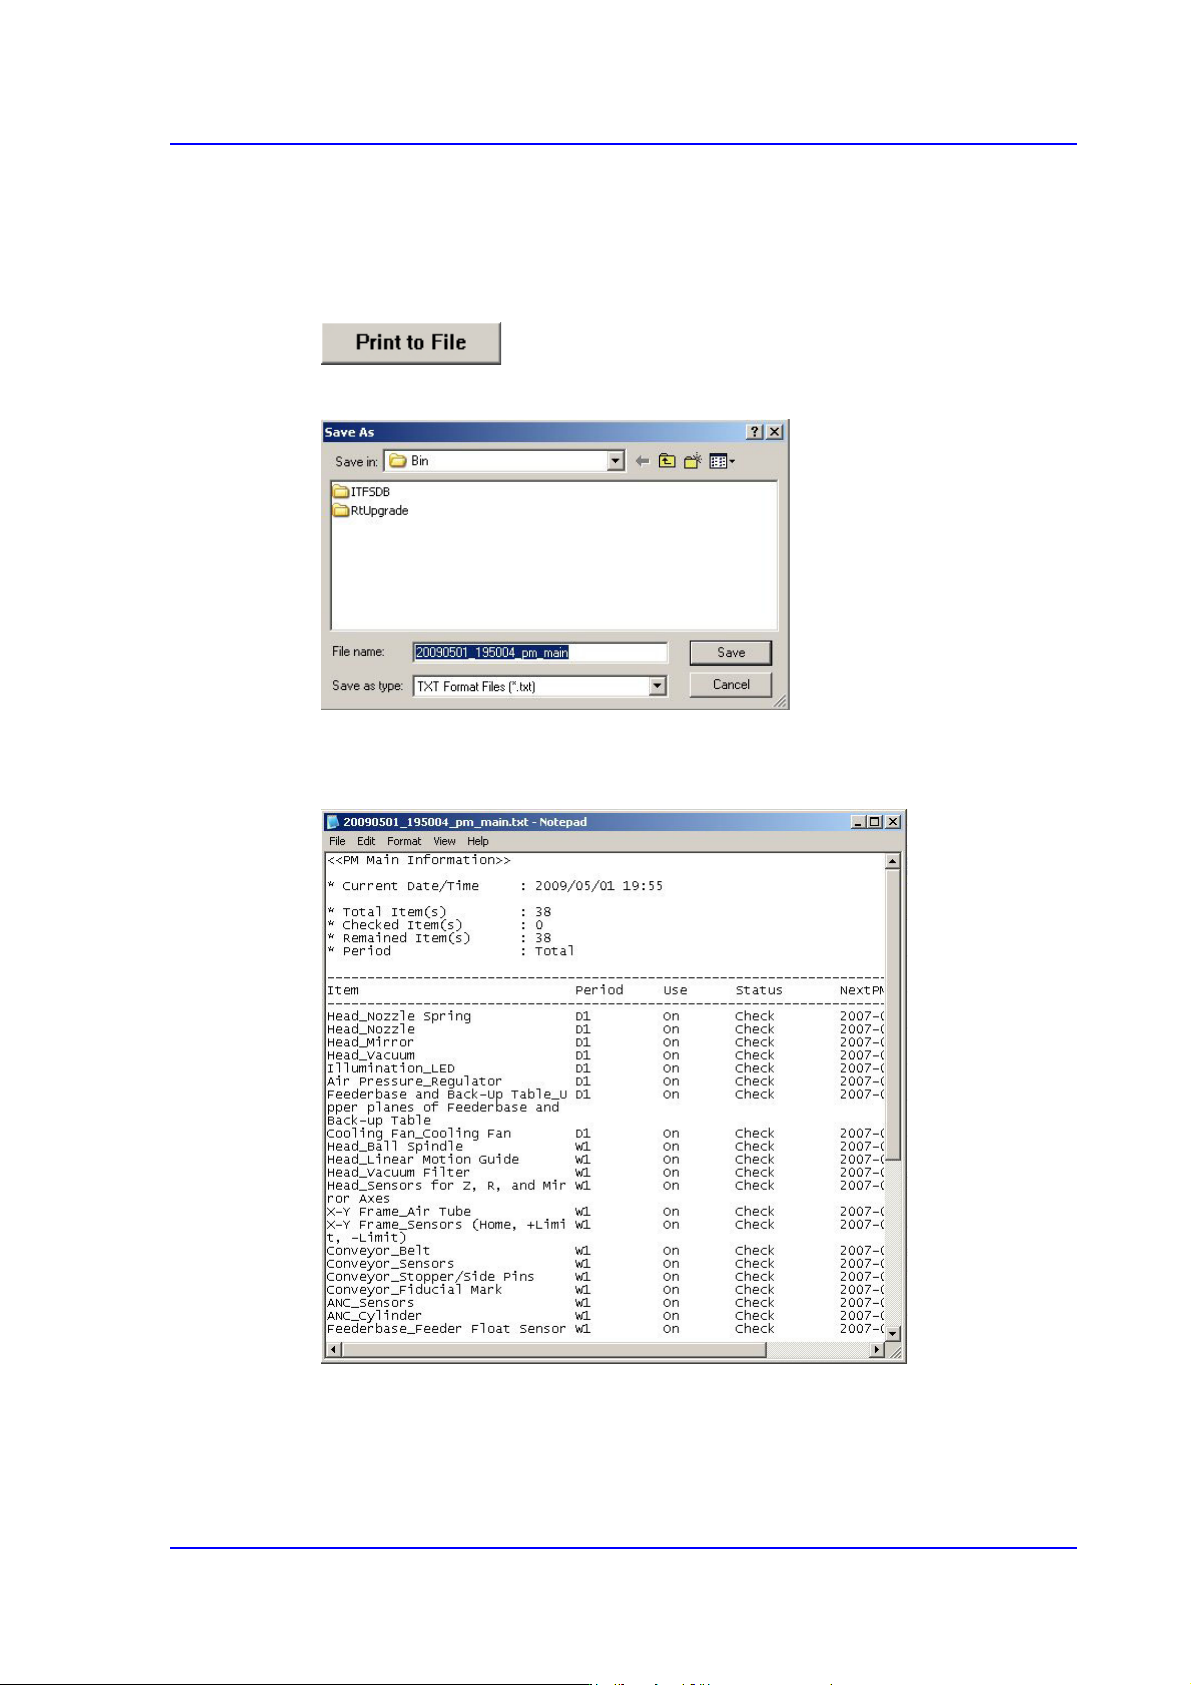
19.4.7. Outputting Check Items in File Format
All check items can be outputted in text file format. This can be performed in the
following manner.
Click the <Print to File> button
Enter the file name and designate the file path and then click <Save>.
The text file is saved in the form shown below.
Figure19.8 Check Item Output Screen
19-10
Multi-Functional Placer SM482(L) PLUS Administrator’s Guide
19.5. Setup Screen
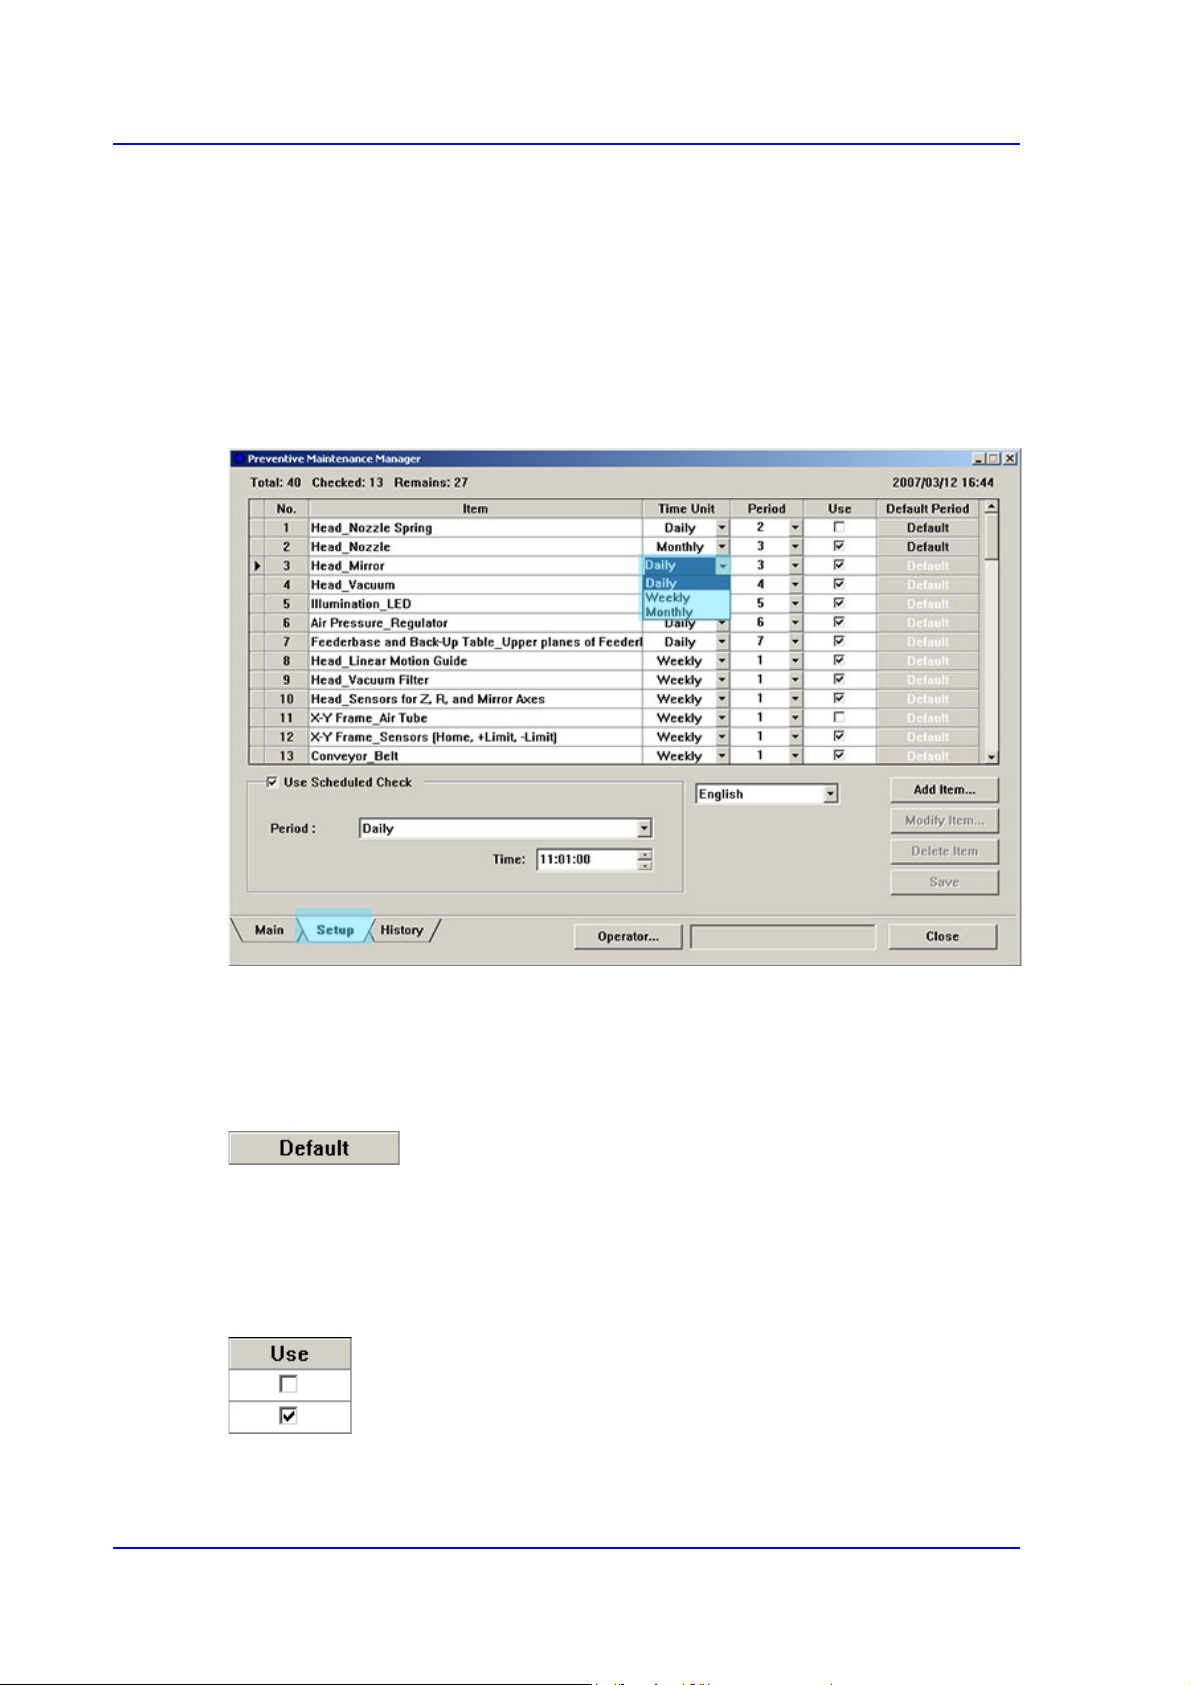
19.5.1. Changing Check Period
The check period of each check item can be changed in the setup screen.
Click the Combo Box button in the Time Unit column for the items whose check period is
to be changed as shown in the following figure to change the check period (daily, weekly
and monthly).
Figure19.9 Changing Check period
19.5.2. Setting Check Period as Default
When setting the changed check period as default value again, click the <Default> button
for the corresponding item.
The change check period is set as default again.
19.5.3. Setting Whether to Use Check Period
Set whether to use the check item in the <Use> column.
19-11
PM Manager
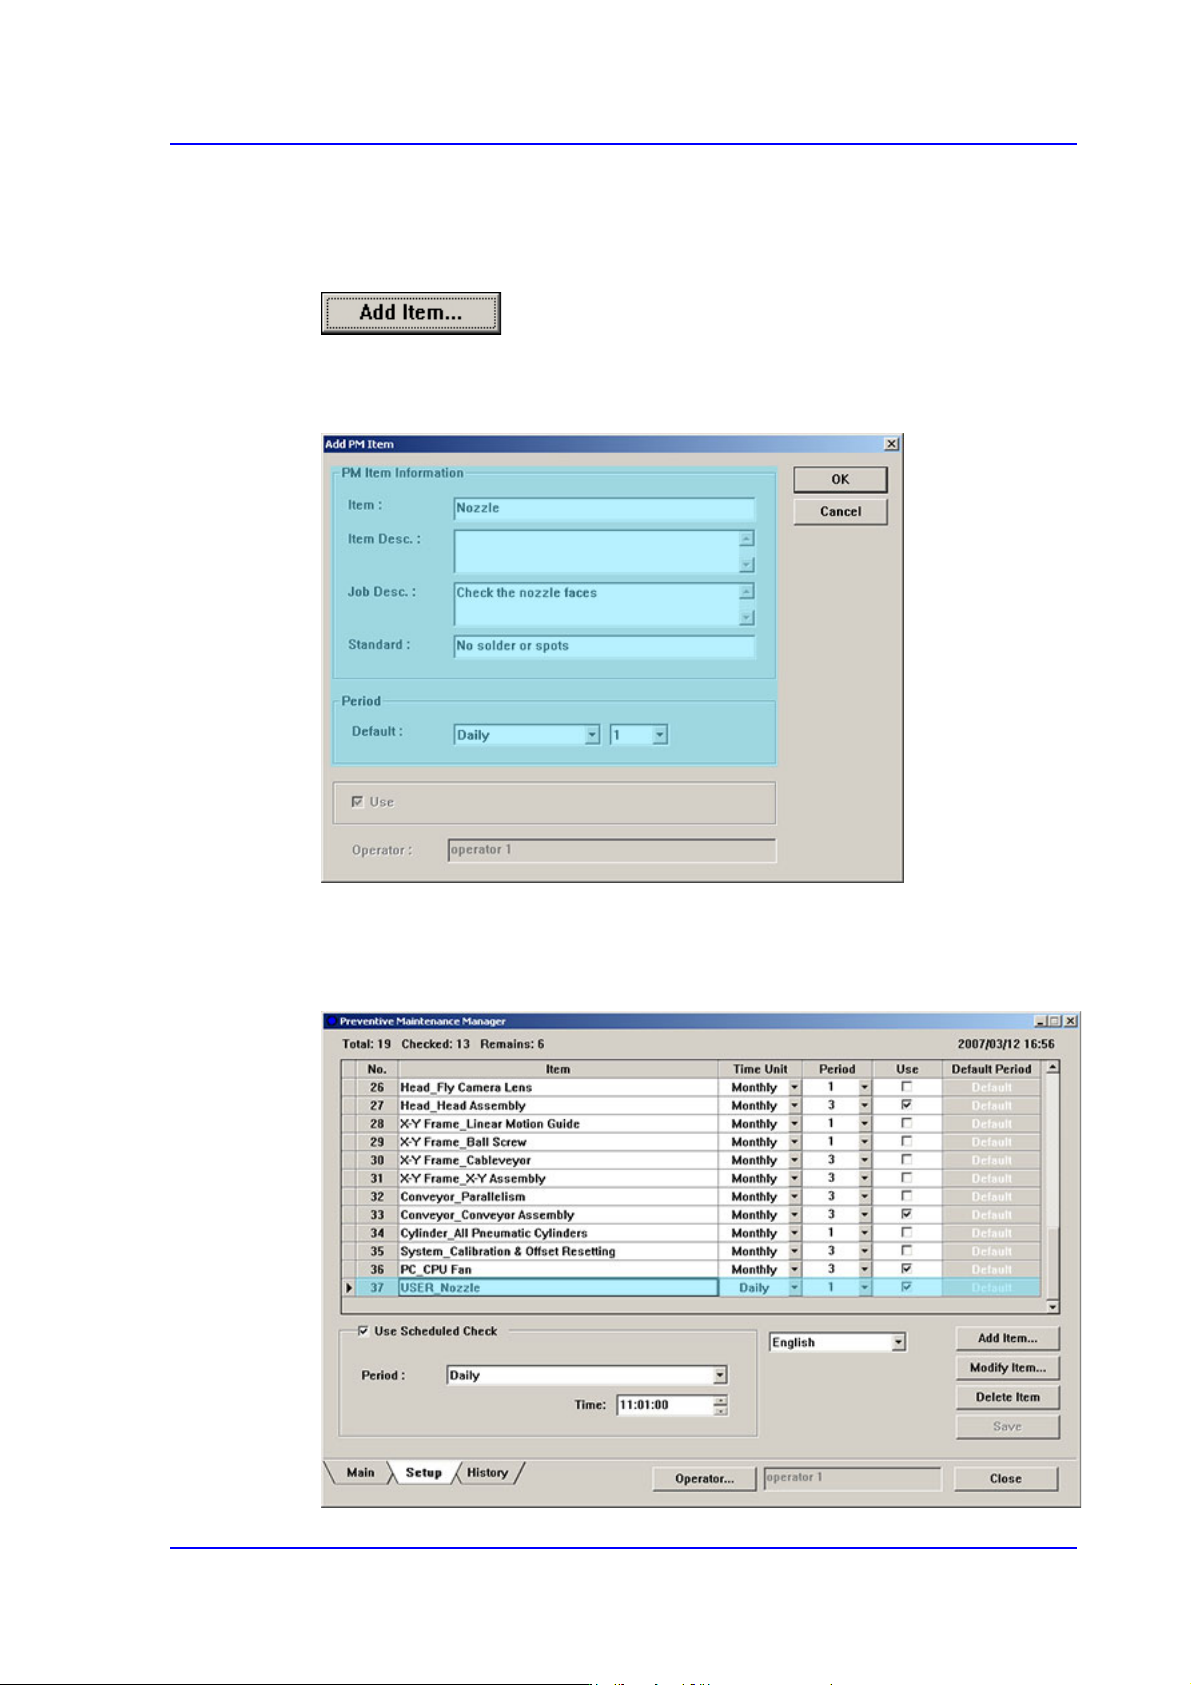
19.5.4. Adding User Check Item
User can add a new check item. This can be performed in the following manner.
Click the <Add Item…> button and execute the ‘Add PM Item’ dialog box
Enter an item to be added in the ‘Add PM Item’ dialog box and set the check period
Figure19.10 Adding User Check Item
If the user check item is added by clicking the <OK> button, a new check item is
added in the setup screen.
Figure19.11 Added User Check Item