SM482PLUS_Admin(Eng_Ver2.8).pdf - 第499页
15-45 System Setup <Z axis> option button: If th is button is selected, when the movement command is transferred to the equipment, displays th e confirm message box if the co mmand is for Z-axis movement. <X…

15-44
Multi-Functional Placer SM482(L) PLUS Administrator’s Guide
Information_Time of Occurrence(_E-Error Code).tmr”.
The basic concept for saving a log file is as follows:
1st Stage
1. Clicking the Stop button (<Up Load> button) will:
In the Start state: Upload and save the file automatically.
In the Stop state: Save the uploaded information in the file automatically.
2. Clicking the Start button will:
In the Start state: Change the state to the Stop state and save the file
automatically. The state is then changed to the Start state.
In the Stop state: Delete the uploaded information and change the state to the
Start state.
3. Define the rule for naming files when using automatic saving.
(Machine Type and Version_Unit Information_Creation Date_E-Auto_File
Index.tmr)
Ex) SM411V1.047_Undefined_20080317_103705_E-Auto_0.tmr
4. Save the Telemetry file in the Log directory.
5. Of the Telemetry files automatically saved in the Log directory, only the five
most recent files are kept and older files are deleted automatically.
When performing works including measurement with the Telemetry being
finished forcedly, press the <Upload> button to change the state to the Stop state
and minimize the Telemetry screen and then perform the work.
2nd Stage
When an EMG level error occurs, save the log automatically and stop/start the
system automatically.
Define the rule for naming files when using automatic saving using the details
of the error.
(Machine Type and Version_Unit Information_Creation Date_E-Auto_File
Index.tmr)
Since the automatic Telemetry saving function may decrease the systems’
performance, use an option to turn off the corresponding function when faced with this
problem.
<Scale> Combo box
Able to setup the system of unit (mm/inch/mil) used by MMI of the equipment.
<Confirm before Move> Combo box
Determines whether to display the confirm window prior to movement.
<None> option button: when this button is selected, does not display the confirm
message box when the movement command is transferred to the equipment.
15-45
System Setup
<Z axis> option button: If this button is selected, when the movement command is
transferred to the equipment, displays the confirm message box if the command is
for Z-axis movement.
<XY, Z axis> option button: If this button is selected, when the movement
command is transmitted to the equipment, displays the confirm message box if the
command is for XY, and Z axes movement.
<Use 2D Barcode> check box
In order to set the 2D barcode parameter of the PCB, select this check box.
<2D Barcode Length> Edit Box
Sets the number of characters for the 2D barcode parameter of the PCB.
<Use OLP DB> check box
Selected when synchronize the part DB of each machine in the inline composed of
several machines.
Selecting this check box will allow the part DB to be shared between machines by
transmitting the part DB of the current machine to the T-OLP of the T-Solution.
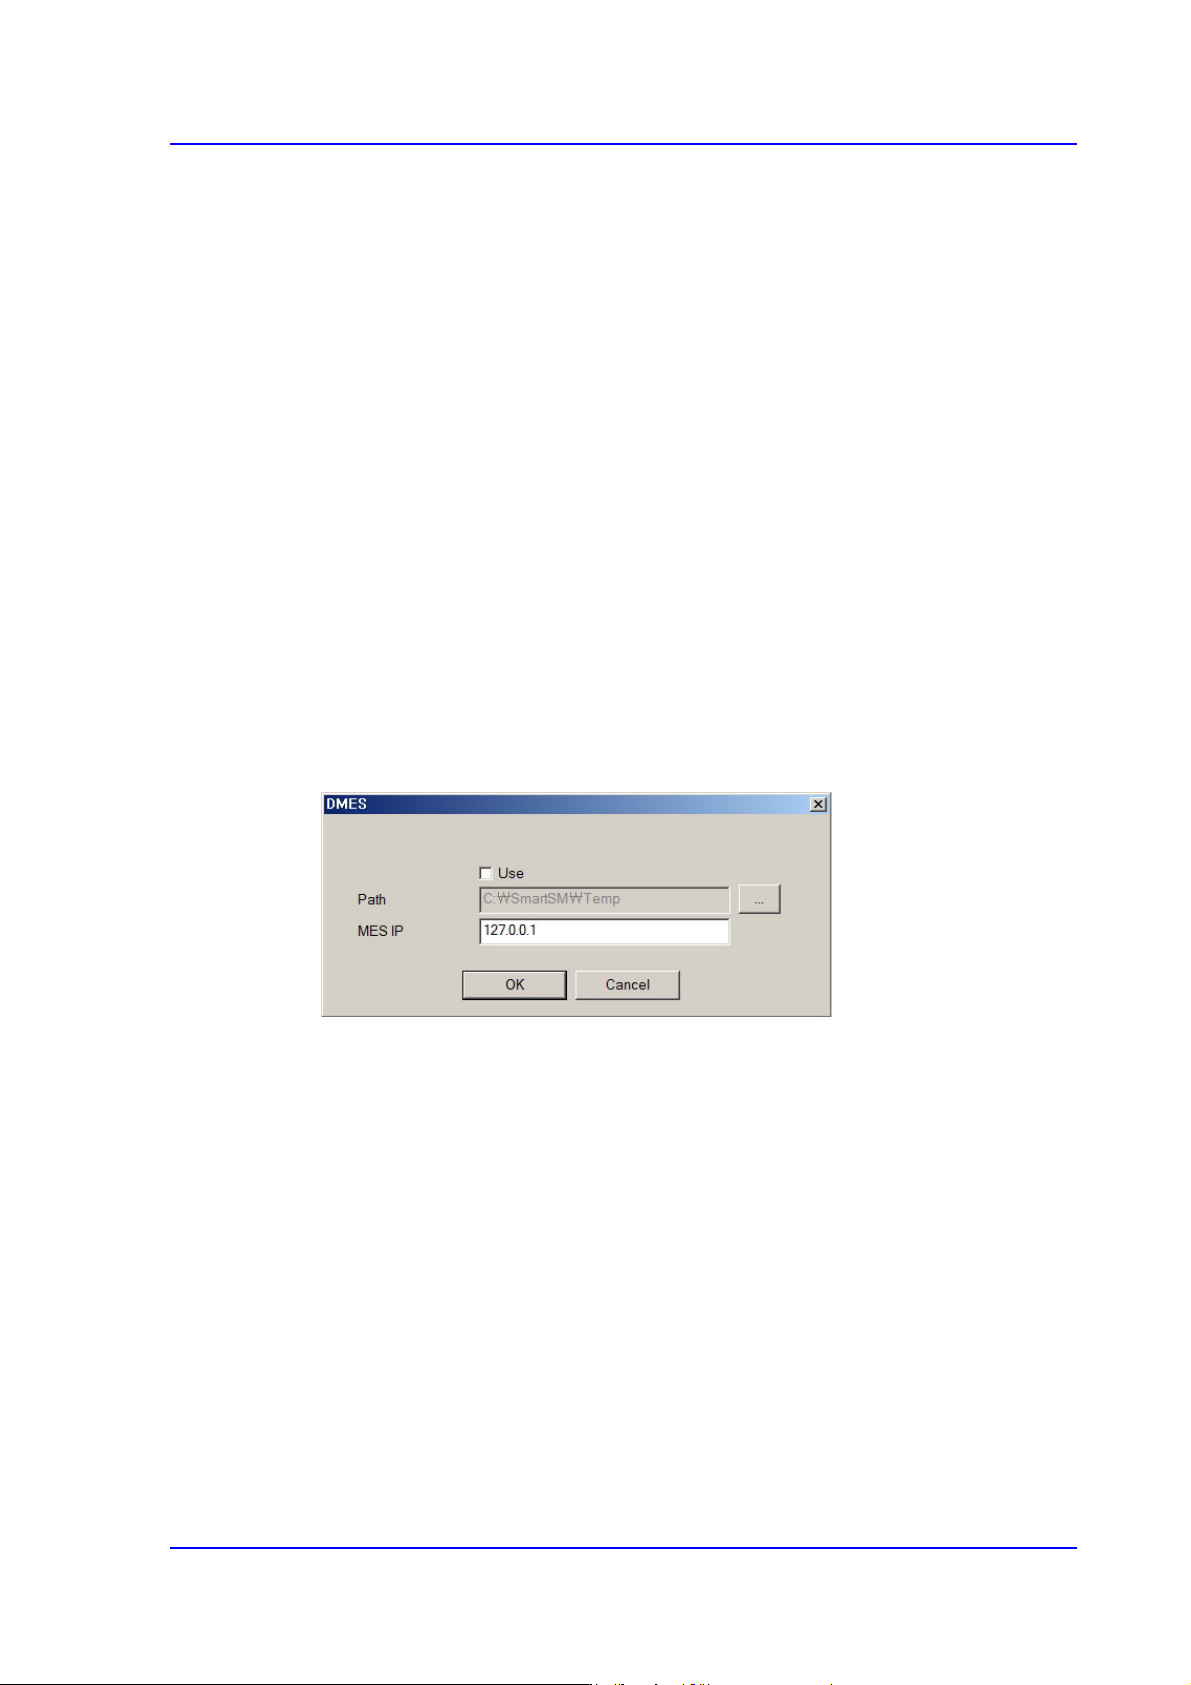
< Use DMES> check box
Sets the IP for communication with the MES host.
<Show Backup Pin> check box
When using the function for sequential changing in the T-Solution, select this check
box to enable the backup pin dialog box.
<Use External Barcode JobChange> Check Box
You can automatically download the corresponding PCB program by scanning the
barcode of the reel list printed by T-Solution with a scanner (not a part of the
equipment).
<External Barcode Scan wait time(sec)> Edit Box
Sets the time required to read the barcode in seconds when reading the barcode with a
scanner (not a part of the equipment).
<Use Work Table> Check Box
Sets whether to use the work table when reading the barcode with a scanner (not a part
of the equipment).
15-46
Multi-Functional Placer SM482(L) PLUS Administrator’s Guide
<Use Pickup Offset Sync> Check Box
When you modify the variable value of the part, the modified variable value of the part
will be automatically saved to the UPD.
<Use Multi-Vendor> check box
Refers to the function used to produce PCBs by using parts made by several
manufacturers for a part.
If a PCB program is created by registering a sub part for one part for one part in the
TOLP of the T-Solution, allows the work to be performed by using sub parts when
placing a part on the PCB with this check box being selected.
<Use NewPartEditor> check box
Selecting this check box will execute the NPE (New Part Editor) while editing a part.
<Use Coaxial Light Sync> Check Box
Sets whether to use the coaxial light synchronization function.
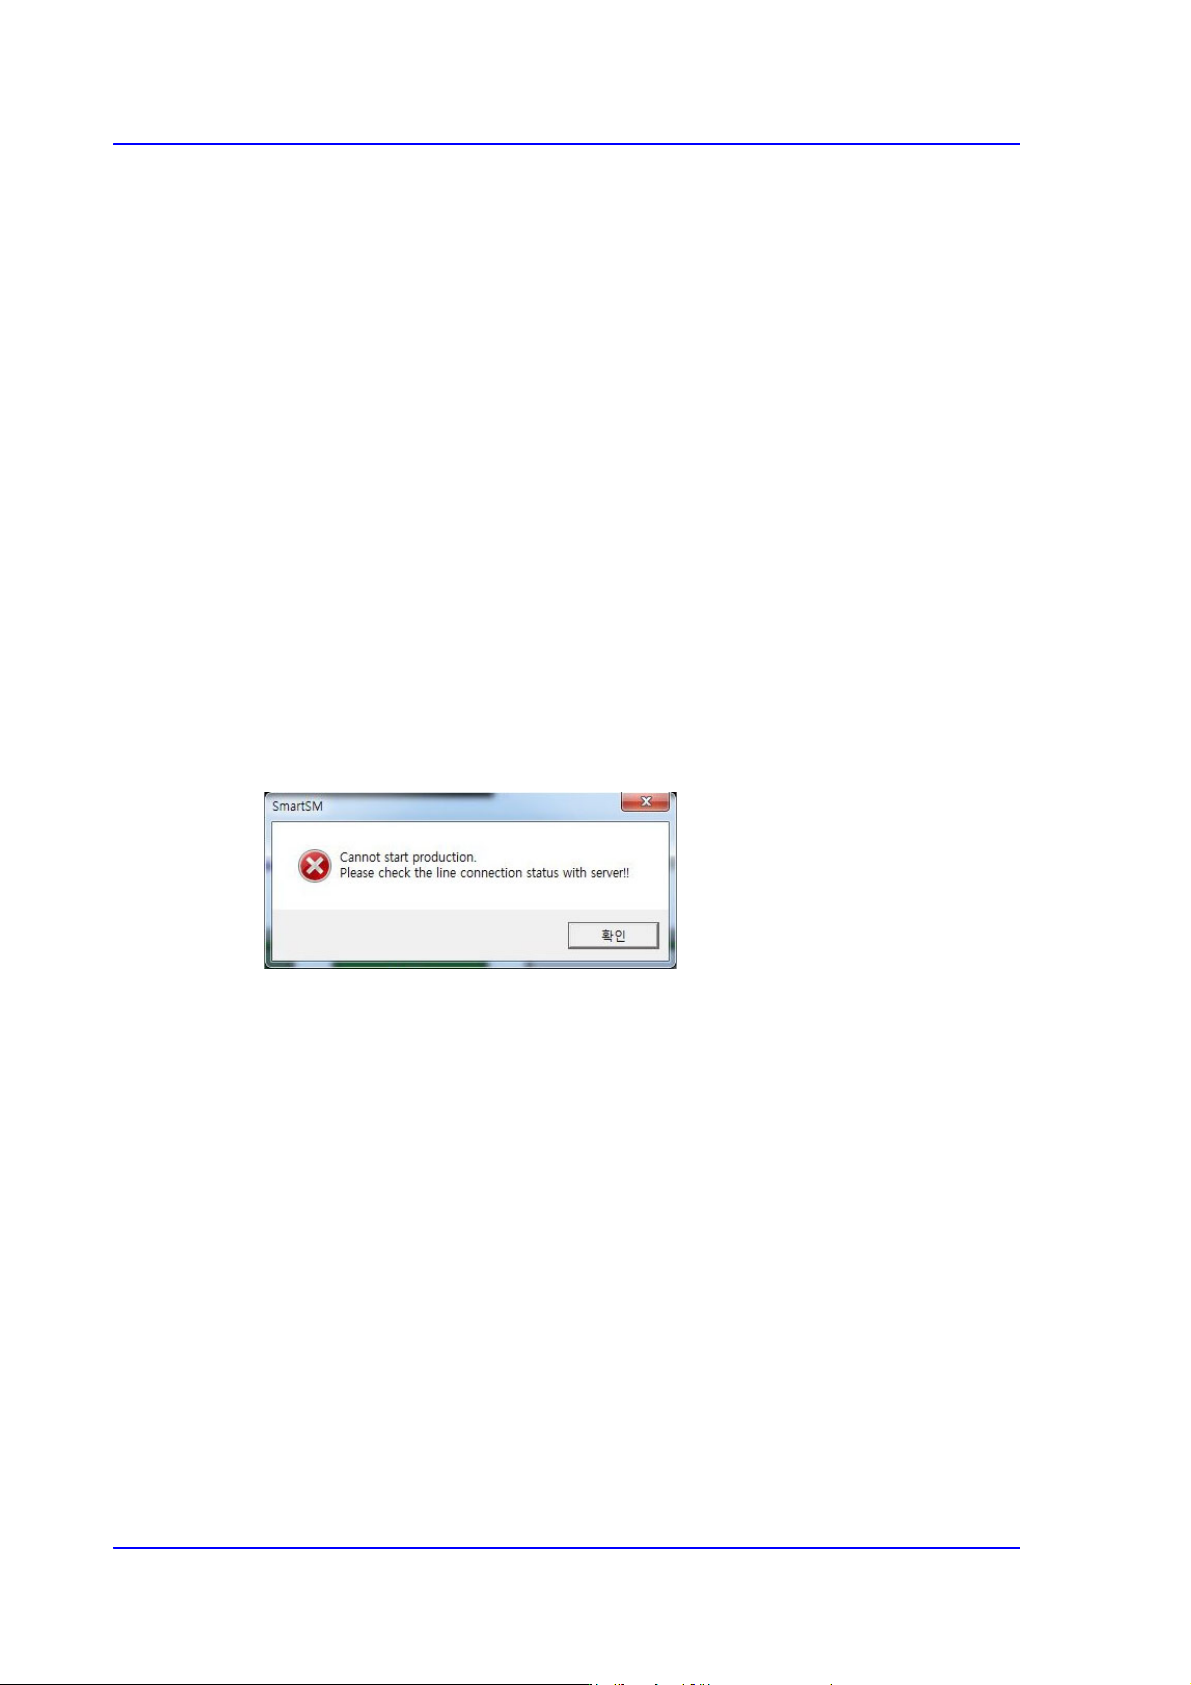
<PNP Connection Check> check box
Checks whether the machine and PNP are connected before starting production.
Starting production with the machine not connected to the PNP will display an error
message.
<PNP Barcode Interlock> Check Box
If this check box is selected, production will begin after determining the validity of the
PCB before production. This is a function that makes the equipment produce only the
permitted PCBs by transmitting the 2D barcode information to PNP - MES after the
2D barcode on the top surface of the PCB has been read before production when the
board has been fed to the equipment.
However, this function is only supported for the equipment loaded with the MES and
installed with the PNP from Hanwha.
<Use Auto Error Report> Button
Used to back up the MMI file manually when the user shuts the machine down. The
user can back up the MMI file manually only when the machine is in an idle state.
<Use iTAC> Button
Sets whether to use the iTAC program, which is a part of the external MES system.
<Use Calibration Guide> Button
If this check box is selected, the equipment notifies the user whether the equipment is