Administrator’s Guide(CP45FV) Eng.pdf - 第110页
Samsung Component Placer CP45FV Series Administrator ’ s Guide Figur e 7-17. “ Auto T each the selected part-Bad ” message box The same as the Figure 11-26, but the <Update> button is inactivated. 7-26
Part Registration
7-25
recognition is greater than 0.1 it recognizes the angle after correcting the angle. It
repeats this until the result of the recognition become less than 0.1. When the
value becomes 0.1, it pick and place the component (it tries recognition up to 4
times)
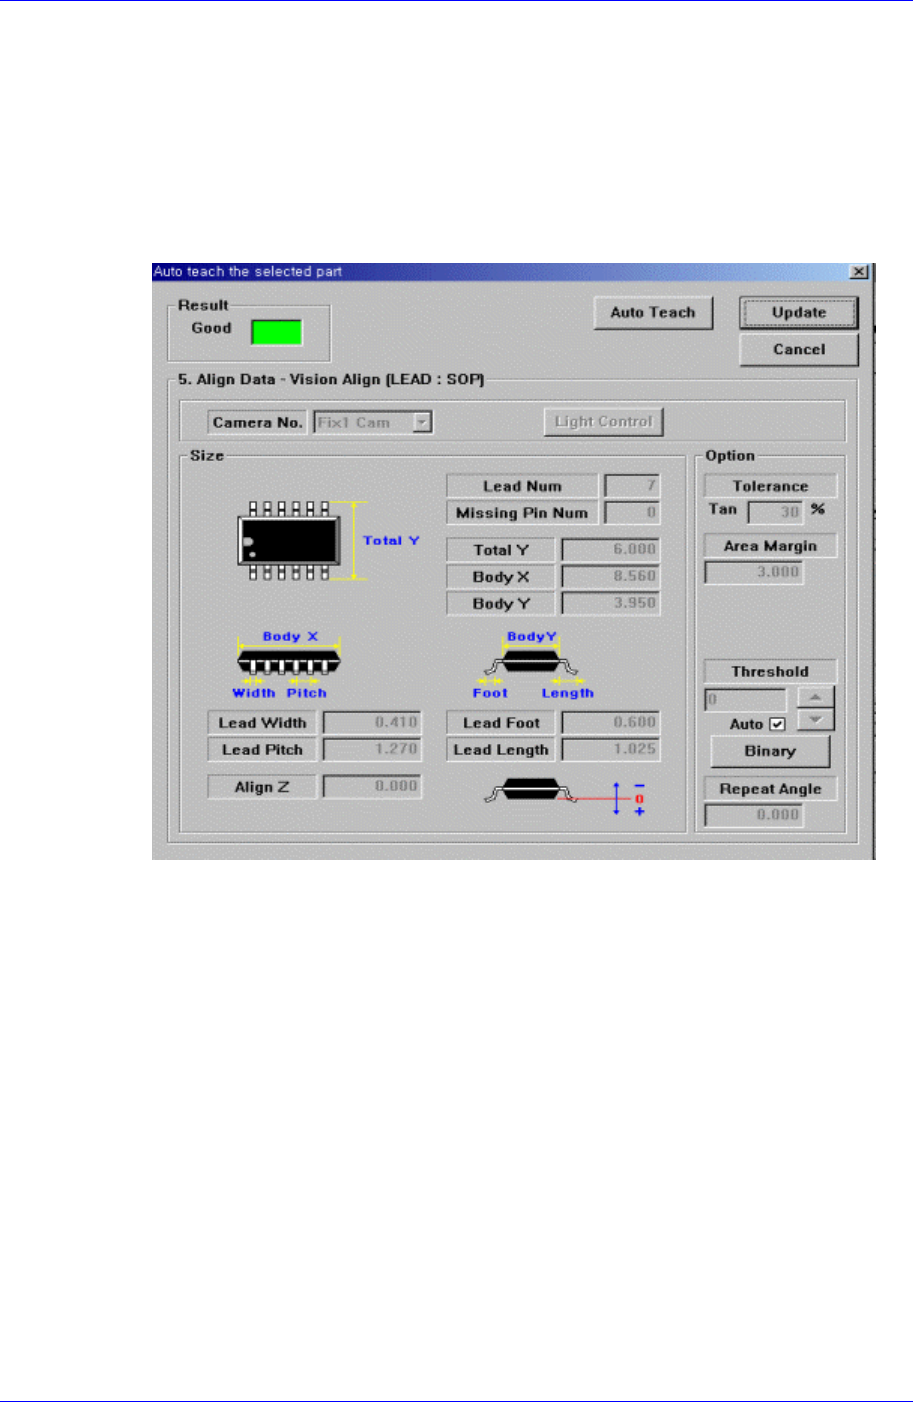
<Auto Teach> button
Automatically finds out the component align data. When auto teach is successful, the
following message box is displayed.
* The “Auto Teach” is supported only for SOP, QFP and PLCC.
Figure 7-16. “Auto Teach the selected part-Good” message box
<Result>
Displays the success or failure of Auto Teach.
<Auto Teach> button
Executes Auto Teach.
<Update> button
Saves the component align data obtained by Auto Teach and closes the message
box.
<Cancel> button
Closes the message box without saving the data obtained by Auto Teach.
When Auto Teach fails, the following message box is displayed.

Samsung Component Placer CP45FV Series Administrator’s Guide
Figure 7-17. “Auto Teach the selected part-Bad” message box
The same as the Figure 11-26, but the <Update> button is inactivated.
7-26
Part Registration
7-27
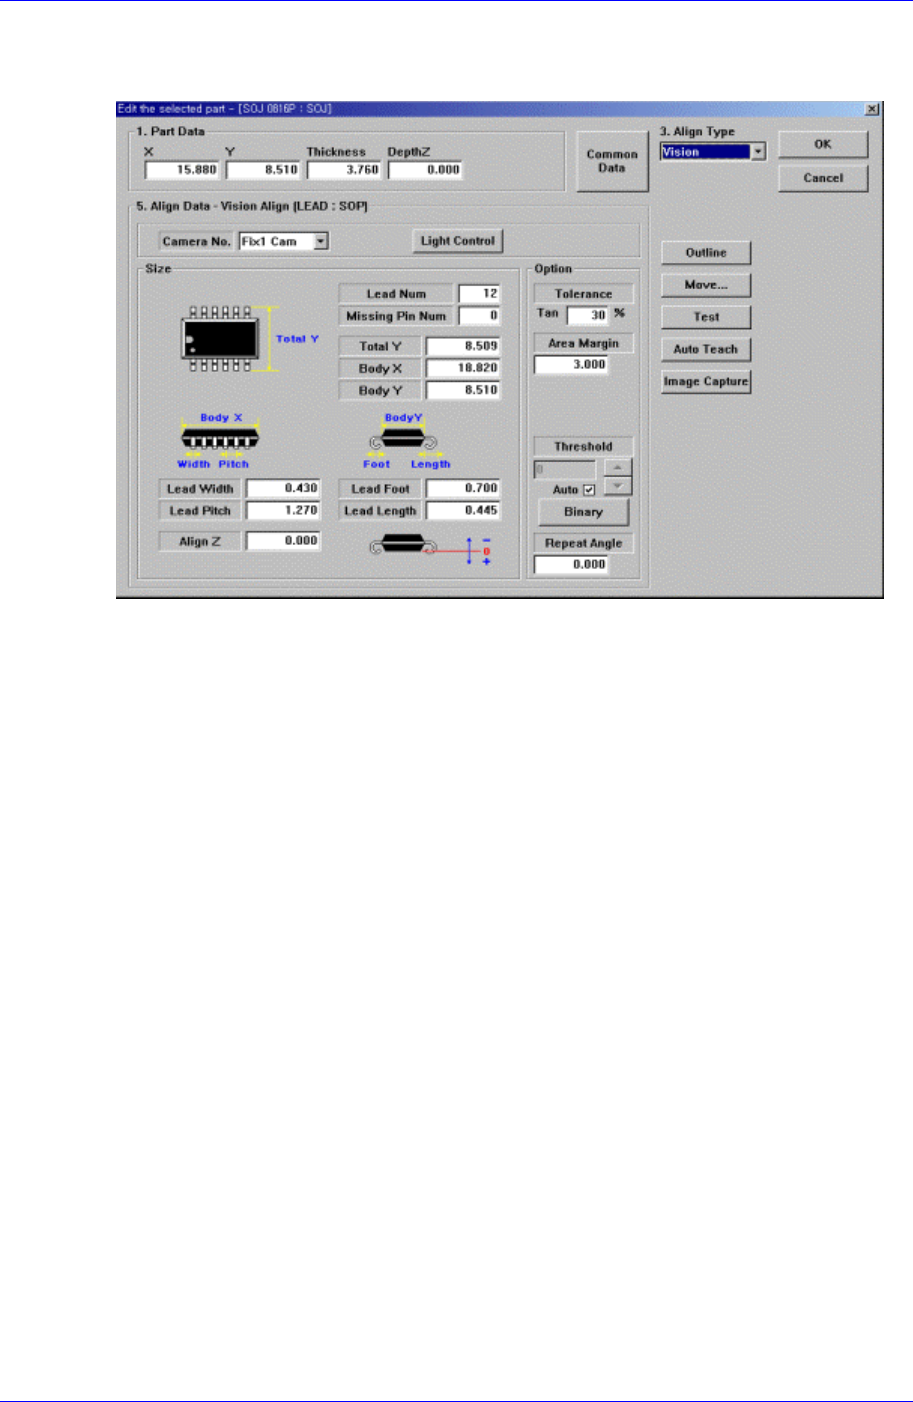
7.3.2. SOJ component data setting
Set the align data for SOJ components.
Figure 7-18. “Align Type = Vision, Package Group = SOJ” dialog box
<Camera No.> combo box
Select the camera to recognize the component. Please refer to “7.2.1.1 Common Align
Data (Page 7-9)” for more information.
<Light Control> button
Set the light for the camera to recognize the component. Please refer to “7.2.1.1
Common Align Data (Page 7-9)” for more information.
<Size> group
Set the Align size.
<Total Y> edit box
Set the size of the whole component in Y direction.
Please refer to “7.2.1.1 Common Align Data (Page 7-9)” for more information.
<Option> group
Set the align option data. Please refer to “7.2.1.1 Common Align Data (Page 7-9)” for
more information.
<Outline> button
Displays the outline of the component on the vision monitor by using the set align
data.
<Move…> button
Performs component pickups or moves to the stage camera. Please refer to “7.2.1.1
Common Align Data (Page 7-9)” for more information.
<Test> button
Tests component recognition by using the set align data. Please refer to “7.2.1.1
Common Align Data (Page 7-9)” for more information.