Administrator’s Guide(CP45FV) Eng.pdf - 第211页
T eaching 13-15 Position Y : Displays the Y position of the moved placement point. When the position of the actual placement point is different from the entered coordinate, perform teaching manually . 13.2.2. Pickup …
Samsung Component Placer CP45FV Administrator’s Guide
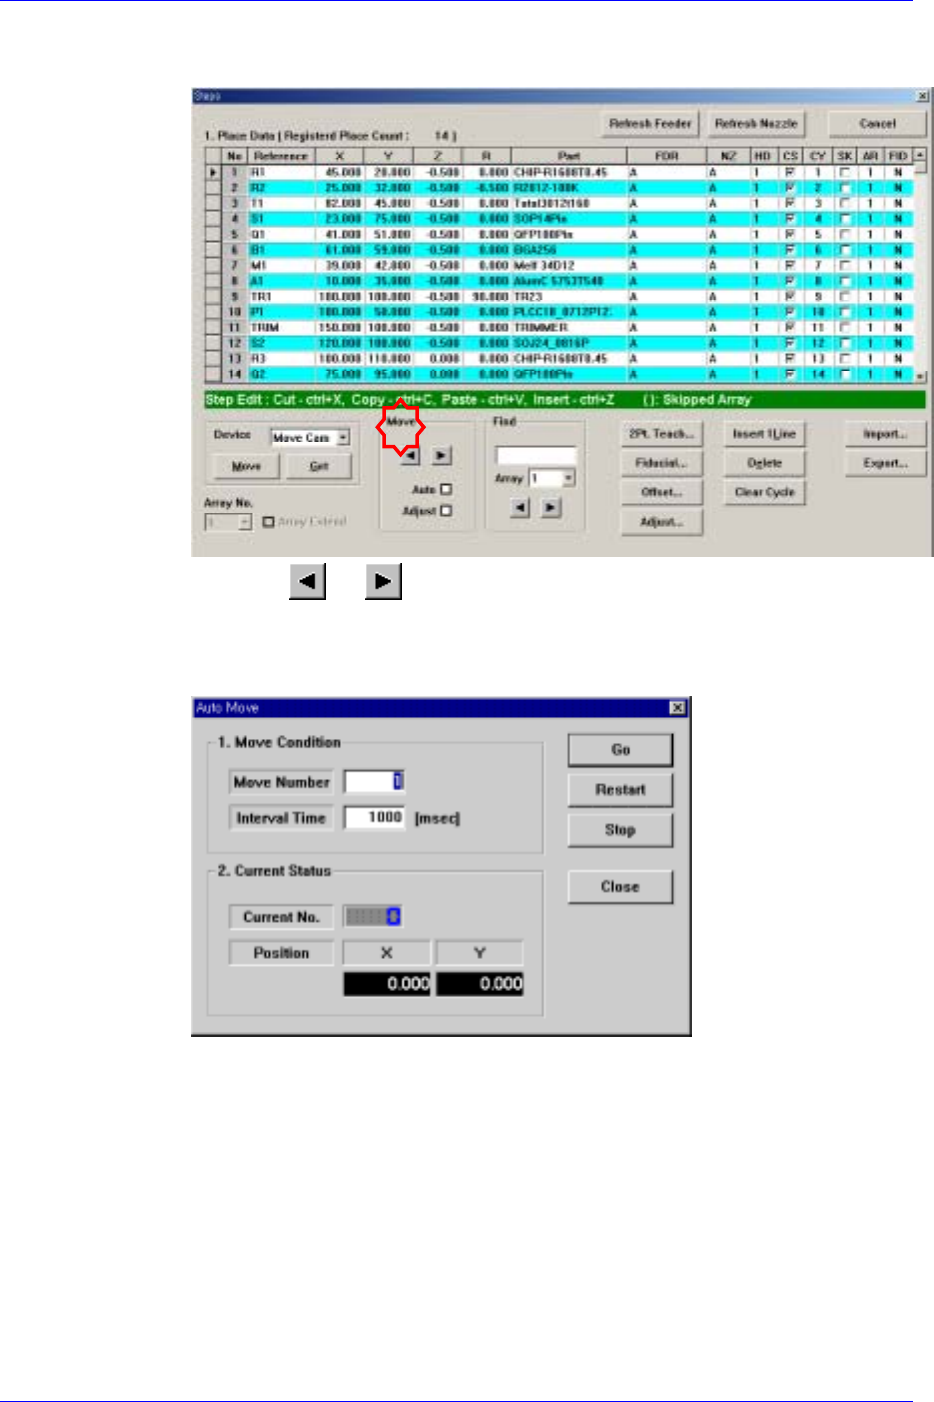
Once a component is registered, check if the actual placement point matches with
the entered coordinate.
When the or button is clicked after checking the <Auto> box in the
<Move> group, the following dialog box is displayed.
To verify the placement point using continuous automatic movement, check off
this box.
<1. Move Condition> group
Set the number of placement points to be moved and the time interval
between movements.
Move Number: Sets the number of placement points to be moved
continuously.
Interval Time: Sets the time interval between placement point movements.
<2. Current Status> group
Displays the number and position of the moved placement point.
Current No.: Displays the number of the moved placement point.
Position X: Displays the X position of the moved placement point.
13-14
Teaching
13-15
Position Y: Displays the Y position of the moved placement point.
When the position of the actual placement point is different from the entered
coordinate, perform teaching manually.
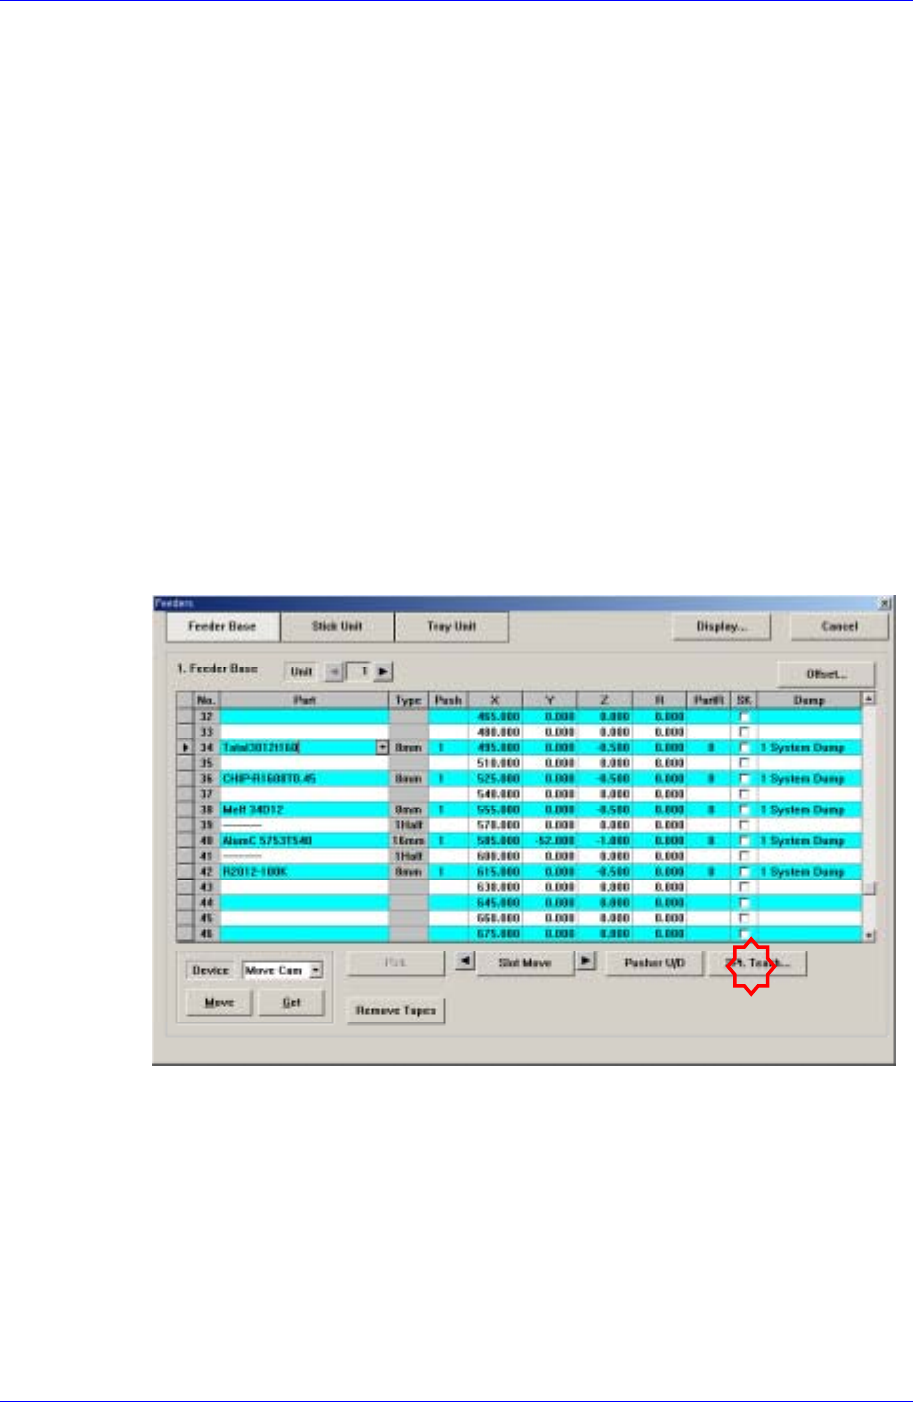
13.2.2. Pickup Point Teaching
This is to teach the positions (X, Y, Z) to pick the component up. This is performed for a
corresponding feeder.
Generally, in the case of the tape feeder, the Z value of the pickup point is set to zero (0).
In the case of the emboss feeder, this value is sometimes set smaller than zero.
However, in case the tape feeder is automatically arranged using the optimizer, the Z
value is sometimes set by automatically applying the properties of each tape feeder
registered in the MMI.
For other types of feeders, mount the suitable nozzle to the component, move the head to
the placement point, and then move down the Z-axis so that the nozzle tip contacts the top
surface of the component before teaching the height of the Z-axis.
Placement point teaching on the tape feeder
When teaching the placement point of the tape feeder, obtain the center of the
component by teaching two points on the edges, facing diagonally, of the pocket
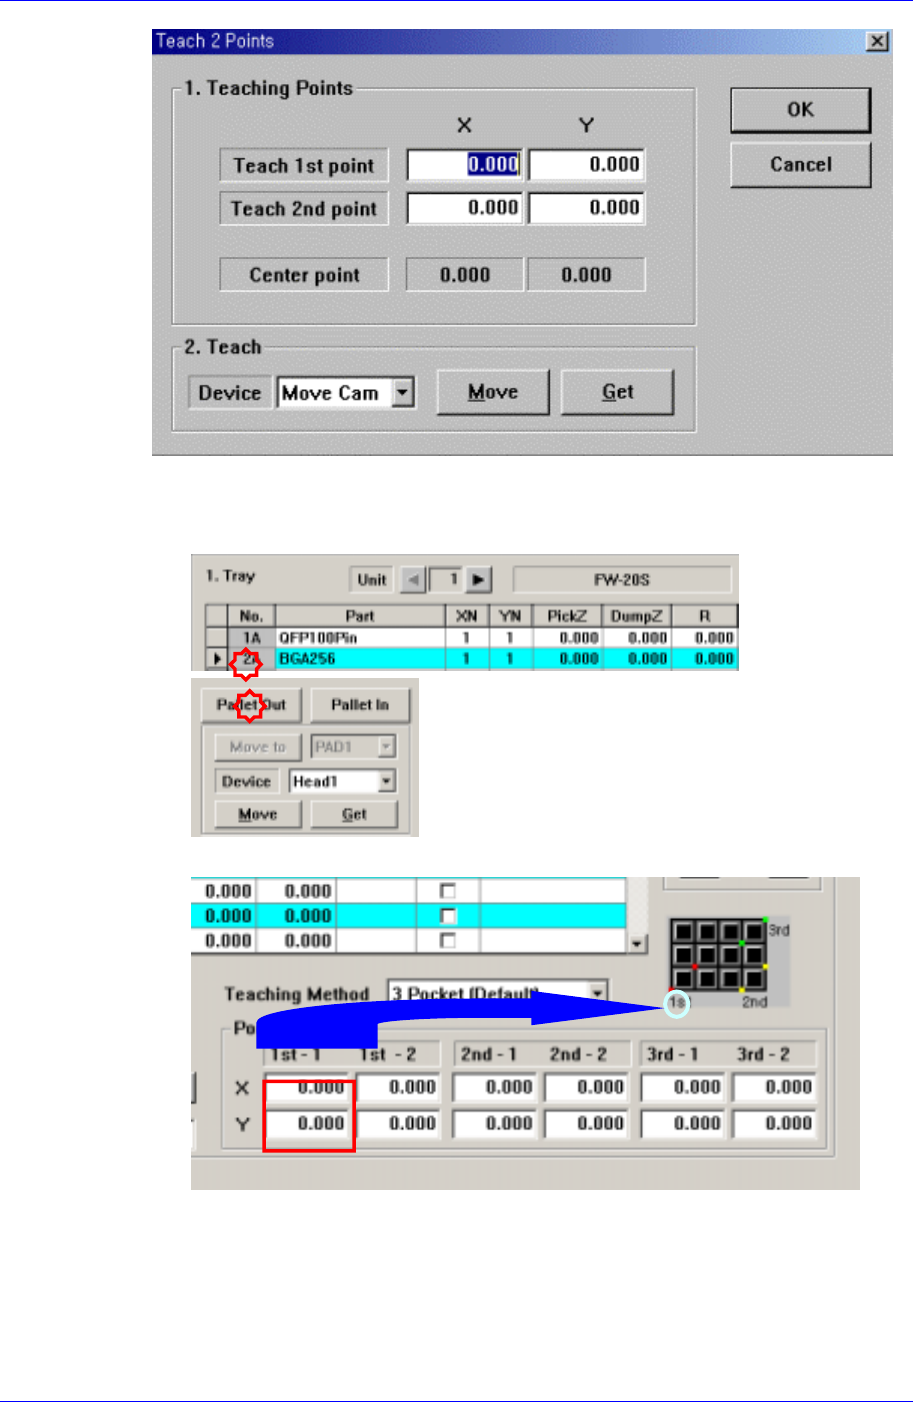
containing components. Clicking this button will display the following dialog box.
Samsung Component Placer CP45FV Administrator’s Guide
Placement point teaching on the tray feeder
Pallet Out: Click the <Pallet Out> button after selecting the corresponding
component.
Pocket Position: Perform Two Point Teaching of three points of the pallet.
Once the teaching of three pockets is completed, the coordinate of each pocket is
set automatically.
13-16