Administrator’s Guide(CP45FV) Eng.pdf - 第181页
Pr oduction Setup 11 - 3 <Customer> S tatic box Displays the customer name. <Board Name> S tatic box Displays the PCB name. <T otal Steps> option button Displays the tota…
Samsung Component Placer CP45FV Series Administrator’s Guide
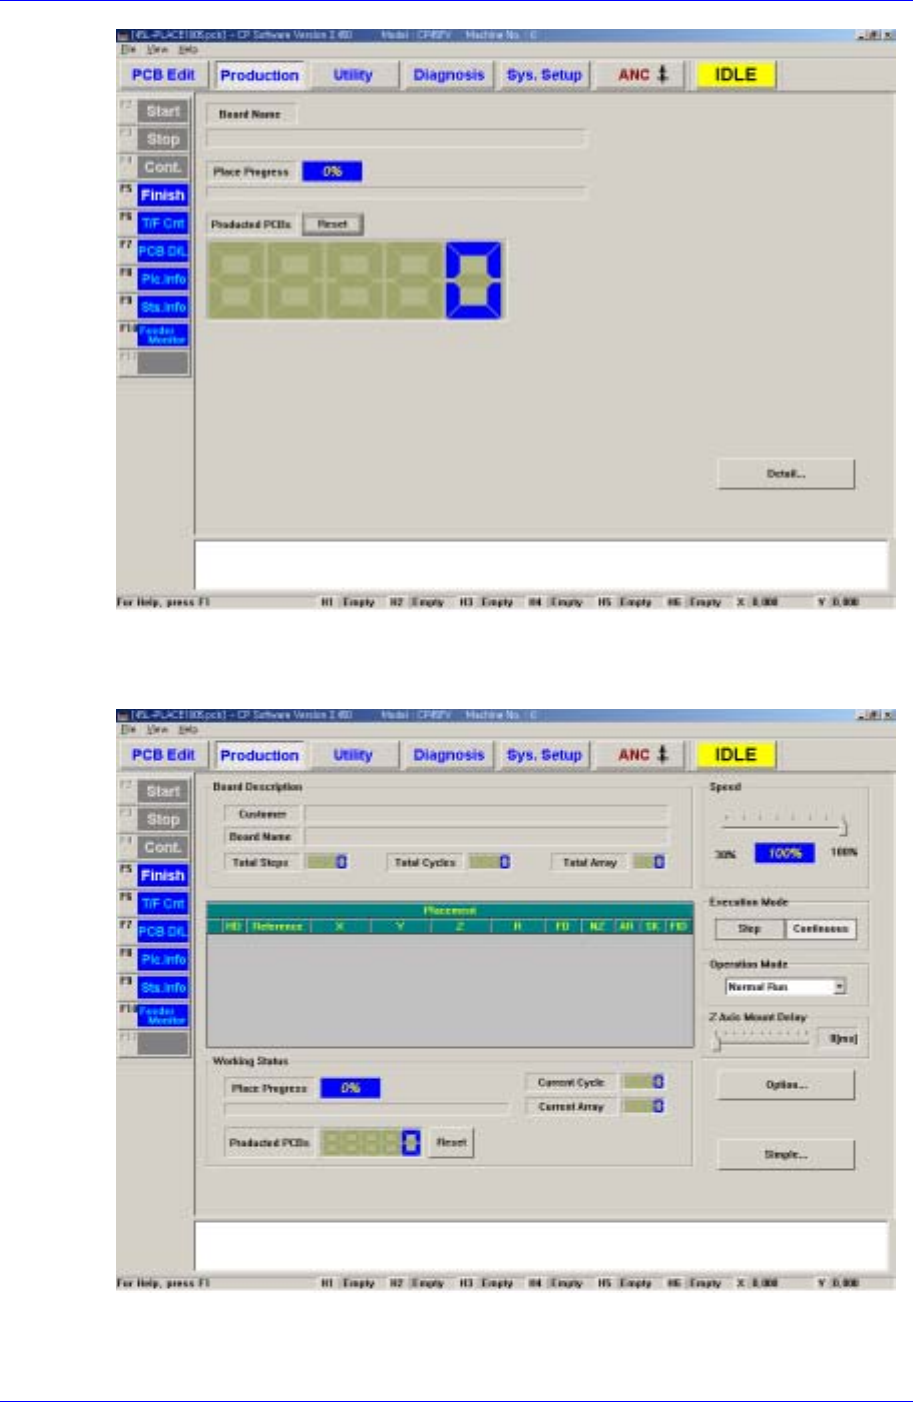
Figure 11-3. “Production” Main screen (Initial screen)
When the submenu, PCB D/L (F7) is clicked on, transmits the PCB data edited to the
machine, and the following screen is displayed.
<Board Description > group
Displays the data related to PCB board.
11-2

Production Setup
11-3
<Customer> Static box
Displays the customer name.
<Board Name> Static box
Displays the PCB name.
<Total Steps> option button
Displays the total number of steps.
<Total Cycles> option button
Displays the total number of cycles.
<Total Array> option button
<Working Status> group
Displays the status of operation in progress.
<Place Progress> Static box
Displays the progress of placement operation with a percentage and a progress
bar.
<Current Cycle> Static box
Displays the cycle in progress.
<Current Array> Static box
Displays the step in progress.
<Produced PCBs> Static box
Displays the number of produced PCBs.
<Reset> button
Initializes the number of produced PCBs to “0”.
<Speed> group
Set the speed of axis.
<Execution Mode> group
Set the execution mode.
<Step> option button
Sets to a mode in which the motion stops after each step of motion.
<Continuous> option button
Sets to a mode of continuous motion.
<Operation Mode> group
Set the operation mode. Available modes are as follows.
Normal Run: Operates normally.
Dry Run: Operates without picking up components actually. When all the steps are
completed, stops operation.
Dry Repeat Run: Operates without picking up components actually. When all the
steps are completed, repeats operation from the first.
Dry1 Run:
Dry1 Repeat Run:
Dry2 Run:
Dry2 Repeat Run:
Samsung Component Placer CP45FV Series Administrator’s Guide
<Option> button
Carries out the function of setting the operation scope. When this button is clicked on,
the following dialog boxes are displayed.
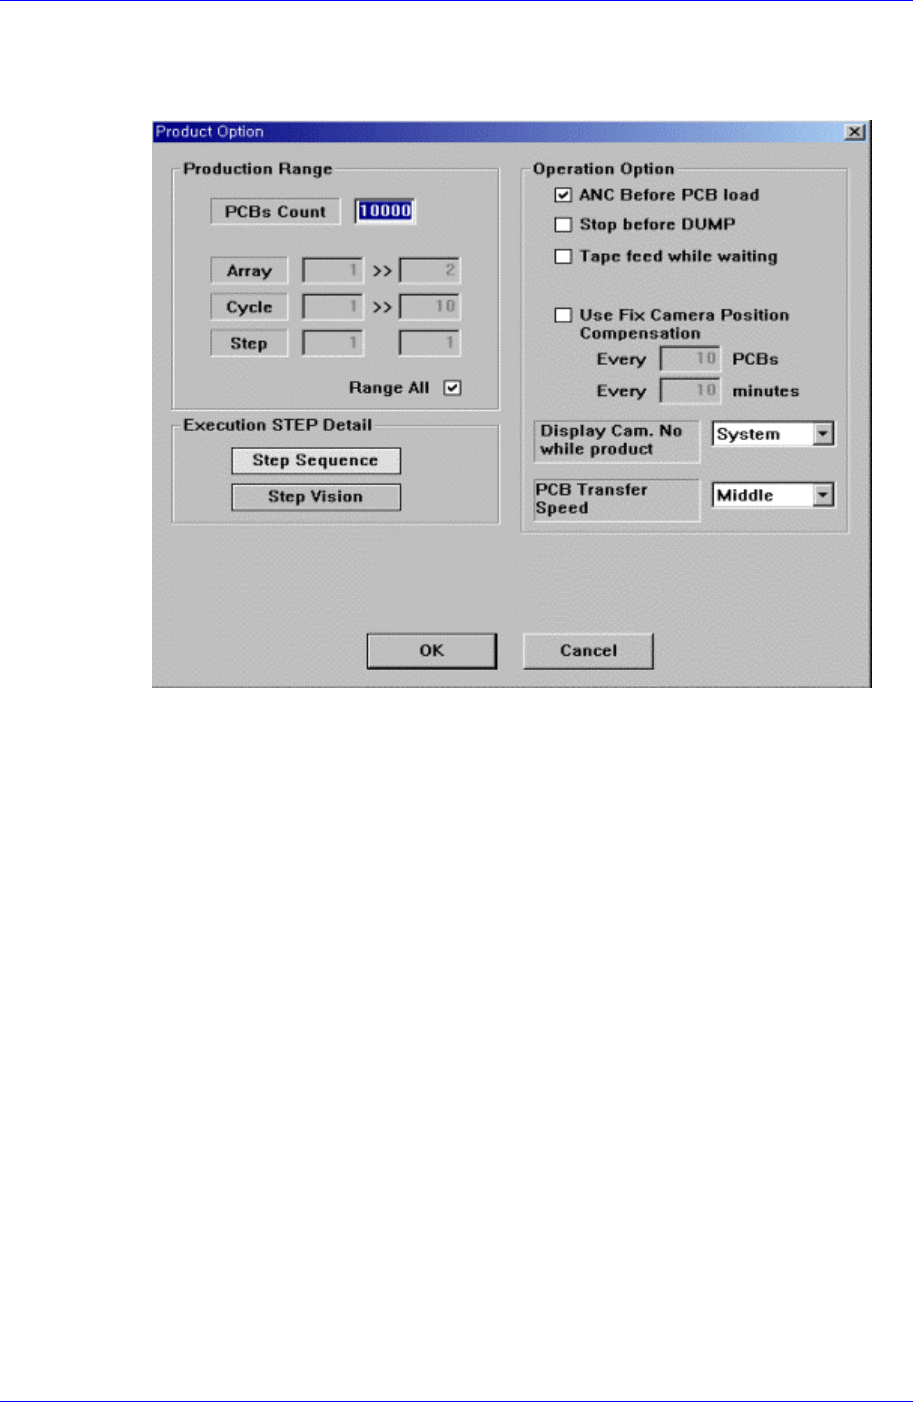
Figure 11-4. “Production Option” dialog box
Set the operation range.
<PCBs Count> Static box
This sets the number of PCBs to be produced. The range of values that can
be inputted is 0-10000. If the PCB Count is set to '0', the PCB Count function
will not be used.
<Array> Static box
It is activated when the “Range All” button is not checked.
If there are Array PCBs, set the range of arrays to operate.
<Cycle> Static box
It is activated when the “Range All” button is not checked.
Set the range of cycles to operate.
<Step> Static box
It is activated when the “Range All” button is not checked.
Set the step to operate.
The step under the start cycle sets the step to start operation in the start cycle,
and the step under the finish cycle sets the step to finish operation in the
finish cycle.
<Range All> check box
Check it when the entire area is to be operated.
<Execution STEP Detail> group
11-4