Administrator’s Guide(CP45FV) Eng.pdf - 第292页
Samsung Component Placer CP45FV Administrator ’ Guide Figur e 16-14. “ Sys. Setup : St andar d Device – St ick ” dialog box <1. Stick T y pe> list box Select the stick feeder type to set. <2. Default Fee…

System Setup
16-25
R2R1SlotL1L2
피
더
FEEDER
<4. Timing – Open Time> edit box
Time needed to open the shutter of the tape feeder.
<4. Timing – Feeding Time> edit box
Time needed to feed the tape feeder.
<5. Pickup Offset - X> edit box
Set the X offset value of the pickups point position of the tape feeder.
Based on the setting of the tape feeder in the front of the machine, set the offset value
of the pickups point of other feeders against the pickups point of the 8mm tape feeder.
<5. Pickup Offset - Y> edit box
Set the Y offset value of the pickups point position of the tape feeder.
<5. Pickup Offset - Z> edit box
Set the Z offset value of the pickups point position of the tape feeder.
<6. Width - Left> edit box
Set the left width of the tape feeder.
<6. Width - Right> edit box
Set the right width of the tape feeder.
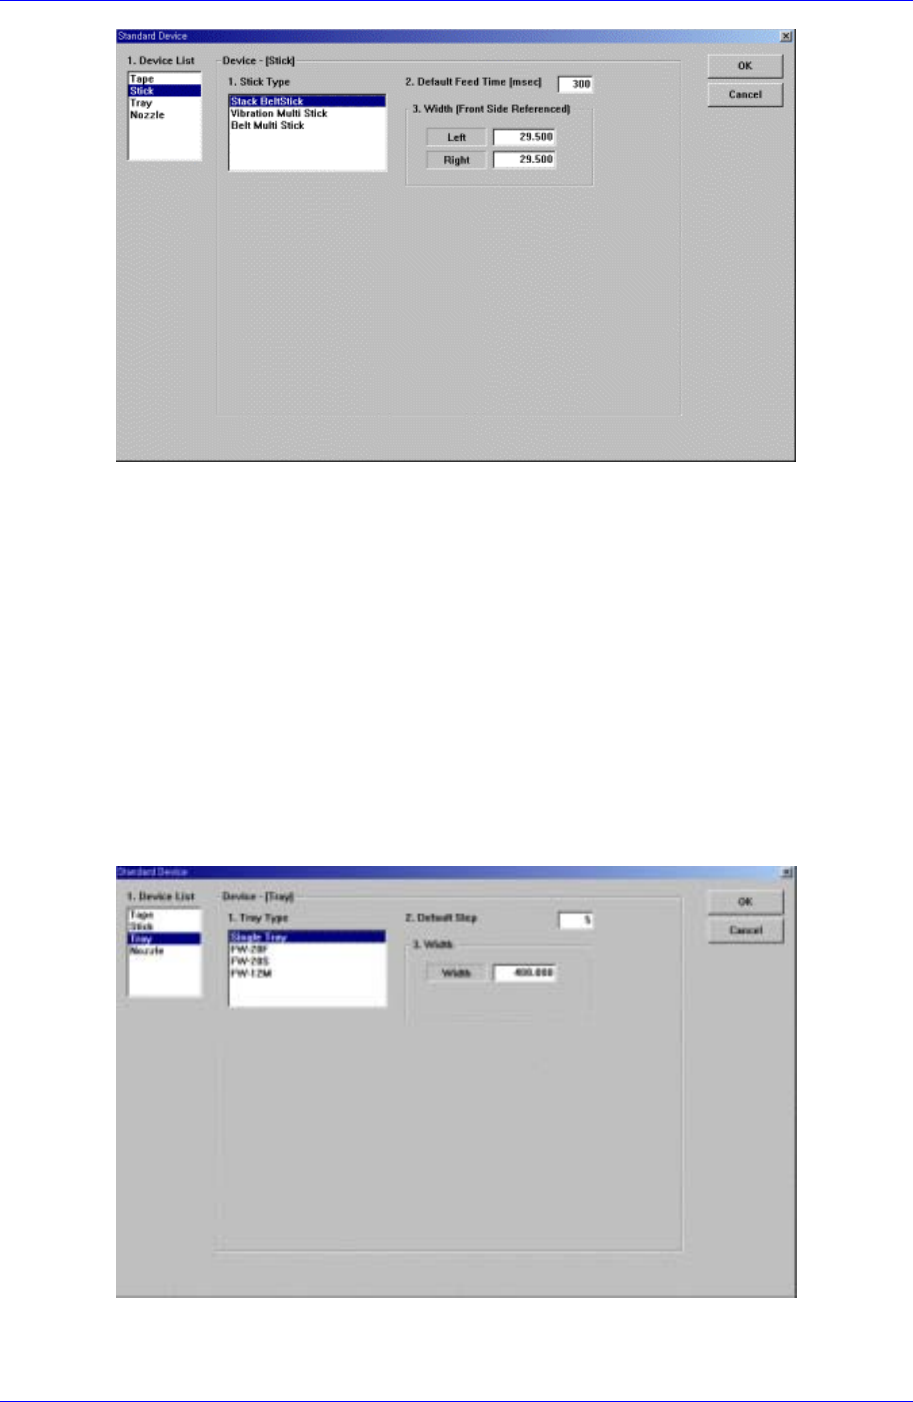
Next screen is the case where the “Stick” is selected in the Device list.
Set the data on the stick feeder..
Samsung Component Placer CP45FV Administrator’ Guide
Figure 16-14. “Sys. Setup : Standard Device – Stick” dialog box
<1. Stick Type> list box
Select the stick feeder type to set.
<2. Default Feed Time> edit box
Set the feed time.
<3. Width – Left> edit box
Set the left width of the stick feeder.
<3. Width – Right> edit box
Set the right width of the stick feeder.
Next screen is the case where the “Tray” is selected in the Device list.
Set the data on the tray feeder
Figure 16-15 . “Sys. Setup : Standard Device – Tray” dialog box
<1. Tray Type> list box
16-26
System Setup
16-27
Select the tray feeder type to set.
<2. Default Step> edit box
Set the number of basic tray for each tray feeder according to the Tray Feeder Type:
Single Tray(5)FW-20F(20), FW-20S(20), FW-12M(12), FW-24XS(24).
<3. Width> edit box
Set the width of the tray feeder.
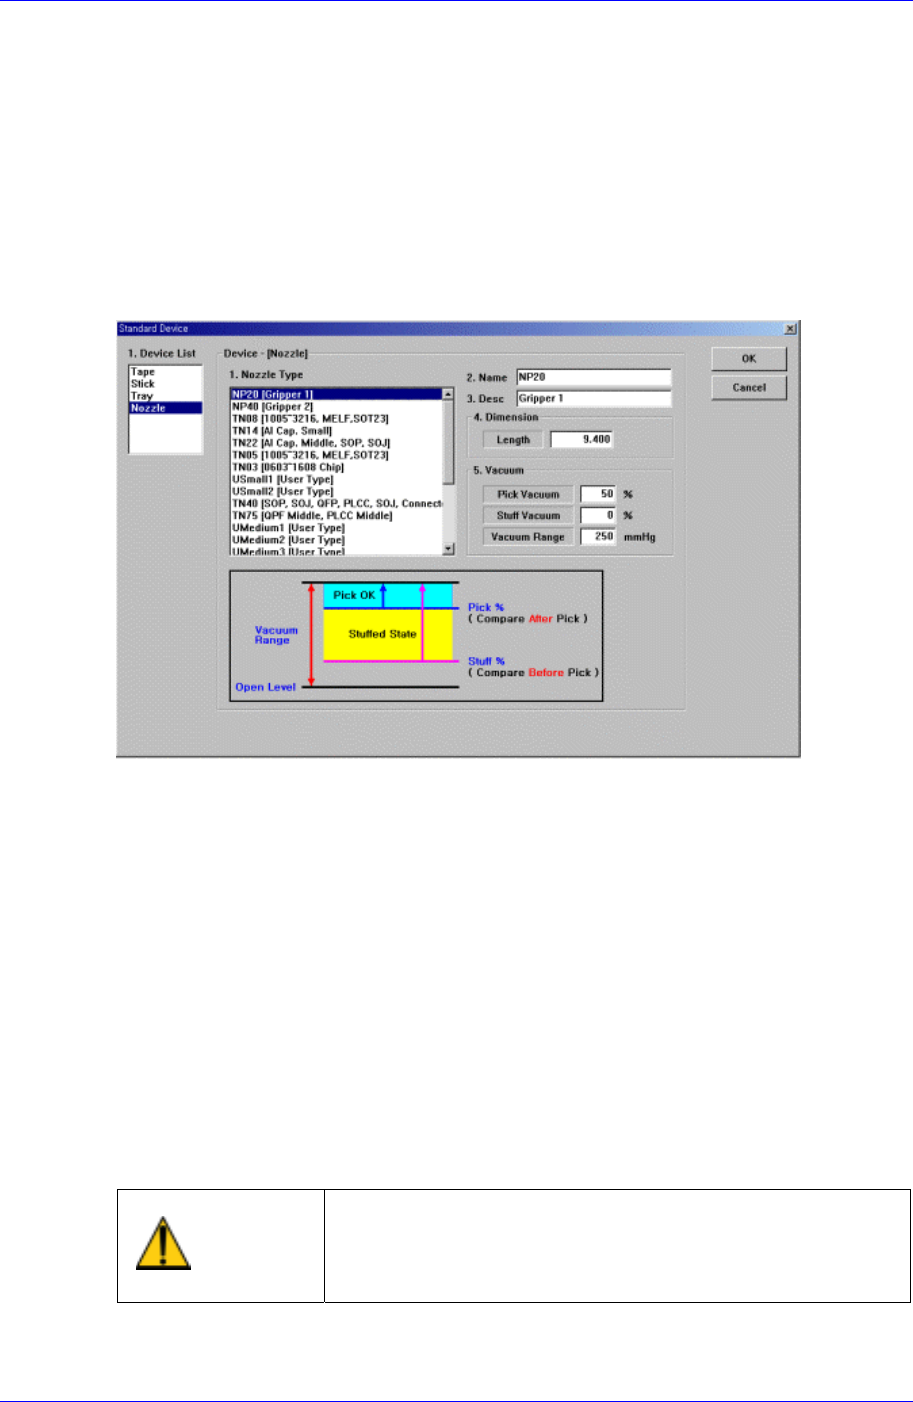
Next screen is the case where the “Nozzle” is selected in the Device list.
Set the data on Nozzle.
Figure 16-16. “Sys. Setup : Standard Device – Nozzle” dialog box
<1. Nozzle Type> list box
Select the nozzle type to set.
<2. Name> edit box
Set the name of the selected nozzle.
<3. Desc> edit box
Set the explanation on the selected nozzle.
<4. Dimension - Length> edit box
Set the nozzle length.
<5. Vacuum – Pick Vacuum> edit box
Set the vacuum pressure level to be used as the criteria to determine whether
component pickups is successful or not after component pickups with a percentage.
Changing the set up status by an unauthorized user could
damage the machine or result in personal injury.
Warning
Unauthorized user must not change the set up status of
the machine.
<5. Vacuum – Stuff Vacuum> edit box