Administrator’s Guide(CP45FV) Eng.pdf - 第290页
Samsung Component Placer CP45FV Administrator ’ Guide <3. Pusher [Front Side Referenced] – Right Pusher Num b er> combo box Set the number of pushers to be operate d to move forward the tape feeder . Based on t…
System Setup
16-23
Changing the set up status by an unauthorized user could
damage the machine or result in personal injury.
Warning
Unauthorized user must not change the set up status of the
machine.
16.8. Device [F10]
Controls the data related to the tape, stick, and nozzle. When this button is selected, the
following dialog box is displayed.
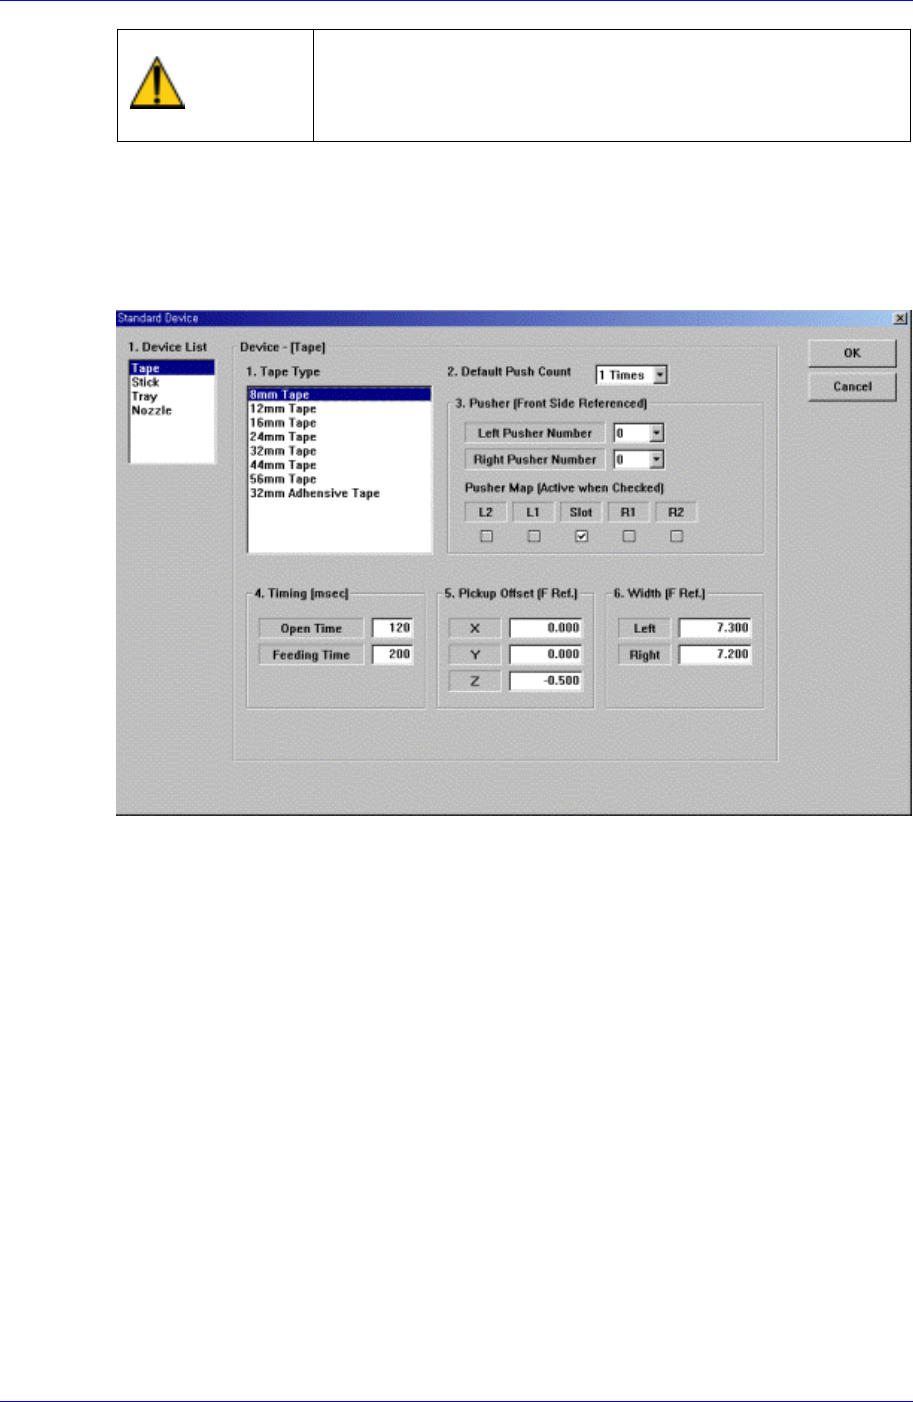
Figure 16-13. “Sys. Setup : Standard Device - Tape” dialog box
<1. Device List> list box
Select the device to set.
The above screen is the case where the “Tape” is selected in the Device list.
Set the data on the tape feeder.
<1. Tape Type> list box
Select the tape feeder type to set.
<2. Default Push Count> combo box
Select how many times the pusher should be operated to move forward the tape
feeder.
8~12mm : 1 pusher is used
16,24mm: 2 pushers (Left, Center) are used
32~56mm: 3 pushers are used
<3. Pusher [Front Side Referenced] – Left Pusher Number> combo box
Set the number of pushers to be operated to move forward the tape feeder.
Based on the slot in which the tape feeder is installed, select the number of pushers
on the left of the corresponding slot.
Samsung Component Placer CP45FV Administrator’ Guide
<3. Pusher [Front Side Referenced] – Right Pusher Number> combo box
Set the number of pushers to be operated to move forward the tape feeder.
Based on the slot in which the tape feeder is installed, select the number of pushers
on the right of the corresponding slot.
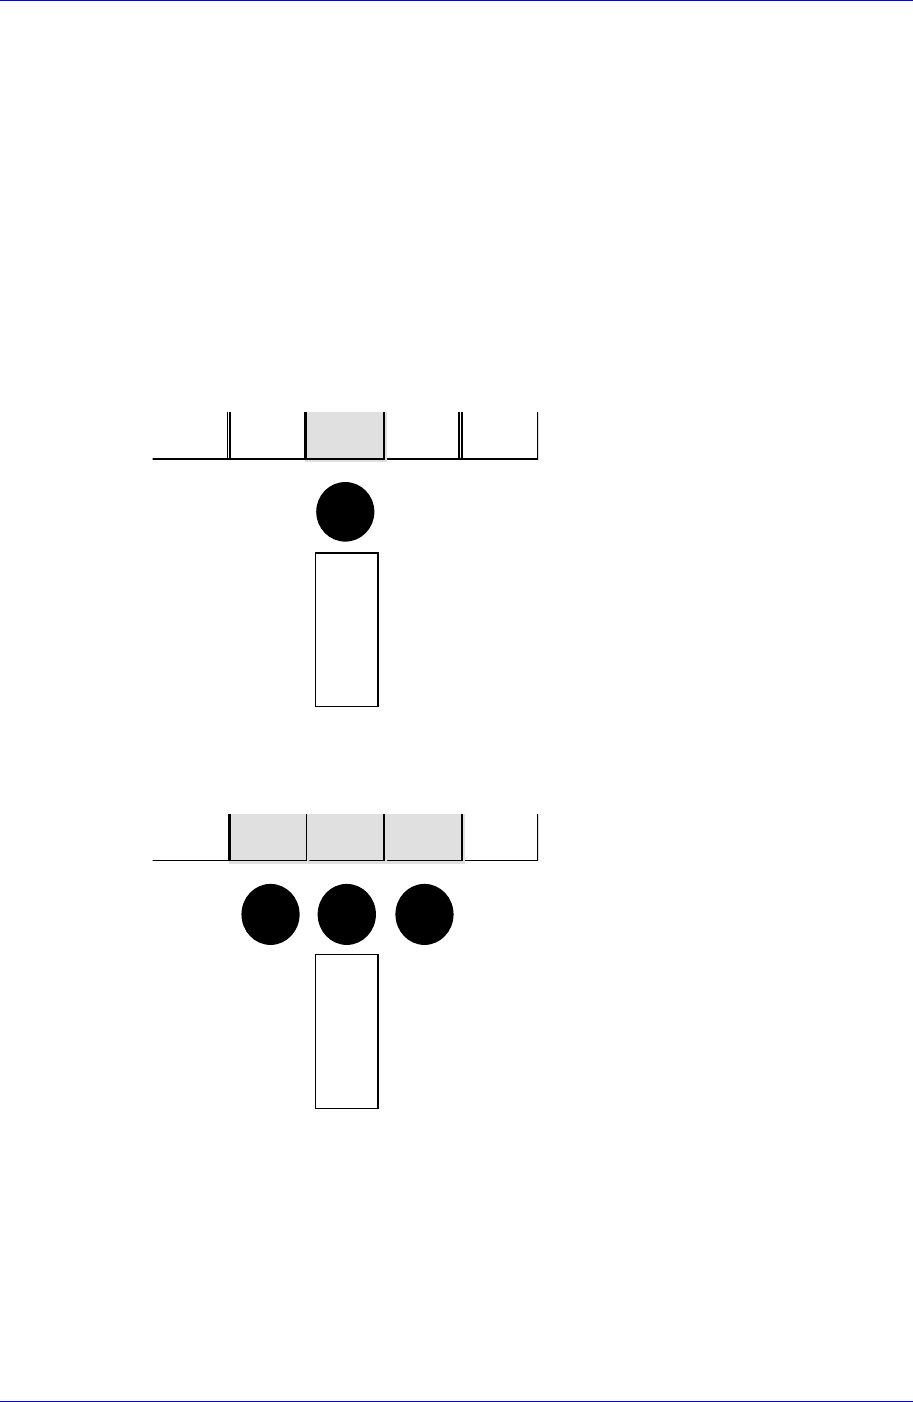
<3. Pusher [Front Side Referenced] – Pusher Map> check box
Set the pusher to be operated to move forward the tape feeder.
When the check box is checked, operates the corresponding pusher.
Next is a figure showing the relationship between the pusher data and the actual
pusher to operate. The solid black circles in the figure indicate the pushers to operate.
1) Left Pusher = 0, Right Pusher = 0
R2R1SlotL1L2
피
더
FEEDER
2) Left Pusher = 1, Right Pusher = 1
R2R1SlotL1L2
피
더
FE
EDER
3) Left Pusher = 2, Right Pusher = 1
16-24

System Setup
16-25
R2R1SlotL1L2
피
더
FEEDER
<4. Timing – Open Time> edit box
Time needed to open the shutter of the tape feeder.
<4. Timing – Feeding Time> edit box
Time needed to feed the tape feeder.
<5. Pickup Offset - X> edit box
Set the X offset value of the pickups point position of the tape feeder.
Based on the setting of the tape feeder in the front of the machine, set the offset value
of the pickups point of other feeders against the pickups point of the 8mm tape feeder.
<5. Pickup Offset - Y> edit box
Set the Y offset value of the pickups point position of the tape feeder.
<5. Pickup Offset - Z> edit box
Set the Z offset value of the pickups point position of the tape feeder.
<6. Width - Left> edit box
Set the left width of the tape feeder.
<6. Width - Right> edit box
Set the right width of the tape feeder.
Next screen is the case where the “Stick” is selected in the Device list.
Set the data on the stick feeder..