3OM-1075-002.pdf - 第142页
AHB01EDTP *4 [Close] Button When this button is pressed, the "T ype Addition" dialog box closes. *5 [Change] Button When this button is pressed, a component type is changed to the contents entered in the "…
AHB01EDTP
2.3 Basic Usage of "Selection of component ID"
Window
2.3.1 Type Addition
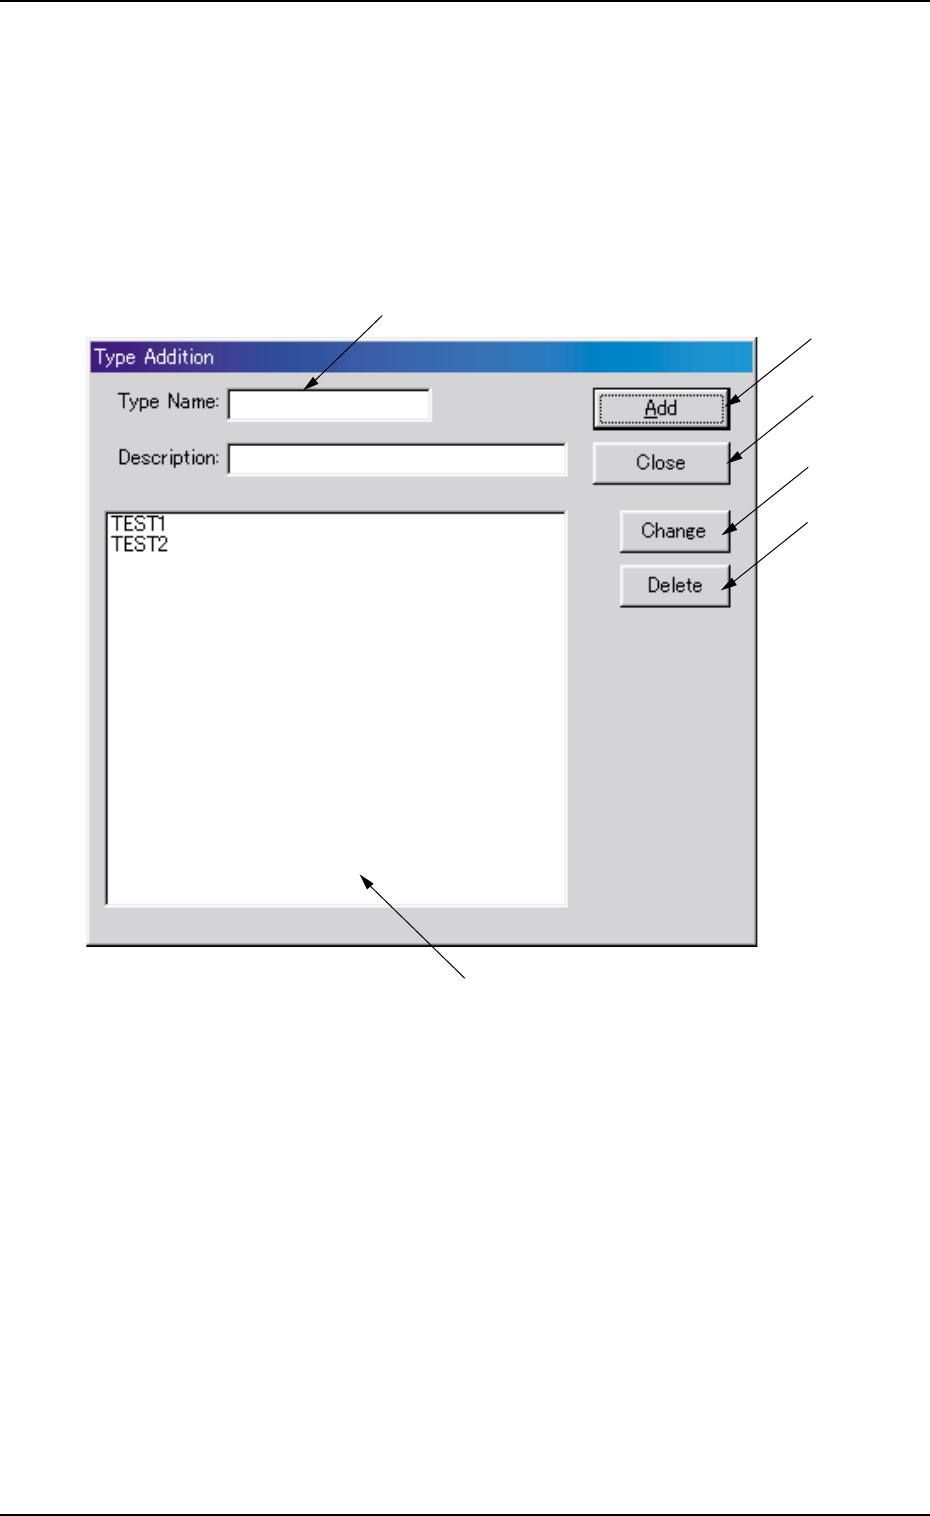
When the [Type Addition] button is pressed, the following dialog box
appears.
Fig. 3C5 "Type Addition" Dialog Box
••
••
• Composition of "Type Addition" Dialog Box
*1 Type Name, Description
Enter parameters in these text boxes.
*2 "List of Component Types" Pane
Newly created component types are displayed in this pane.
*3 [Add] Button
When this button is pressed, a type entered in the "Type Name" text
box is added as a new type.
2.3 Basic Usage of "Selection of component ID" Window
*6
*3
*4
*2
*1
*5
0206-003 3-6

AHB01EDTP
*4 [Close] Button
When this button is pressed, the "Type Addition" dialog box closes.
*5 [Change] Button
When this button is pressed, a component type is changed to the
contents entered in the "Type Name" and "Description" text boxes.
*6 [Delete] Button
When this button is pressed, the component type selected in "*2" is
deleted.
0206-002 3-7
2.3 Basic Usage of "Selection of component ID" Window
AHB01EDTP
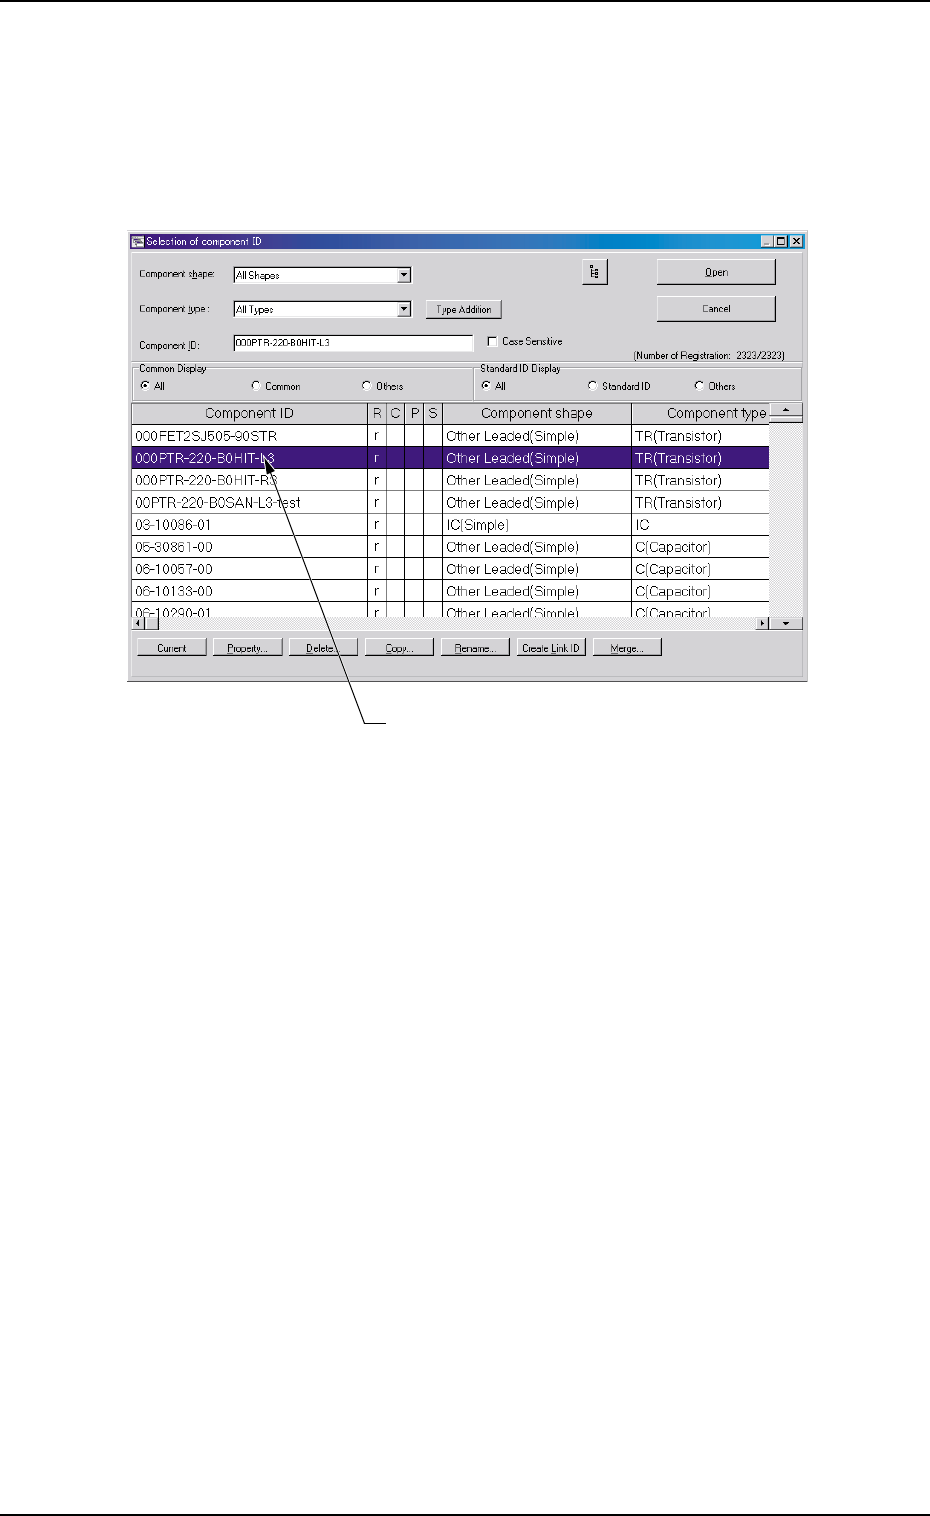
2.3.2 Deleting the Component ID
(1) Select the component ID to be deleted.
The selected component ID turns blue, indicating that it is se-
lected.
Fig. 3C6
(2) Press the [Delete...] button.
The "Confirmation" dialog box opens. When the [YES] is pressed,
the selected component ID is deleted.
Pressing the [NO] button closes the "Confirmation" dialog box
without deleting the component ID.
0308-003 3-8
Selected Component ID
2.3 Basic Usage of "Selection of component ID" Window