3OM-1075-002.pdf - 第324页
*3 Nozzle ID Nozzle IDs can be specified. When an arbitrary nozzle ID is selected and the [ ] icon is pressed, the "Nozzle T ype" window opens. Double-clicking the "Nozzle ID" (title) also opens the &…

0308-003 5-90 AHB01EDTP
3.1 "Nozzle Stocker Data" Tab
3.1 "Nozzle Stocker Data" Tab
The machine performs the nozzle change operation during automatic
operation according to this nozzle stocker data.
Be sure to enter parameters correctly. Otherwise, the
nozzles may interfere with each other.
••
••
• Sheet Layout
When the "Nozzle Stocker Data" tab is pressed in the "Nozzle Data"
window, the following tab sheet appears inside the window.
Fig. 3E79 "Nozzle Stocker Data" Tab Sheet
••
••
• Sheet Composition
*1 Tabs and Tab Sheets
The "Nozzle Stocker Data" tab sheet is provided with 2 tabs -
"Stocker B1" and "Stocker B2". When a tab is pressed, the corre-
sponding tab sheet appears.
The same items appear in the "Stocker B1" and "Stocker B2" tab
sheets.
*2 Address
Shown are the addresses of the nozzle stocker.
*2
*1
*3 *4 *5
CAUTION

*3 Nozzle ID
Nozzle IDs can be specified.
When an arbitrary nozzle ID is selected and the [ ] icon is
pressed, the "Nozzle Type" window opens.
Double-clicking the "Nozzle ID" (title) also opens the "Nozzle
Type" window.
*4 Direction [
° °
° °
° ]
(Not Available)
In principle, "000" (0
°°
°°
°) must be specified.
This is the reserved data for special nozzles, etc., that are used
to place special component.
*5 C
Set control commands in the text boxes.
- : This command handles the steps as those used for com-
ponent placement.
S : This command invalidates the steps.
This command prohibits the use of the nozzle in the stocker ad-
dress where the nozzle ID is already set.
When "S" (bypass designation) is set, the control process is
handled in the same way as the blank setting.
01 12-001 5-91
AHB01EDTP
3.1 "Nozzle Stocker Data" Tab
••
••
• Operation Procedure
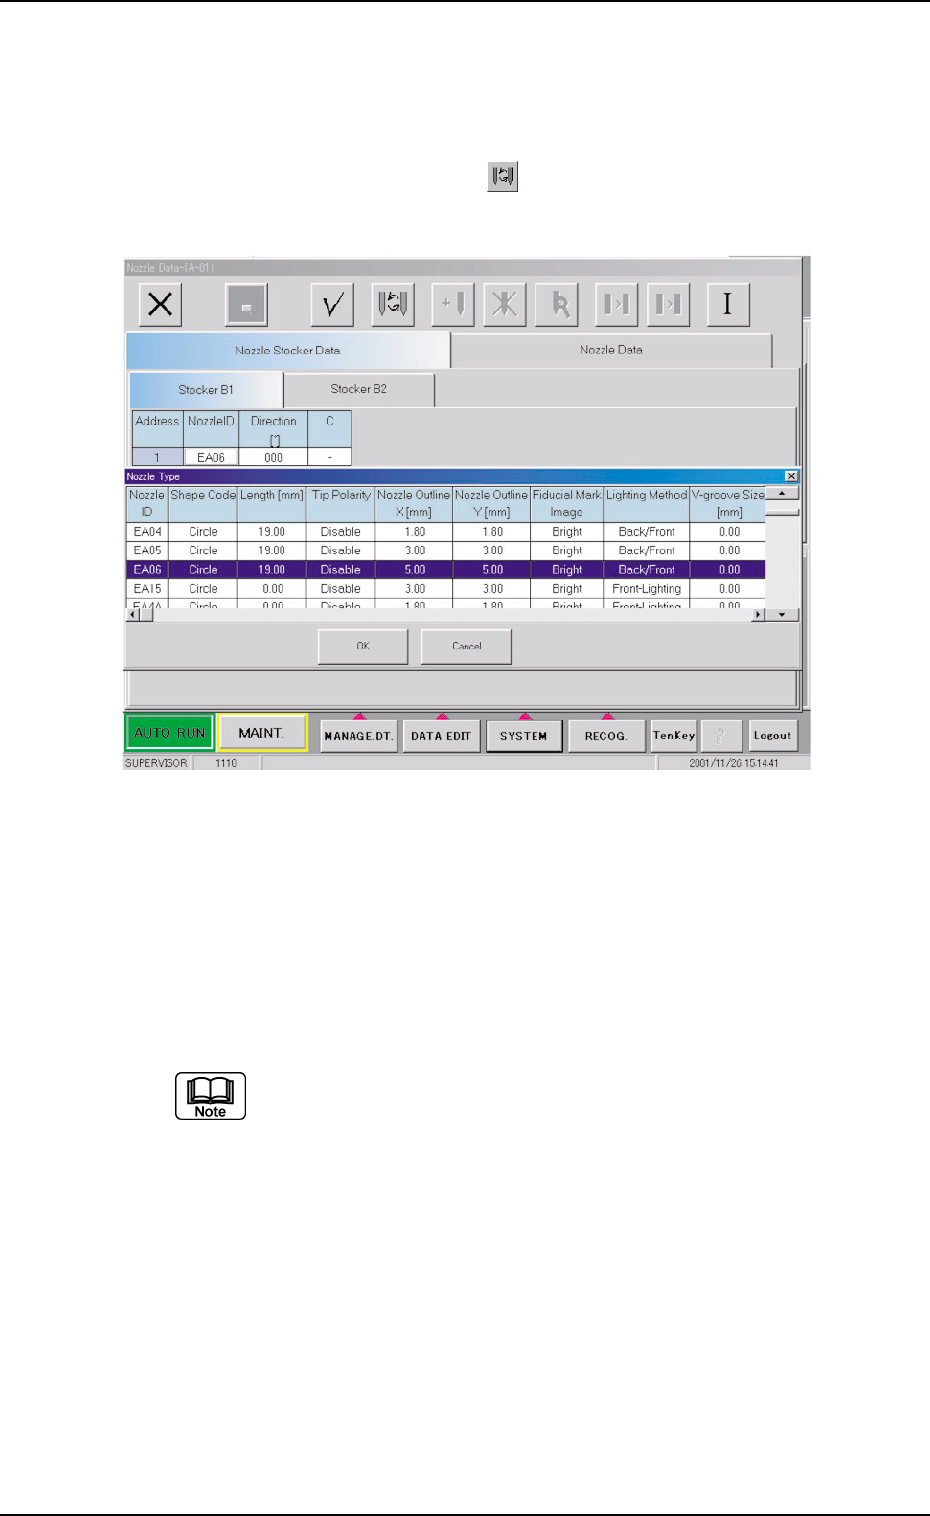
Nozzle Type Change Operation
(1) Select the nozzle ID in the address where the nozzle type must
be changed and press the [ ] icon.
The "Nozzle Type" window opens.
Fig. 3E80 "Nozzle Type" Window
The line of the nozzle ID selected in (1) is highlighted in the "Nozzle
Type" window.
(2) Select the nozzle type to be allocated and press the [OK] button.
The source nozzle type is changed to the selected one.
It is recommended for better efficiency that the nozzles for
Head #1 be stored in Nozzle Stocker B1 and the nozzles for
Head #2 in Nozzle Stocker B2.
0206-002 5-92
AHB01EDTP
3.1 "Nozzle Stocker Data" Tab