3OM-1075-002.pdf - 第330页
*10 Pick-up Hole Data (1), (2), (3), and (4) Size X [mm], Size Y [mm] Set the dimensions of the nozzle pick-up holes in the text boxes. Data Input Range X: 00.00 to 18.00 Y : 00.00 to 18.00 In the case of "Circle&qu…
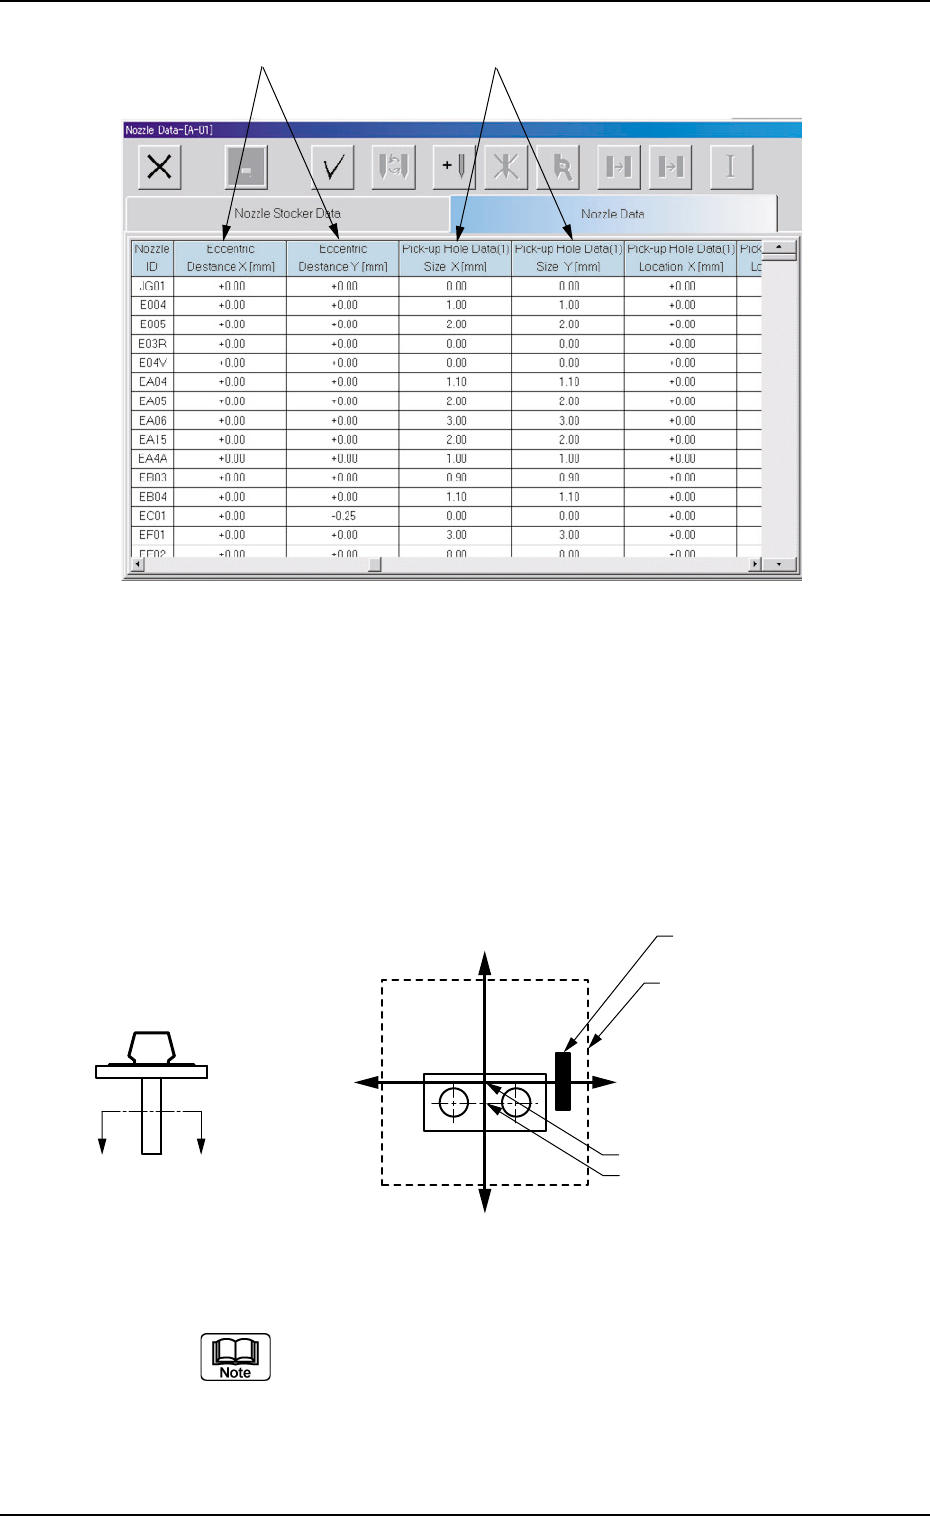
Fig. 3E84
*9 Eccentric Distance X [mm], Y [mm]
In the case of the special nozzle whose tip is manufactured eccen-
trically from the head rotational center, set the eccentricity (distances)
separately for the "X" and "Y" directions.
Data Input Range
X: −99.99 to +99.99
Y: −99.99 to +99.99
Fig. 3E85
(a) Set "0, 0" as the data values (X, Y) for all the standard
nozzles.
(b) By pressing one of the titles (the labels arranged on
top of the list), the parameters can be sorted by "Nozzle
ID", "Length [mm]" , etc., and reorganized, depending
on which title is selected.
3.2 "Nozzle Data" Tab
0206-002 5-96 AHB01EDTP
*9
*10
X(+)
Y (-)
Y (+)
X(-)
A′
A
Diffusion Plate
Imprinted Nozzle ID
Nozzle Center
Nozzle Rotational Center
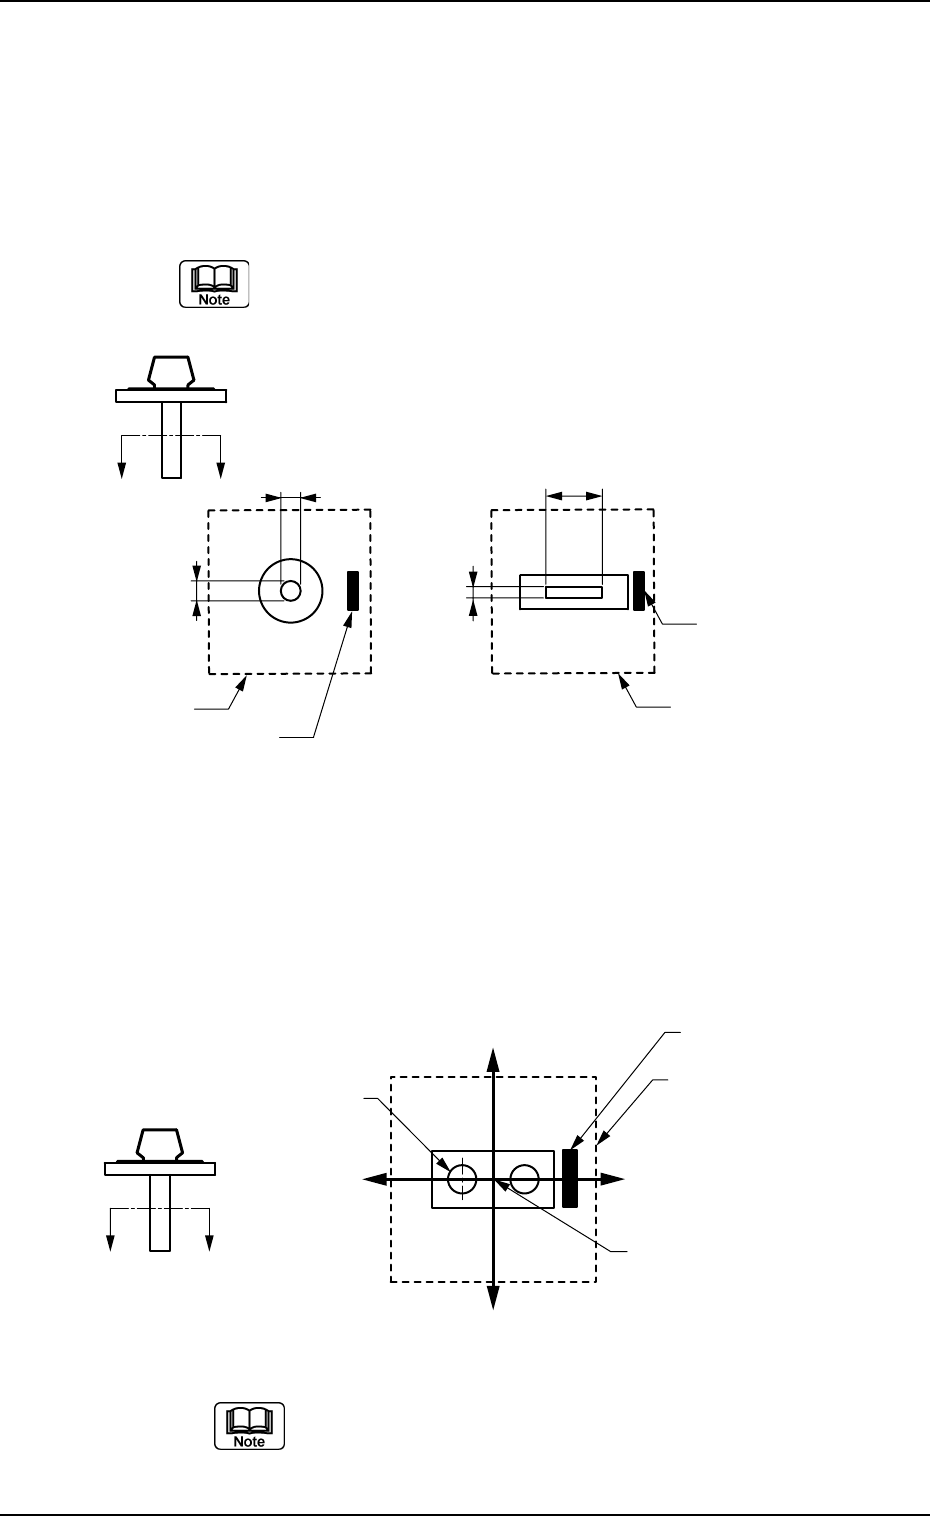
*10 Pick-up Hole Data (1), (2), (3), and (4)
Size X [mm], Size Y [mm]
Set the dimensions of the nozzle pick-up holes in the text boxes.
Data Input Range
X: 00.00 to 18.00
Y: 00.00 to 18.00
In the case of "Circle", set the same dimensions for "X" and
"Y".
In the case of "Rectangle", set Dimensions X and Y.
Fig. 3E86
*11 X[mm], Y[mm]
Set the center position (based on the nozzle center) of the pick-
up hole (1) in the text boxes.
Data Input Range
X: -99.99 to +99.99
Y: -99.99 to +99.99
Fig. 3E87
When the pertinent hole is not found, set "00.00" for both
"X" and "Y".
Parameters can be specified for up to 4 pieces of pick-
up holes.
3.2 "Nozzle Data" Tab
0206-002 5-97 AHB01EDTP
X
Y
X
Y
Aѳ
A
Imprinted Nozzle ID
Imprinted Nozzle ID
Diffusion Plate Diffusion Plate
X(-)
Y (+)
Y (-)
X(+)
A′
A
Diffusion Plate
Imprinted Nozzle ID
Pick-up Hole (1)
Nozzle Center

0206-002 5-98 AHB01EDTP
••
••
• Operation Procedure
How to add a nozzle type newly
(1) Press the [ ] icon.
The "Nozzle Type Property" window opens.
Fig. 3E88
(2) Enter parameters (nozzle data) in the text boxes.
(3) Press the [OK] button.
The nozzle data is added as new one.
How to change a nozzle type
(1) Select the nozzle data to be changed.
(2) Press the [
] icon.
The "Nozzle Type Property" window opens.
(3) Change the data.
(4) Press the [OK] button.
The nozzle data is changed.
When the [Cancel] button is pressed in the "Nozzle Type Prop-
erty" window, the "Nozzle Type Property" window closes with-
out newly adding or modifying the data.
3.2 "Nozzle Data" Tab