3OM-1075-002.pdf - 第146页
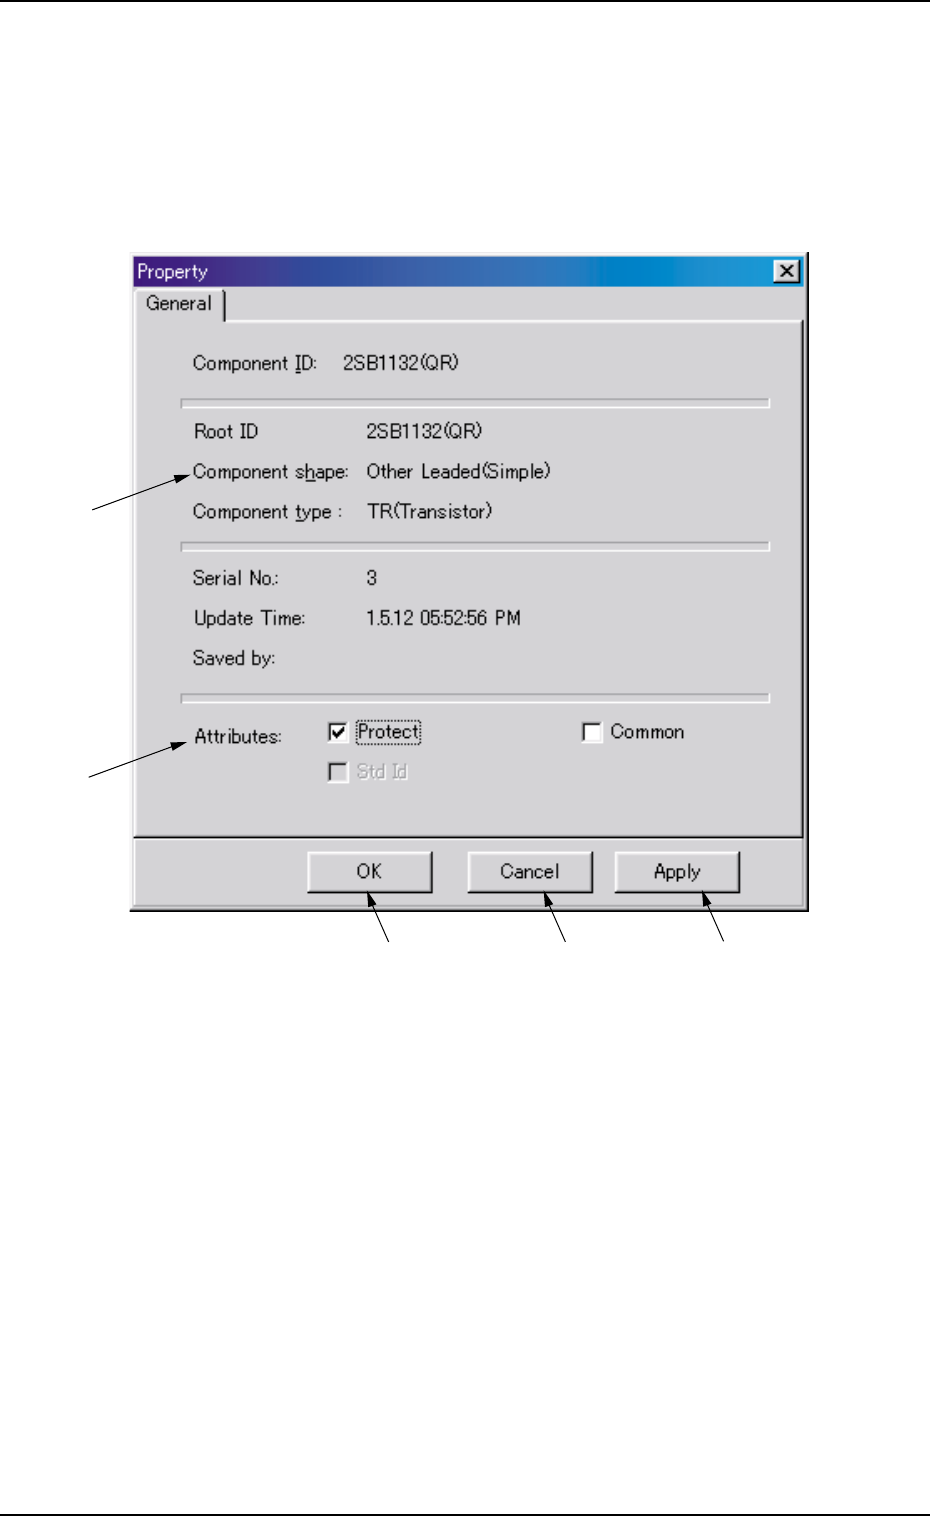
AHB01EDTP 2.3.7 Property of Component ID (1) Select the component ID to view its property . The selected component ID turns blue, indicating that it is selected. (2) Press the [Property ...] button. The "Property&qu…
AHB01EDTP
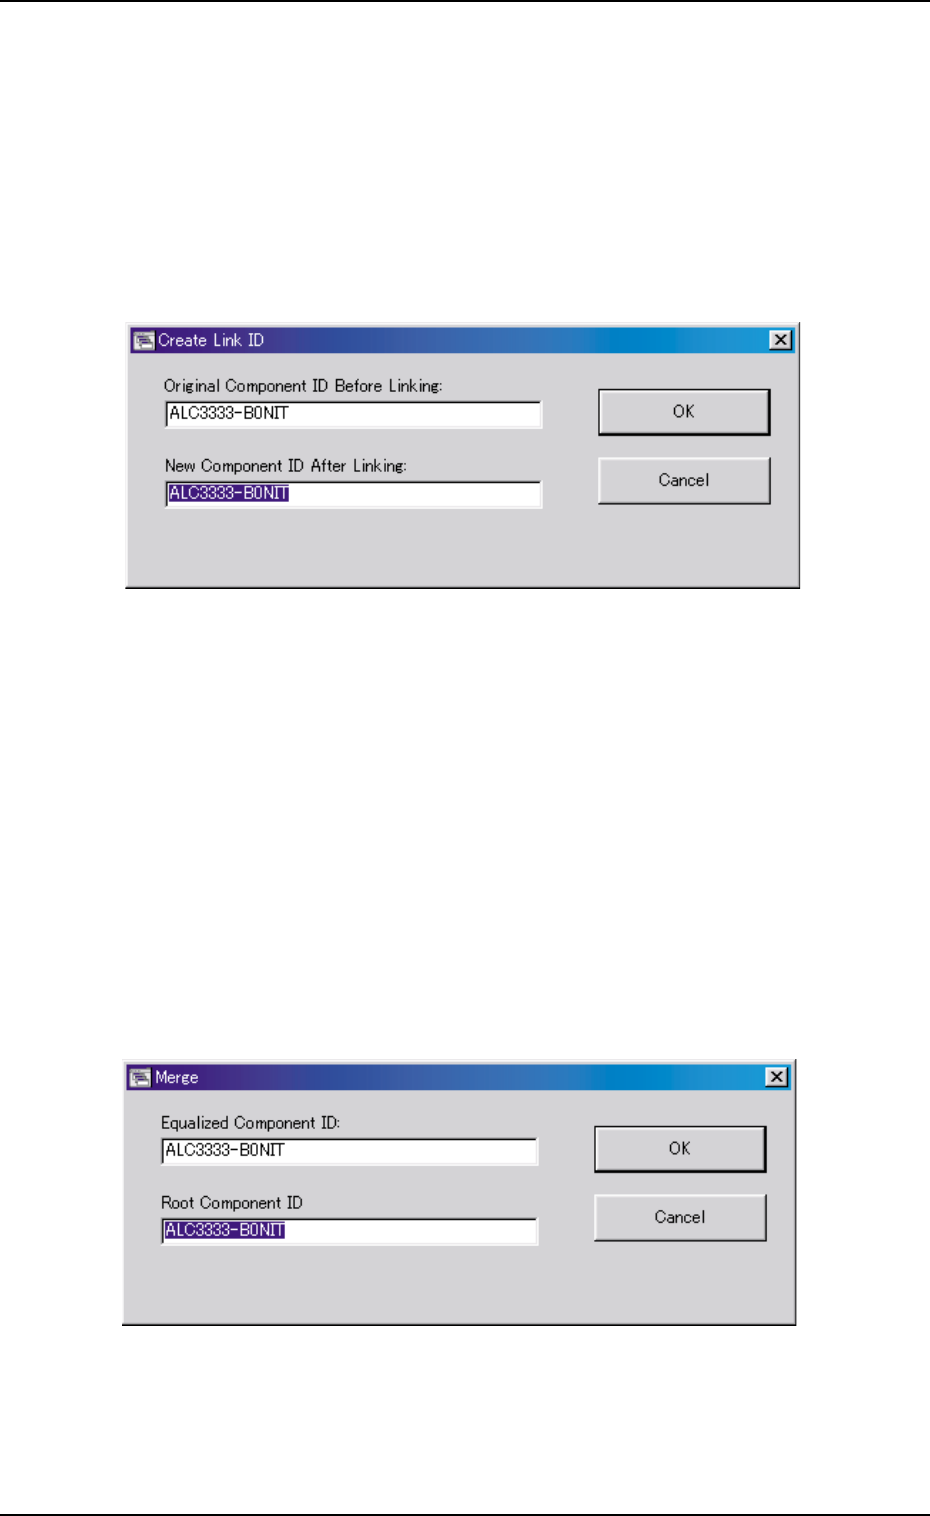
2.3.5 Creating the Link ID
(1) Select the component ID as an original component ID before link-
ing.
The selected component ID turns blue, indicating that it is se-
lected.
(2) Press the [Create Link ID] button.
The "Create Link ID" dialog box opens.
Fig. 3C9
(3) Enter the new link ID name in the "New Component ID After Link-
ing:" text box and press the [OK] button.
A new link ID is created.
2.3.6 Merging the Component ID
(1) Select the component ID to be merged.
The selected component ID turns blue, indicating that it is se-
lected.
(2) Press the [Merge...] button.
The "Merge" dialog box opens.
Fig. 3C10
(3) Enter a component ID to be linked in the "Root Component ID"
text box and press the [OK] button.
The component ID is merged.
0206-003 3-10
2.3 Basic Usage of "Selection of component ID" Window
AHB01EDTP
2.3.7 Property of Component ID
(1) Select the component ID to view its property.
The selected component ID turns blue, indicating that it is selected.
(2) Press the [Property...] button.
The "Property" dialog box appears.
Fig. 3C11 "Property" Dialog Box
••
••
• Composition of "Property" Dialog Box
*1 Component ID, Root ID, Component shape, Component type,
Serial No., Update Time, Saved by
The property of the component ID is displayed.
*2 Protect, Common, Std Id
The attributes of the component ID are displayed. The check boxes
enable the operator to change the corresponding attributes.
*1
*2
*3
*4
*5
0206-003 3-11
2.3 Basic Usage of "Selection of component ID" Window

AHB01EDTP
0206-002 3-12
Check Boxes
: The check box is marked, indicating that the function is used
or enabled.
When " " is pressed, it changes to " ".
: The check box is not marked, indicating that the function is not
used or disabled.
When " " is pressed, it changes to " ".
"Protect"
When this check box is turned on (checked), this component ID is
specified as "Protected", making it impossible to edit the data of the
component ID.
"Common"
When this check box is turned on (checked), this component ID is
specified as "Common".
"Std Id"
When this check box is turned on (checked), this component ID is
specified as "Standard ID".
*3 [OK] Button
When this button is pressed, the changed attributes are applied if
any and the "Property" sheet closes.
*4 [Cancel] Button
The changed attributes are not applied and the "Property" sheet
closes.
*5 [Apply] Button
The changed attributes are applied.
2.3 Basic Usage of "Selection of component ID" Window