CM602all_EJM8AESM_Service Manual.pdf - 第1077页
EJ M8A-E- 090101-A01- 00 Page 9- 1- 1-2 Sof twar e Sof twar e Inst allation 1. Proced ures for Sav ing th e CM 602-L Mach i ne Param eters & N etw ork Configurati on 1.1 W i th the C M602- L op er ated, sel ect [ Fi …
EJM8A-E-090101-A01-00
Page 9-1-1-1
Software Software Installation
9-1-1 Installation
Procedures for Upgrading the CM602-L Version
When upgrading the CM602-L system from earlier than V6.35-016E to V6.35-016E or later,
follow the procedures below:
* When the version is upgraded, the FROM is cleared. Be sure to backup
the following data.
* Machine parameters
* Network configuration
* Refer to page 16 “CM602 Supplementary Procedures for Upgrading the
System”
* The engineer mode password is also cleared; re-set the password.
<Apology>
The screens shown in this instruction manual are CM402-M ones. Although some portions of
the screens are different from the CM602-L ones, the upgrade portions are the same. We are
sorry for the inconvenience caused by the different screens, but please refer to them.
9-1 Software Installation
EJM8A-E-090101-A01-00
Page 9-1-1-2
Software Software Installation
1. Procedures for Saving the CM602-L Machine Parameters & Network
Configuration
1.1
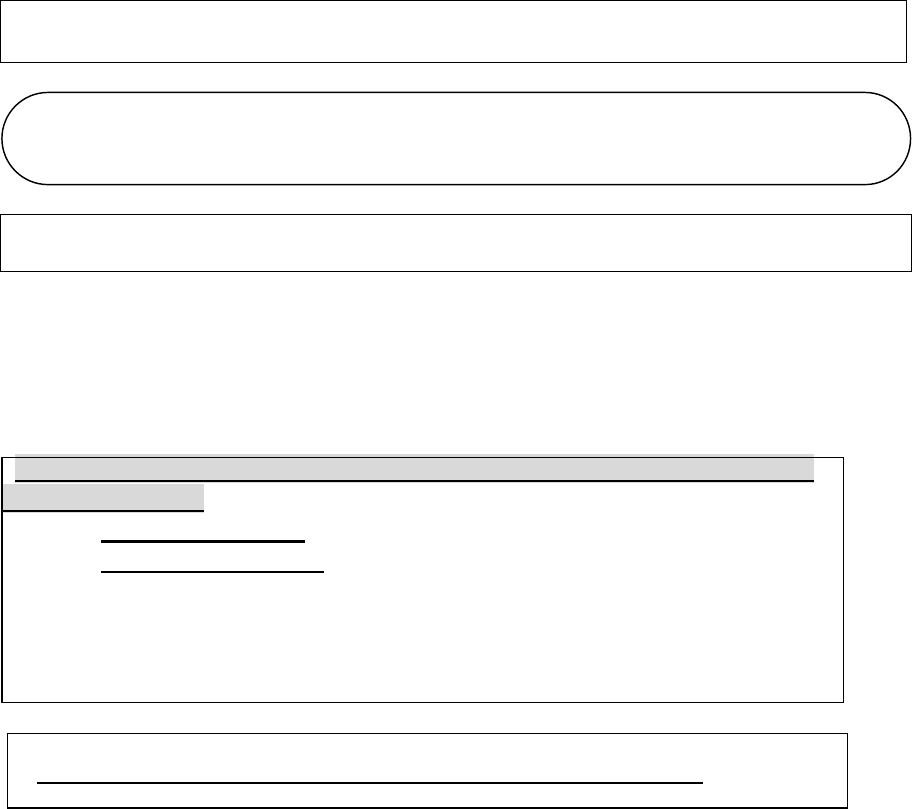
With the CM602-L operated, select [File management] from the main menu.
Select [Floppy Disk] and [Sub operation] so that the “Mach prmtr save” button is
displayed. (Fig. 1.1). Press that button so that the machine parameters are saved
into a floppy disk (FD). 【Time: 10 sec. Approx.】
Fig. 1.1 “File management” screen CM602-L
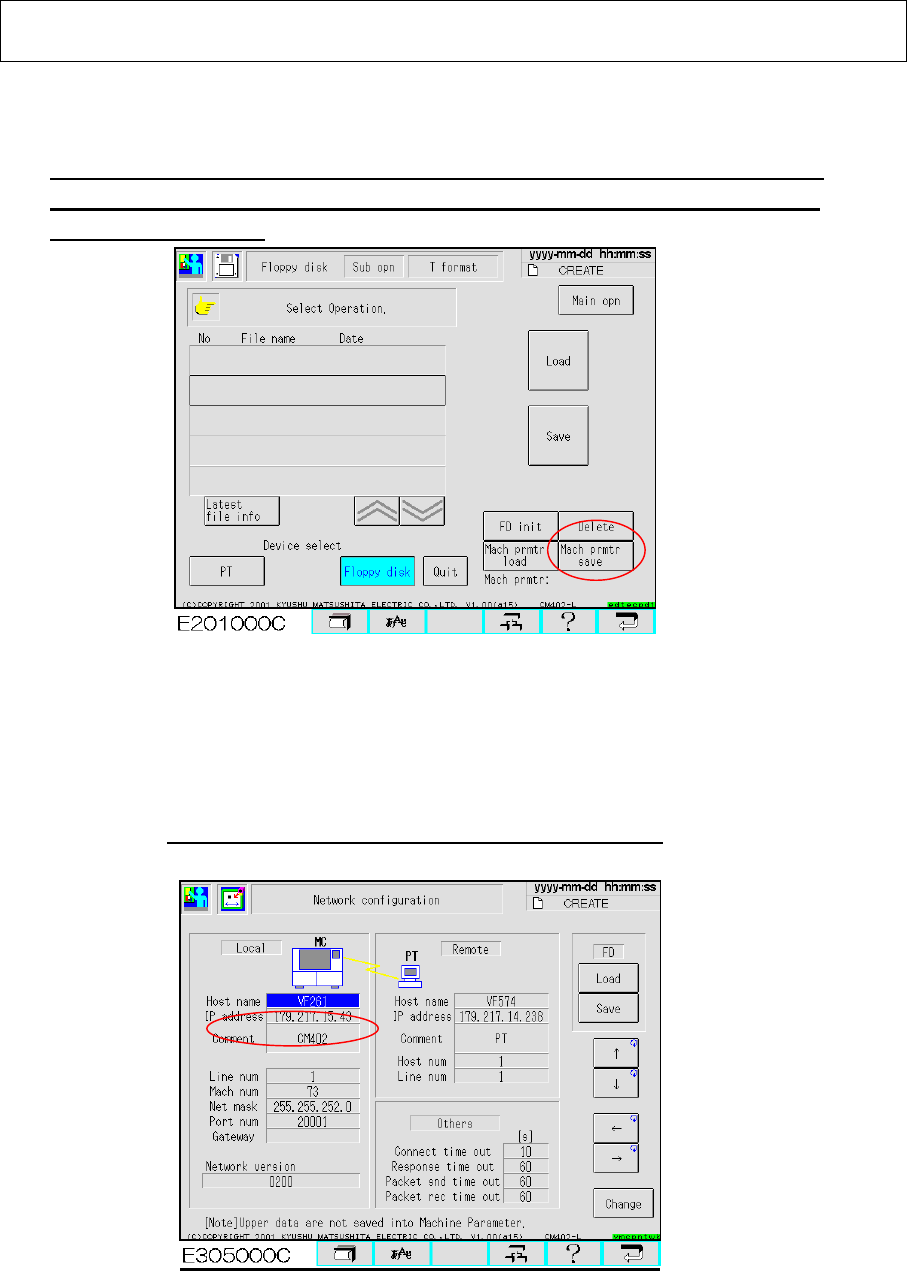
1.2 Select [Machine Parameter] from the main menu and [Network configuration] so that the
“Network configuration” screen is displayed. (Fig. 1.2) Press the “Save” button so
that the network parameters are saved into a floppy disk. (The floppy disk containing
the machine parameters can be used.) 【Time: 3 sec. Approx.】
Remember the CM602-L IP address; it may be required later.
Fig. 1.2 Network Configuration screen CM602-L
1.3 Upgrading the version clears the password to enter the “Engineer” mode. After
the version is upgraded, it is necessary to set the password.
EJM8A-E-090101-A01-00
Page 9-1-1-3
Software Software Installation
2. CM602-L Kernel Version Upgrade
2.1 Power down the machine.
2.2 Insert the kernel version upgrade install disk into the floppy disk drive (FDD).
Note. The kernel cannot be installed if its type is not matched with the machine model.
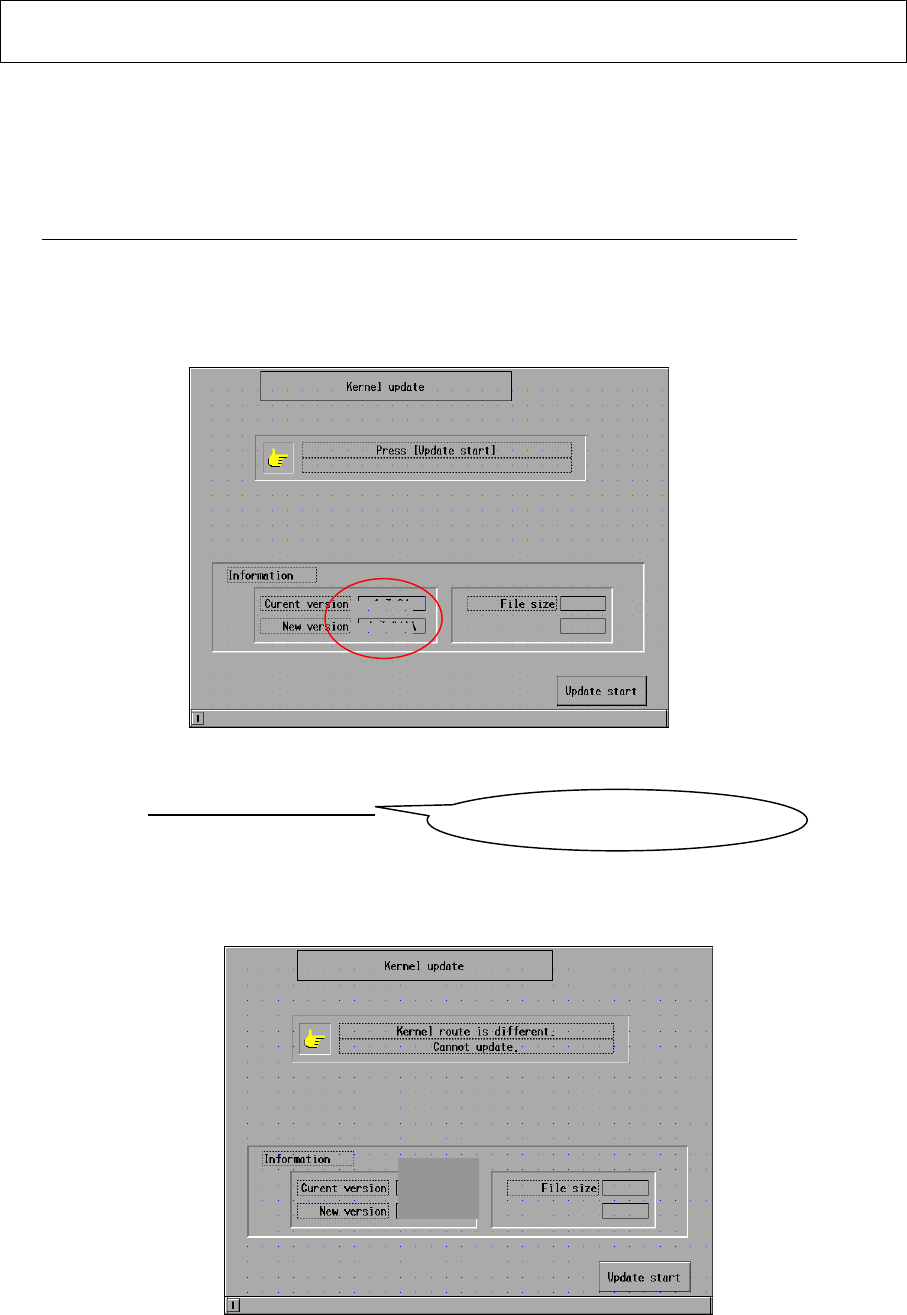
2.3 Power up the machine. After the machine is booted up, the initial screen is displayed.
(Fig. 2.1)
【Time: 100 sec. Approx.】
Fig. 2.1 Initial screen CM602-L
2.4 The current and the new kernel versions are displayed. Check that the new kernel
version is CM602-L:V2. 02. 00GJ.
If the kernel type is not matched with the machine model, the kernel cannot be installed.
(Fig. 2.2) Remove the floppy disk, power down the machine and use the correct
floppy disk.
Fig. 2.2 Initial screen CM602-L
2.01.00GA
2.01.00GB
1.3.24AA
2.01.00GA
2.01.00GB
1.3.24AA
2.01.00GB
Check the last letter is J.