CM602all_EJM8AESM_Service Manual.pdf - 第550页
Kgs. min. 67 min. 20 min. 47 min. A ssembl y A d j ustmen t Teaching Total Time Weigh t o f Part Removal Disassembl y Phillips screwdriver #1 Phillips screwdriver #2 Allen key 3 mm FM-1112 Head Camera Height Jig Machiner…
Machinery Part Replacement
Remarks
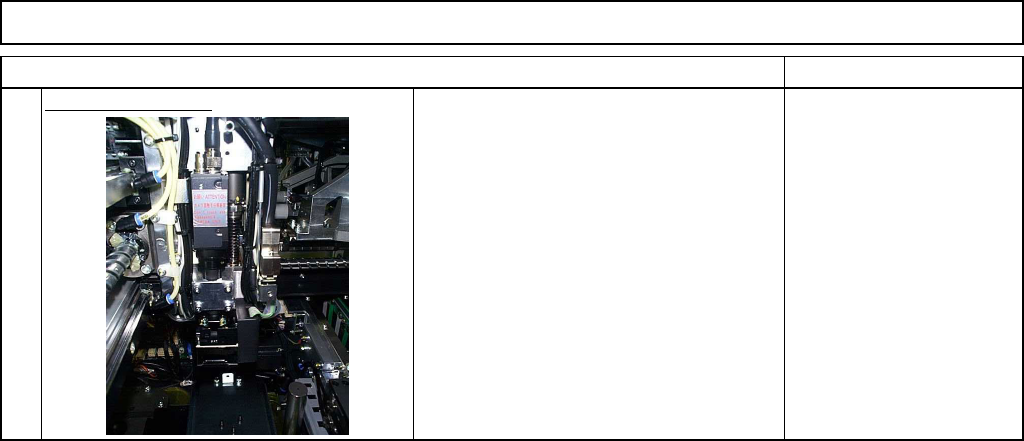
Head Camera Unit
Item
Adjust the camera.
Refer to "Head Camera Adjustment ---
Focus and Theta."
Section 4-1-2
9
EJM8A-E-SMA050601-A01-00
Page 5-6-1-4
Kgs.
min.
67
min.
20 min. 47 min.
A
ssembl
y
A
d
j
ustmen
t
Teaching Total Time
Weigh
t
o
f
Part
Removal
Disassembl
y
Phillips screwdriver #1
Phillips screwdriver #2
Allen key 3 mm
FM-1112
Head Camera Height Jig
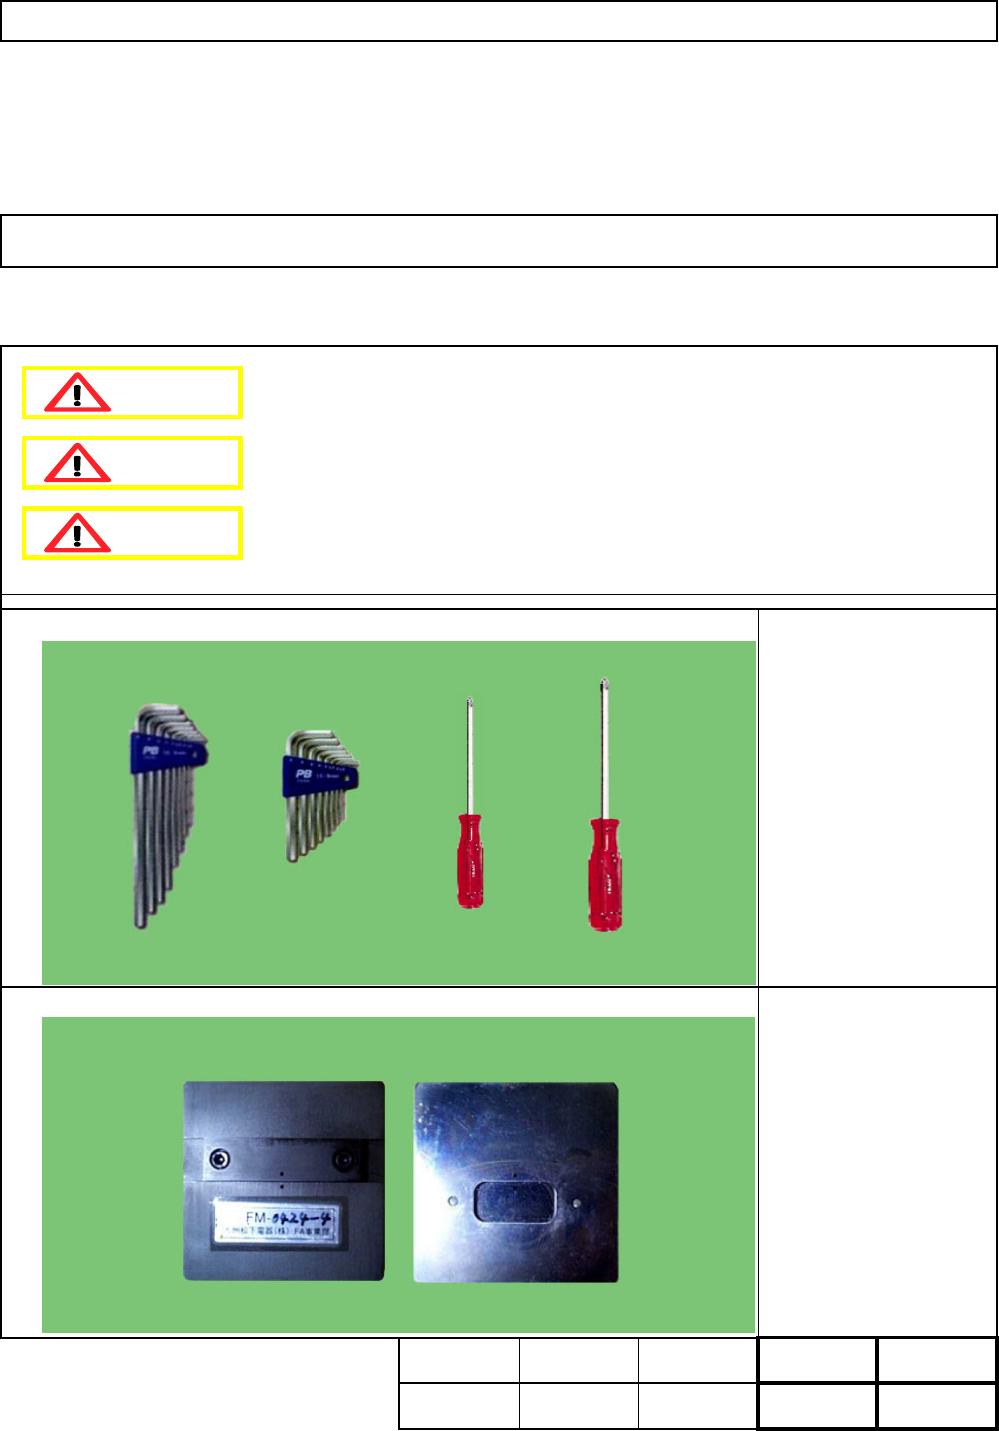
Machinery Part Replacement Head Camera Unit
This section describes the procedures for replacing the head camera.
5-6-2 Head Camera Replacement
・Tools
・Jig
Dange
r
Warning
Caution
EJM8A-E-SMA050602-A01-00
Page 5-6-2-1
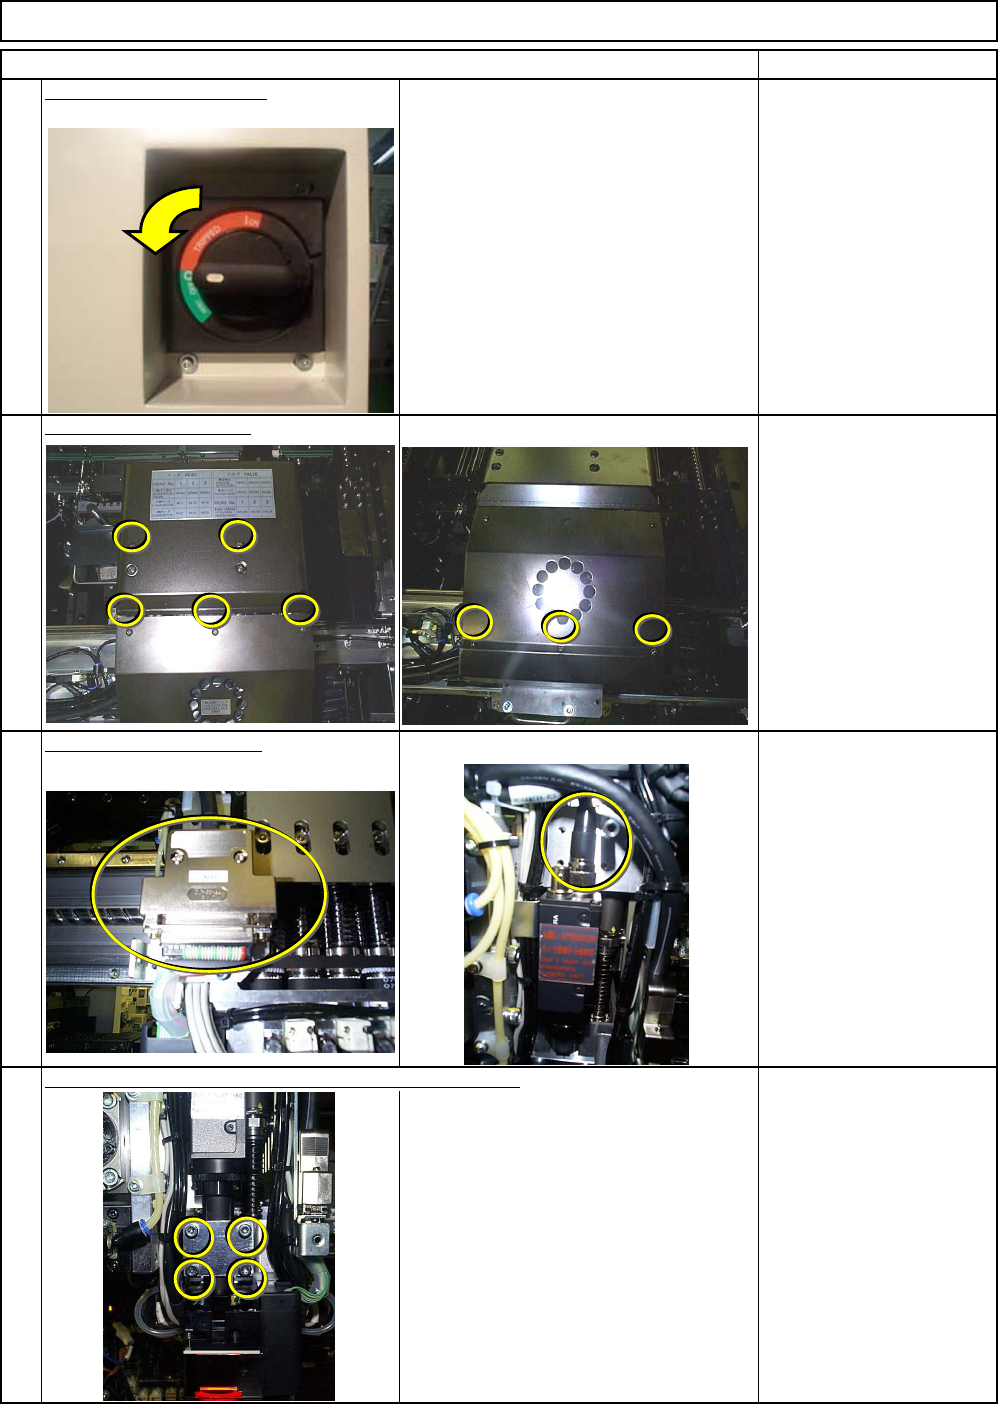
Be careful not to let the camera fall.
Phillips screwdriver #1
Phillips screwdriver #2
Screw M3 8 pcs.
M4 4 pcs.
Tools and Specifications
Head Camera Unit
Item Remarks
Tools and Specifications
Switch off the main power.
3
Allen key 3 mm
Screw M4 4 pcs.
Phillips screwdriver #1
Connector screw
4
2
1
Machinery Part Replacement
Remove the head cover
.
Tools and Specifications
Disconnect the connector.
Tools and Specifications
Remove the camera holding screws, holding the camera.
EJM8A-E-SMA050602-A01-00
Page 5-6-2-2