CM602all_EJM8AESM_Service Manual.pdf - 第658页
Machinery Part Replacement Remark 12-Nozzle Head Unit Item Magic marker Nipper Disconnect the connectors and the tubes. Cut off the cable ties. Nipper Put a mark on the vacuum release tube and remove it. Disconnect the c…
Machinery Part Replacement
Remark
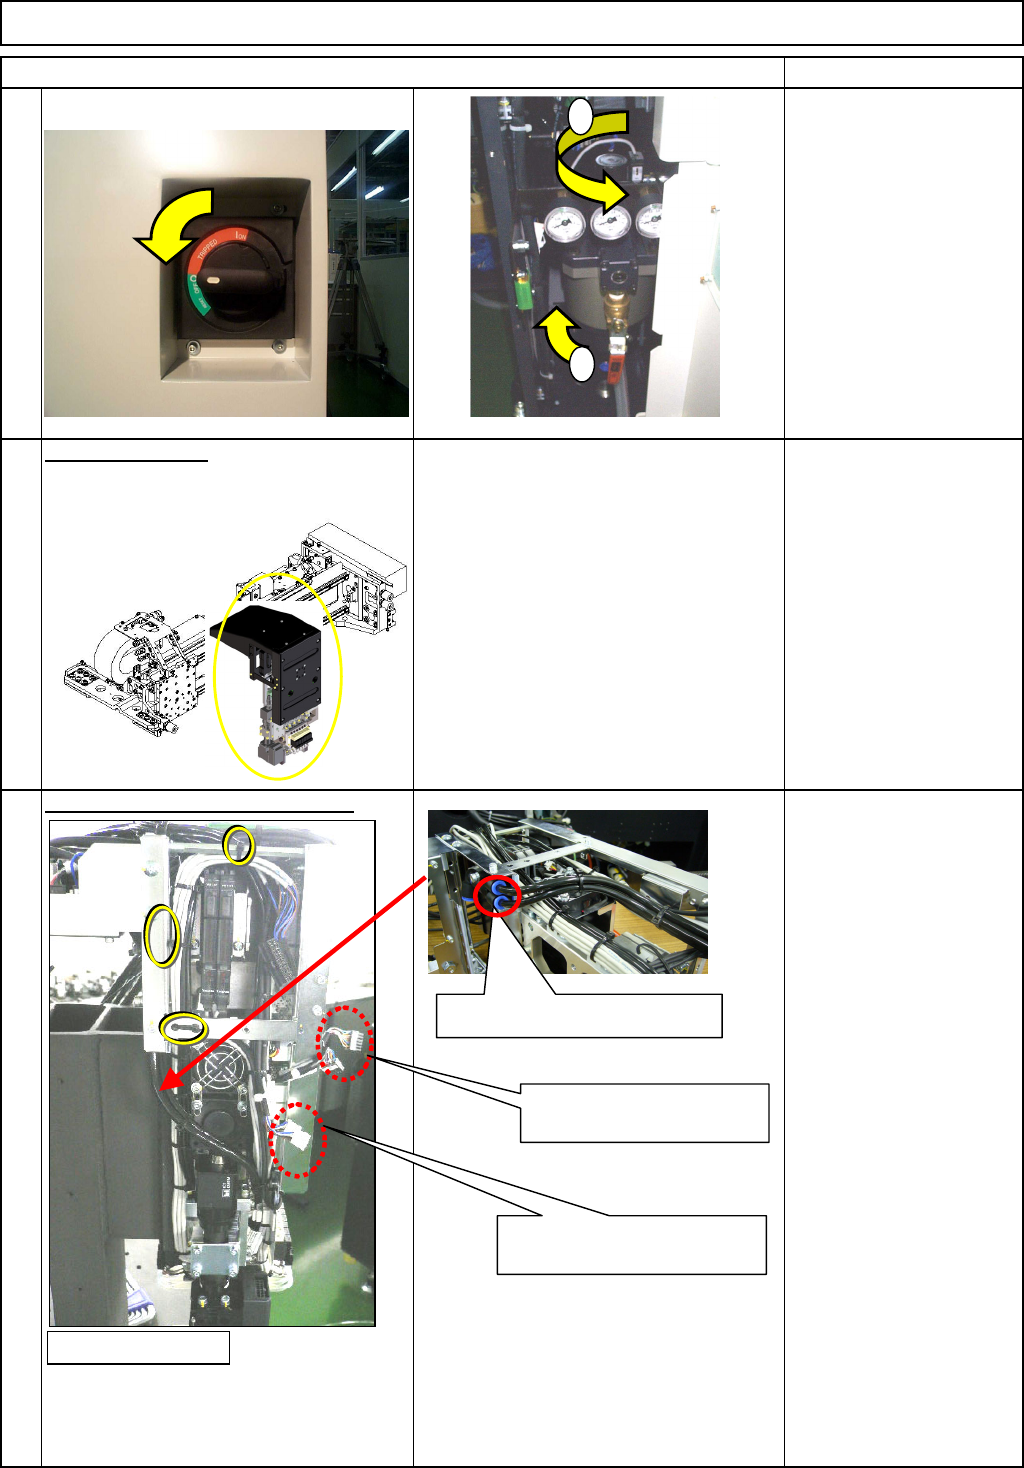
Turn off the power and air supply.
Remove the head.
See "12-Nozzle-Head-Unit
Replacement."
Section 5-10-1
Remove the tube and the cable tie.
12-Nozzle Head Unit
3
2
Item
1
Remove the two tubes.
Disconnect the connectors
CN35 and 36
Disconnect the connectors
CN39 and 40
<Left side>
1
2
EJM8A-E-SMA051009-A01-00
Page 5-10-9-2
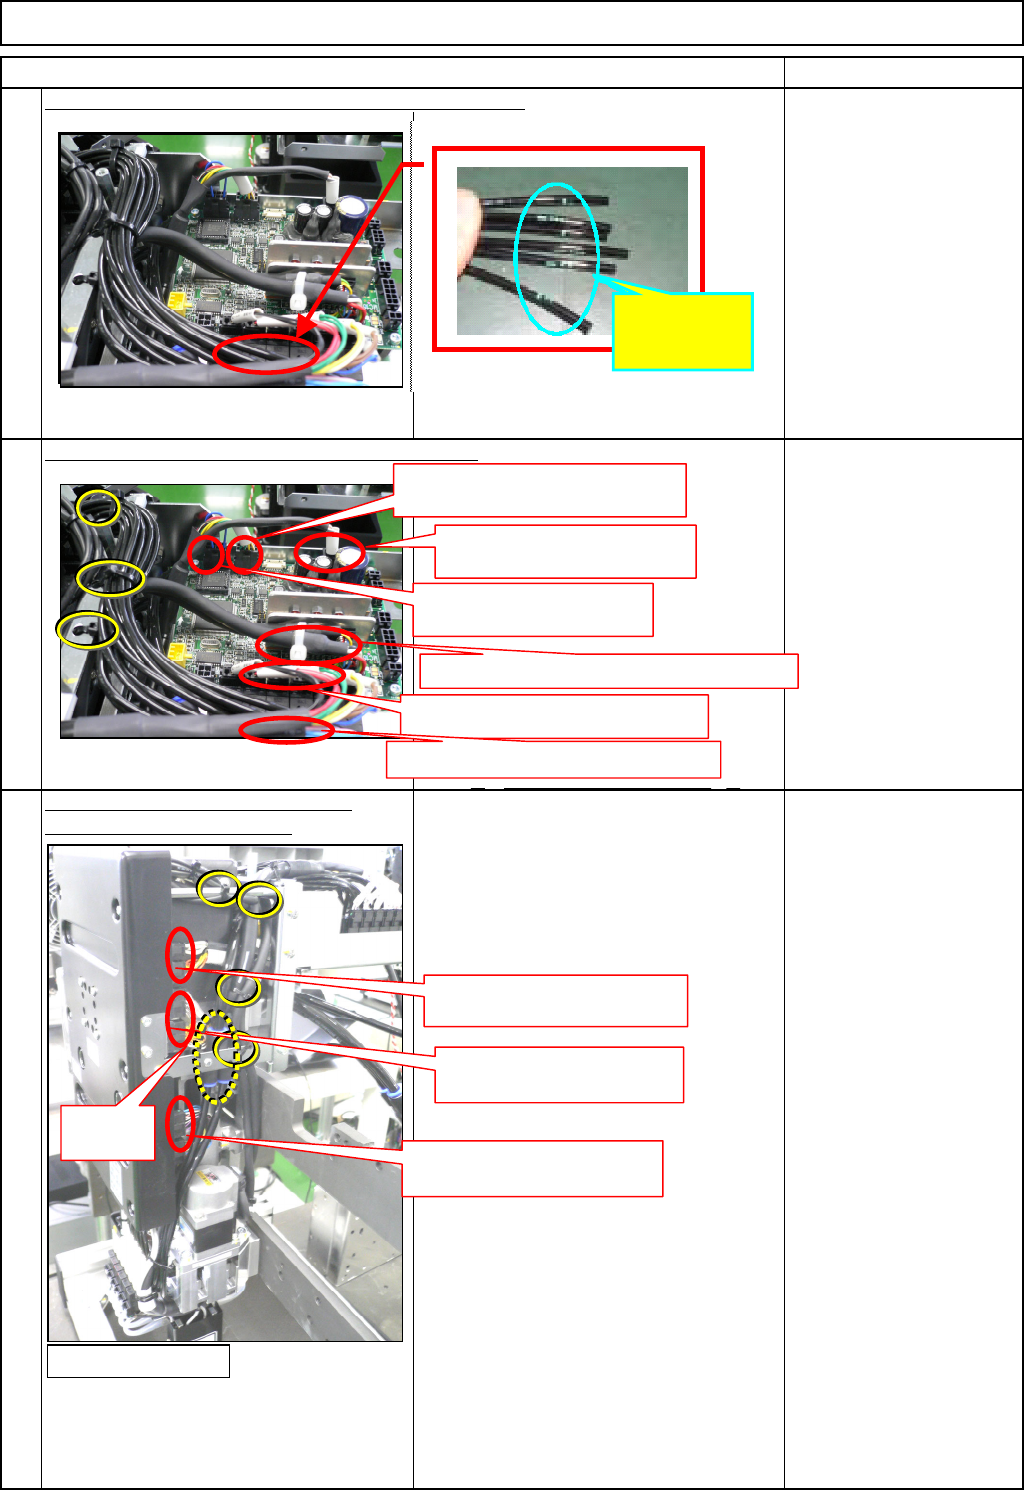
Machinery Part Replacement
Remark
12-Nozzle Head Unit
Item
Magic marker
Nipper
Disconnect the connectors and the
tubes. Cut off the cable ties.
Nipper
Put a mark on the vacuum release tube and remove it.
Disconnect the connectors. Cut off the cable ties.
4
5
6
Disconnect the connectors
CN31 & 32.
Disconnect the connectors
CN29 & 30.
Disconnect the connectors
CN25 & 26.
Remove
the tube.
Disconnect the connector
CN4.
Disconnect the connector CN6.
Disconnect the connector
CN7.
Disconnect the valve connector.
Disconnect the valve connector.
Disconnect the θ motor connector
<Right side>
Put a mark
here.
EJM8A-E-SMA051009-A01-00
Page 5-10-9-3
Machinery Part Replacement
Remark
12-Nozzle Head Unit
Item
Disconnect the connectors. Cut off the
cable ties.
Remove the front board.
1. Remove the four M3 x 6L bolts (1).
Remove the cooling-fan bracket.
2. Remove the six board-holding bolts (2)
with a wrench.
Remove the board.
M3 x 6L 4 pcs.
Board holding bolt 6 pcs.
8
7
<Front>
1
2
Encoder
NP1
Encoder
NP3
Encoder
NP2
Encoder
NP4
Encoder
NP5
Encoder
NP6
Encoder
NP12
Encoder
NP11
Encoder
NP10
Encoder
NP9
Encoder
NP8
Encoder
NP7
Motor
NP1
Motor
NP2
Motor
NP3
Motor
NP4
Motor
NP5
Motor
NP6
Motor
NP7
Motor
NP8
Motor
NP9
Motor
NP10
Motor
NP11
Motor
NP12
EJM8A-E-SMA051009-A01-00
Page 5-10-9-4