CM602all_EJM8AESM_Service Manual.pdf - 第507页
interference sensor dog. Place the lead checker sensor amplifier. See Section "6-2-5 3-Head Support Regulator Replacement." See Sections "6-3-1. Installing the Lead Checker" Place the electropneumatic…
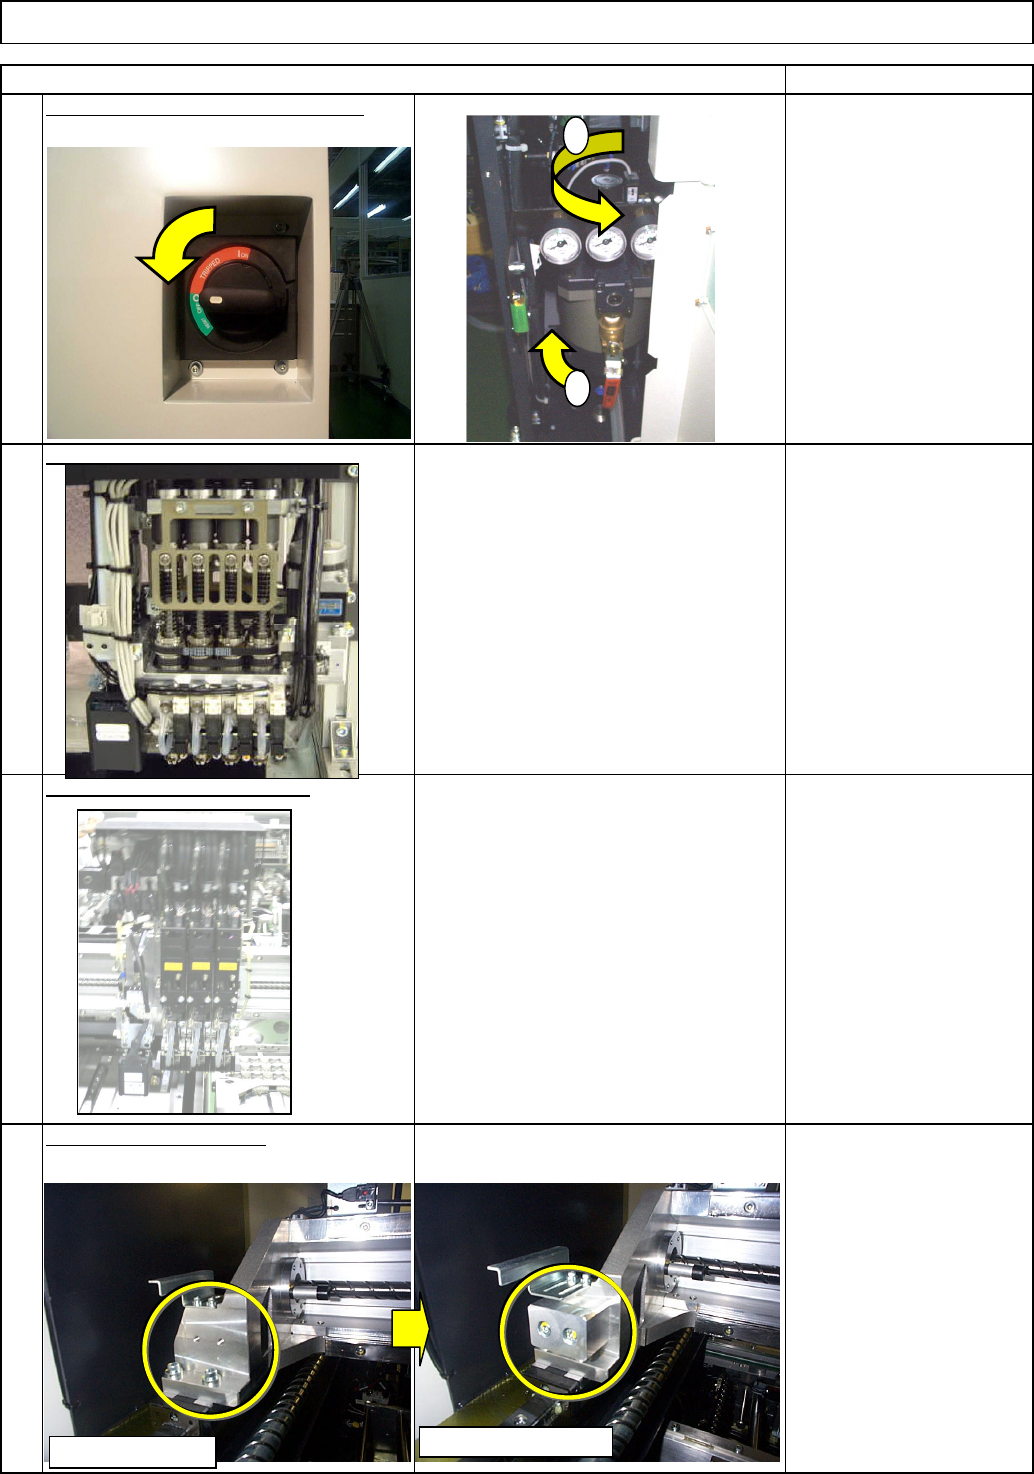
Switch off the power and air supply.
Install the multi-purpose head
Remove the high-speed head.
3
BLOCK:KXFB02KDA00
2 pcs.
See Section "5-3-1
Transfer Head Assembly
Replacement"
Remarks
4
2
1
Item
Machinery Part Replacement
Z Unit (3-nozzle type)
See Section 5-5-1.
Replacing a Set of Head
Units."
Mount the stopper block.
1
2
High-speed head
Multi-purpose head
EJM8A-E-SMA050503-A01-00
Page 5-5-3-2
interference sensor dog.
Place the lead checker sensor amplifier.
See Section "6-2-5 3-Head
Support Regulator
Replacement."
See Sections "6-3-1.
Installing the Lead
Checker"
Place the electropneumatic regulator.
Do not move the dog.
Feeler gauge
Remarks
6
7
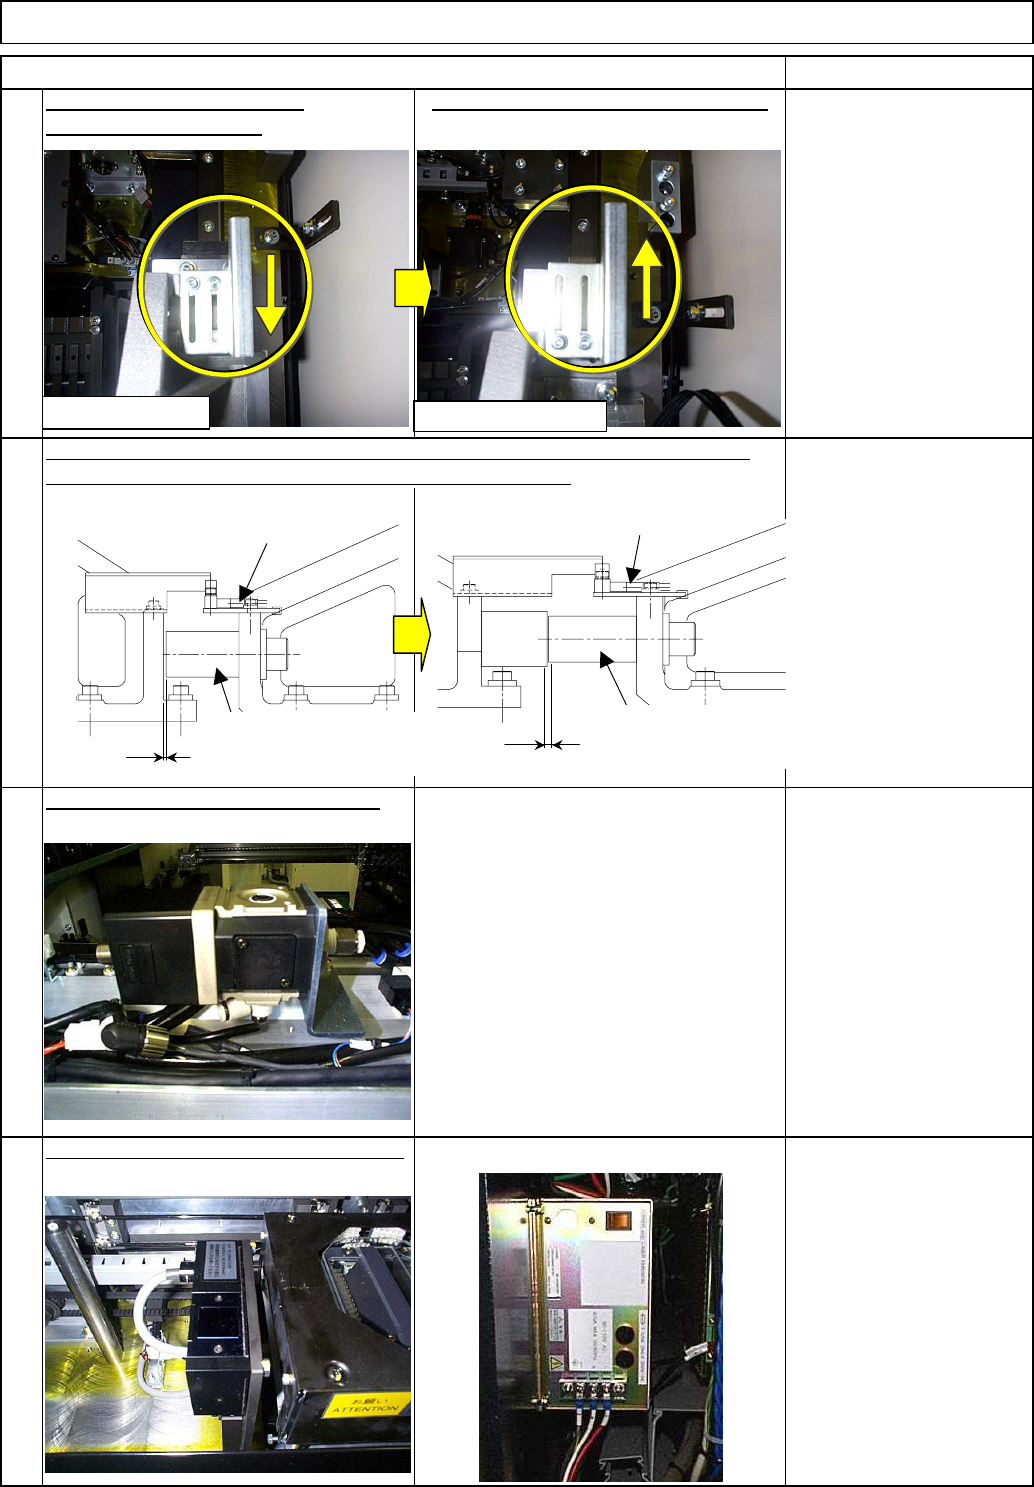
Adjust the collision preventing photo sensor so that it turns ON when the gap of
the collision preventing stopper and the X beam is 0.5 mm.
5
Move it up to the other end of the cut.
Item
Precisely position the Y-axis
8
Machinery Part Replacement
Z Unit (3-nozzle type)
[Multi-purpose head][High-speed head]
0.5
Dog
0.5
High-speed head
Multi-purpose head
Collision preventing
stopper
PH bracketDog
Collision preventing
stopper
PH bracket
EJM8A-E-SMA050503-A01-00
Page 5-5-3-3
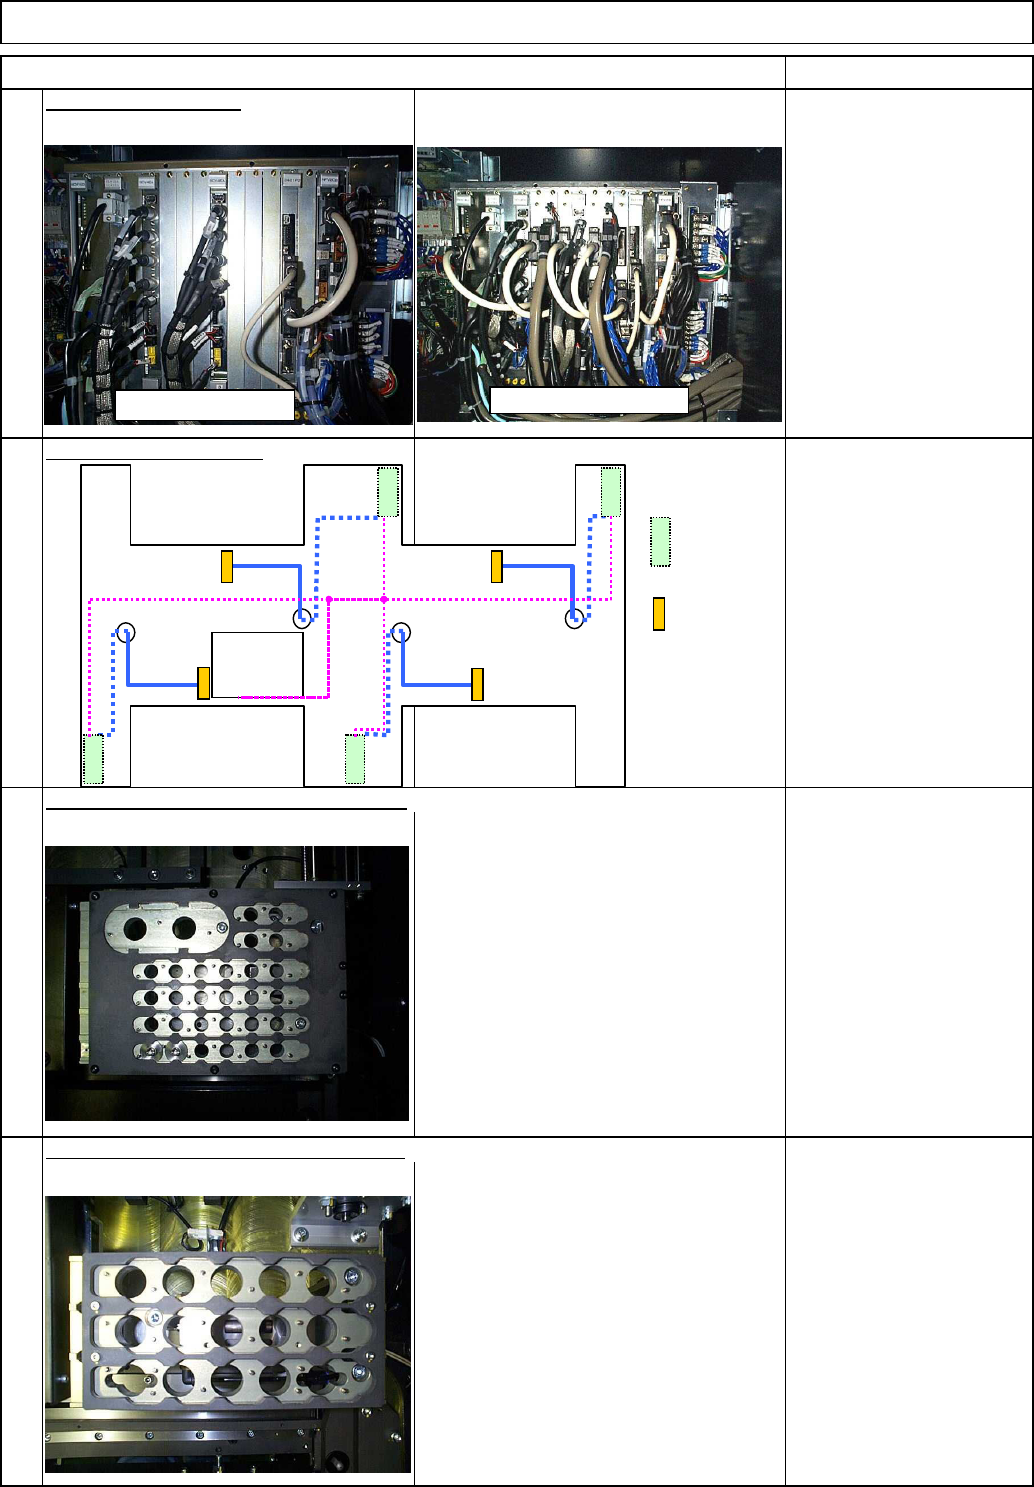
Place the multi-purpose nozzle changer.
Remove the high-speed nozzle changer.
Z Unit (3-nozzle type)
Remarks
Place the laser board.
See Section "6-1-3
Nozzle Changer
Replacement (High-Speed
Machines)."
See Sections "6-3-1.
Adding a Lead Checker"
10
11
9
Machinery Part Replacement
Item
Connect the connectors.
12
See Section "6-2-3.
Nozzle Changer
Replacement (Multi-
Purpose Machines)."
Amplifier
Sensor
CPUBO
X
Multi-purpose head
High-speed head
EJM8A-E-SMA050503-A01-00
Page 5-5-3-4