CM602all_EJM8AESM_Service Manual.pdf - 第643页
Machinery Part Replacement Remark Turn off the power and air supply. Remove the head. See "12-Nozzle-Head-Unit Replacement." Section 5-10-1 Remove the vacuum-sensor connectors. 12-Nozzle Head Unit Item 1 2 3 Fr…
Machinery Part Replacement
This section describes the procedures for replacing the vacuum sensor.
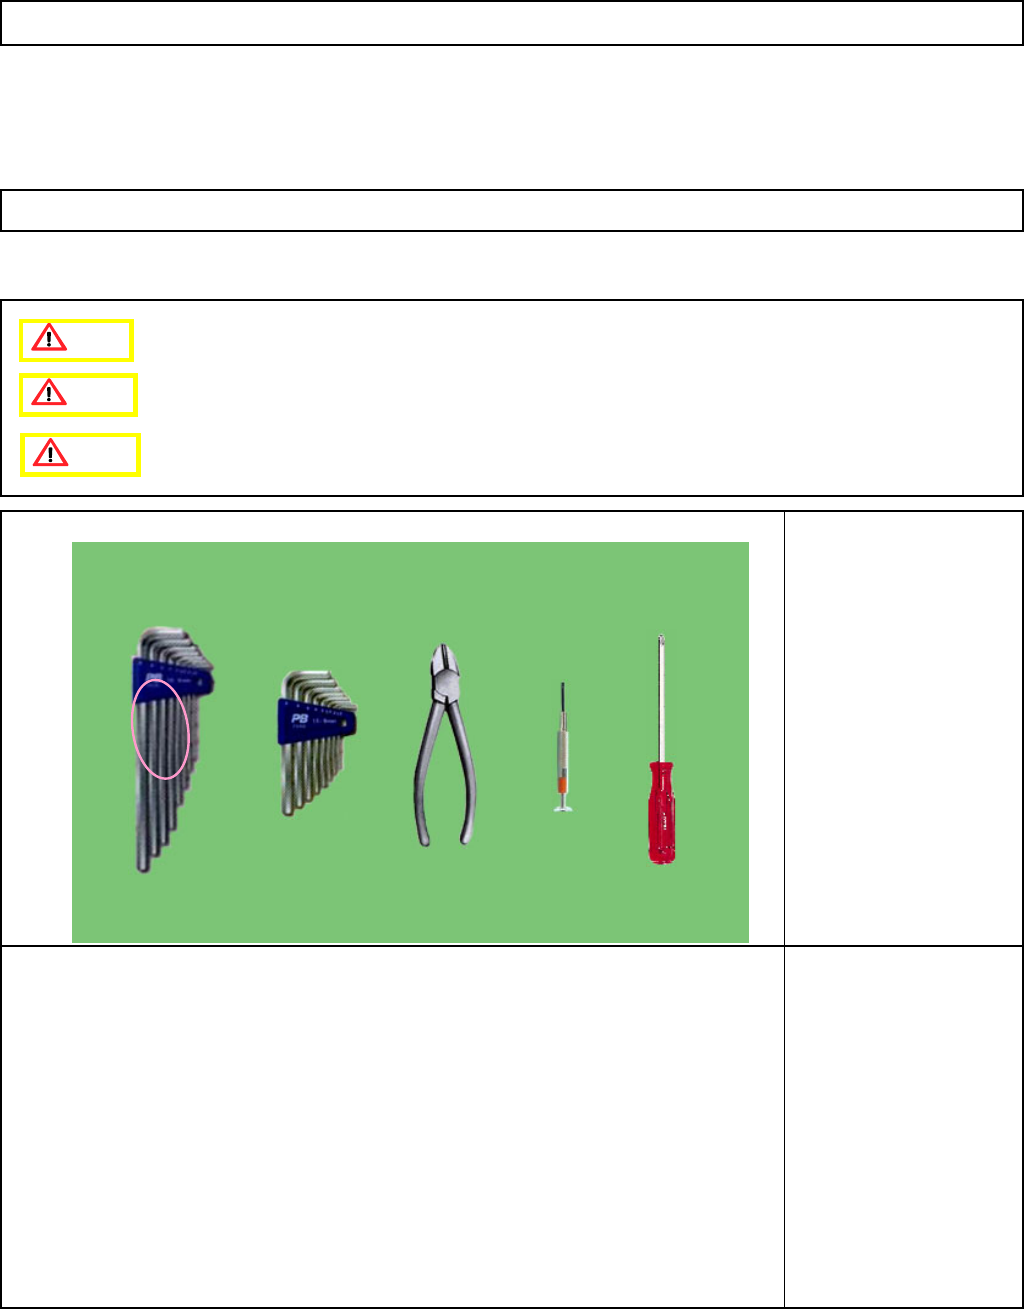
Tools
Precision screwdriver
Phillips screwdriver #1
Allen key 2.5 mm
Nipper
Cable tie
Jig
None
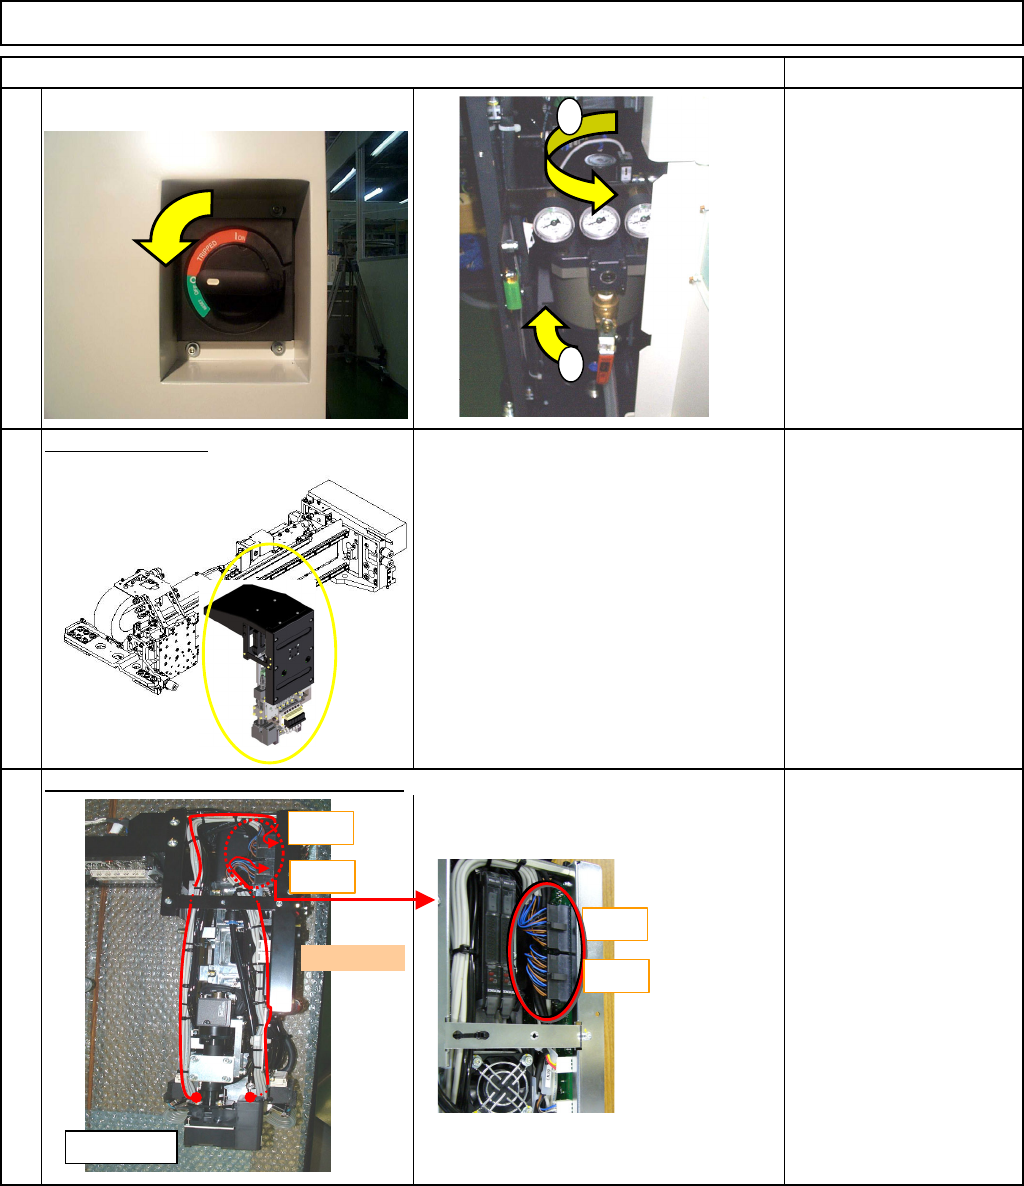
5-10-7 Vacuum Sensor Replacement
12-Nozzle Head Unit
Caution
Dange
r
Warning
EJM8A-E-SMA051007-A01-00
Page 5-10-7-1
Machinery Part Replacement
Remark
Turn off the power and air supply.
Remove the head.
See "12-Nozzle-Head-Unit
Replacement."
Section 5-10-1
Remove the vacuum-sensor connectors.
12-Nozzle Head Unit
Item
1
2
3
Front
CN35
CN35
<Left side>
CN36
CN36
1
2
EJM8A-E-SMA051007-A01-00
Page 5-10-7-2
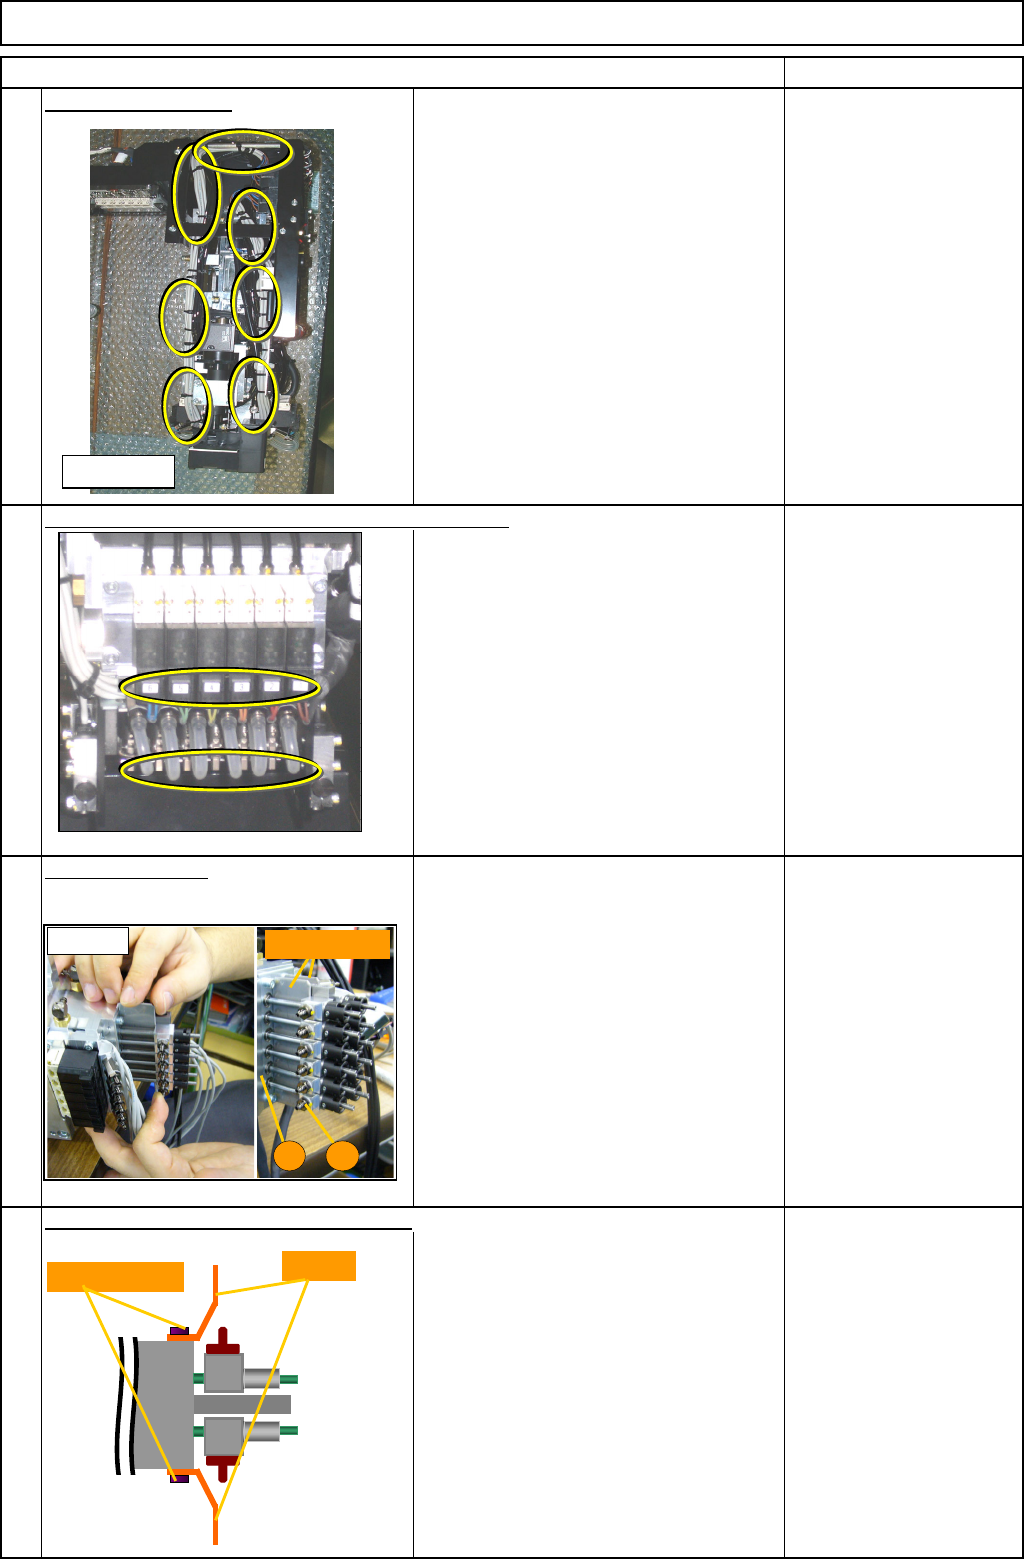
Machinery Part Replacement
Remark
12-Nozzle Head Unit
Item
Cut off the cable ties.
Nipper
Remove the vacuum hose and the valve connectors.
Repeat this step for the rear side.
Insert the plate jig.
Insert the plate jig between the spline
housing (A) and the θ-axis unit (B).
Repeat this step for the rear side.
Plate jig
Remove the vacuum-valve-cable bracket.
Repeat this step for the rear side.
CBSS3-6 4 pcs.
5
7
6
4
<Left side>
<Fig. 1>
Plate jig
A
B
Bracket
Bolt (CBSS3-6)
EJM8A-E-SMA051007-A01-00
Page 5-10-7-3